
Authagonal
Documentation
Everything you need to get started with Authagonal — from creating your first tenant to wiring SSO, SCIM, and custom branding.
Getting Started
Authagonal gives each tenant a fully standards-compliant OIDC server. Every tenant gets its own issuer URL, discovery document, and token endpoints — no shared infrastructure between tenants. You can go from zero to a working login flow in under 5 minutes.
Create an Account
Sign up at authagonal.io and choose a slug for your account. The slug becomes your issuer domain: {slug}.authagonal.io. After creating your account, verify your email address to get started.
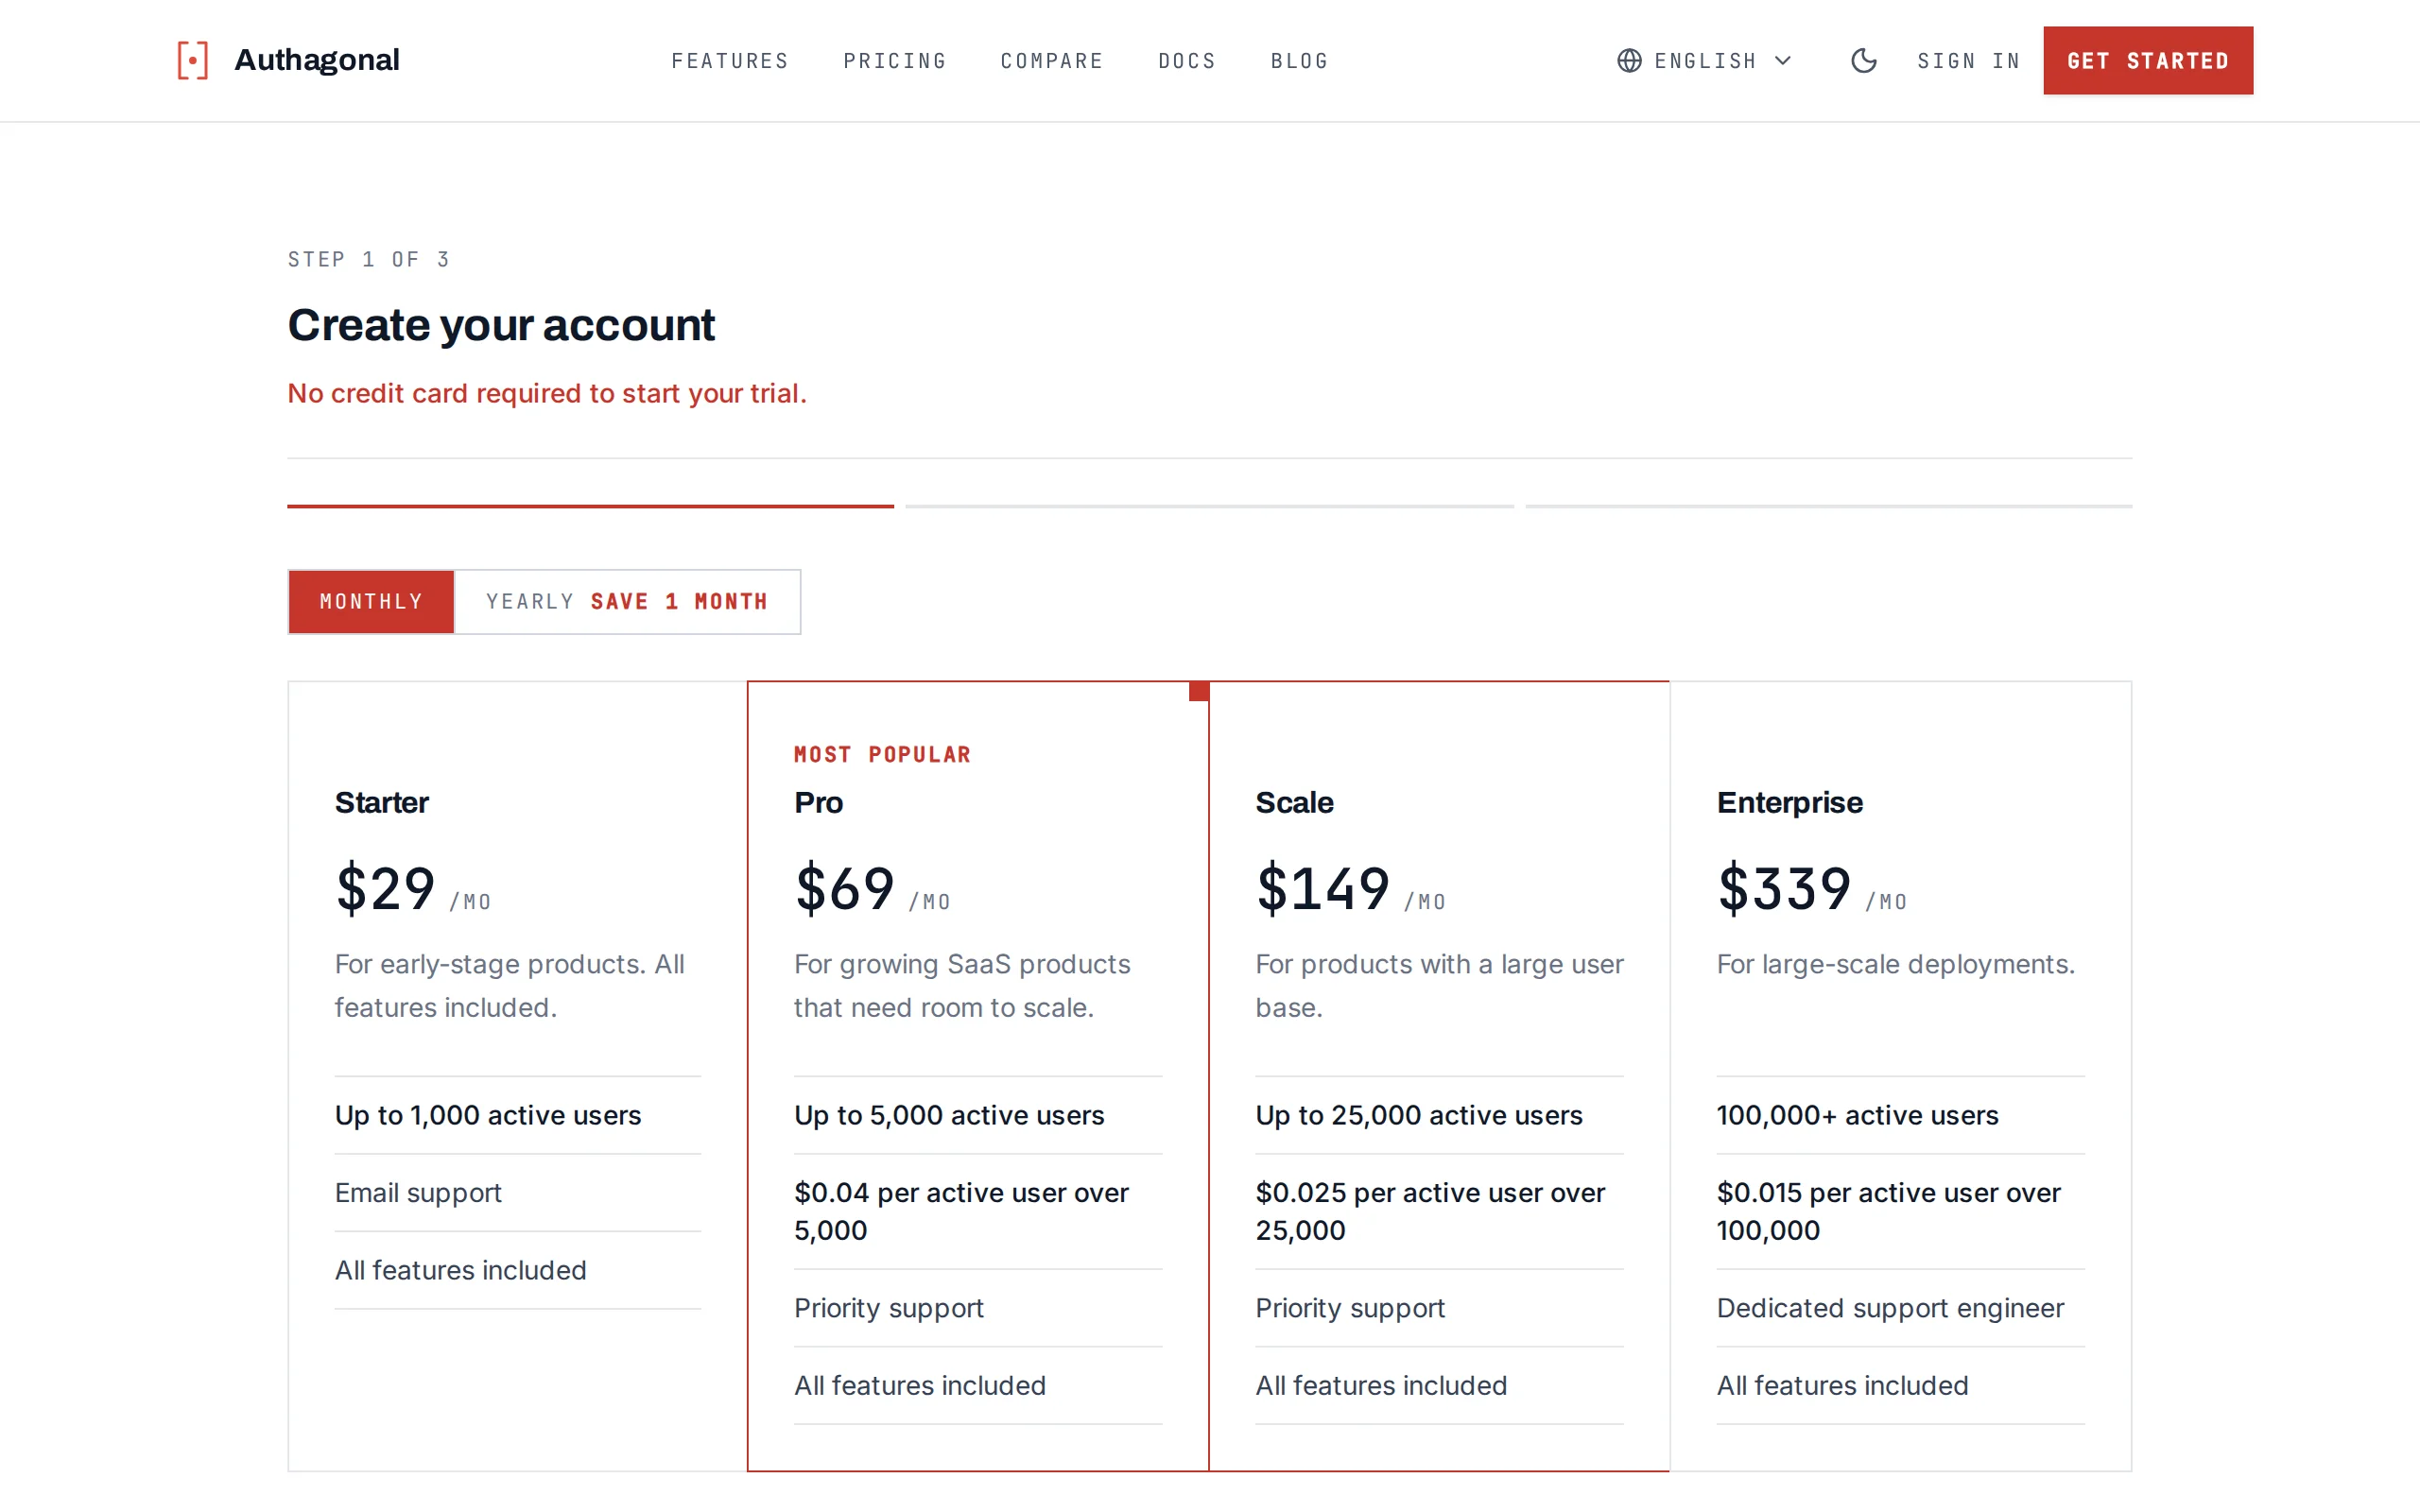
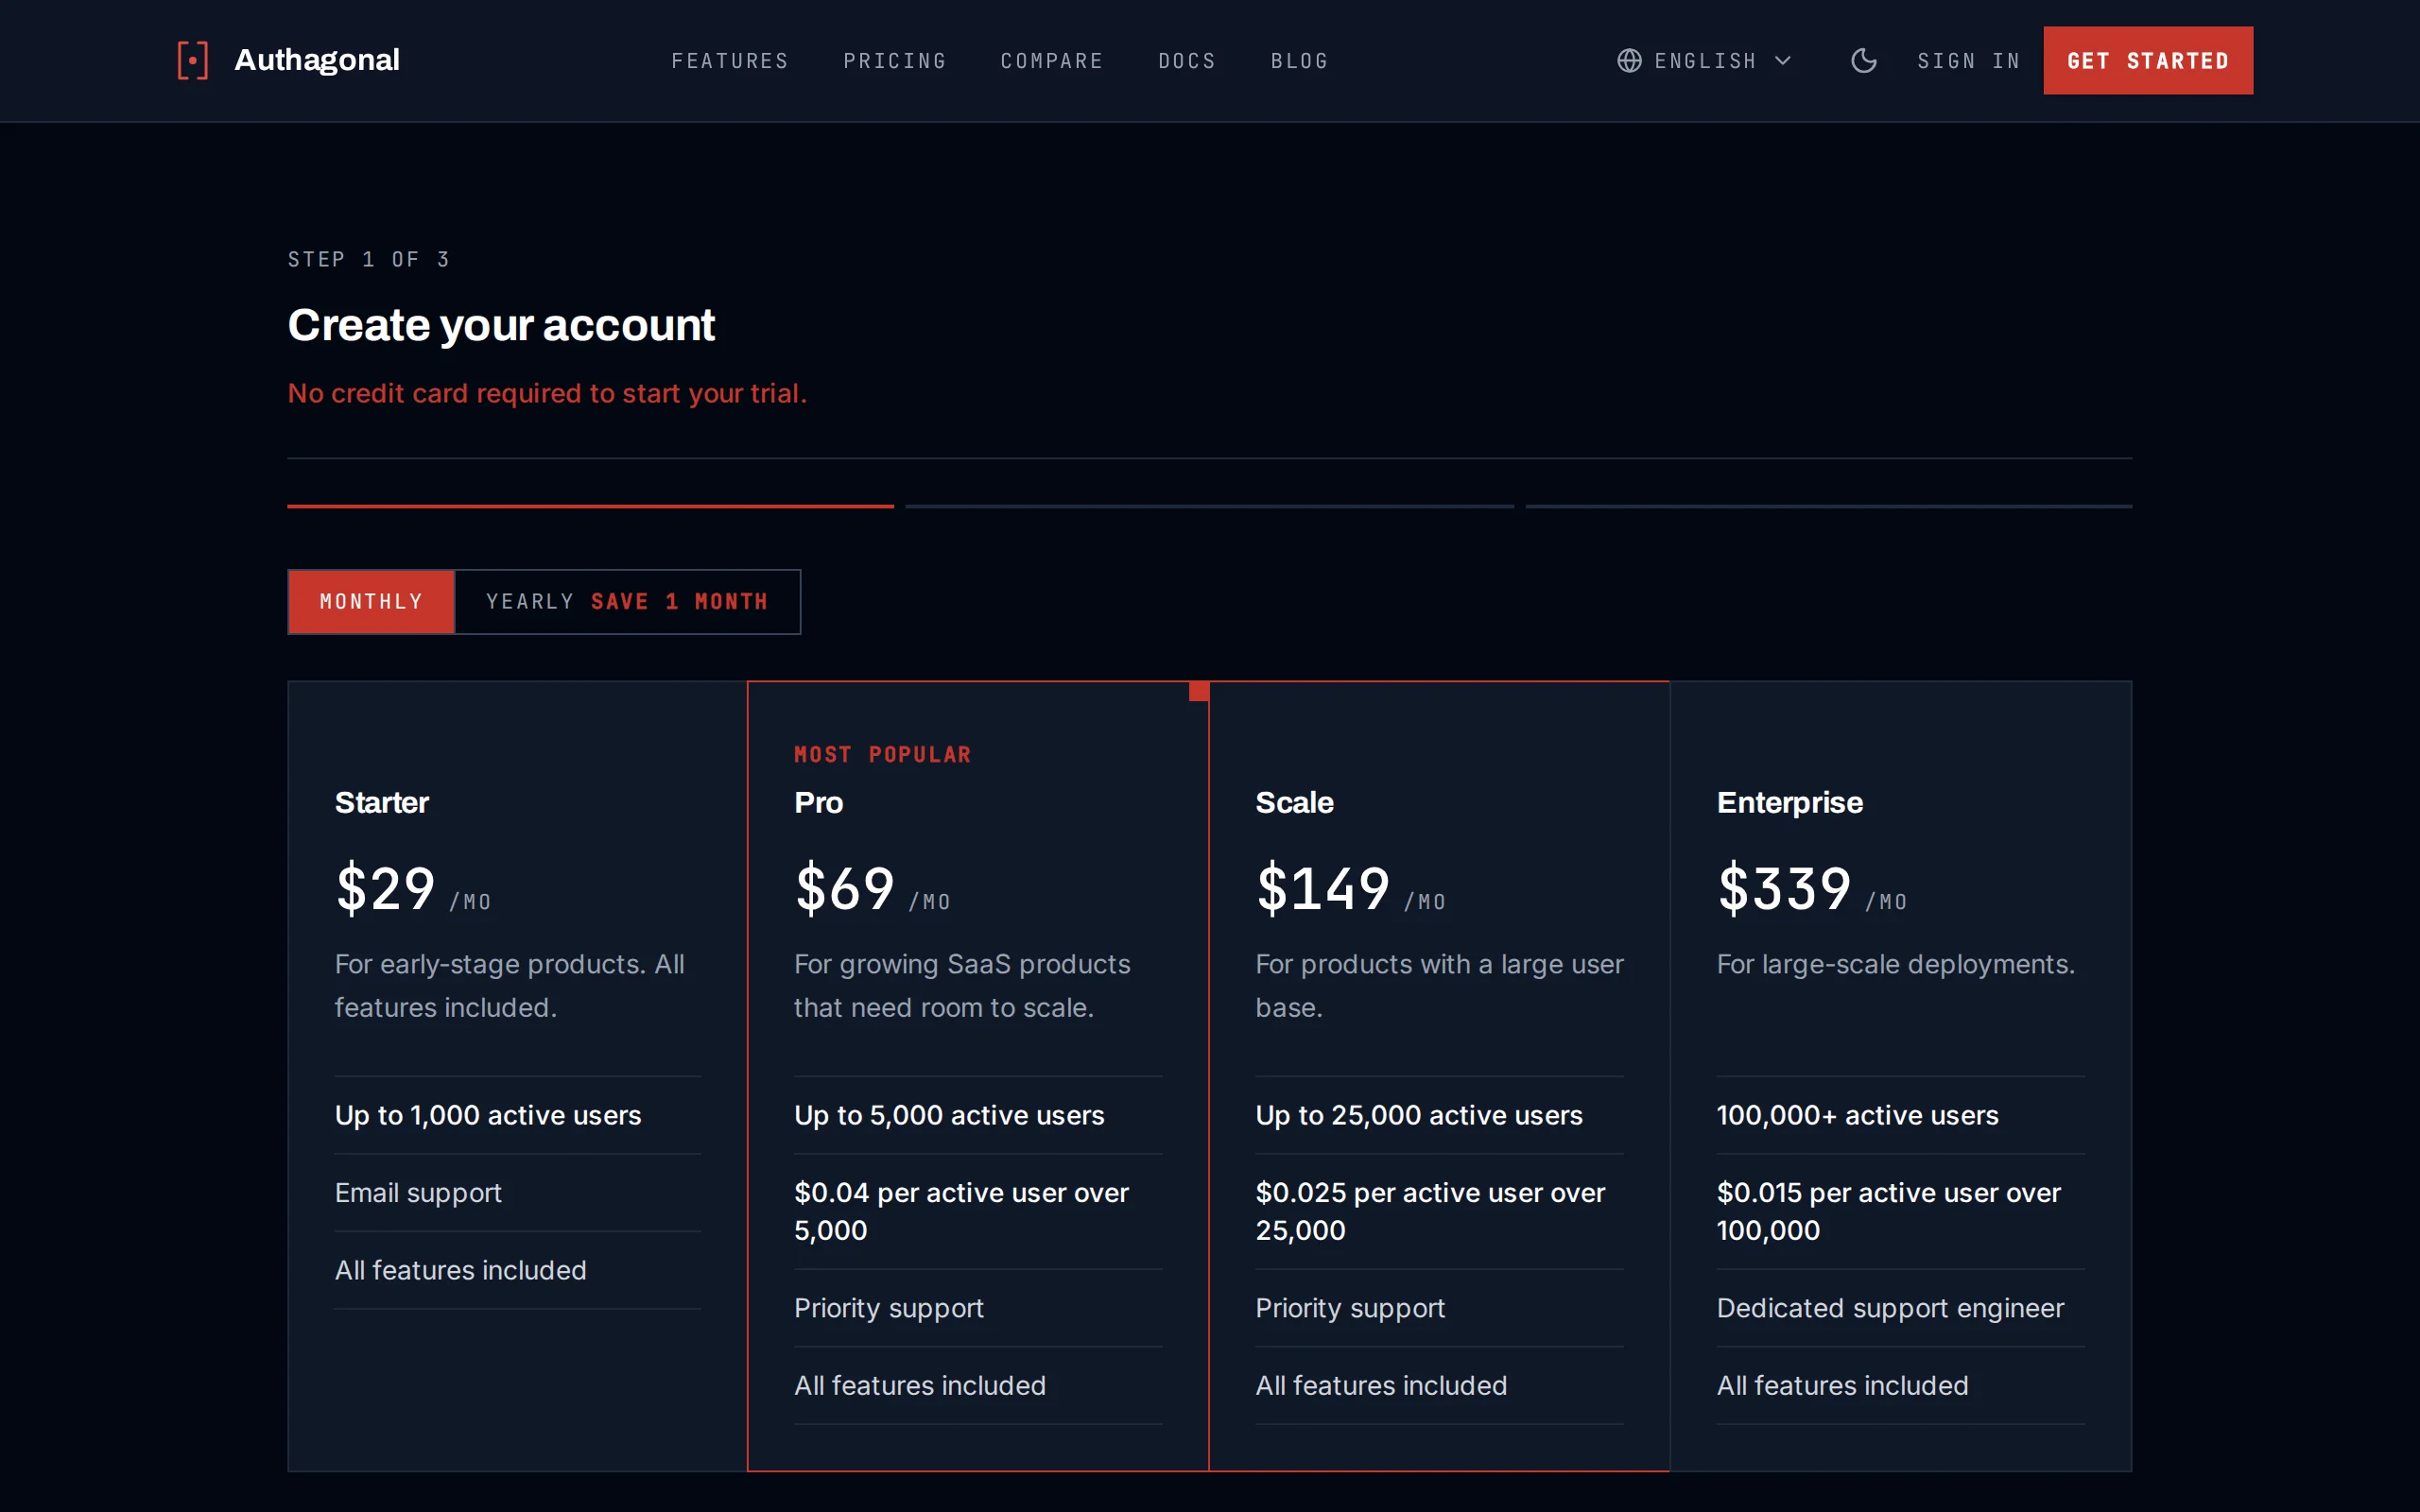
Choose a unique slug for your account during signup
Register a Client
Navigate to Clients in the portal sidebar and click Create. Enter a clientId and clientName for your application. Then configure at least one redirect URI — this is where users are sent after authenticating. For example: https://app.example.com/callback.
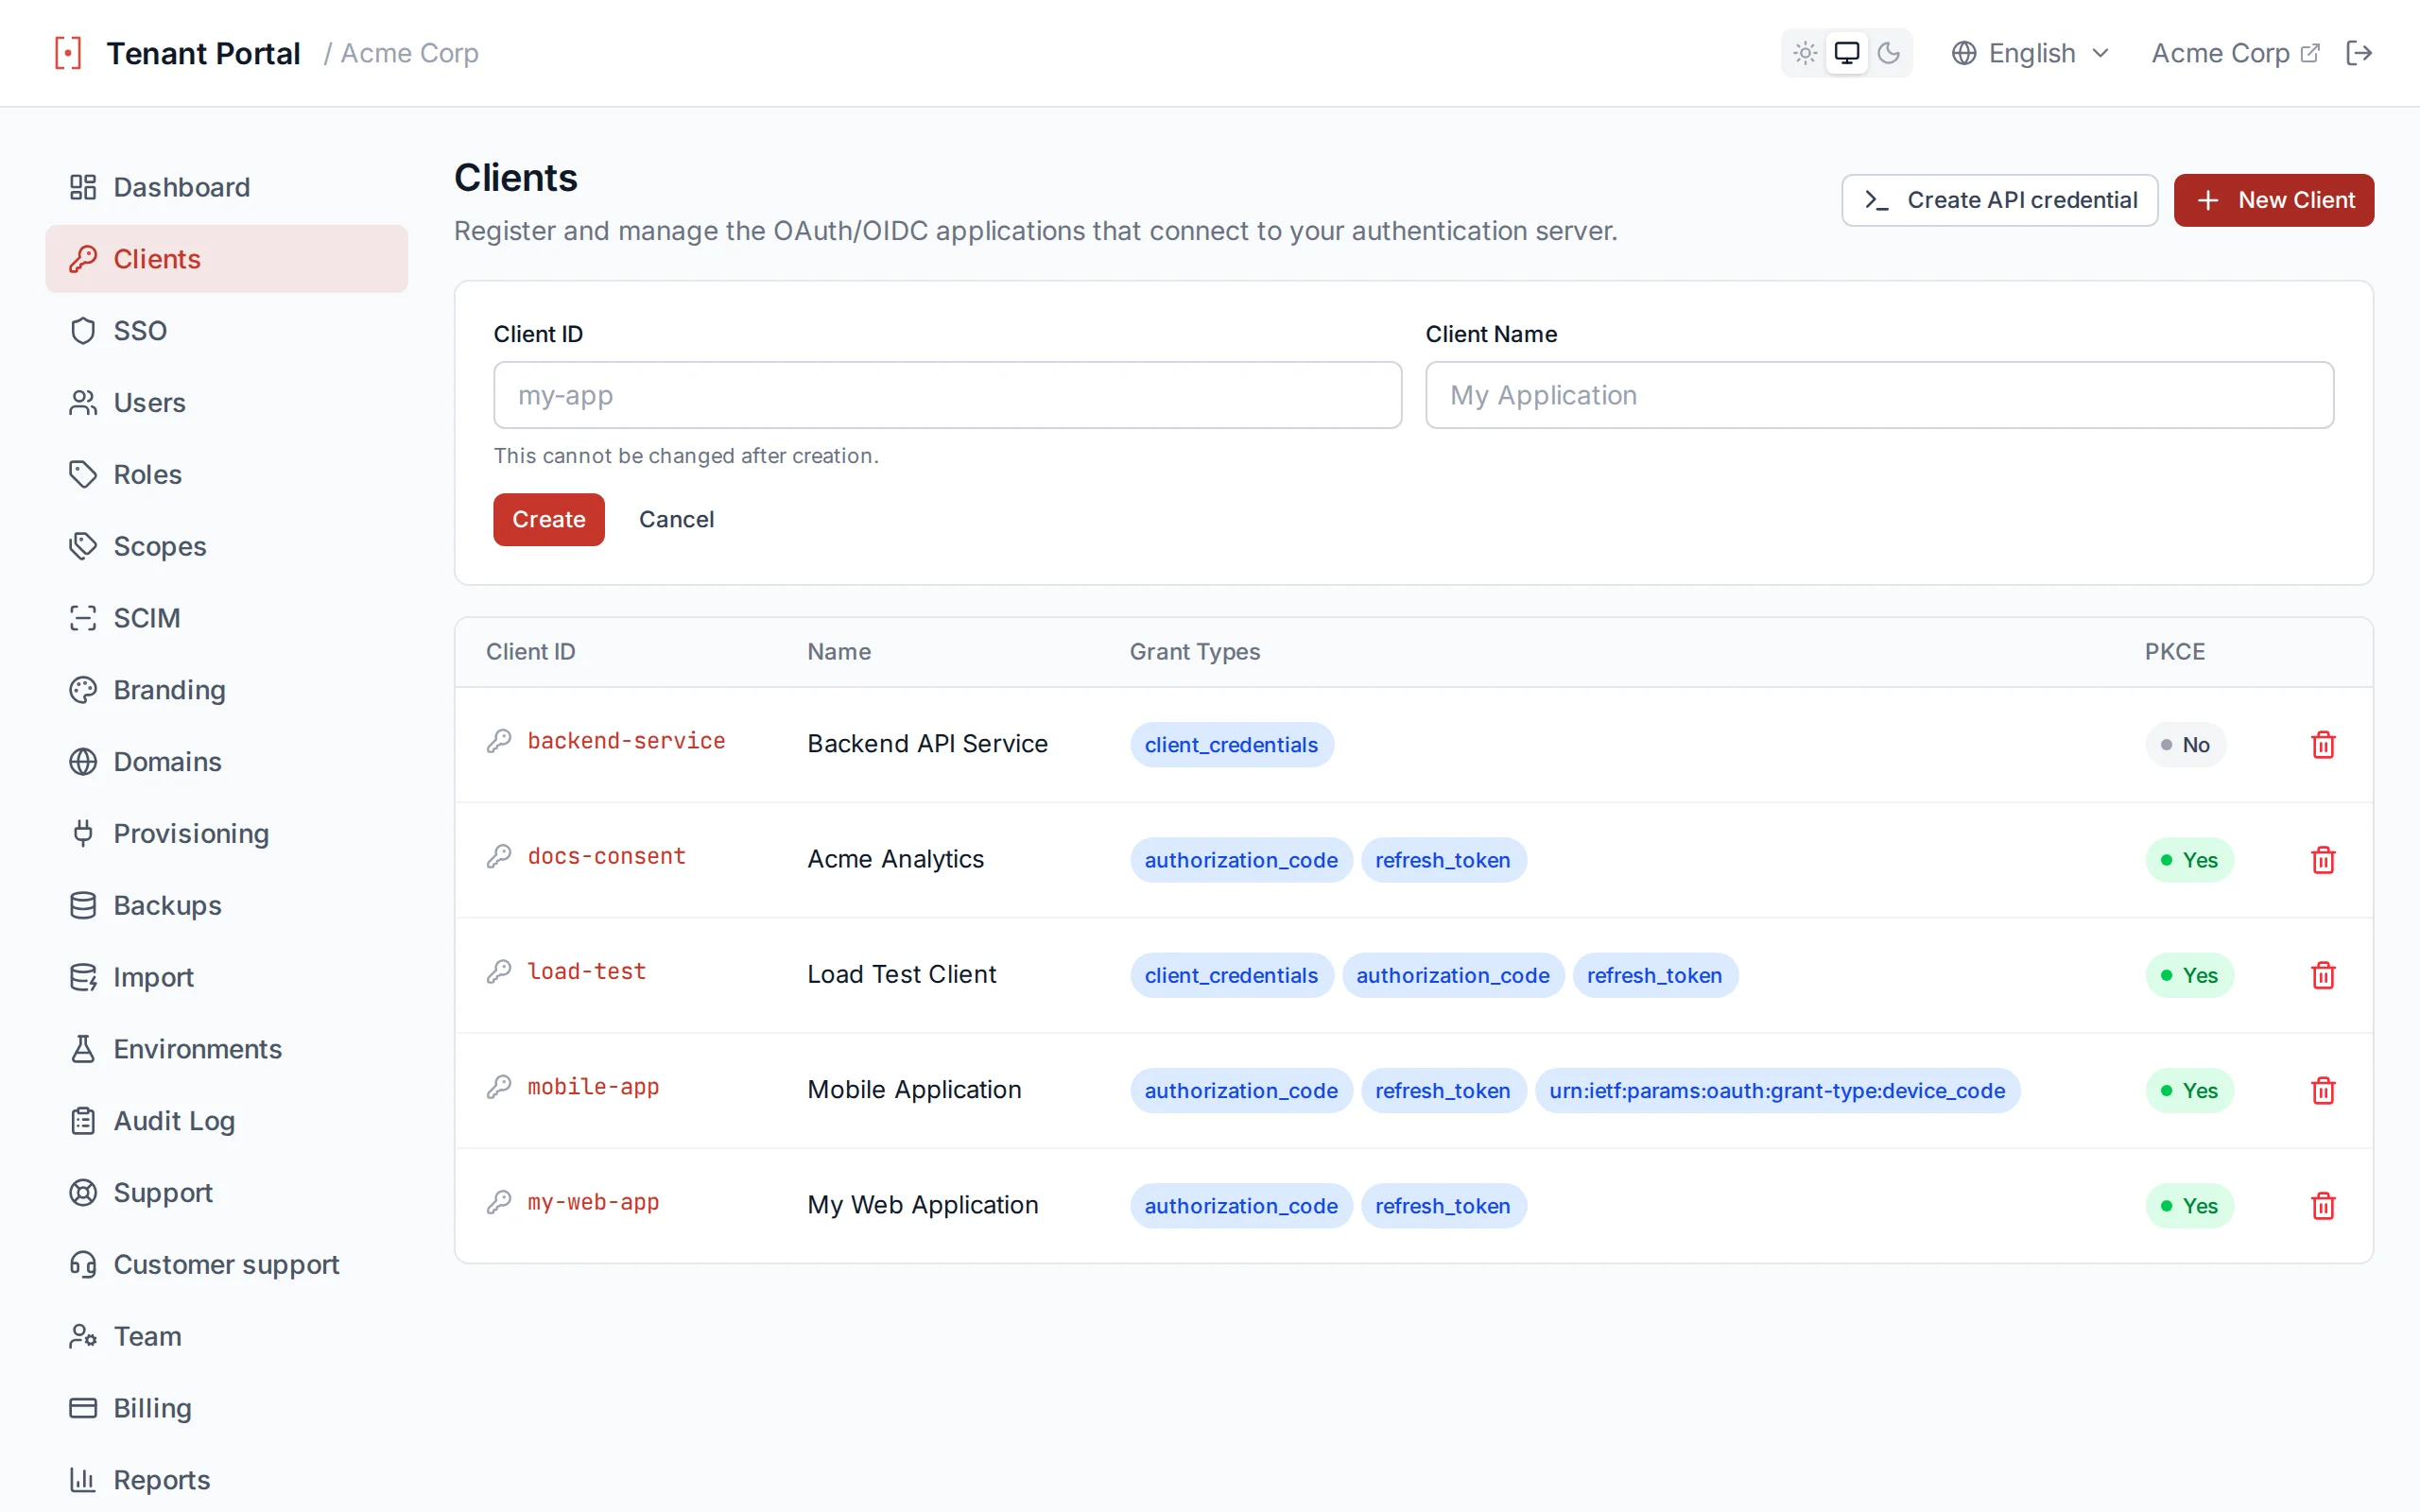
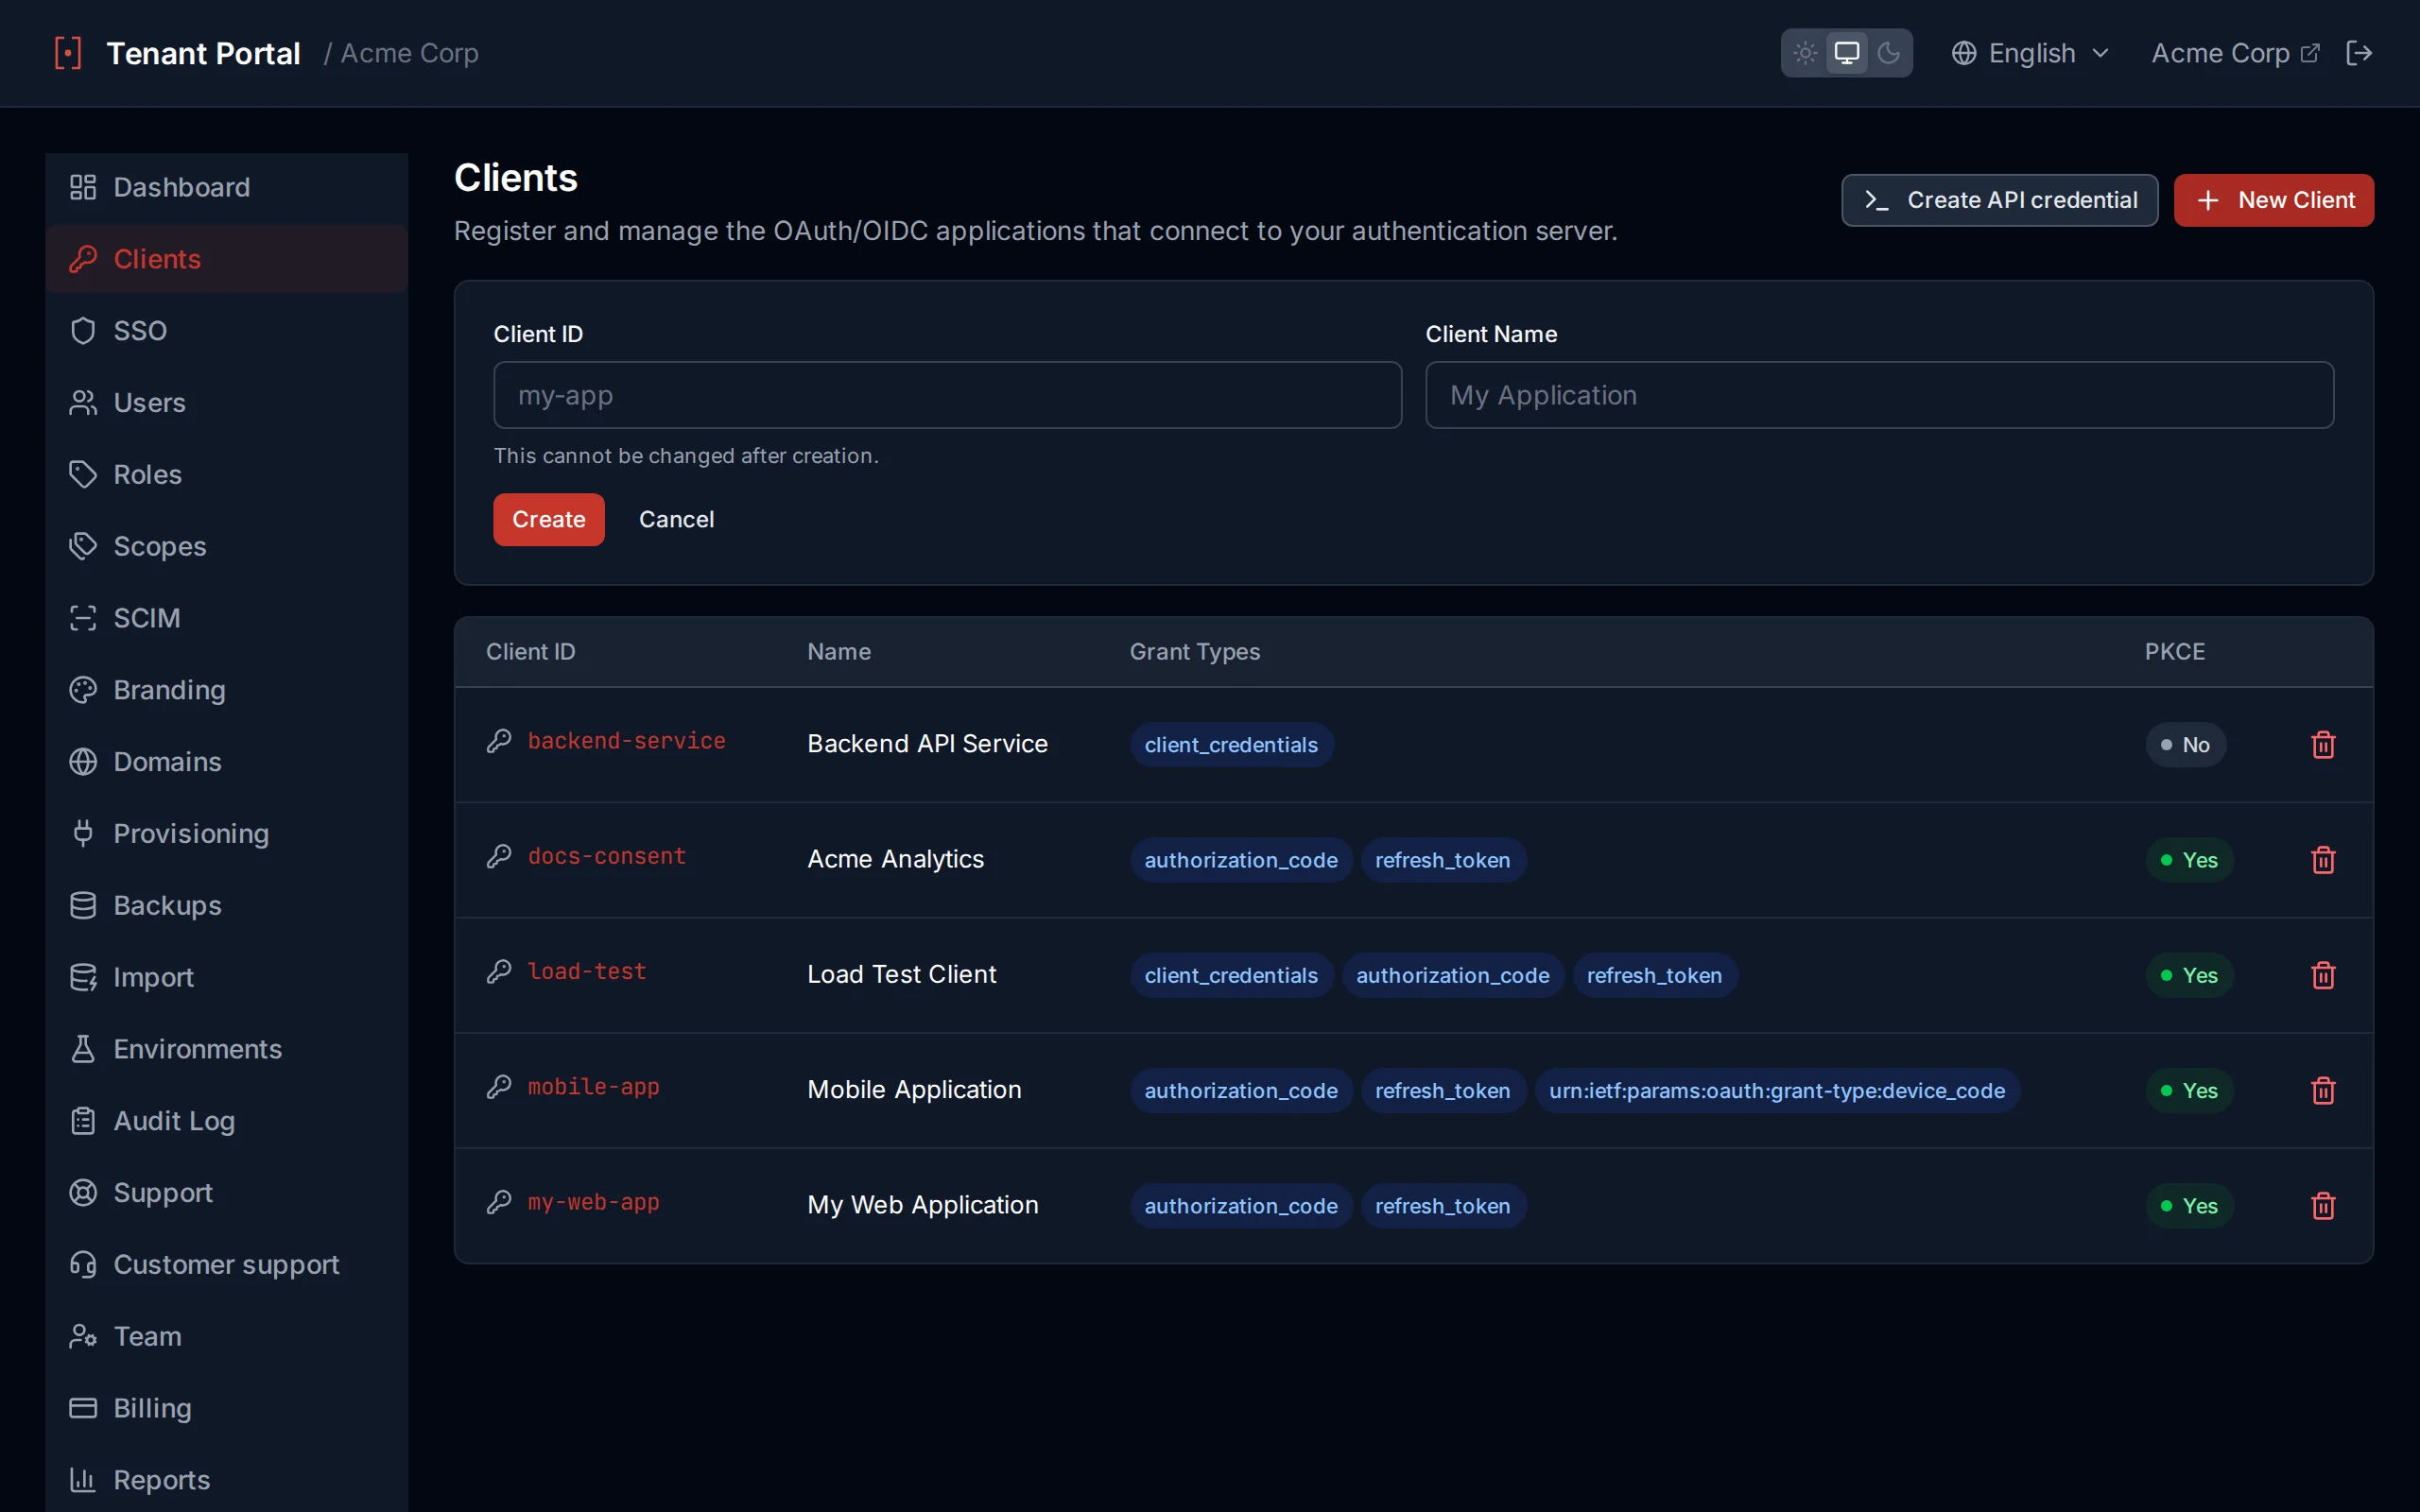
Register a new OAuth client in the portal
Local Development
http://localhost:3000/callback as a redirect URI for local development. Authagonal allows non-HTTPS redirect URIs for localhost origins.Your First Login
The fastest way to integrate is with oidc-client-ts, a lightweight OIDC client library for JavaScript and TypeScript applications.
import { UserManager } from 'oidc-client-ts';

const mgr = new UserManager({
  authority: 'https://acme.authagonal.io',
  client_id: 'my-app',
  redirect_uri: 'https://app.example.com/callback',
  response_type: 'code',
  scope: 'openid profile email',
});

// Redirect to login
mgr.signinRedirect();

// On callback page
const user = await mgr.signinRedirectCallback();
console.log(user.profile); // { sub, email, name, ... }
If you prefer a minimal approach without a library, you can use the standard OAuth 2.0 authorization code flow with plain fetch:
// 1. Redirect the user to the authorization endpoint
const authorizeUrl = new URL('https://acme.authagonal.io/connect/authorize');
authorizeUrl.searchParams.set('client_id', 'my-app');
authorizeUrl.searchParams.set('redirect_uri', 'https://app.example.com/callback');
authorizeUrl.searchParams.set('response_type', 'code');
authorizeUrl.searchParams.set('scope', 'openid profile email');
authorizeUrl.searchParams.set('code_challenge', codeChallenge);
authorizeUrl.searchParams.set('code_challenge_method', 'S256');
window.location.href = authorizeUrl.toString();

// 2. On the callback page, exchange the code for tokens
const res = await fetch('https://acme.authagonal.io/connect/token', {
  method: 'POST',
  headers: { 'Content-Type': 'application/x-www-form-urlencoded' },
  body: new URLSearchParams({
    grant_type: 'authorization_code',
    code: new URLSearchParams(window.location.search).get('code')!,
    redirect_uri: 'https://app.example.com/callback',
    client_id: 'my-app',
    code_verifier: codeVerifier,
  }),
});

const tokens = await res.json();
// tokens.id_token, tokens.access_token, tokens.refresh_token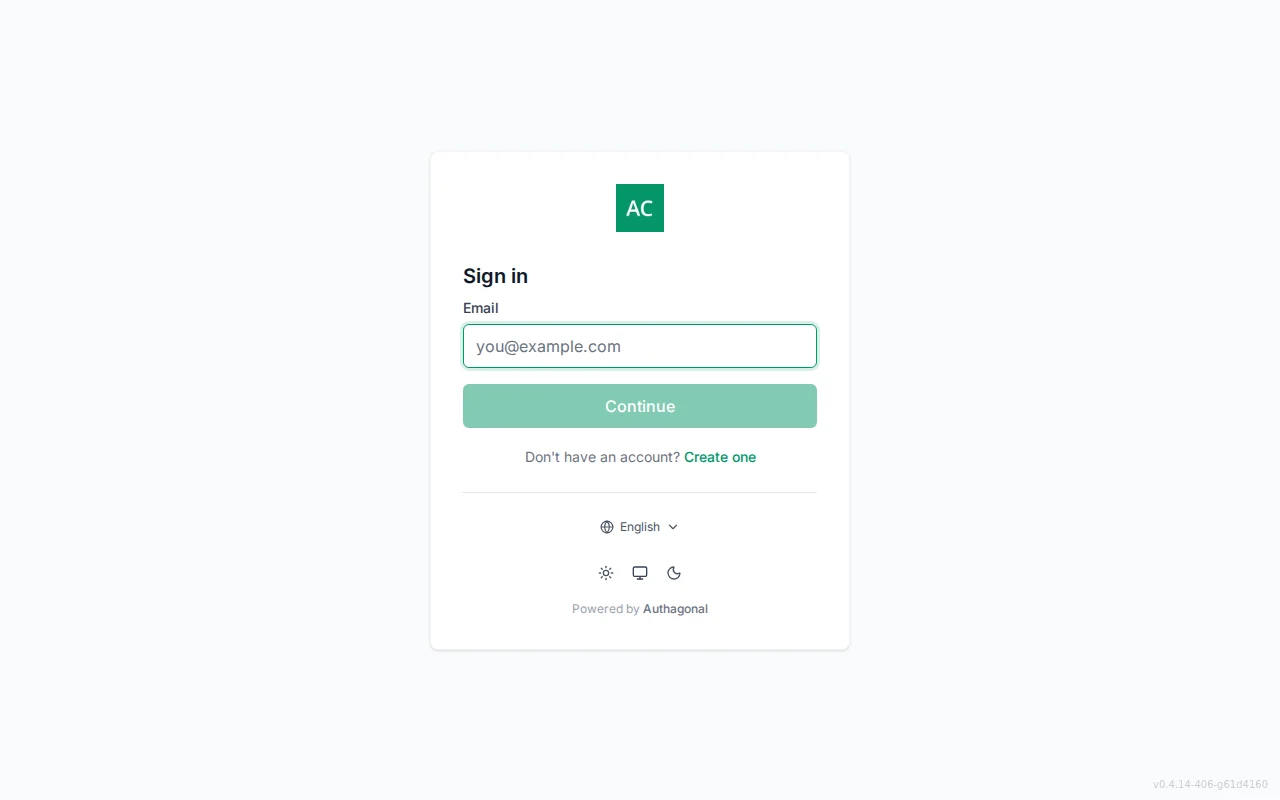
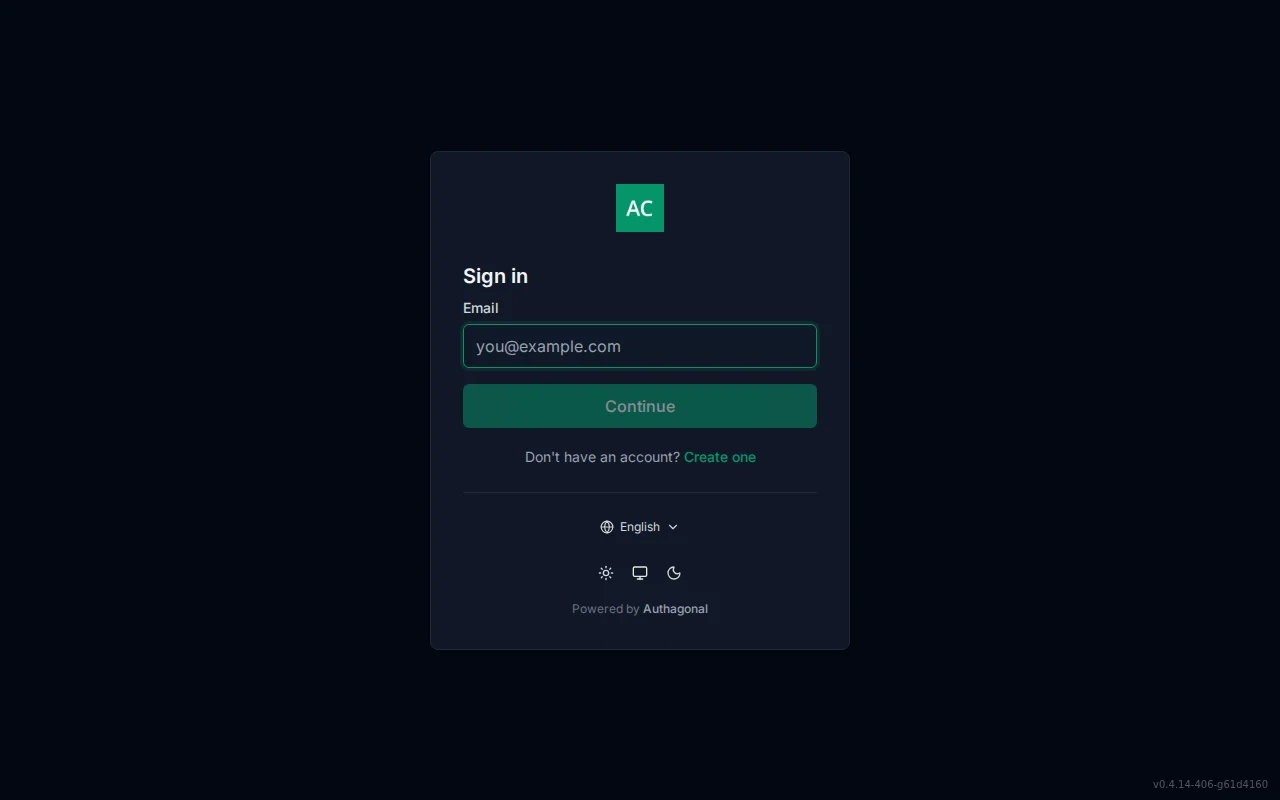
The default login page for your tenant
Sandbox Mode
{slug}-sandbox.authagonal.io) and can be refreshed from production at any time without affecting live users.Dashboard
The portal dashboard gives you a real-time overview of your tenant. It surfaces the metrics that matter most — user growth, authentication activity, and quick navigation to every feature in the portal.
Overview
At the top of the dashboard you will see a welcome message along with your current total user count. Below that, a Daily Active Users chart displays a 7-day history of unique users who authenticated each day, giving you a quick pulse on engagement trends.
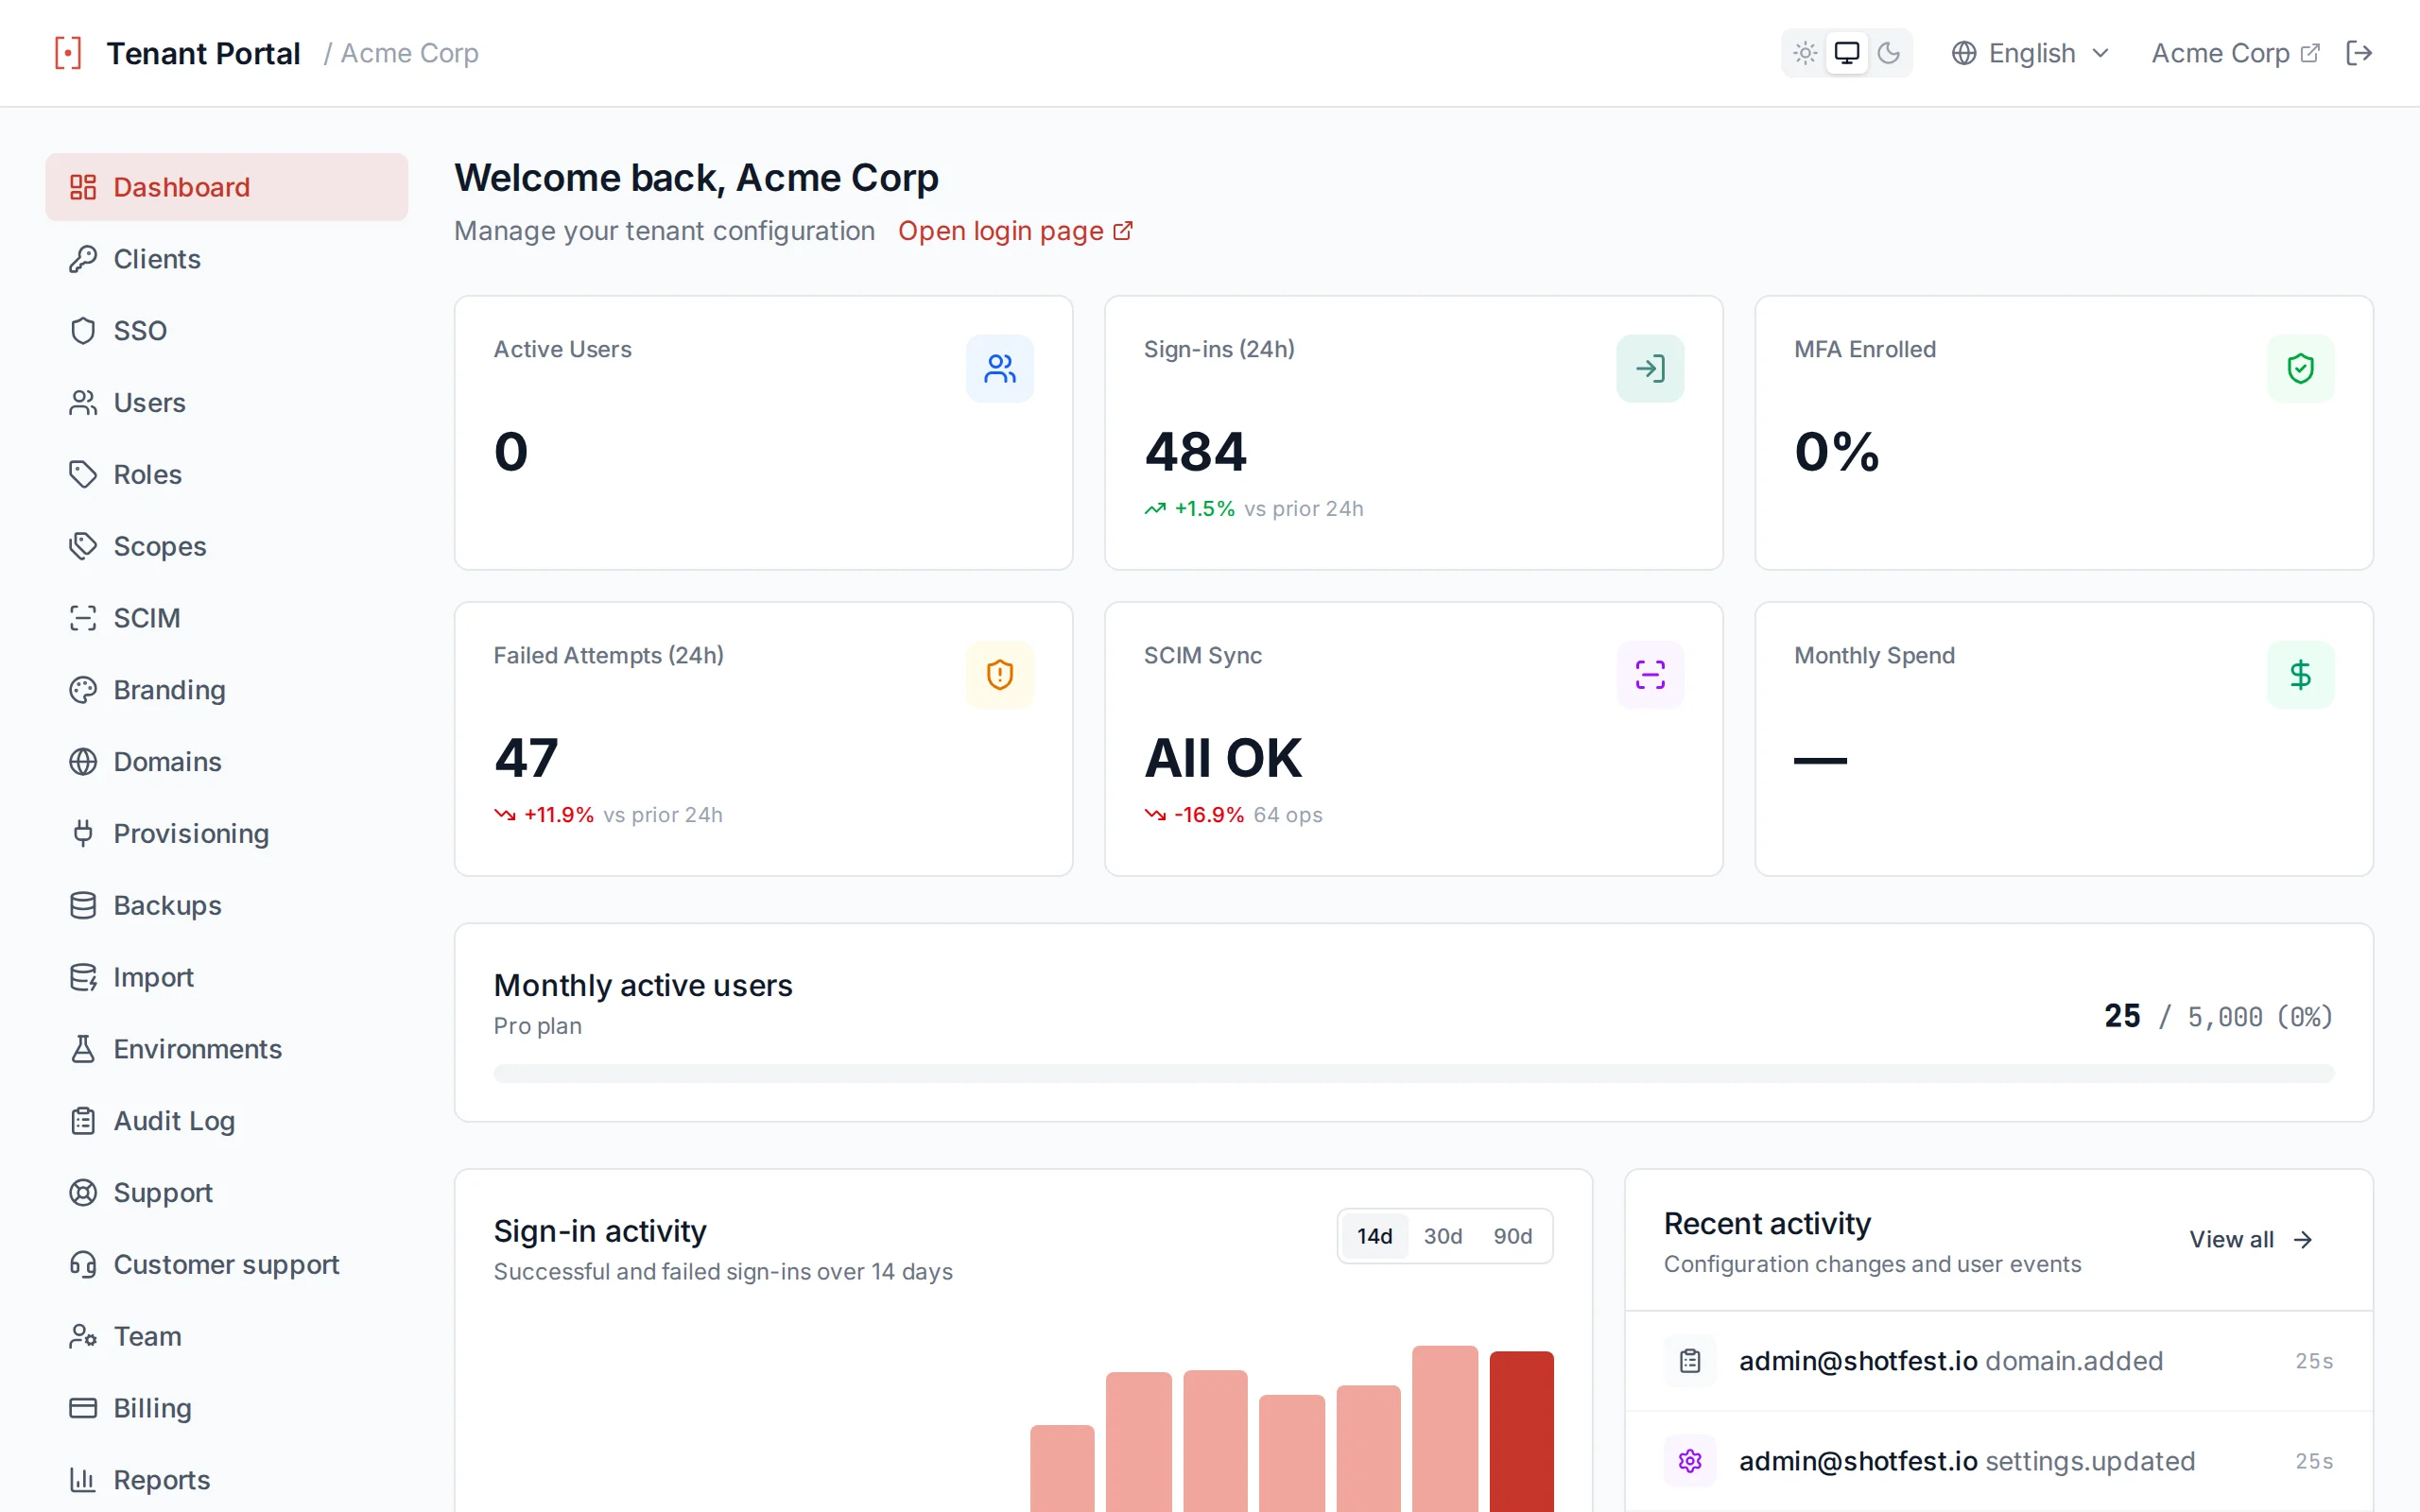
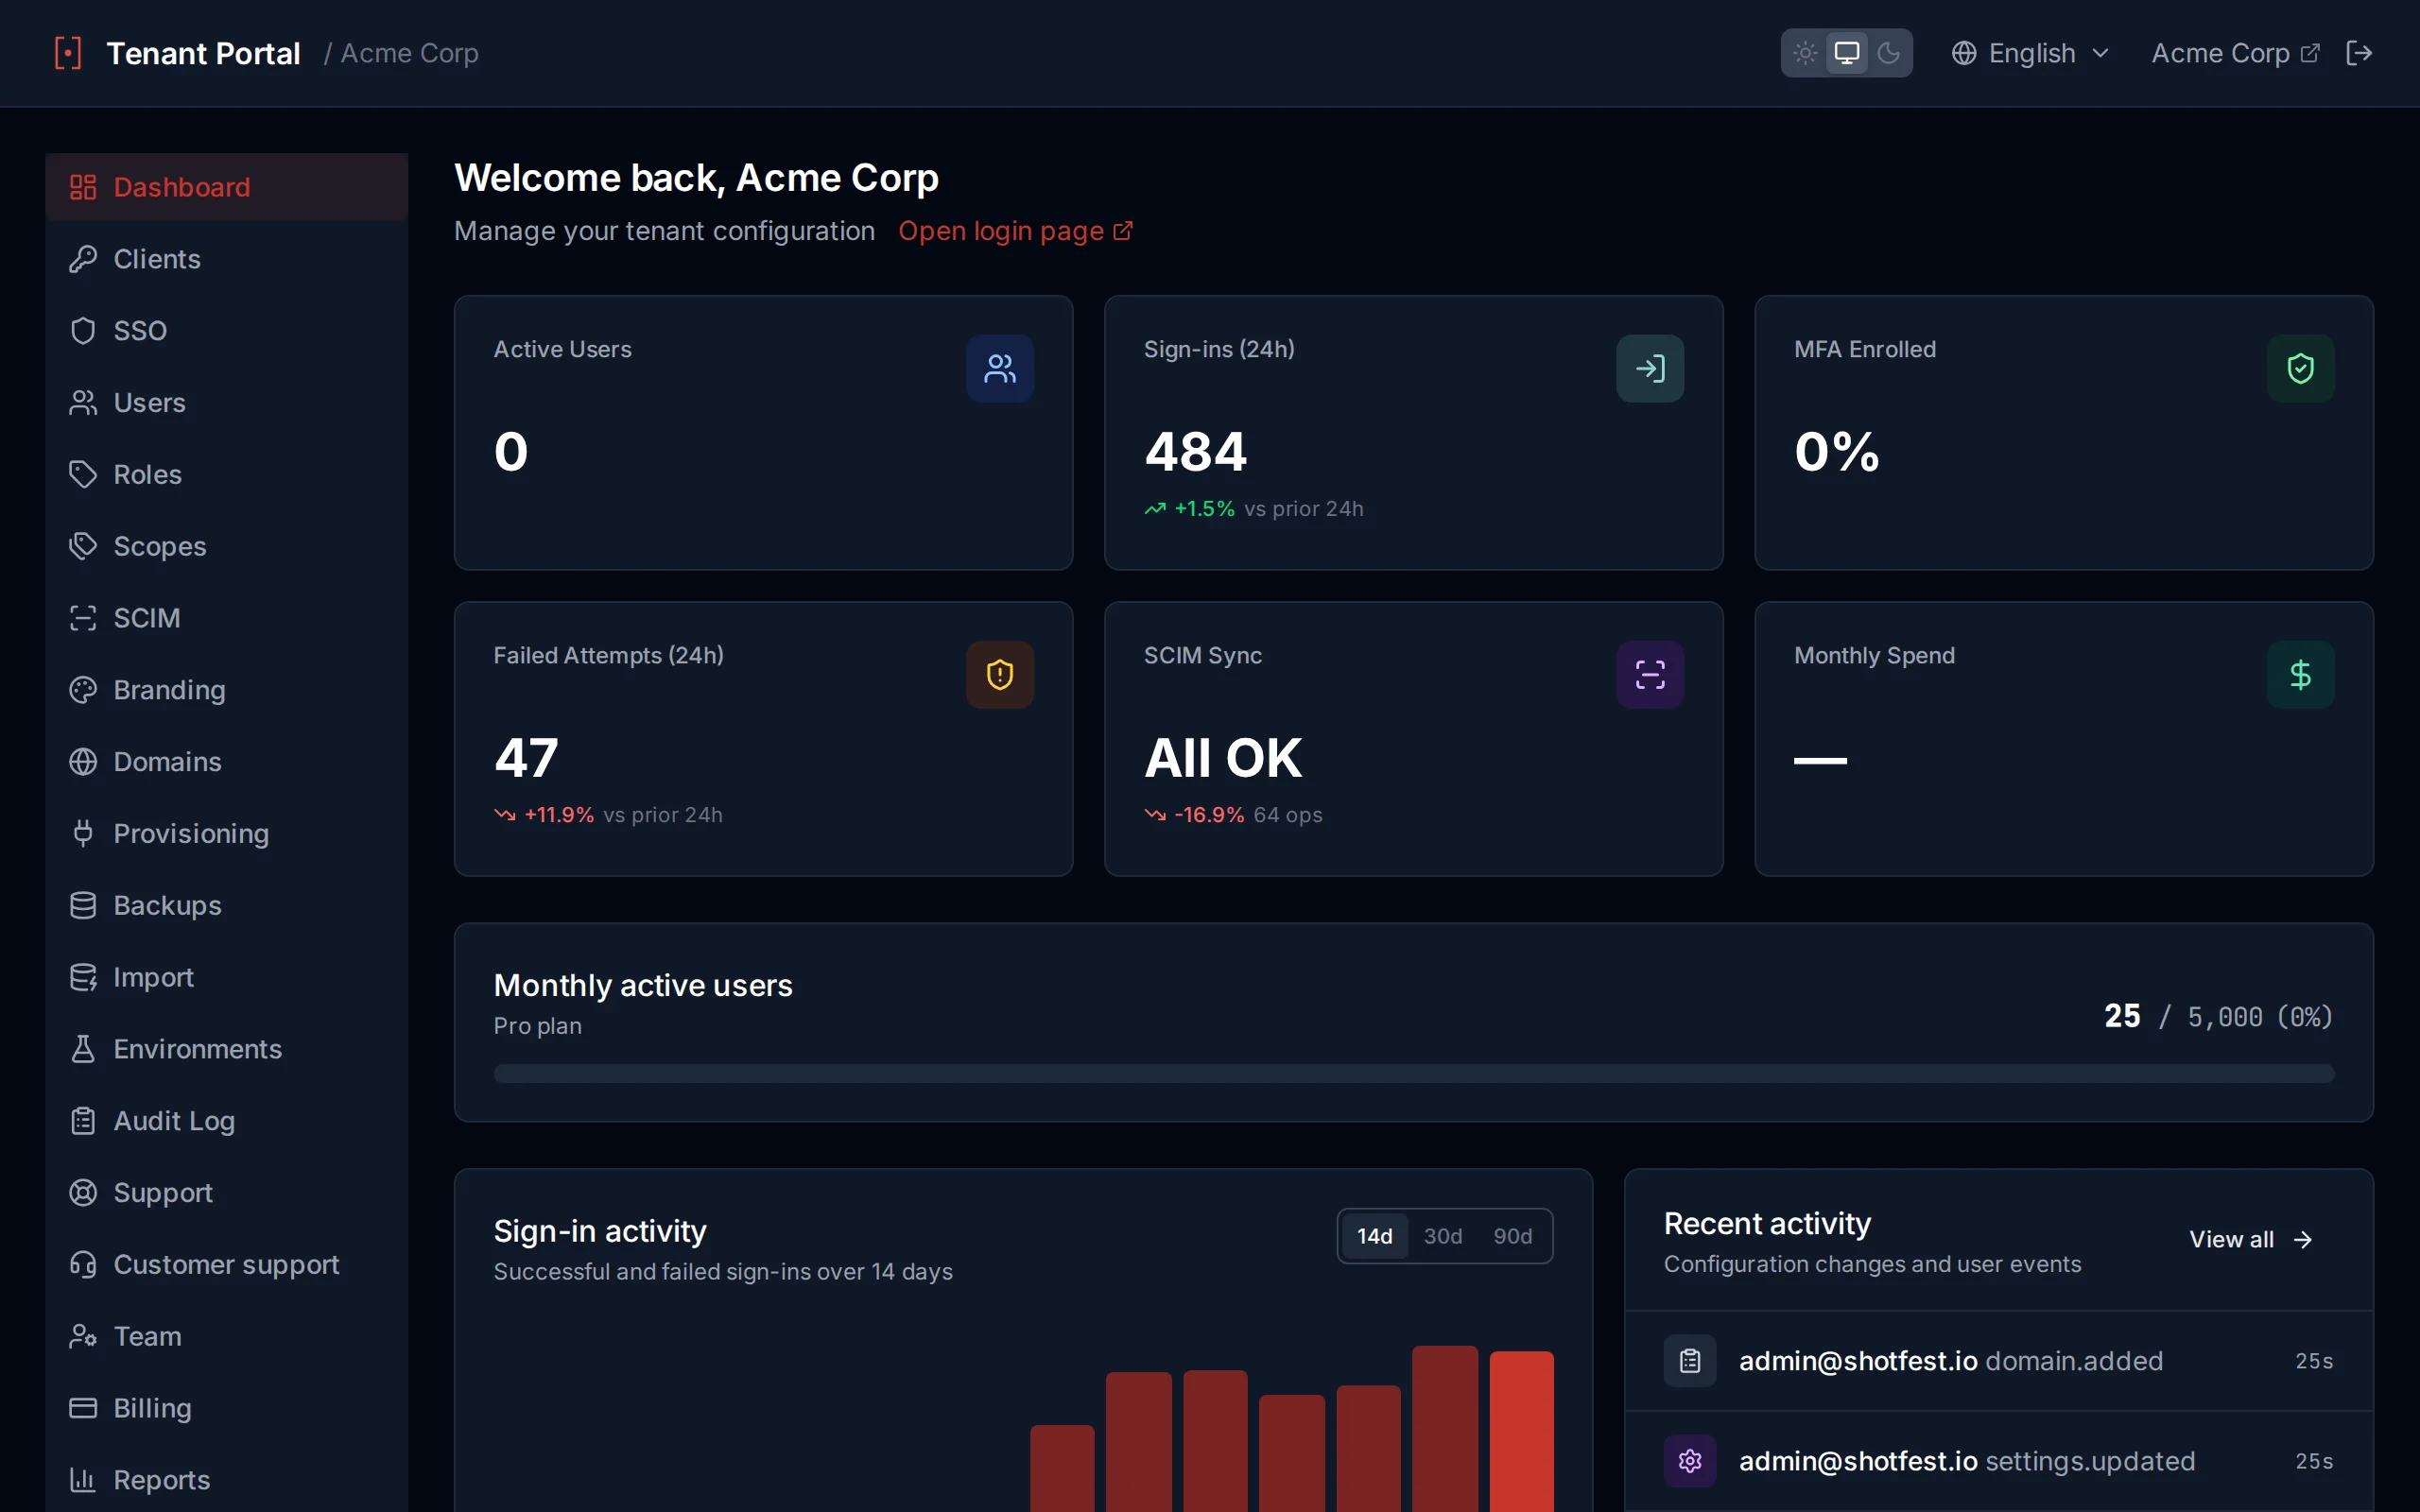
The dashboard home screen with DAU chart and activity overview
Activity Metrics
The activity metrics panel displays four stat cards summarizing key authentication events:
- Successful Logins — total completed authentication flows
- Failed Logins — incorrect credentials, locked accounts, or policy rejections
- Active Users — unique users who authenticated in the selected period
- SCIM Operations — user and group provisioning events from connected IdPs
Use the time range filters to switch between 24 hours, 3 days, 7 days, and 30 days. All stat cards and charts update to reflect the selected window.
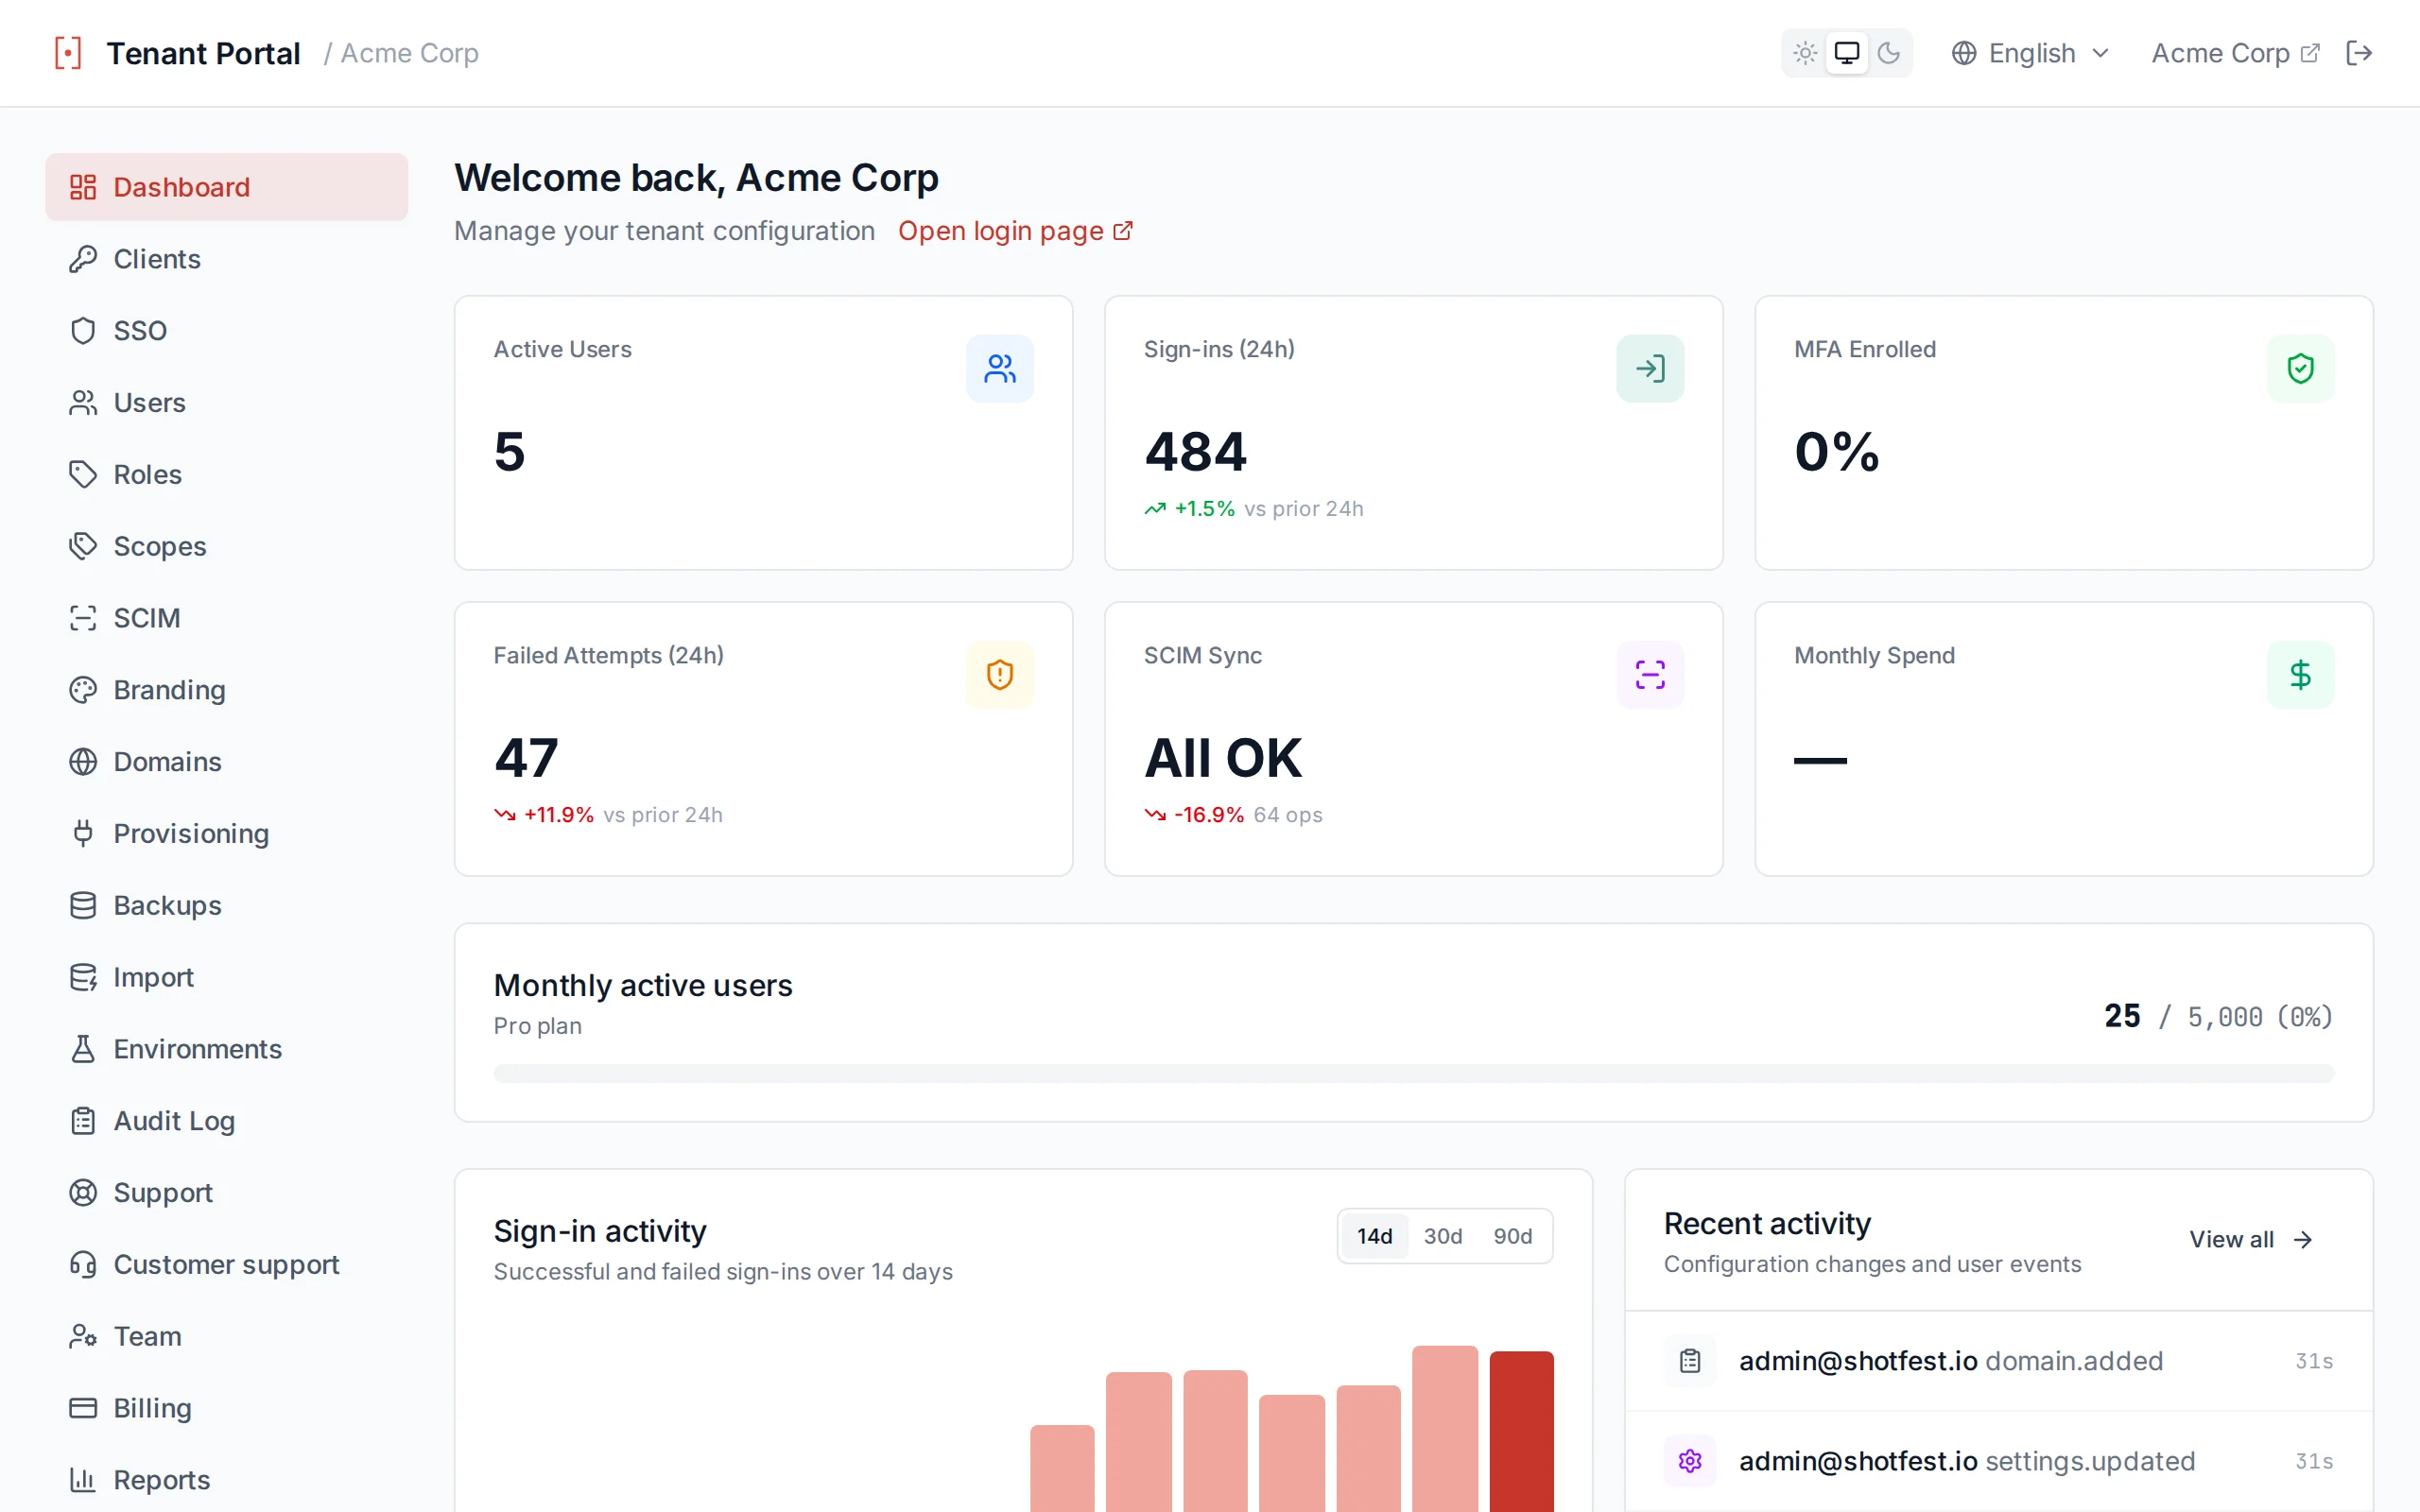
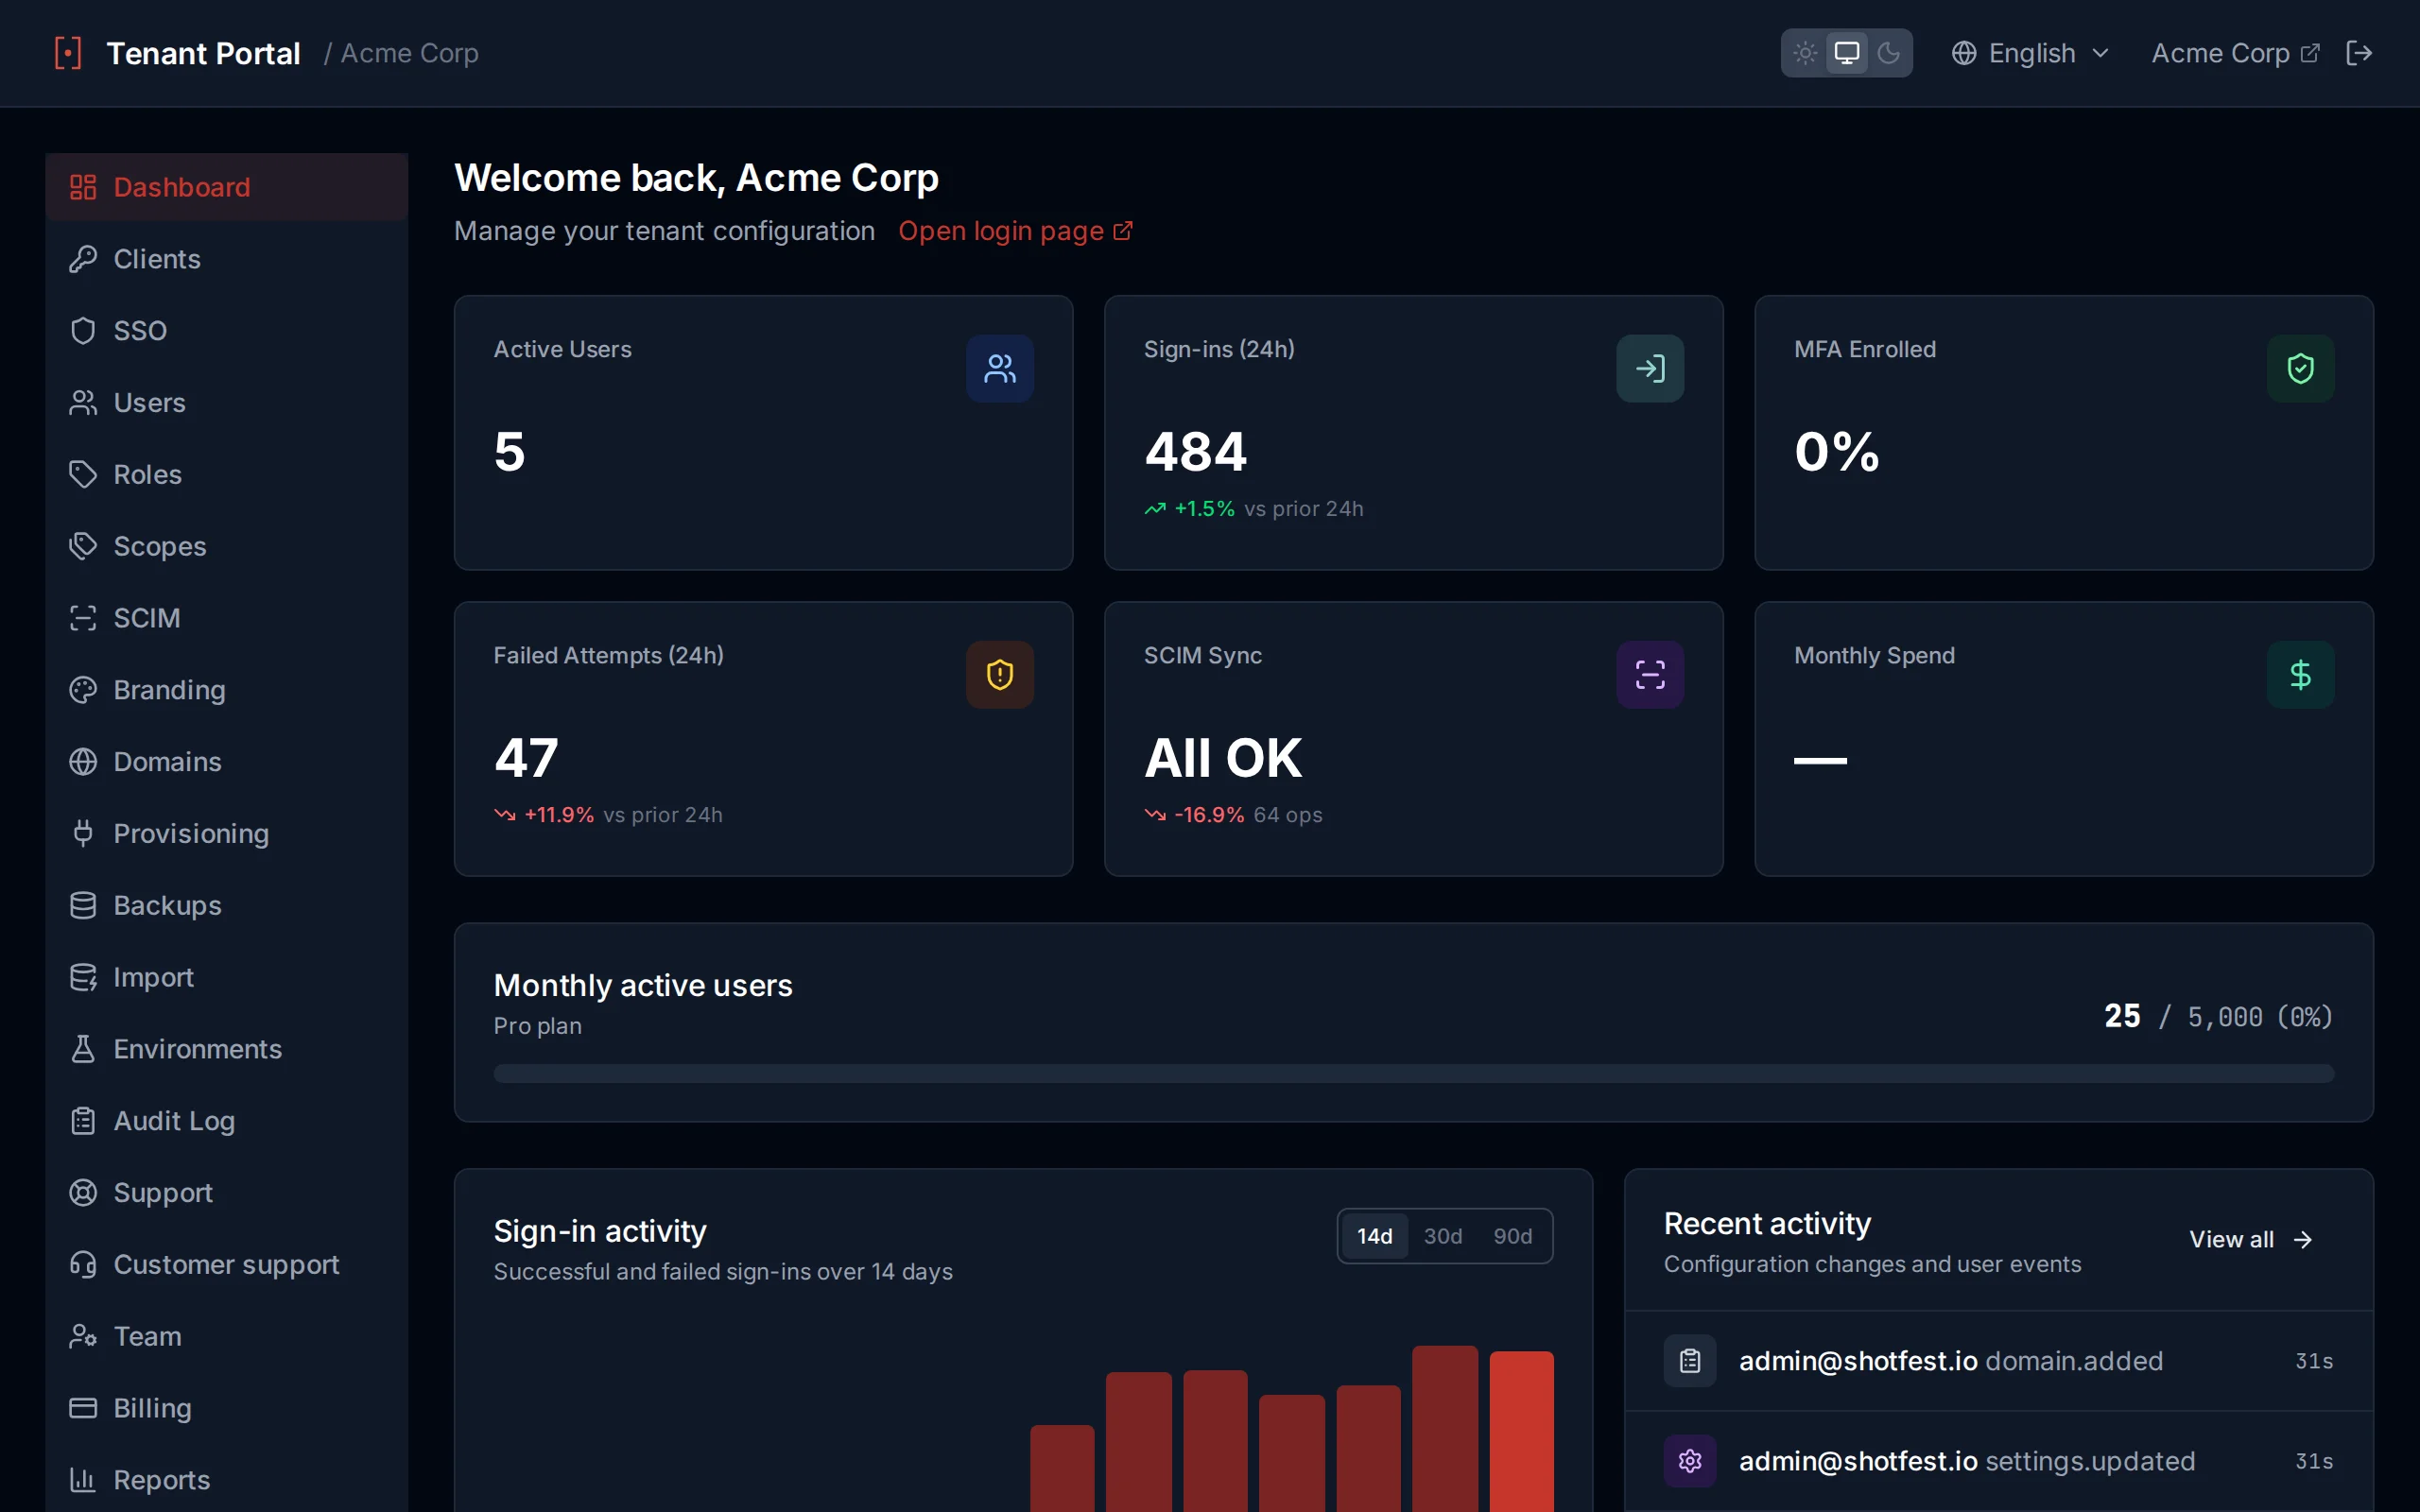
Activity metrics with configurable time range
Quick Navigation
Below the metrics panel, navigation cards link directly to every major feature: Clients, Users, Groups, Roles, SSO, SCIM, Branding, and Settings. Each card shows a brief description so new team members can orient themselves quickly.
Clients
OAuth clients represent the applications that authenticate users through your tenant. Each client has its own configuration for redirect URIs, scopes, grant types, token lifetimes, and MFA policy.
Client List
The Clients page displays a table of all registered clients. Each row shows the clientId, display name, allowed grant types as colored badges, and whether PKCE is enabled. Click any row to open the full configuration editor.
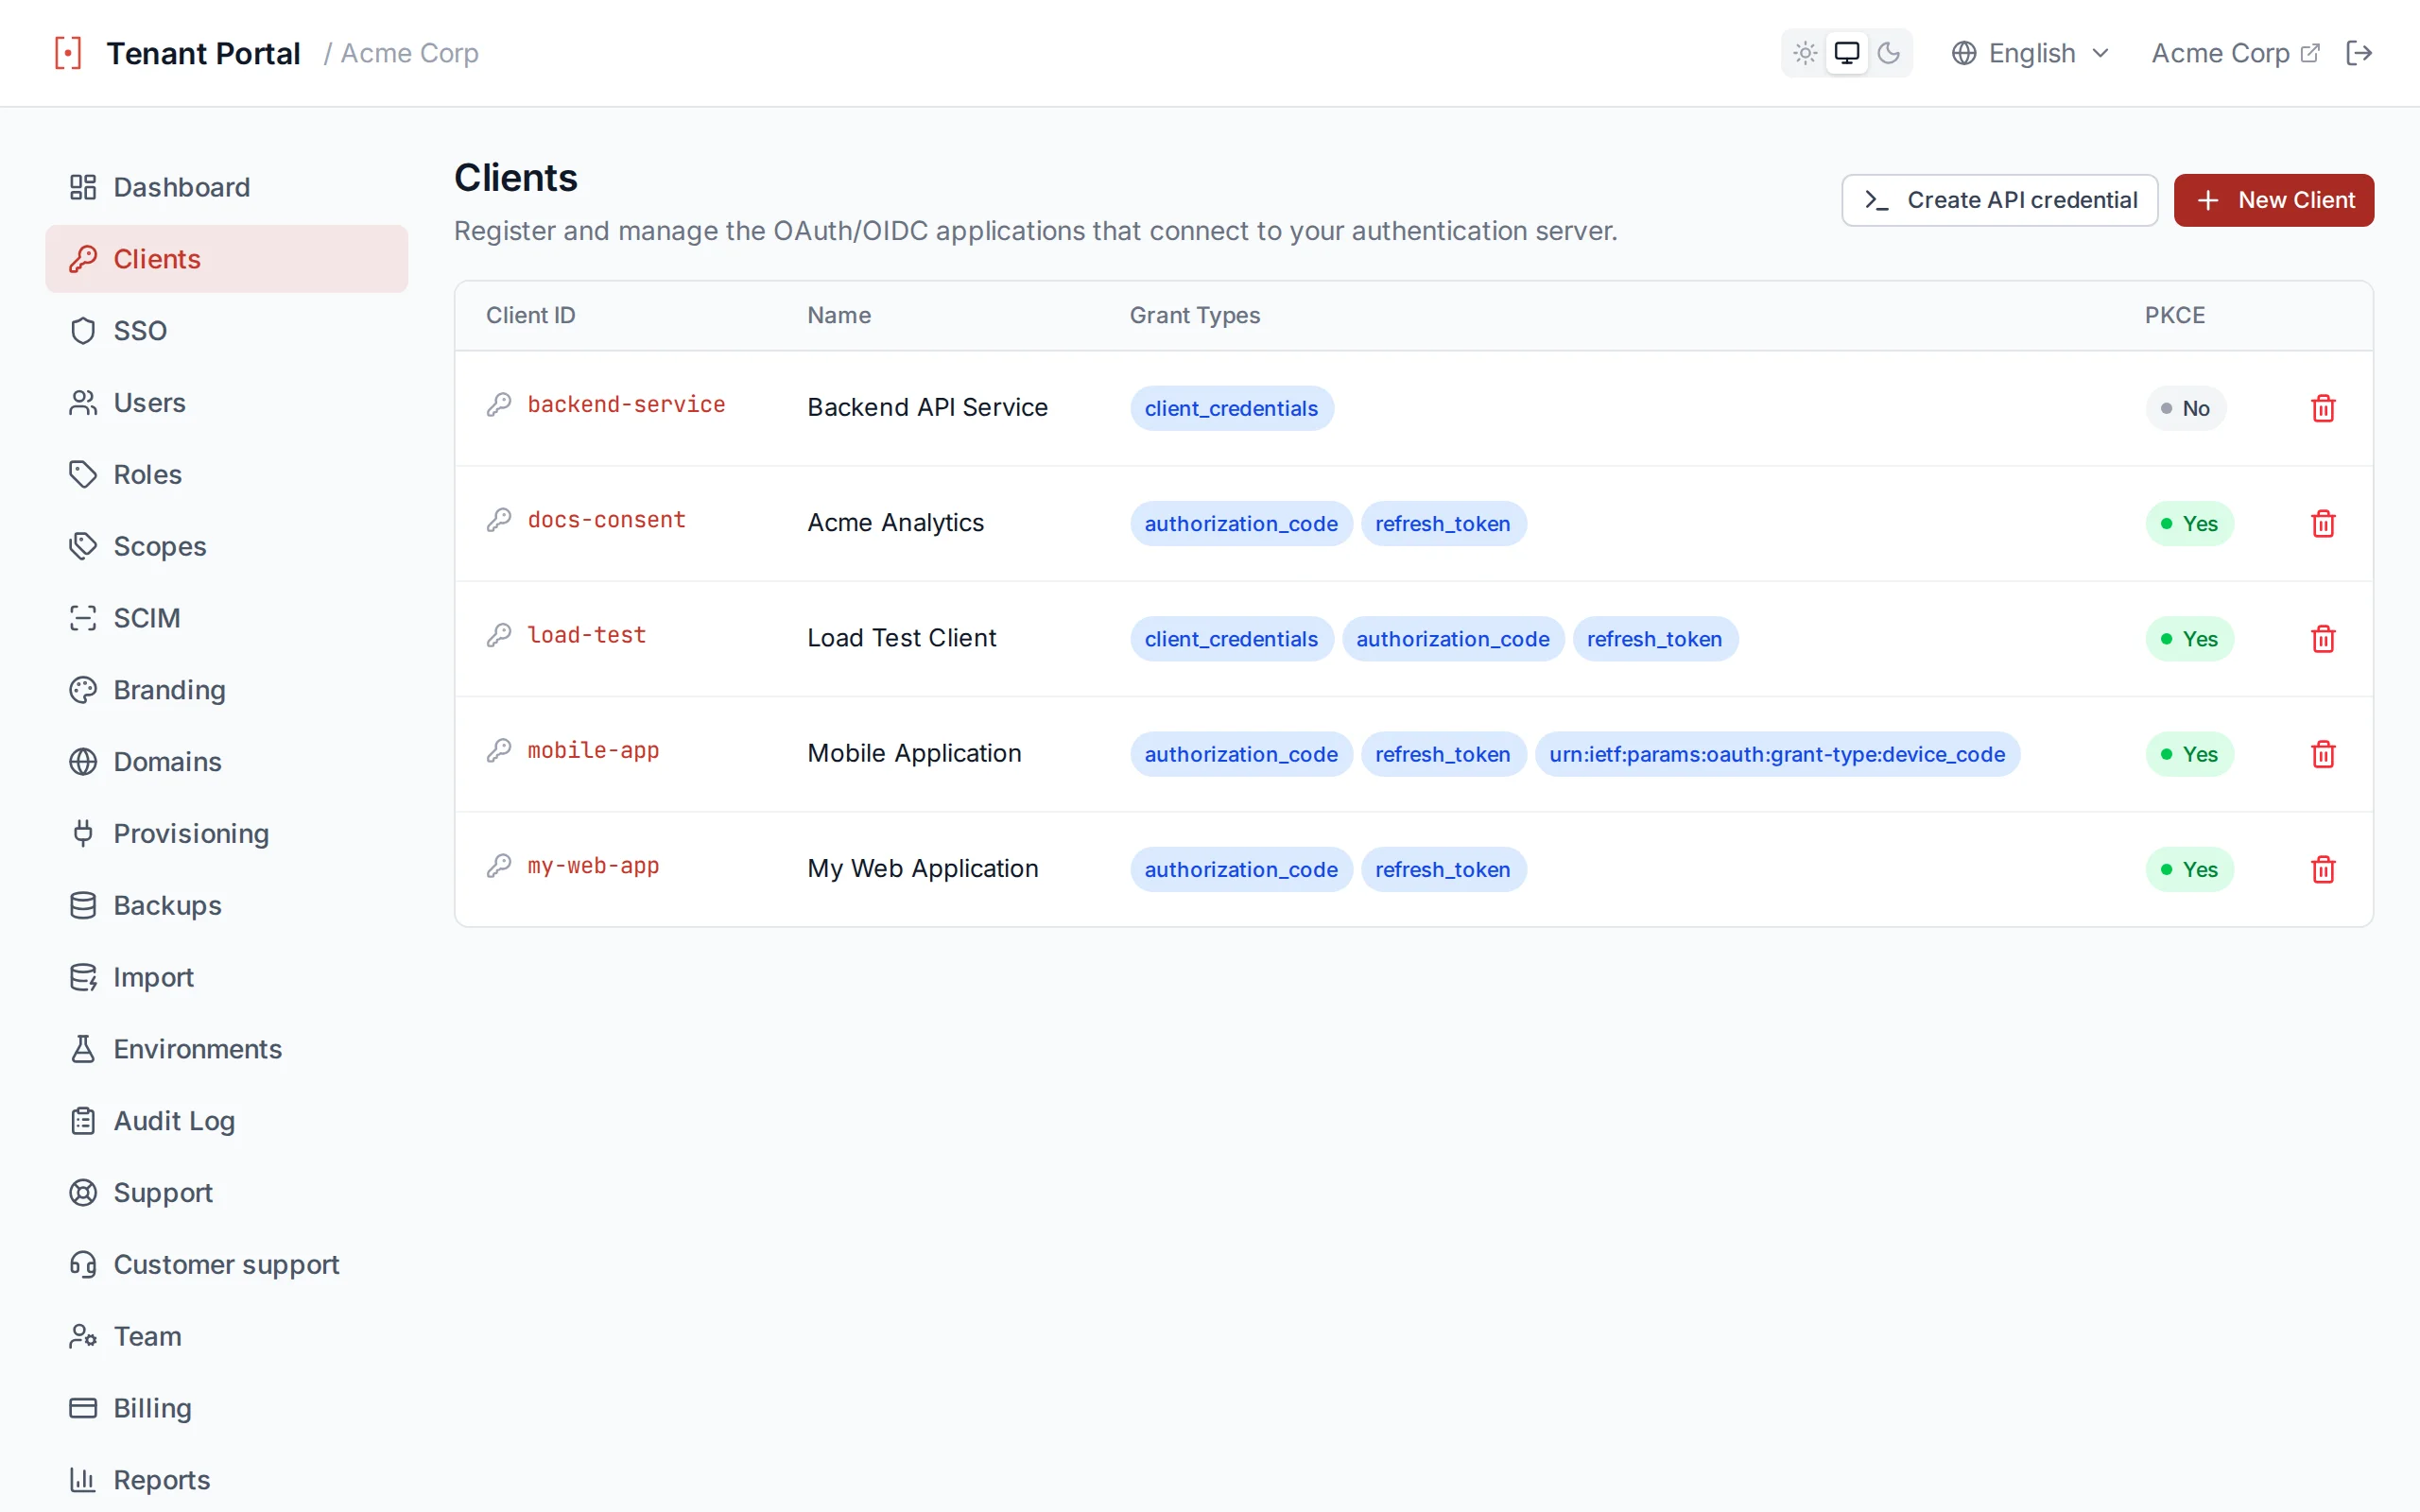
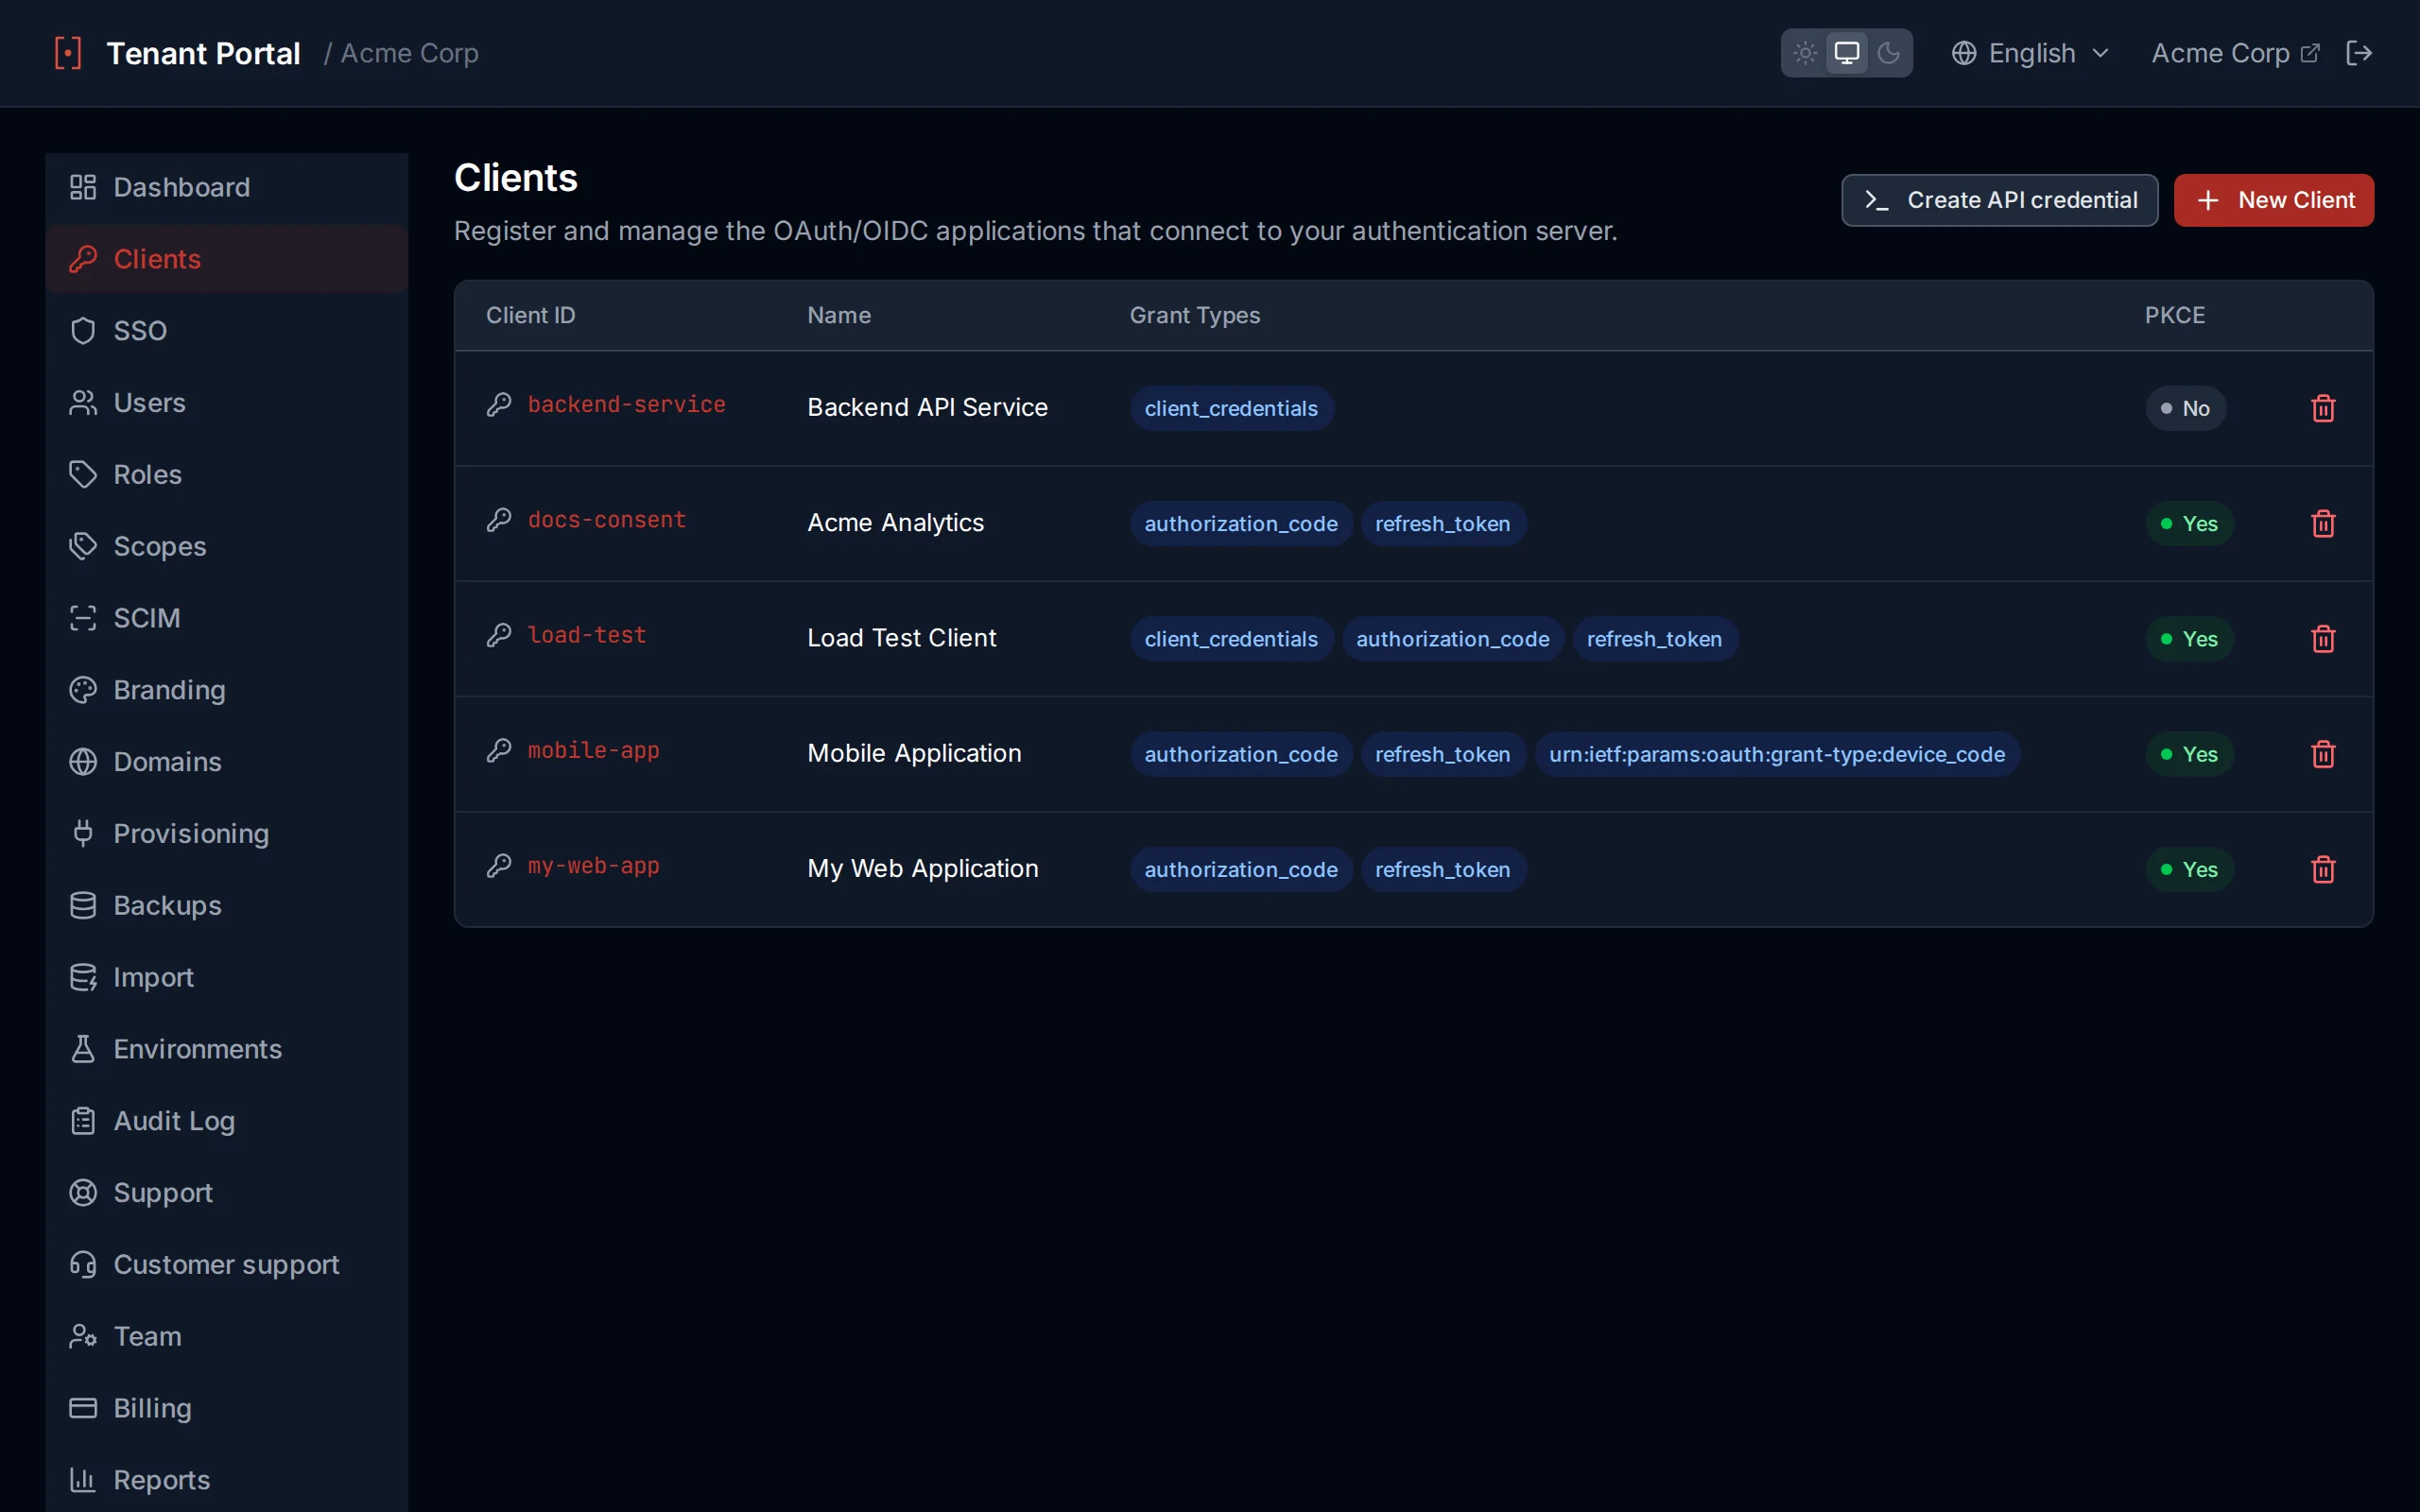
Client list with grant type badges and PKCE indicators
Creating a Client
Click Create Client to register a new application. You need to provide two fields:
clientId— a unique identifier for the client (e.g.my-spa)clientName— a human-readable display name
Register a new OAuth client
Deleting a Client
To delete a client, open the client configuration and click the Delete Client button at the bottom of the page. You will be asked to confirm before the client is permanently removed. All active sessions and tokens for the deleted client are immediately invalidated.
Client Configuration Reference
Each client has a comprehensive set of configuration options organized into several sections.
General Settings
| Setting | Description | Default |
|---|---|---|
clientName | Display name shown in consent screens and the portal | — |
requirePkce | Require Proof Key for Code Exchange on authorization code flows | On |
requireClientSecret | Require a client secret for token requests (disable for public clients like SPAs) | Off |
allowOfflineAccess | Allow the client to request refresh tokens via the offline_access scope | Off |
alwaysIncludeUserClaimsInIdToken | Include all user claims directly in the ID token instead of requiring a UserInfo call | Off |
includeGroupsInTokens | Include the user's group memberships as a groups claim in the ID token | Off |
PKCE Security
URIs
URI fields use a tag input — type a value and press Enter or comma to add it. Click the X on any tag to remove it.
| Setting | Description |
|---|---|
redirectUris | Allowed callback URLs after authentication. Must exactly match the redirect_uri parameter in authorization requests. |
postLogoutRedirectUris | Allowed URLs to redirect to after logout. |
allowedCorsOrigins | Origins permitted for cross-origin requests to the token and UserInfo endpoints. |
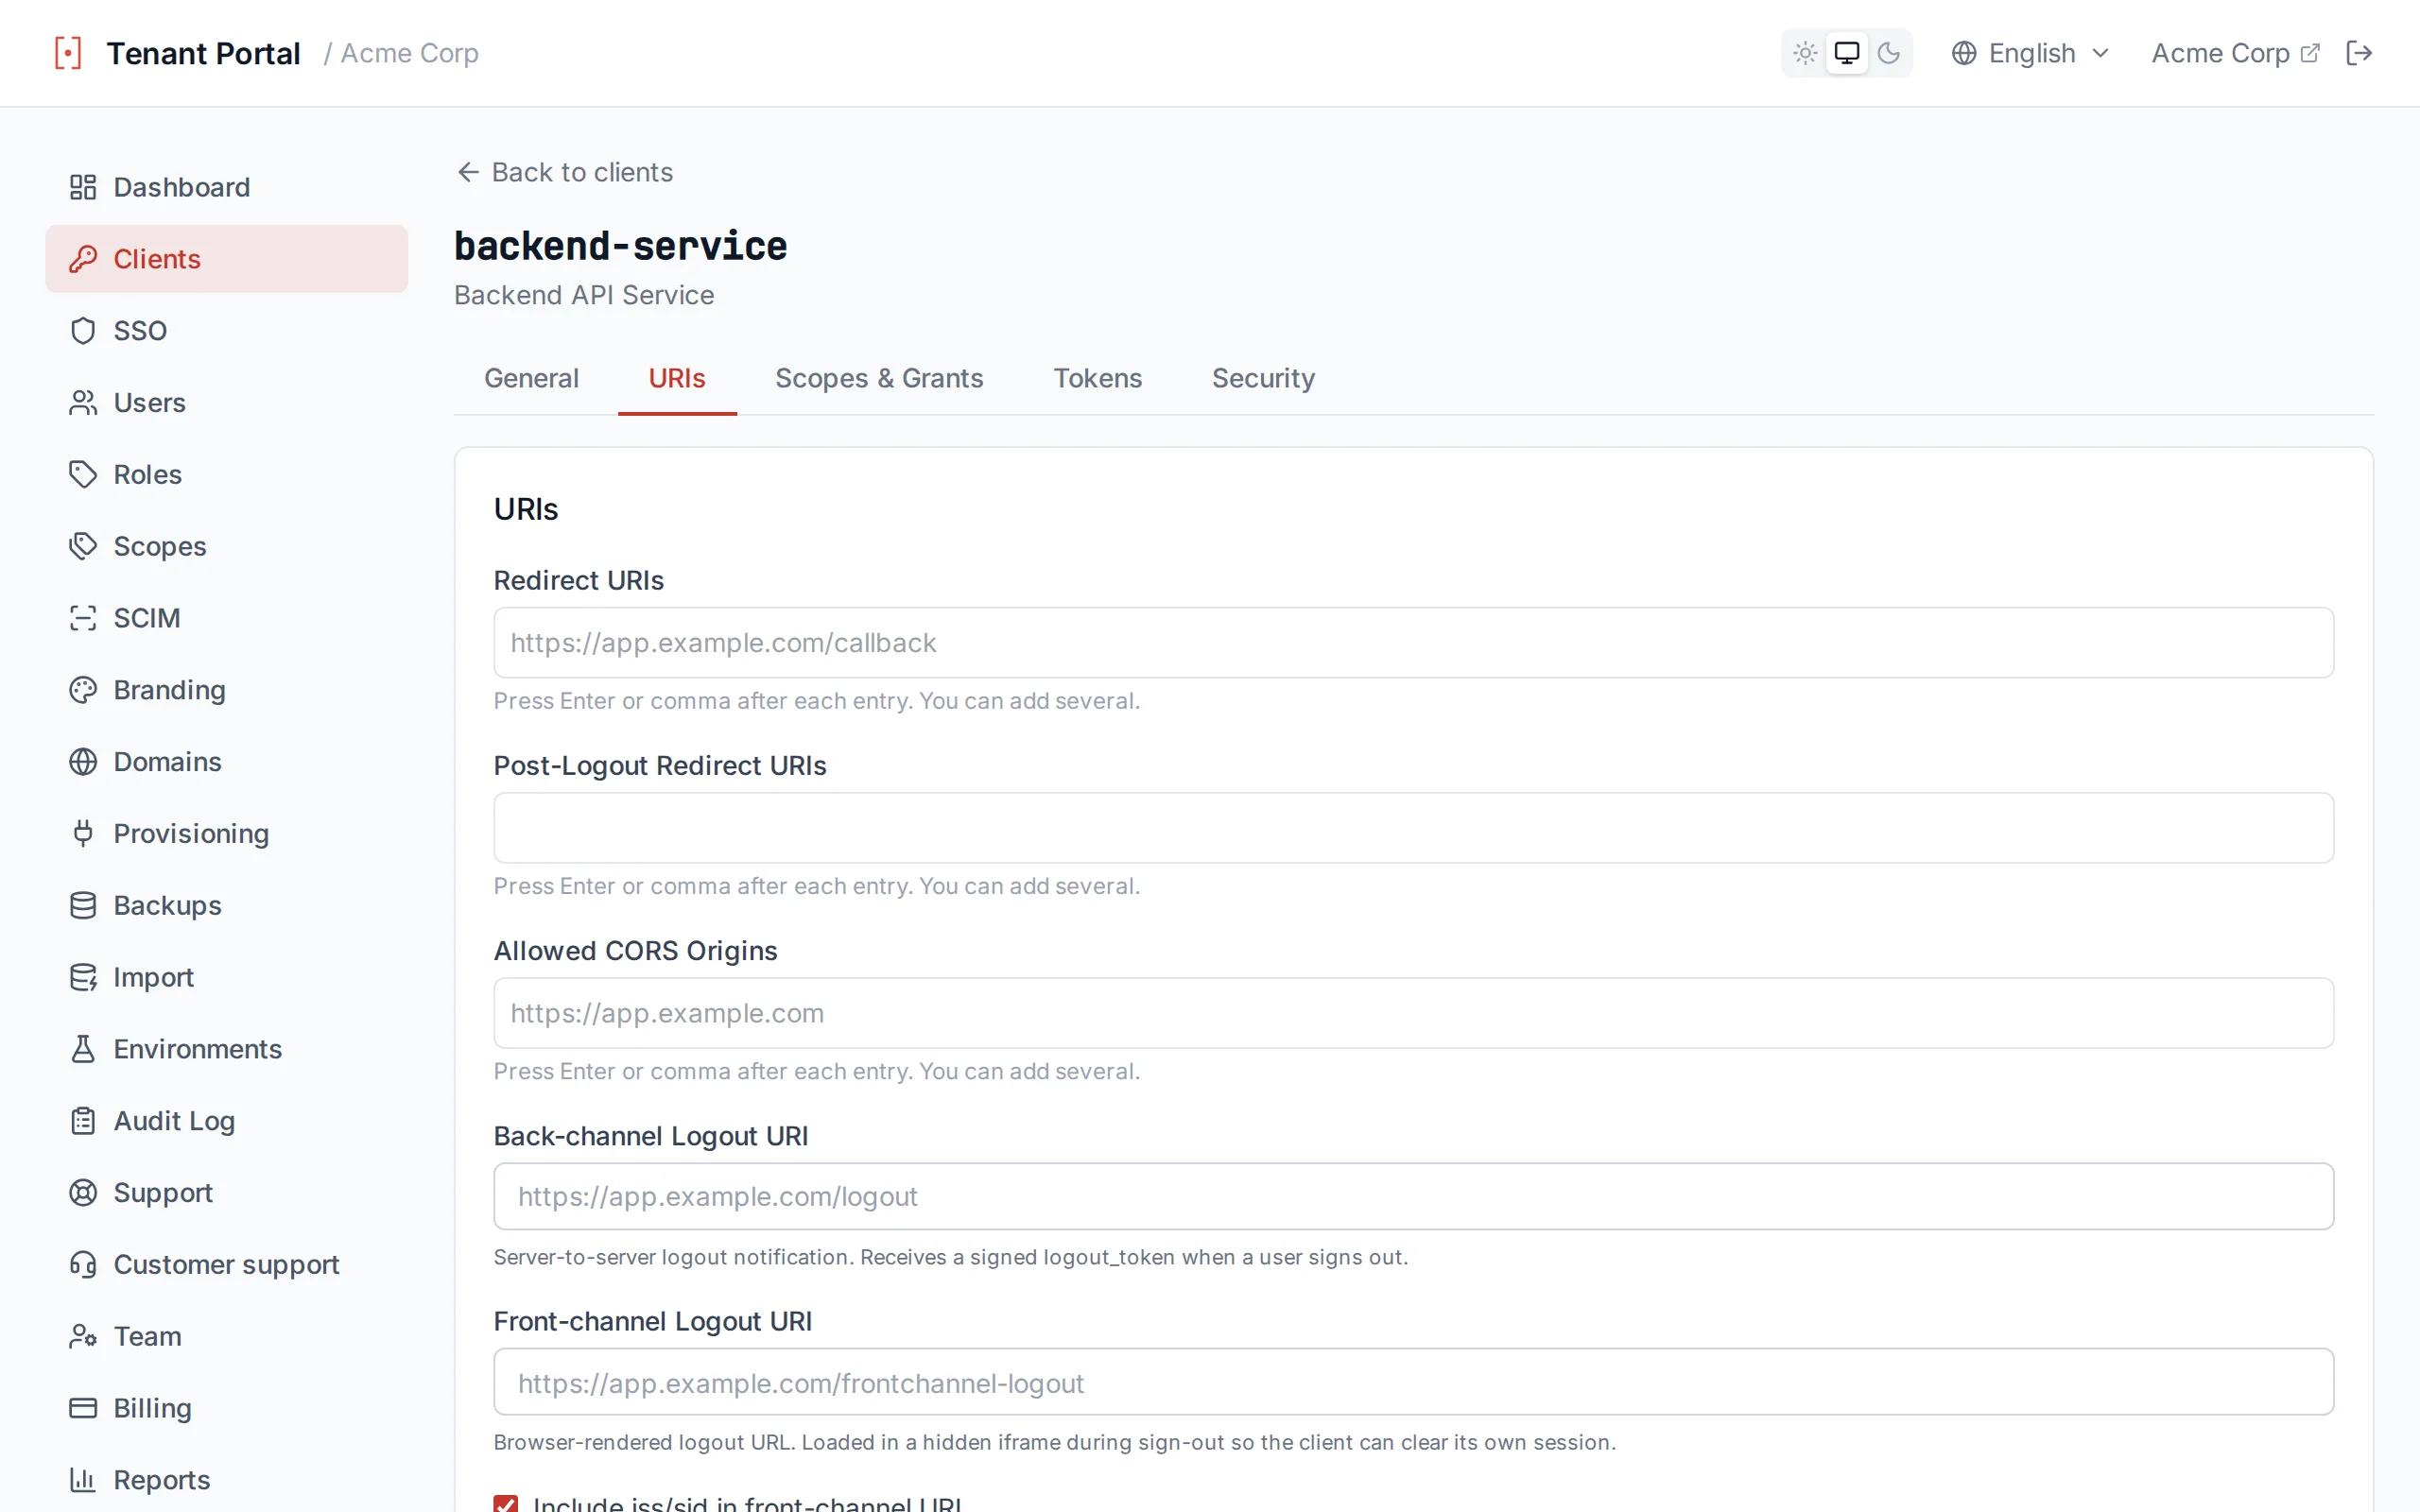
Tag input fields for configuring URIs
Scopes & Grant Types
| Setting | Options |
|---|---|
allowedScopes | openid profile email offline_access |
allowedGrantTypes | authorization_code client_credentials refresh_token device_code |
Token Lifetimes
| Setting | Description | Default |
|---|---|---|
accessTokenLifetimeSeconds | How long access tokens are valid | 1800 (30 min) |
identityTokenLifetimeSeconds | How long ID tokens are valid | 300 (5 min) |
authorizationCodeLifetimeSeconds | How long authorization codes are valid for exchange | 300 (5 min) |
absoluteRefreshTokenLifetimeSeconds | Maximum lifetime of a refresh token regardless of activity | 2592000 (30 days) |
slidingRefreshTokenLifetimeSeconds | Refresh token expiry resets on each use, up to the absolute lifetime | 1296000 (15 days) |
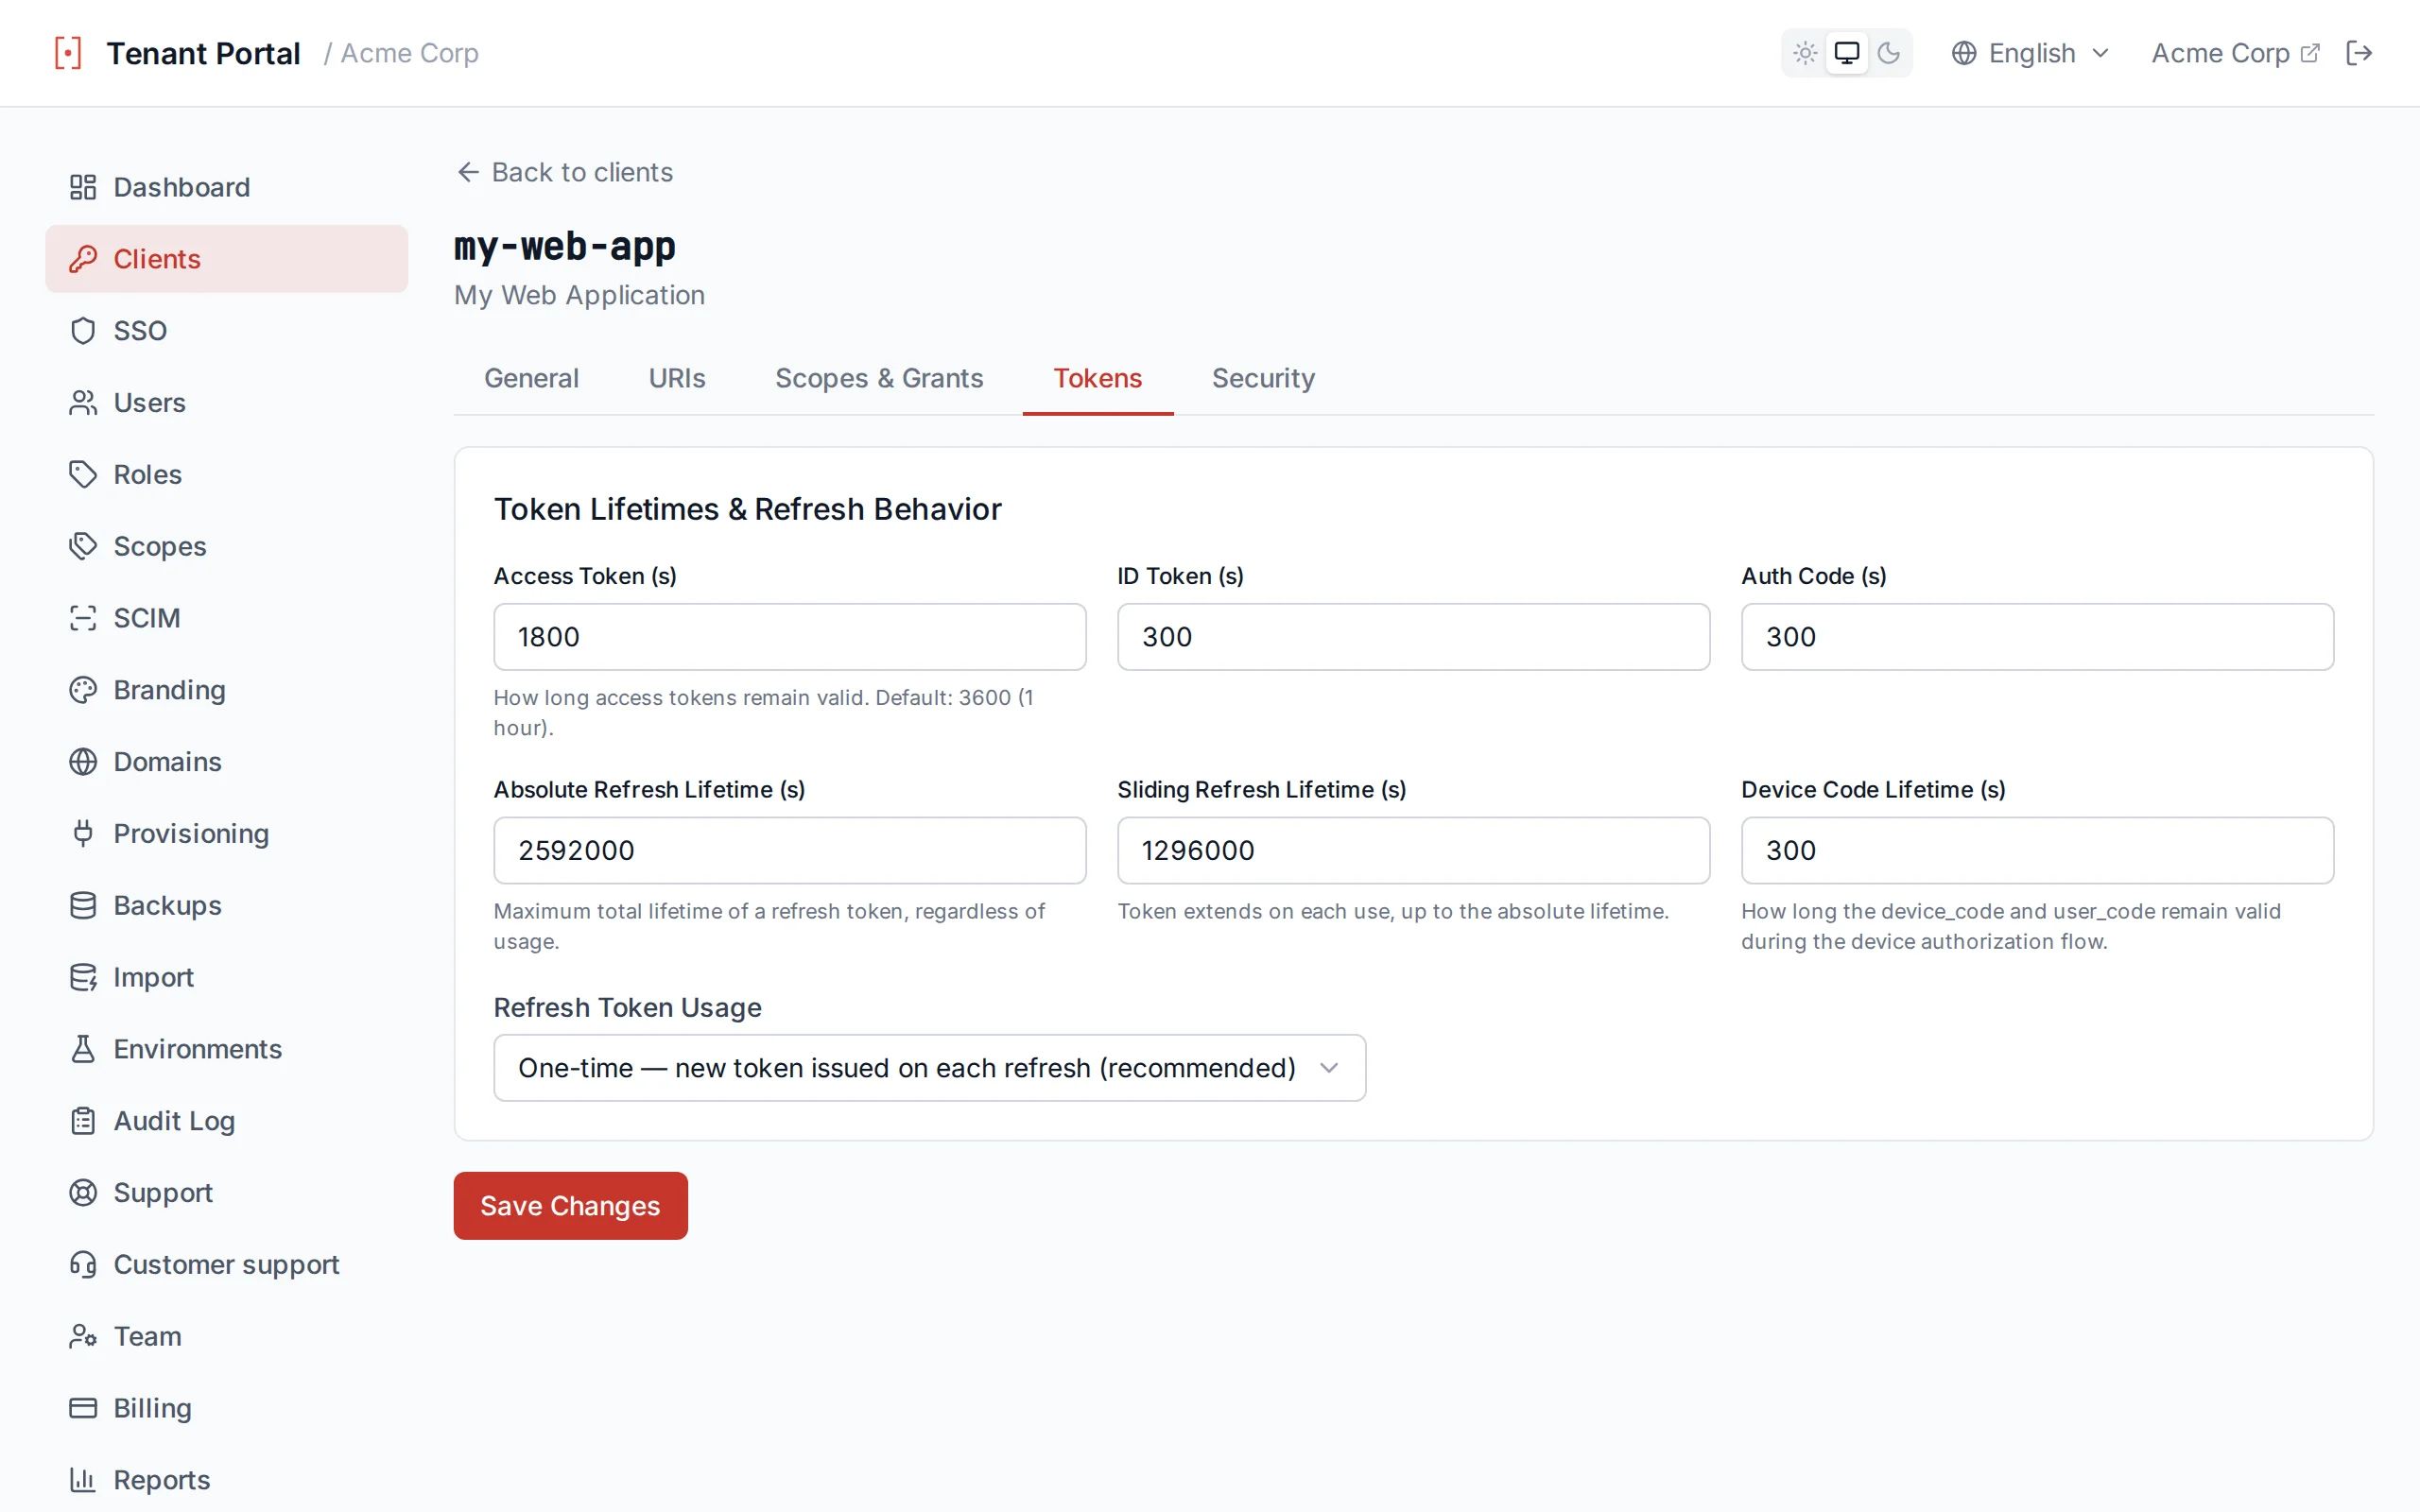
Configure token lifetimes per client
Logout URIs
Clients can register both back-channel and front-channel logout URIs. Either or both are optional — configure whichever matches how your application clears its session.
| Setting | Description |
|---|---|
backChannelLogoutUri | Server-to-server POST with a signed logout token. Reliable even when the user's browser is offline. |
frontChannelLogoutUri | Rendered in a hidden iframe during logout so the browser clears cookies and local storage. |
frontChannelLogoutSessionRequired | When on, the logout URL receives iss and sid query parameters so your app can correlate the logout with the specific session. |
Use both together
MFA Policy
Each client can override the tenant-wide MFA policy with a per-client setting. The MFA policy dropdown offers three options:
| Policy | Behavior |
|---|---|
| Disabled | MFA is never prompted for this client |
| Enabled | Users can optionally enroll in MFA; they will be prompted if enrolled |
| Required | All users must complete MFA to authenticate through this client |
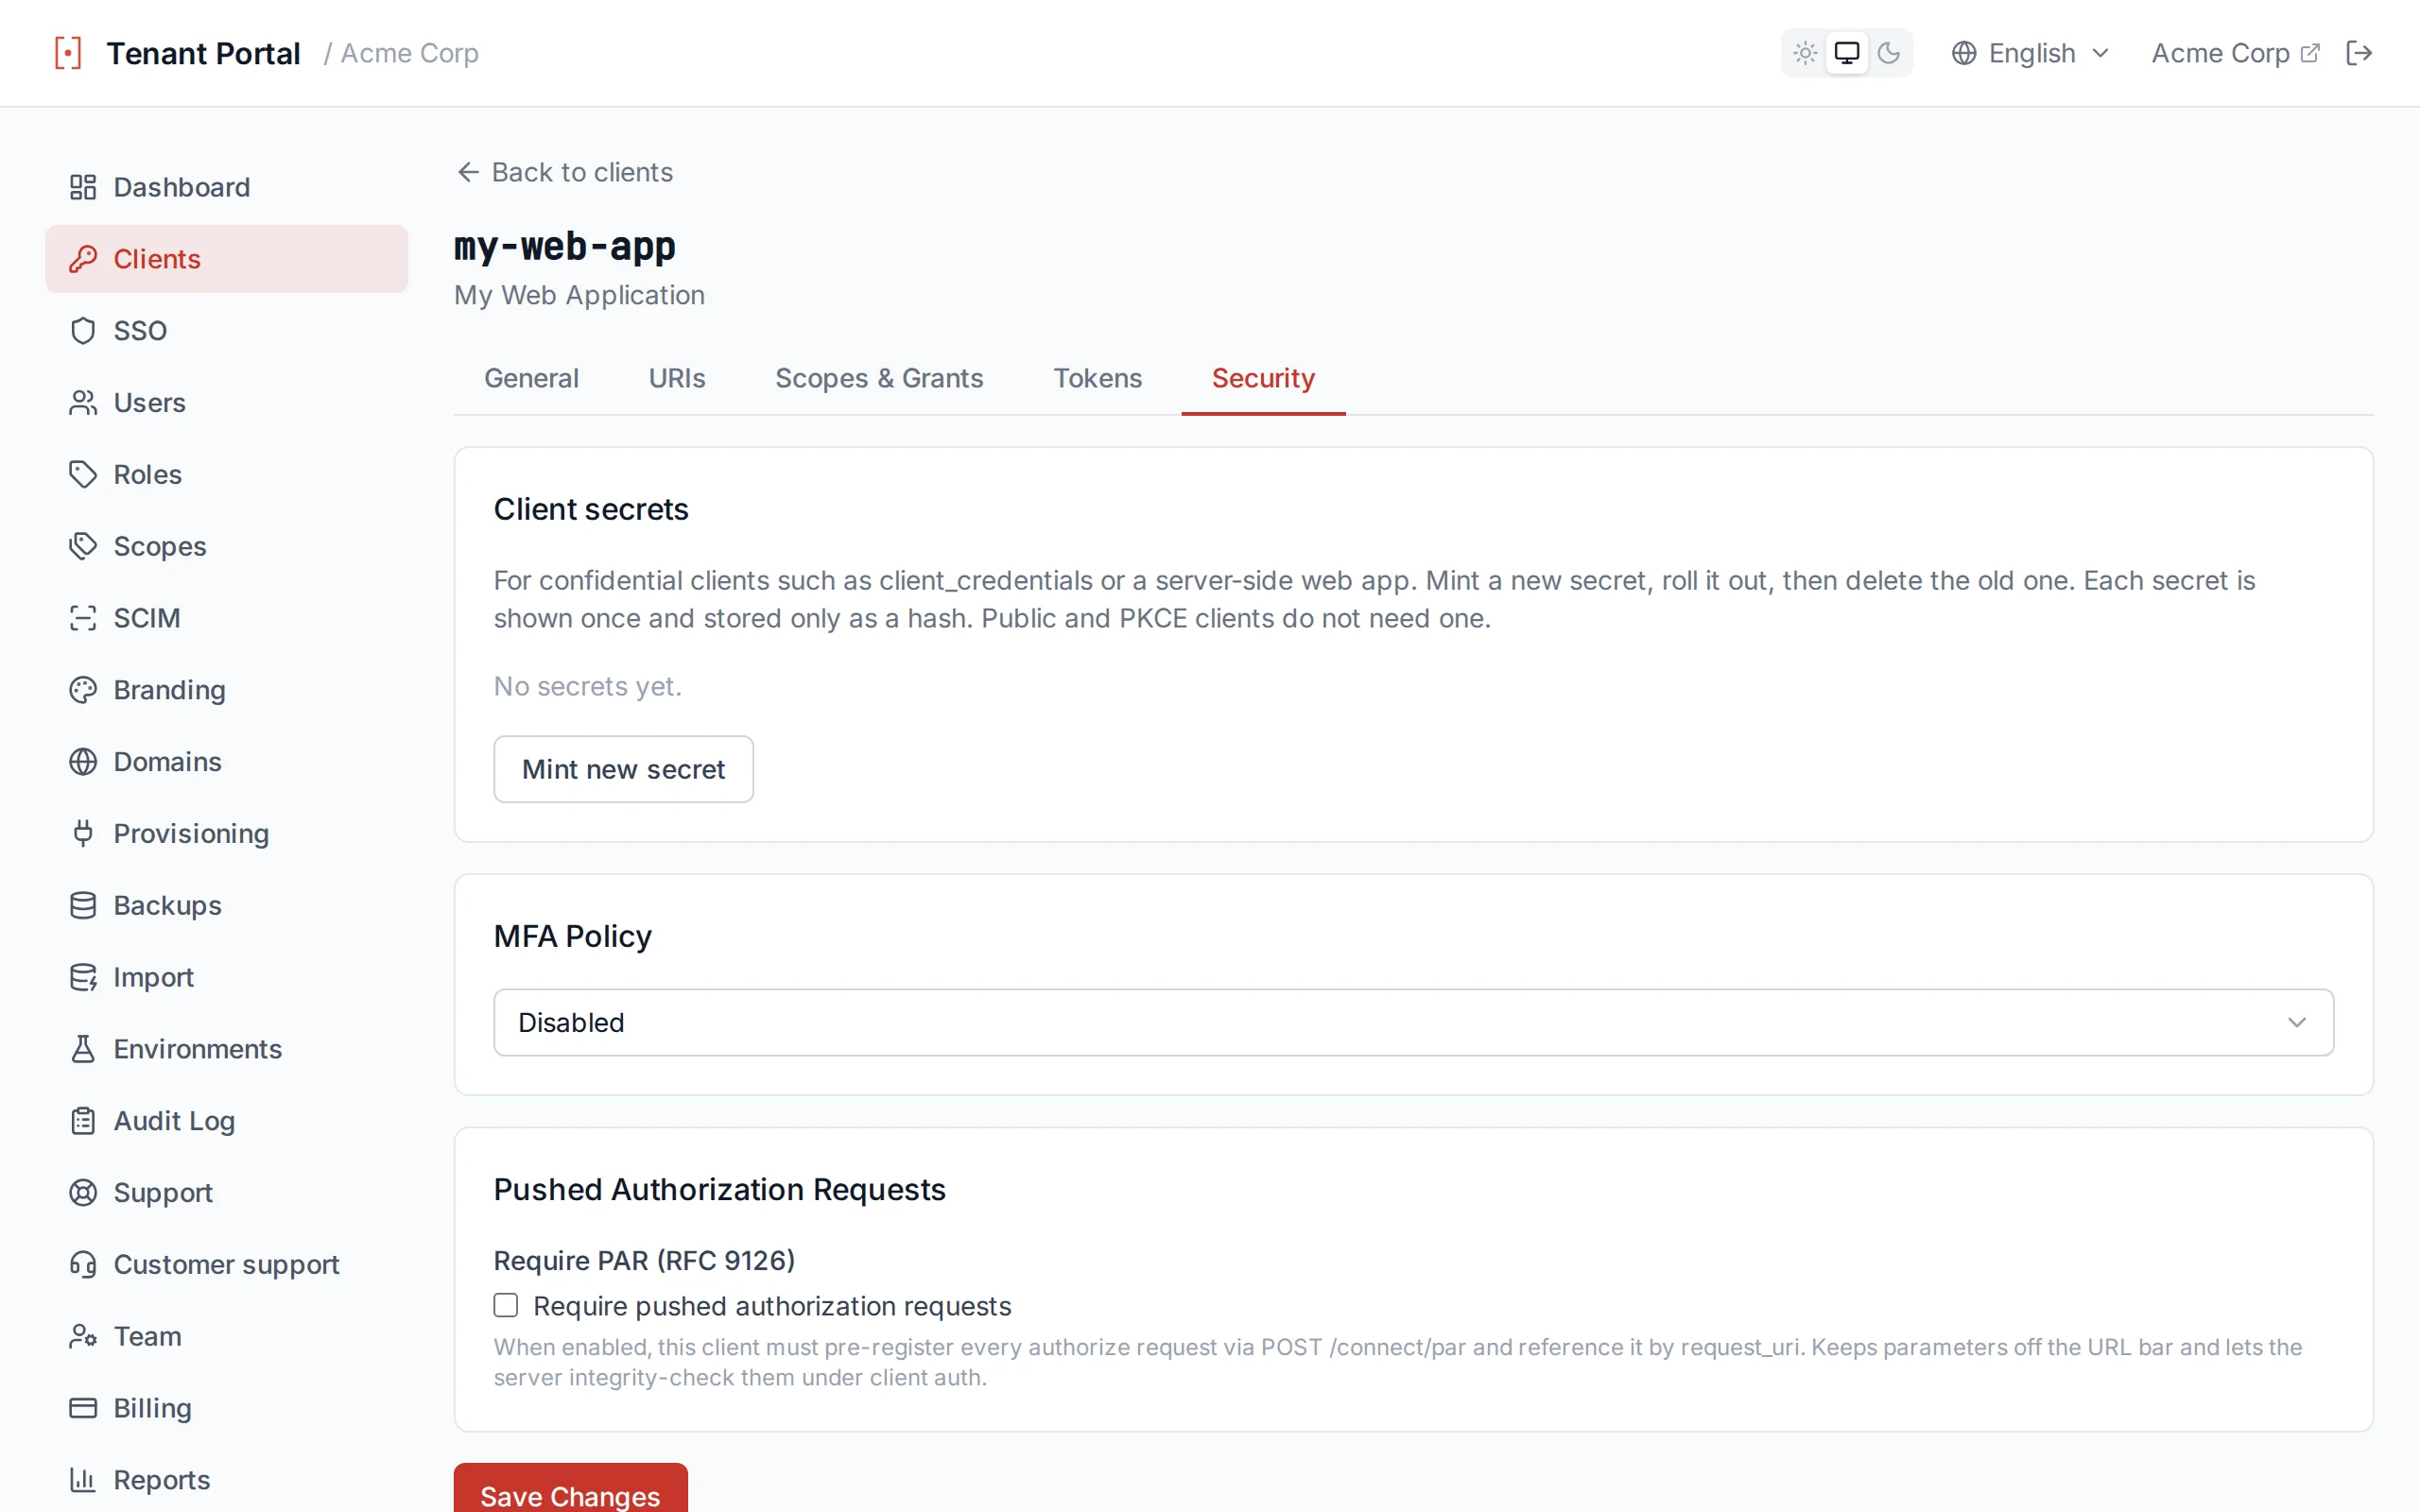
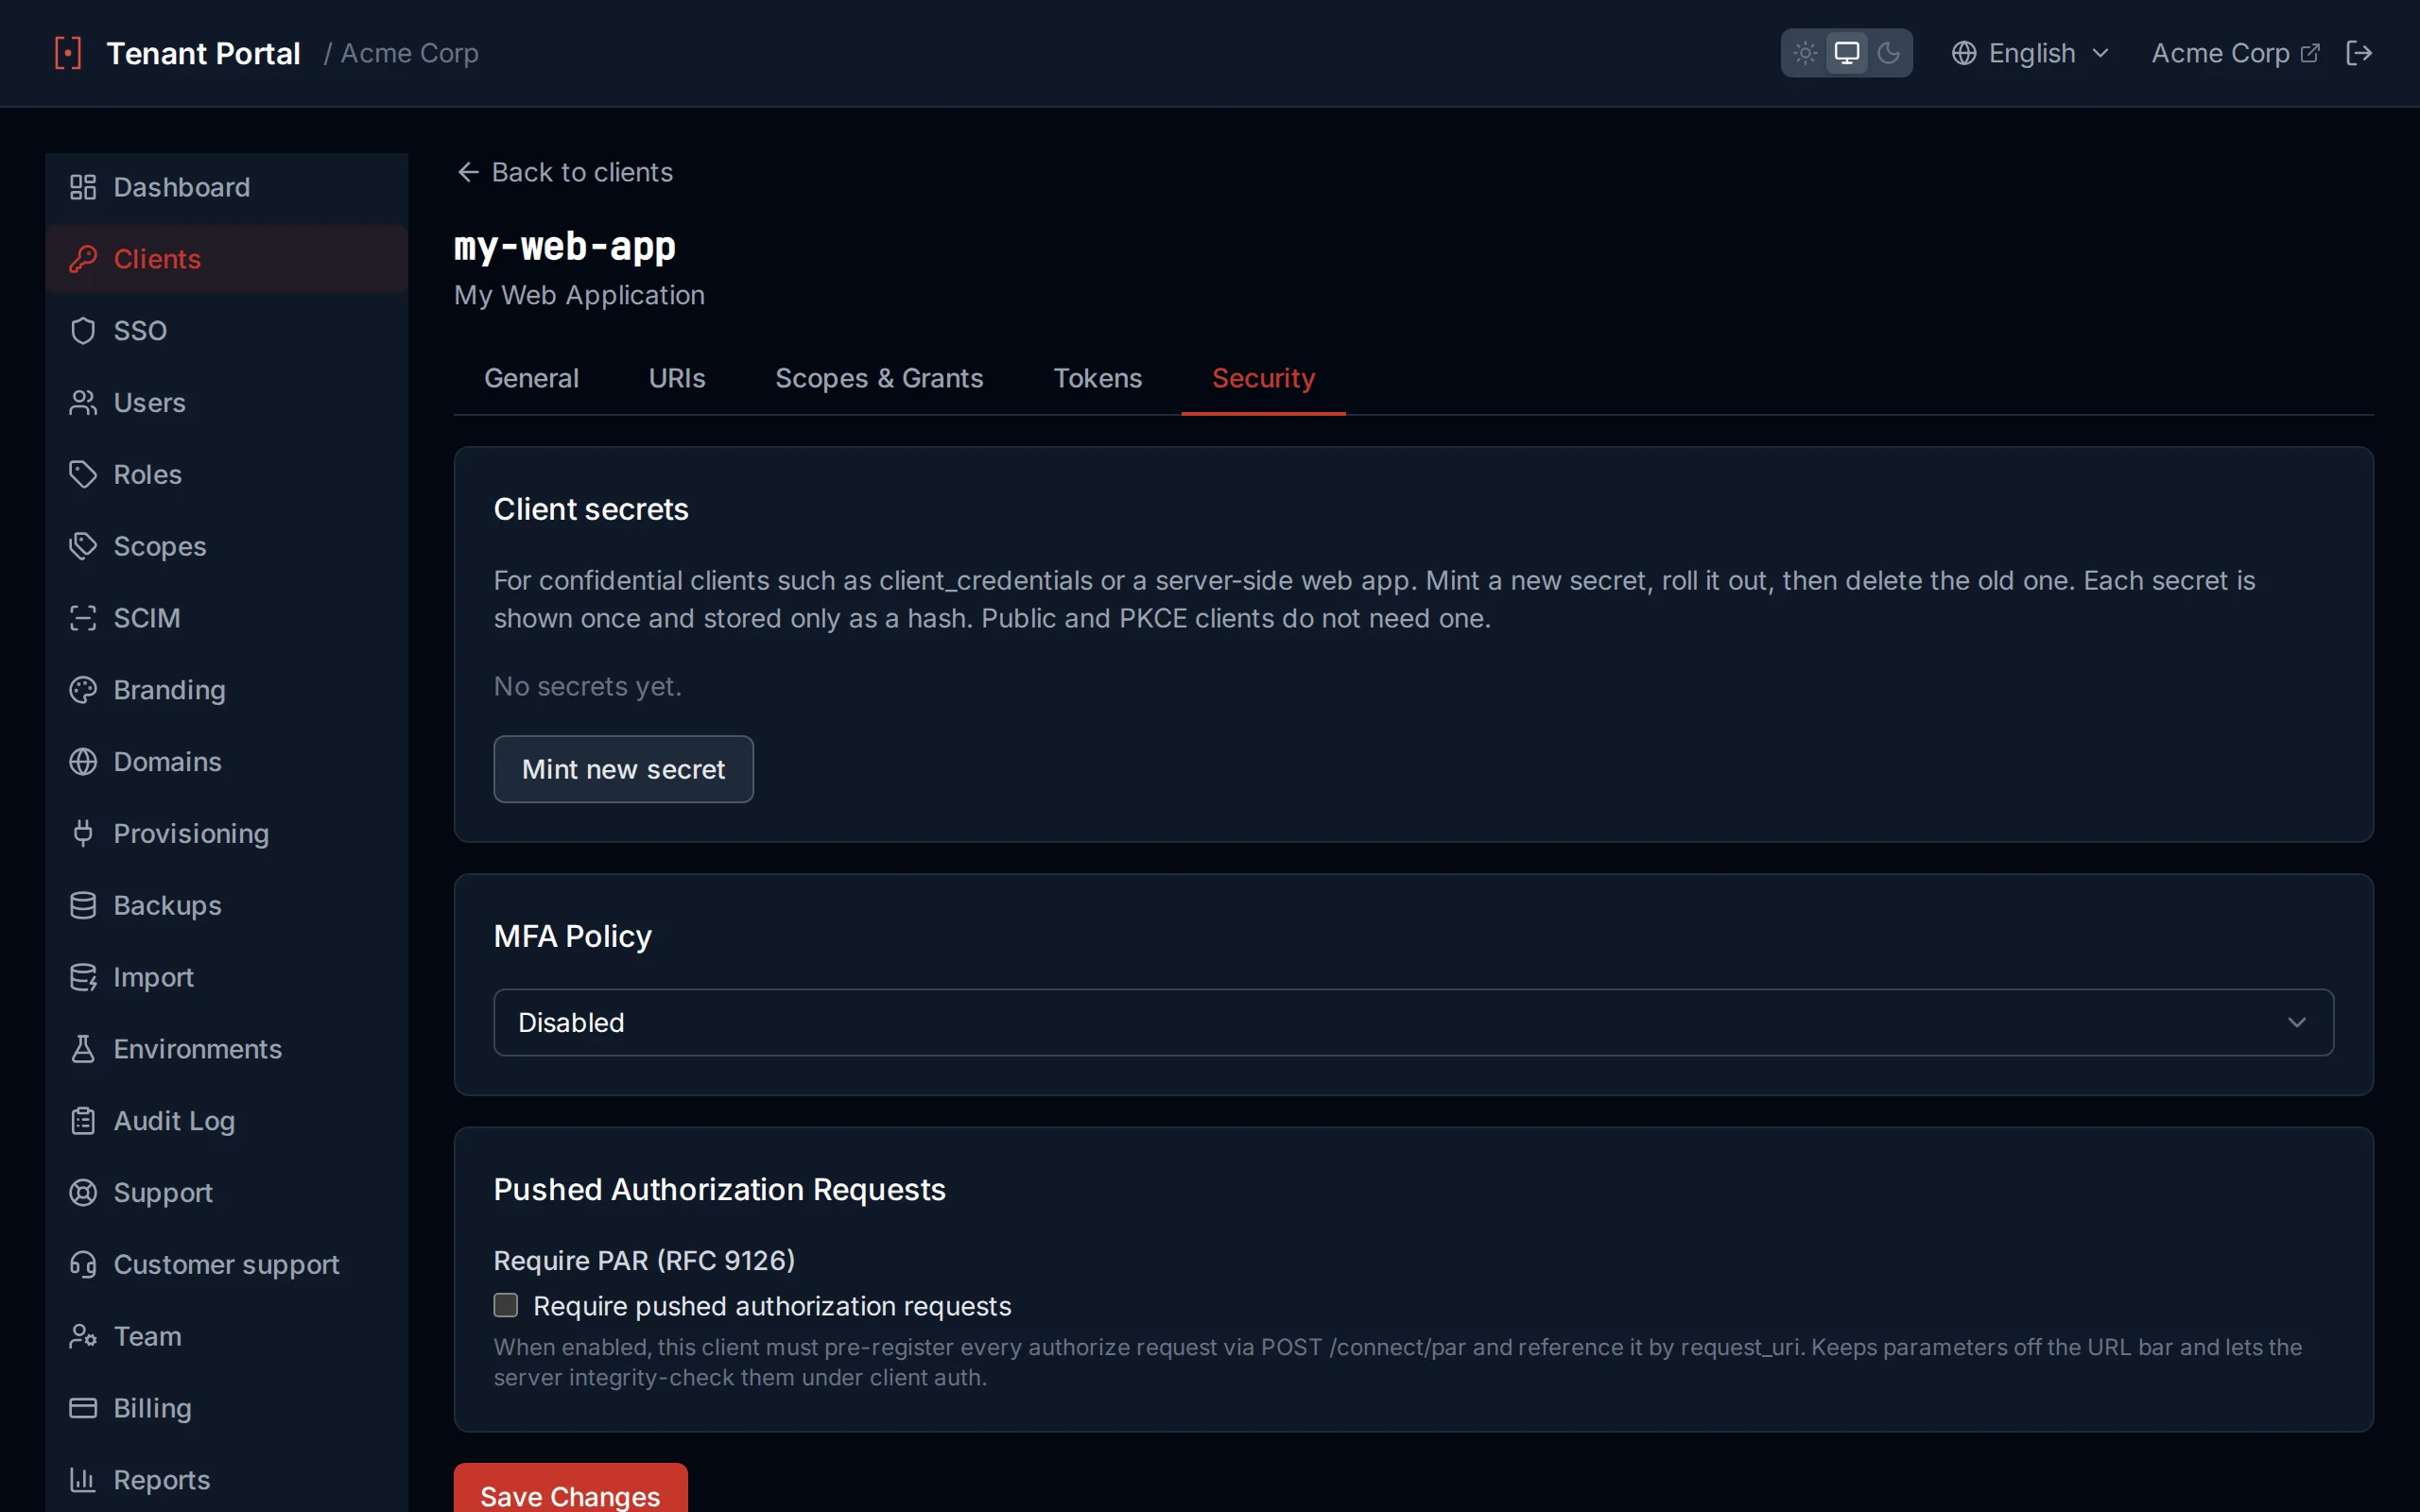
Per-client MFA policy override
Enterprise SSO
Enterprise SSO lets your customers bring their own identity provider. Authagonal supports both SAML 2.0 and OIDC federation with domain-based routing, so users are automatically directed to the correct IdP based on their email address.
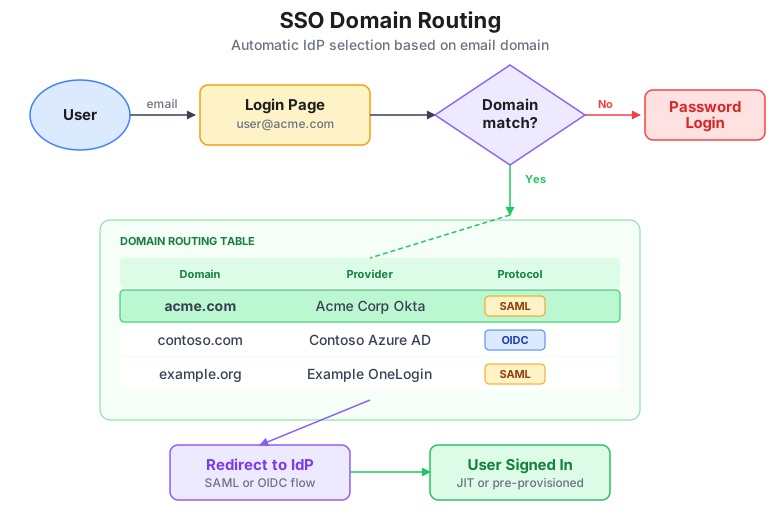
Domain-based SSO routing
SAML 2.0 Connections
To create a SAML connection, navigate to the SSO page and select the SAML tab. Provide the following:
| Field | Description |
|---|---|
connectionName | A human-readable name for this connection (e.g. "Acme Corp Okta") |
entityId | Your SP entity ID. Register this exact value at your IdP as the application's Identifier (Entity ID); assertions must name it as the Audience |
metadataUrl | URL to the IdP's SAML metadata XML document |
metadataXml | Pasted IdP metadata XML, for IdPs without a metadata URL (Google Workspace) or whose URL is not internet-reachable. Provide either this or metadataUrl, not both |
nameIdFormat | Optional NameID format requested from the IdP. Omit for the emailAddress default, or set "none" to omit NameIDPolicy entirely (recommended for ADFS) |
When you save the connection, Authagonal fetches the metadata document and imports the IdP's signing certificate, SSO endpoint URL, and name identifier format. The metadata is periodically refreshed to pick up certificate rotations.
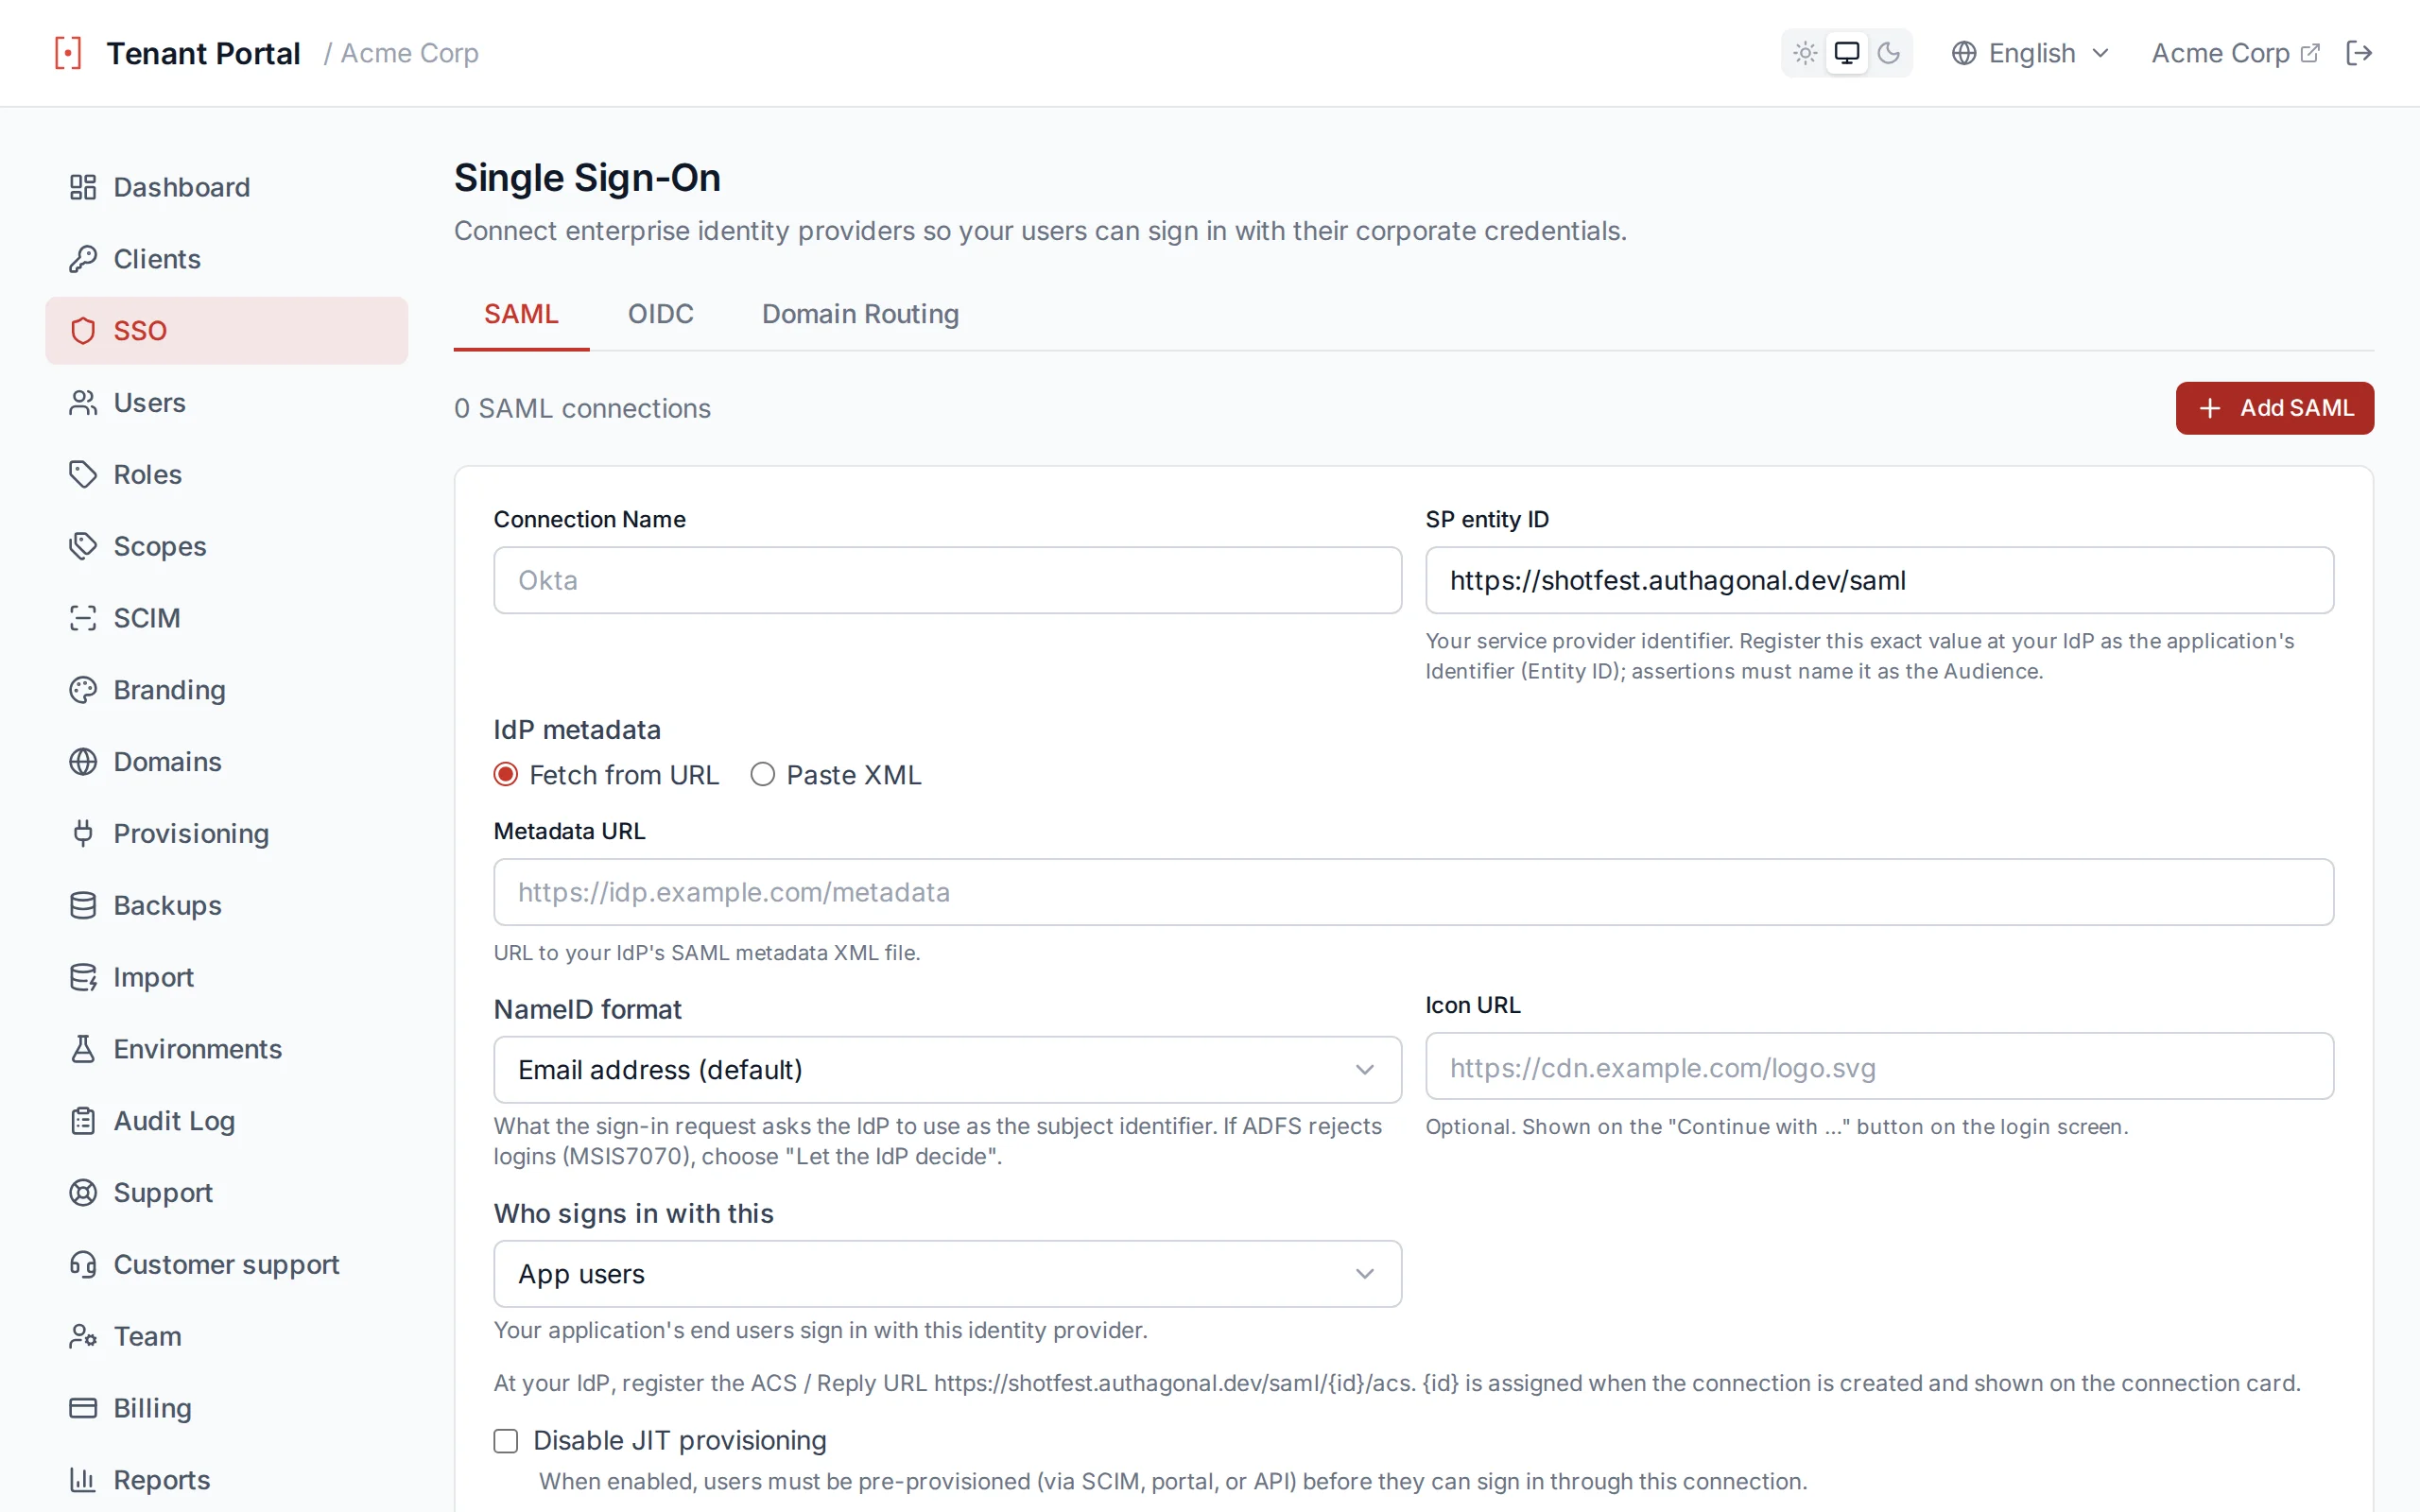
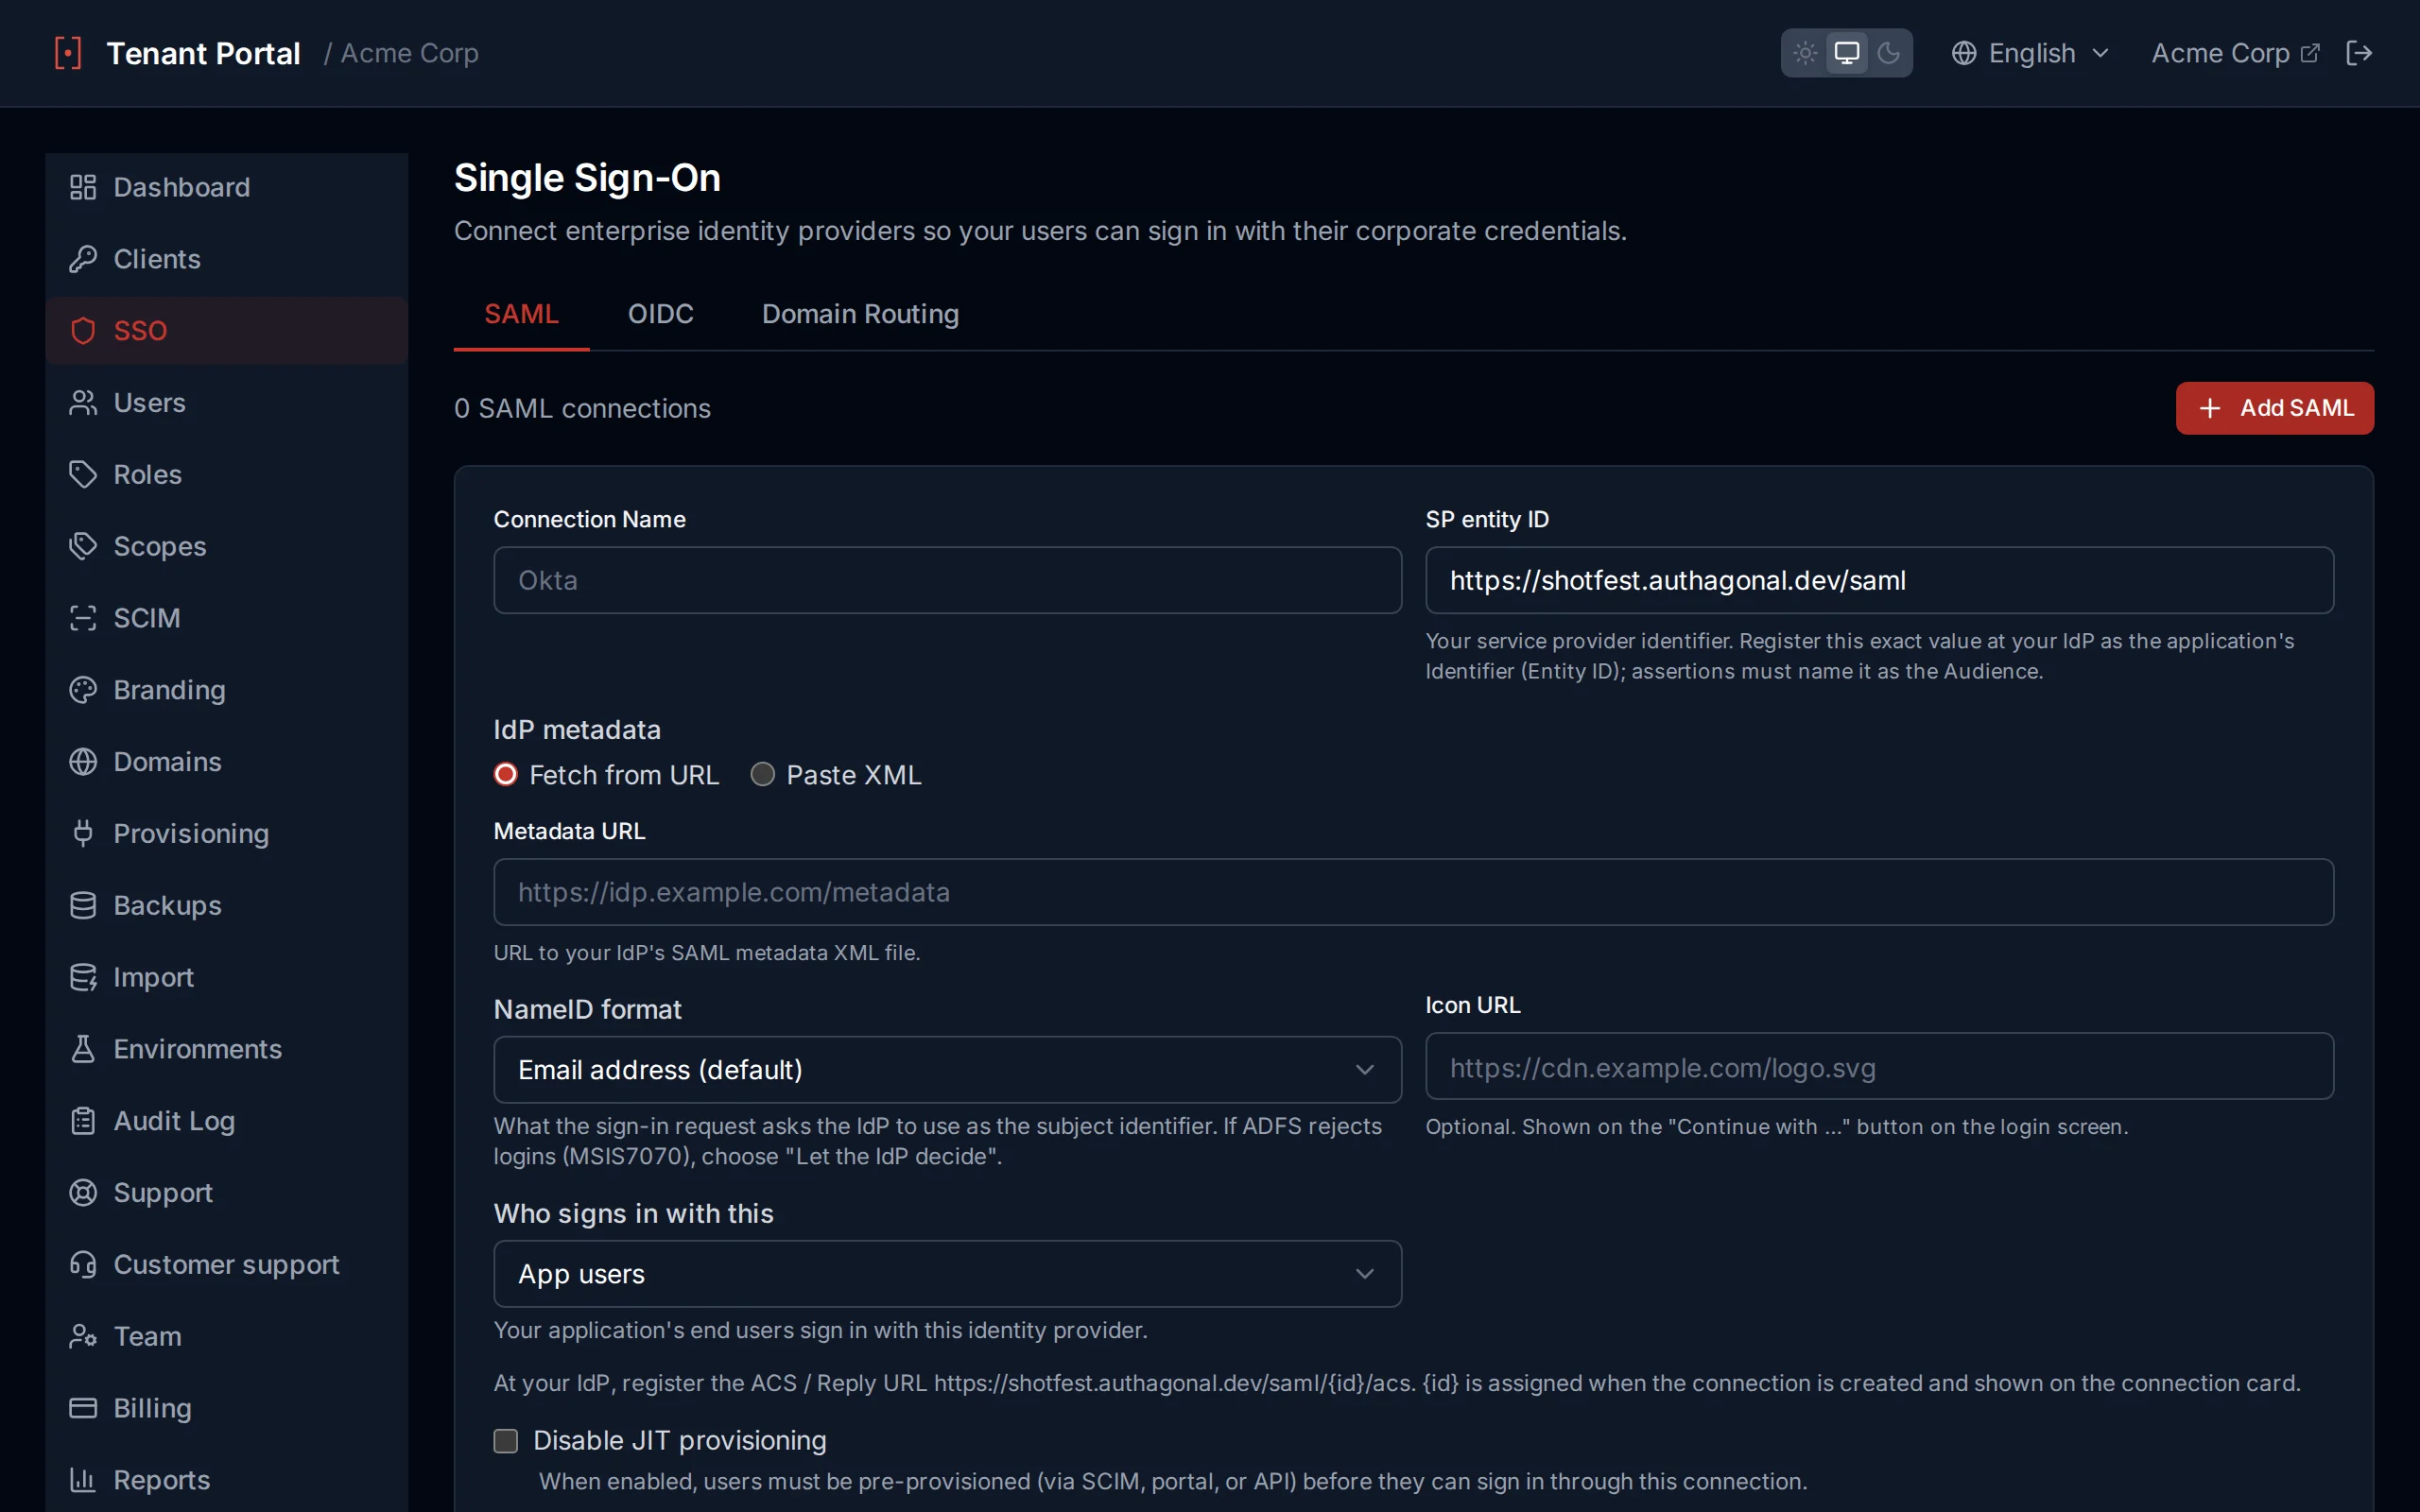
Create a SAML 2.0 SSO connection
OIDC Connections
To create an OIDC federation connection, select the OIDC tab and provide:
| Field | Description |
|---|---|
connectionName | A human-readable name for this connection |
discoveryUrl | The OpenID Connect discovery URL (e.g. https://login.microsoftonline.com/{tenant}/v2.0/.well-known/openid-configuration) |
clientId | The client ID registered with the external IdP for this federation |
clientSecret | The client secret for the external IdP registration |
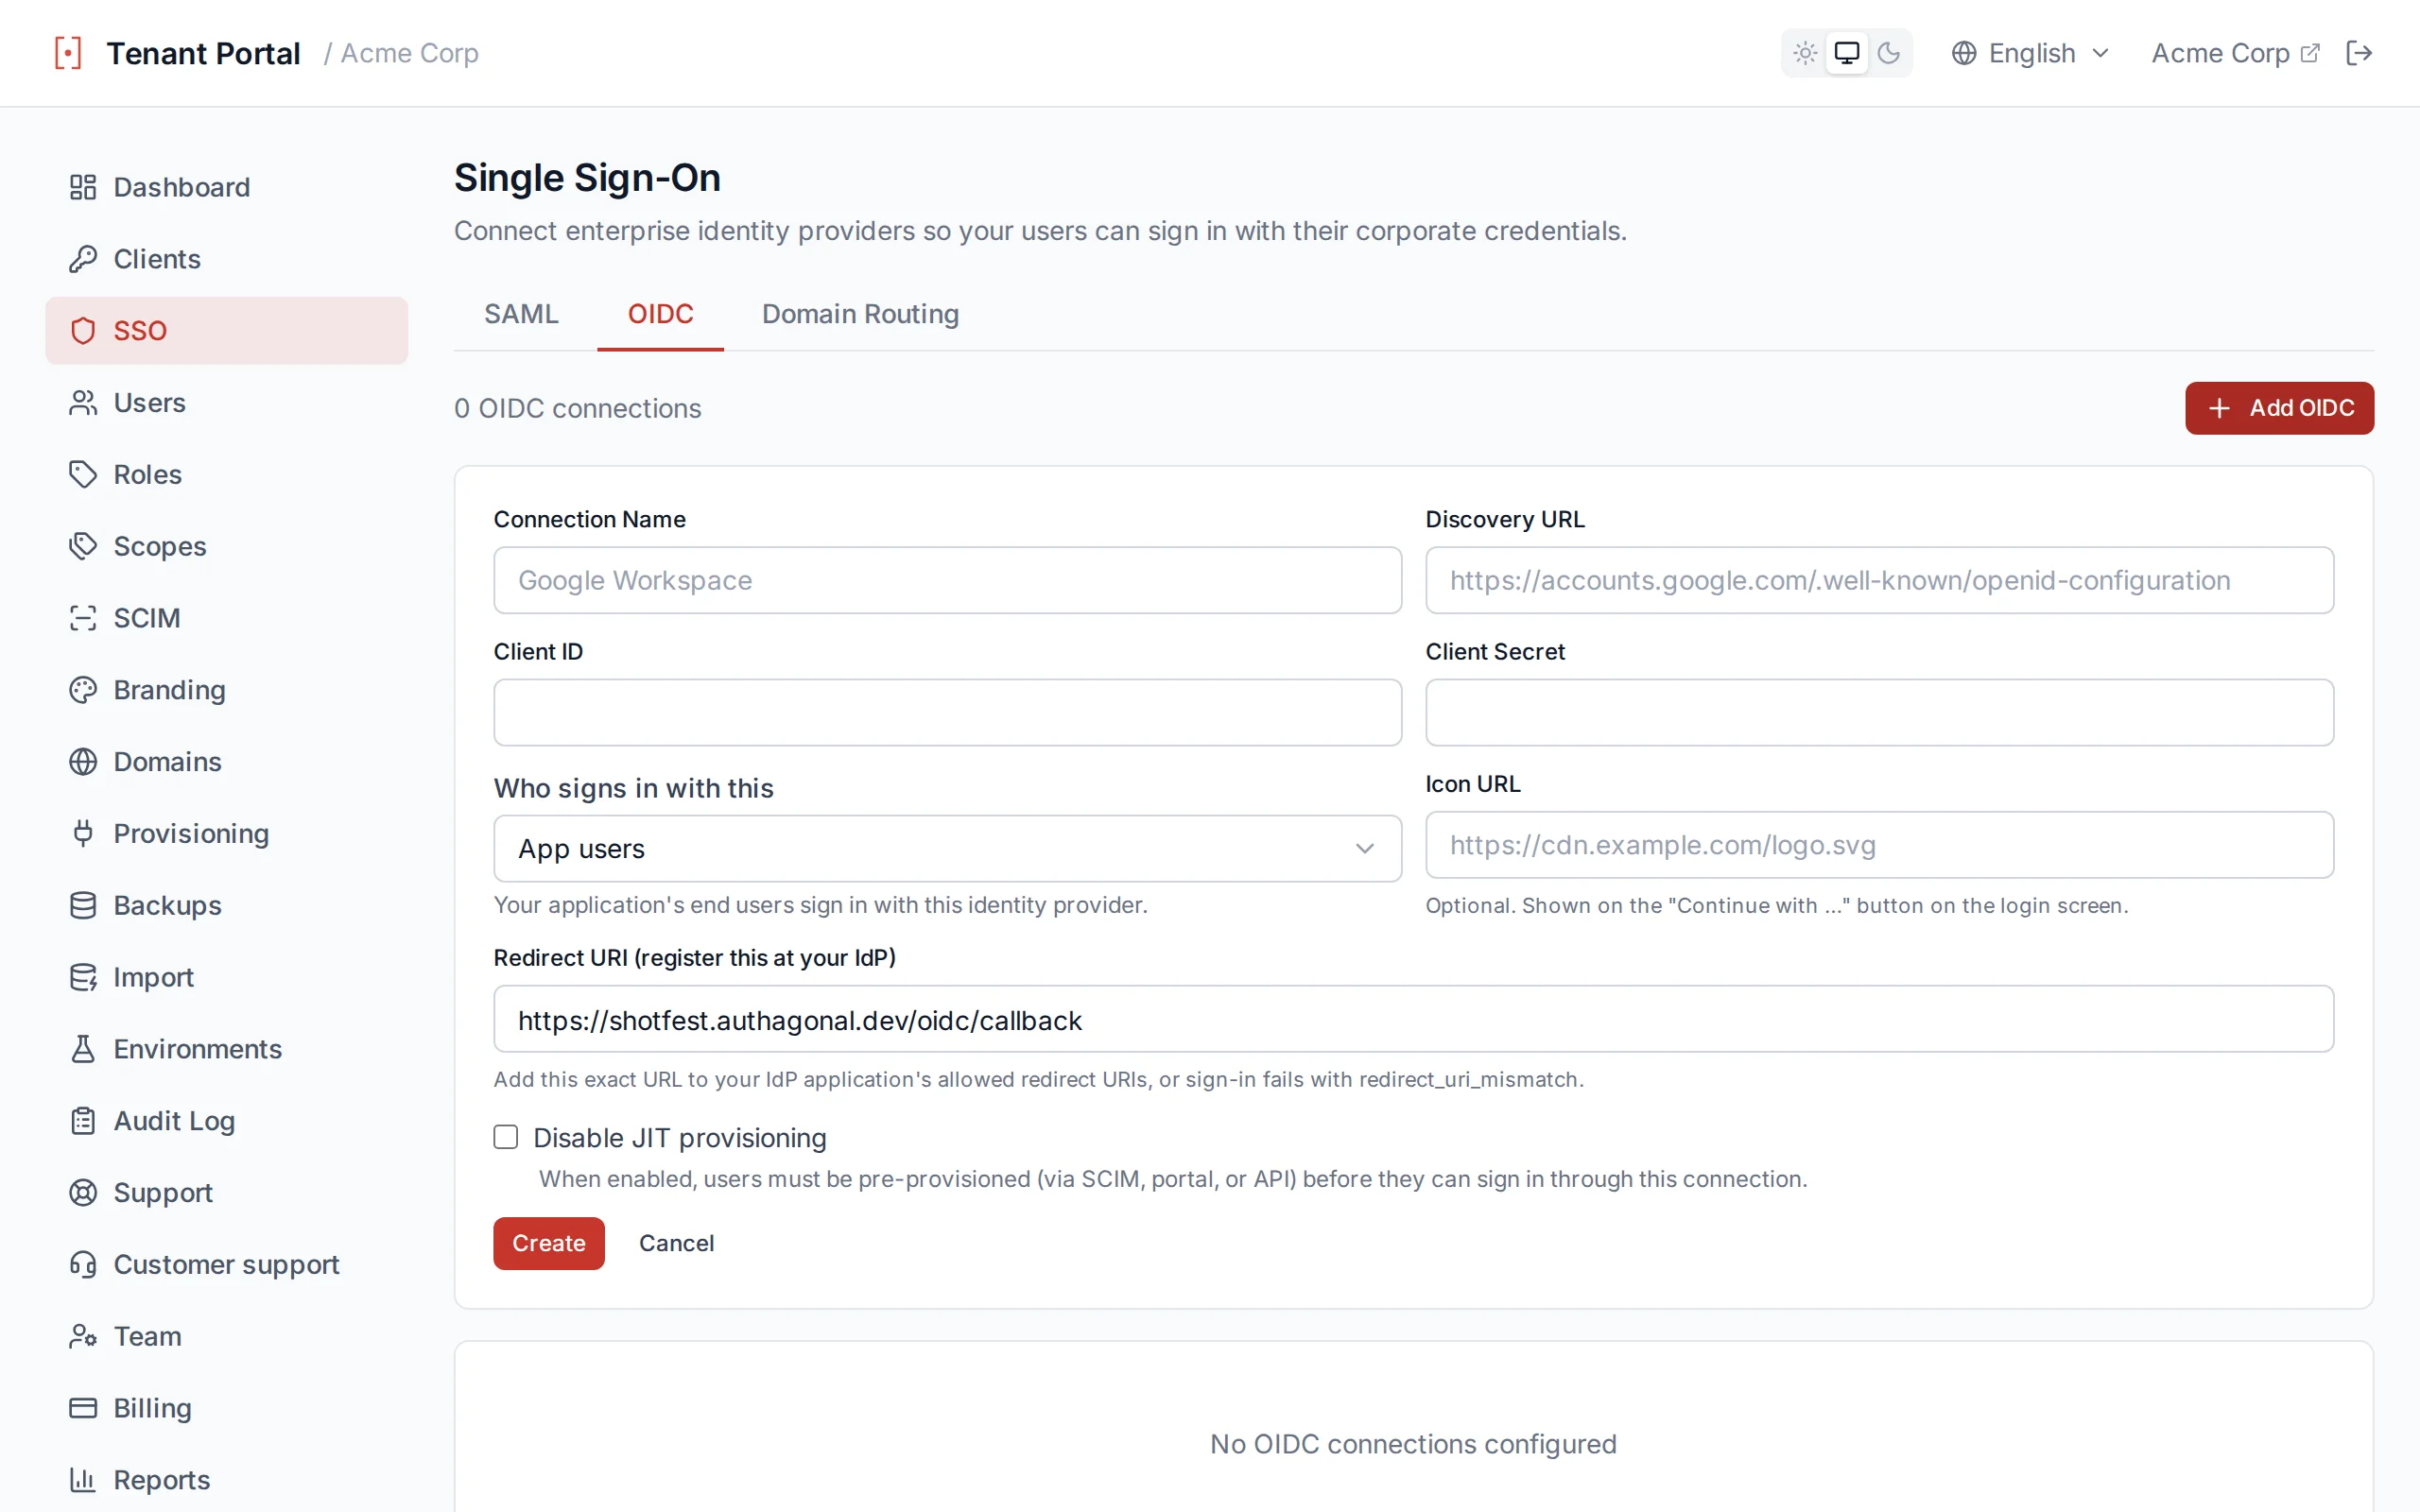
Create an OIDC federation connection
Domain Routing
Domain routing automatically redirects users to the correct identity provider based on their email domain. When a user enters their email on the login page, Authagonal checks if the domain portion (e.g. acme.com) matches any configured SSO connection. If it does, the user is seamlessly redirected to their organization's IdP.
| Email Domain | SSO Provider | Protocol |
|---|---|---|
| acme.com | Acme Corp Okta | SAML 2.0 |
| contoso.com | Contoso Azure AD | OIDC |
| example.org | Example OneLogin | SAML 2.0 |
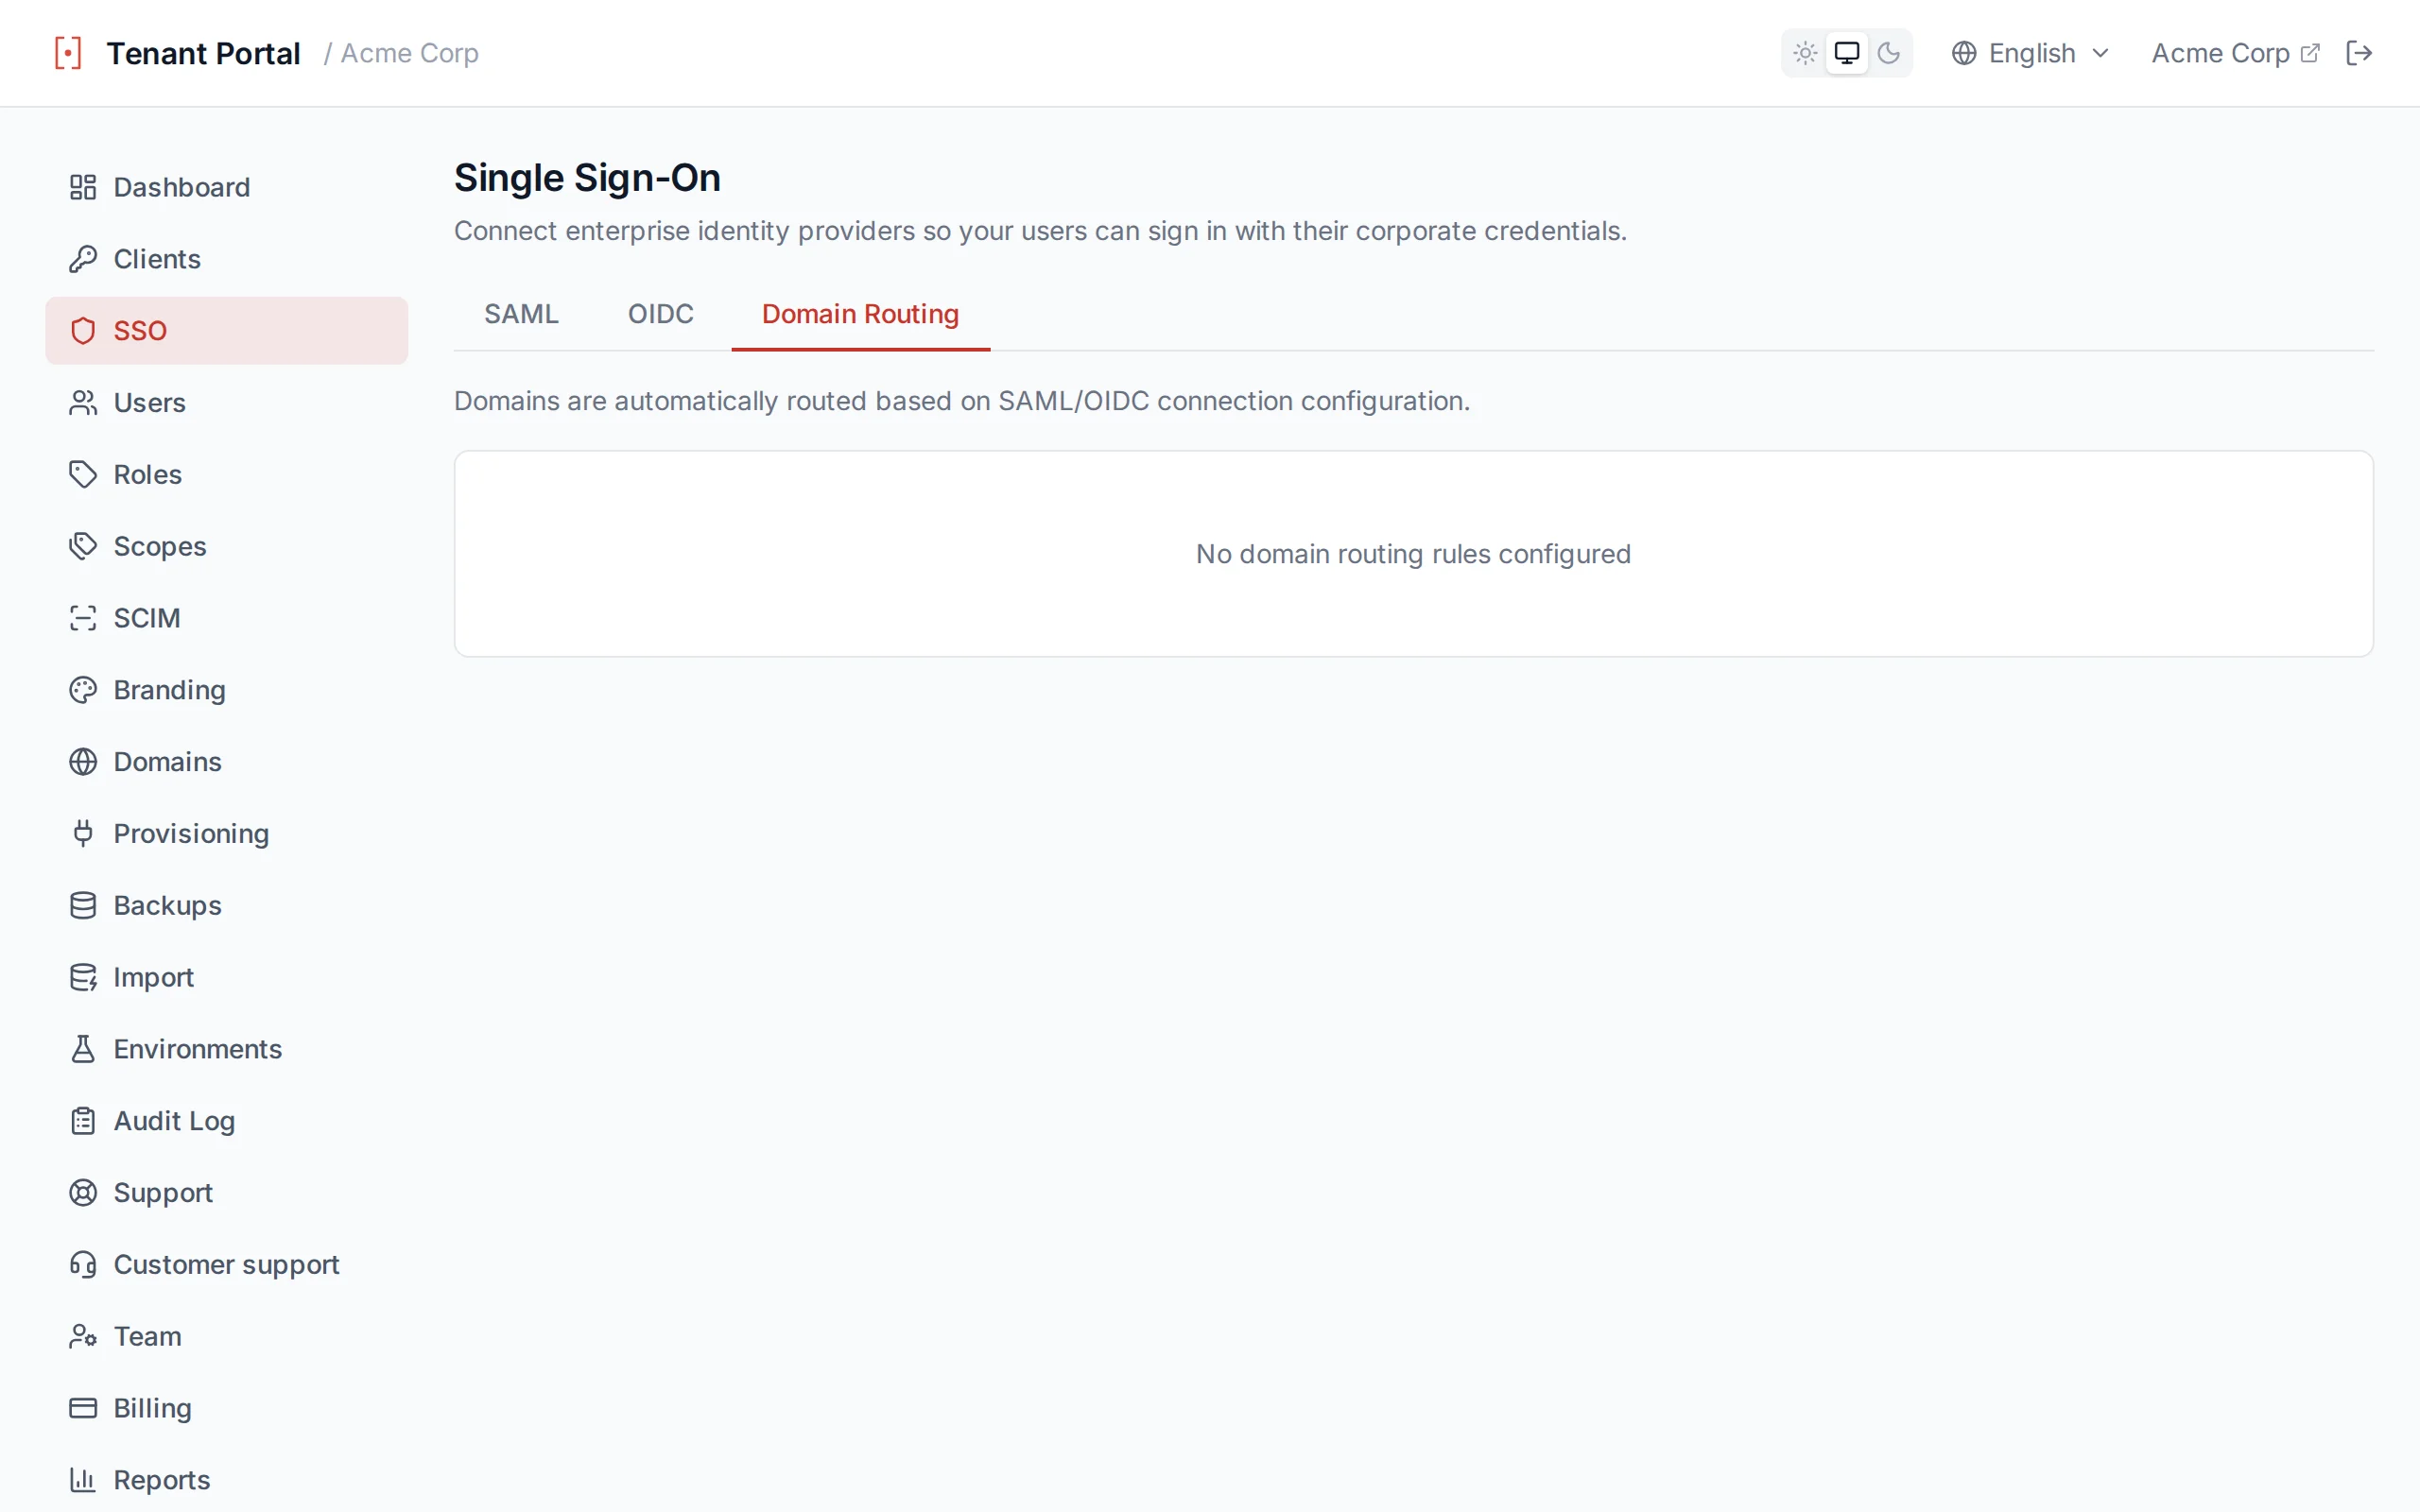
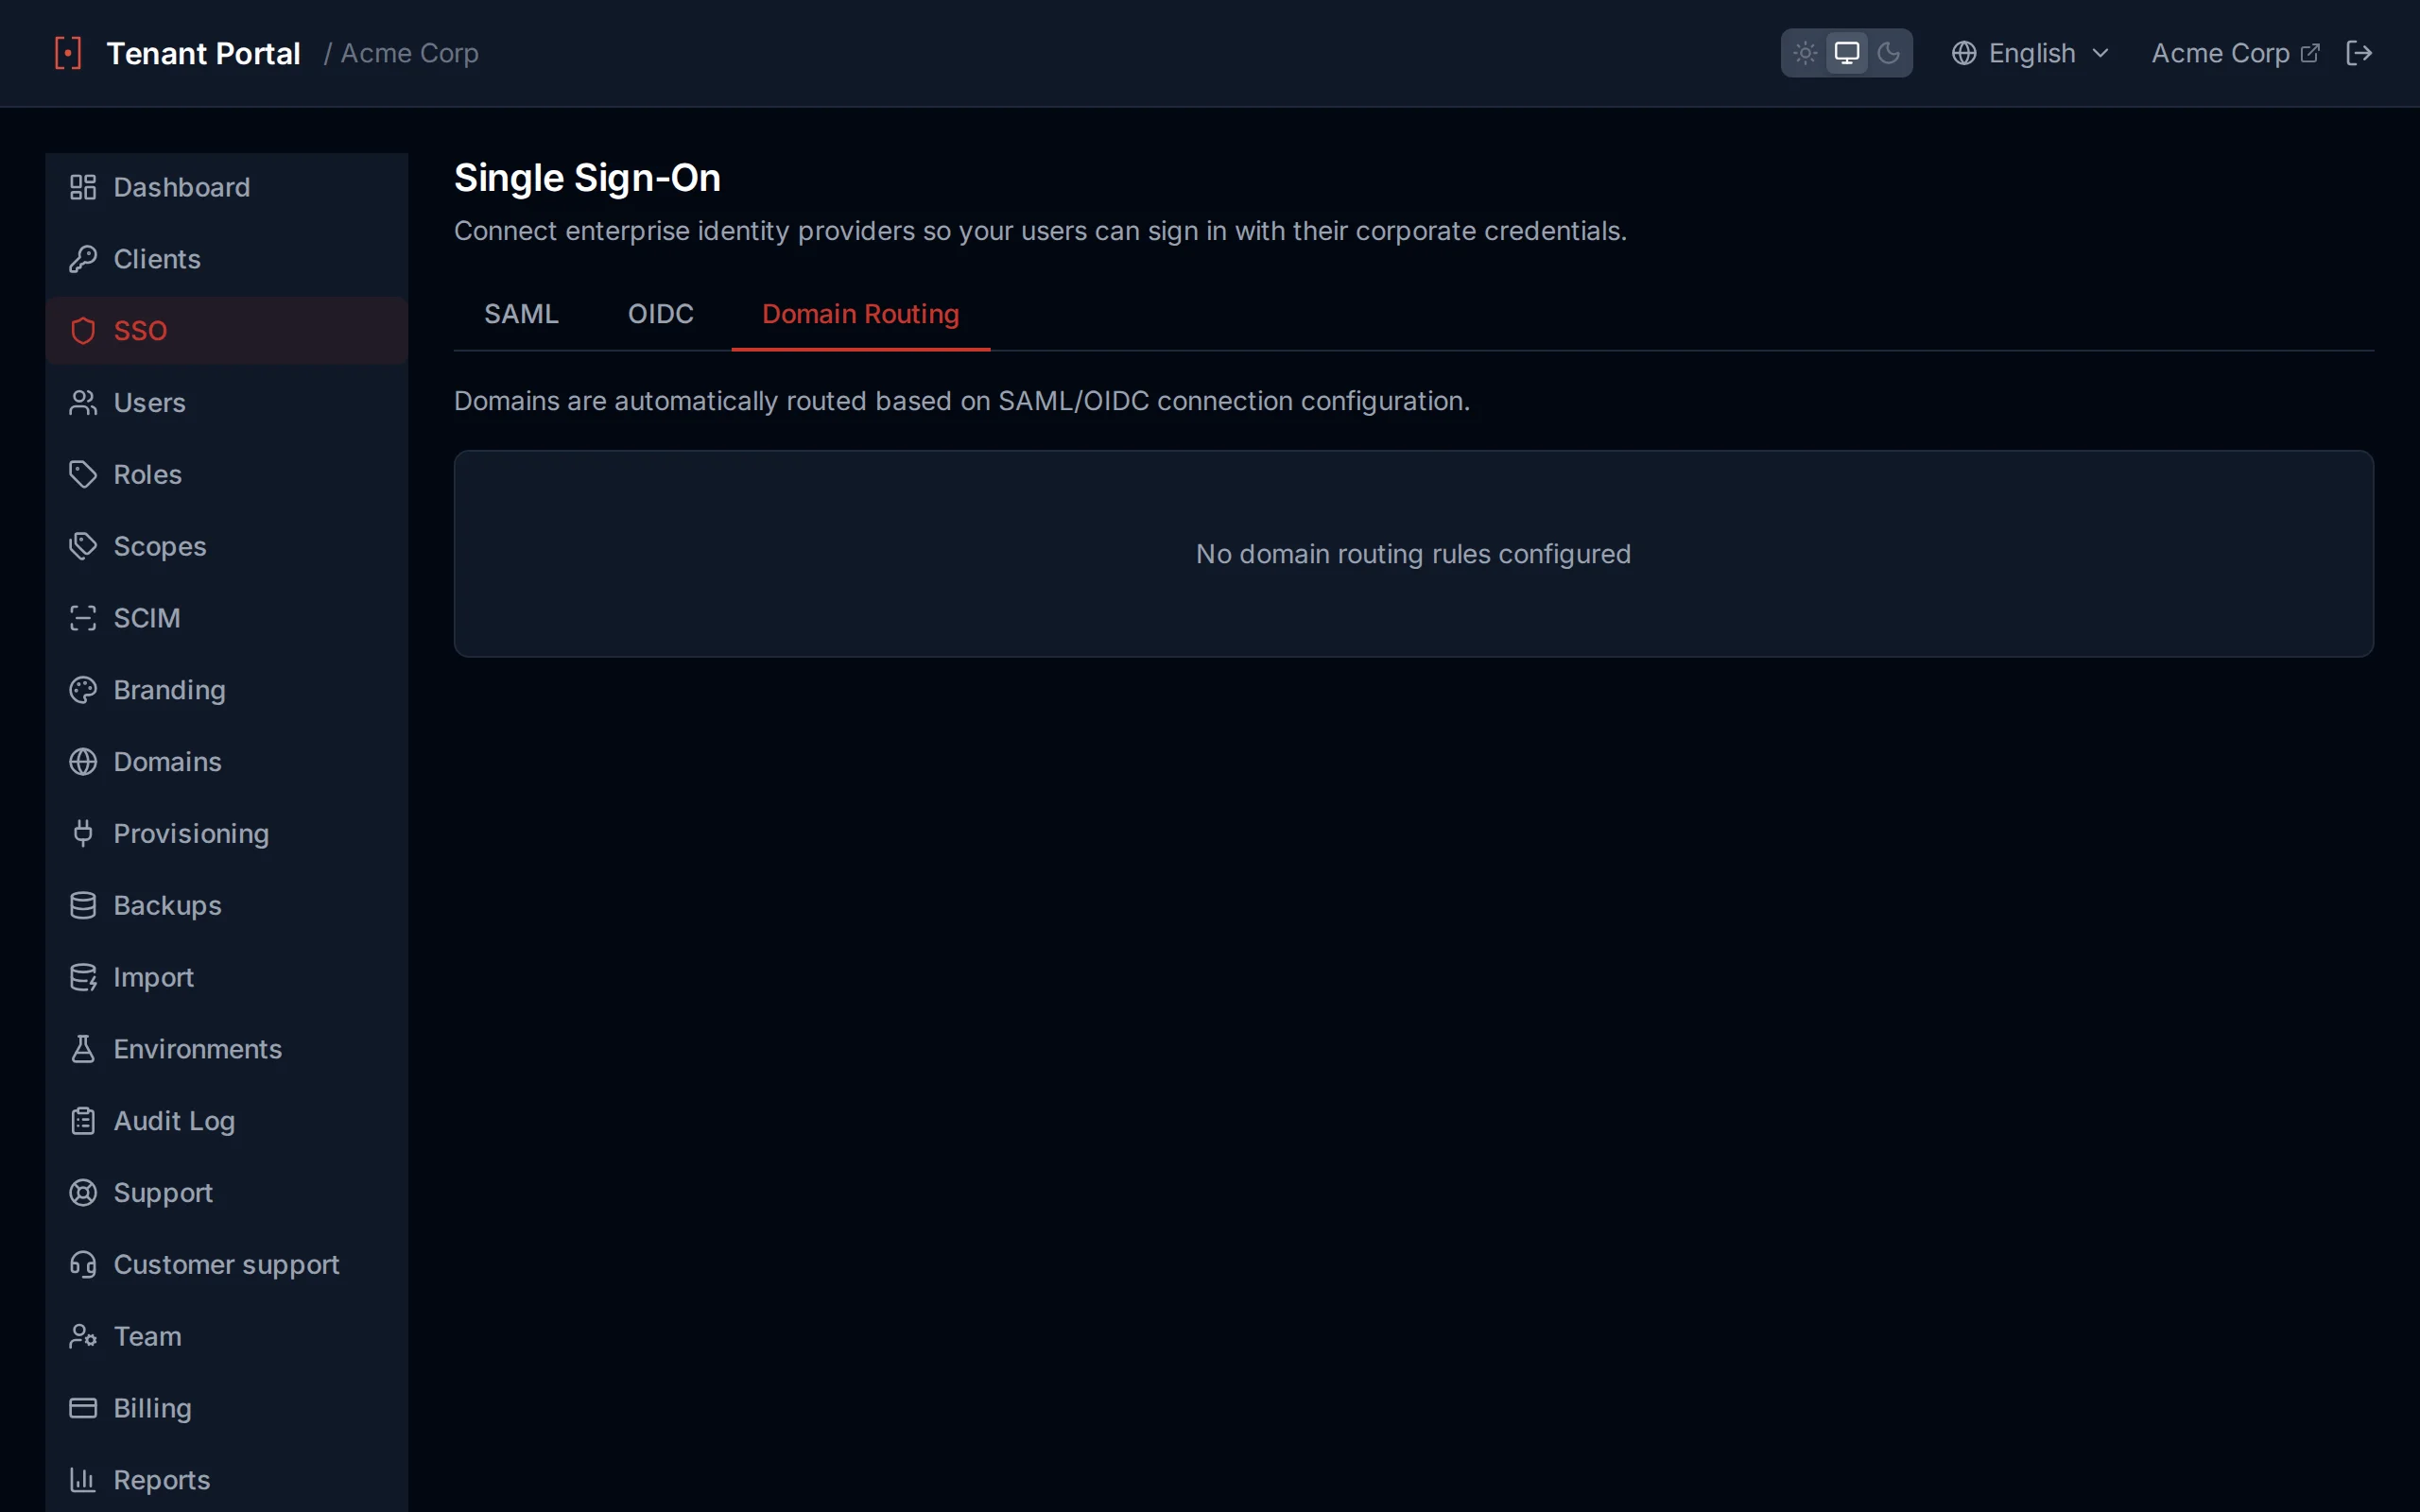
Domain routing maps email domains to identity providers
SP-Initiated Flow
/saml/{connectionId}/login or /oidc/{connectionId}/login.JIT Provisioning
By default, when a user signs in via SSO for the first time and doesn't already exist in your tenant, Authagonal creates their account automatically (Just-In-Time provisioning). This can be disabled per connection by checking Disable JIT provisioning when creating or editing the connection.
When JIT provisioning is disabled, only users who have been pre-provisioned — via SCIM, the portal's Users page, or the API — can sign in through that connection. Unknown users receive an access_denied error and are directed to contact their administrator.
Per-Connection Setting
Test Before Rollout
Users
The Users page lets you manage all end users in your tenant. You can search for users, view their details, create new accounts, and see how each user was provisioned.
Search & Pagination
The search bar supports filtering by email address or user ID. Search is debounced at 300ms so results update as you type without overwhelming the API. Results are paginated at 50 users per page — use the navigation controls at the bottom of the table to move between pages.
User Table
The user table displays the following columns for each user:
| Column | Description |
|---|---|
| The user's email address, shown with a verification badge if the email has been confirmed | |
| User ID | The unique identifier assigned to the user |
| Full Name | First and last name combined |
| Status | Active or Inactive — indicates whether the account is enabled |
| MFA | Enabled or Off — whether multi-factor authentication is enrolled |
| Source | SCIM or Local — how the user was created |
| Created | The date the user account was created |
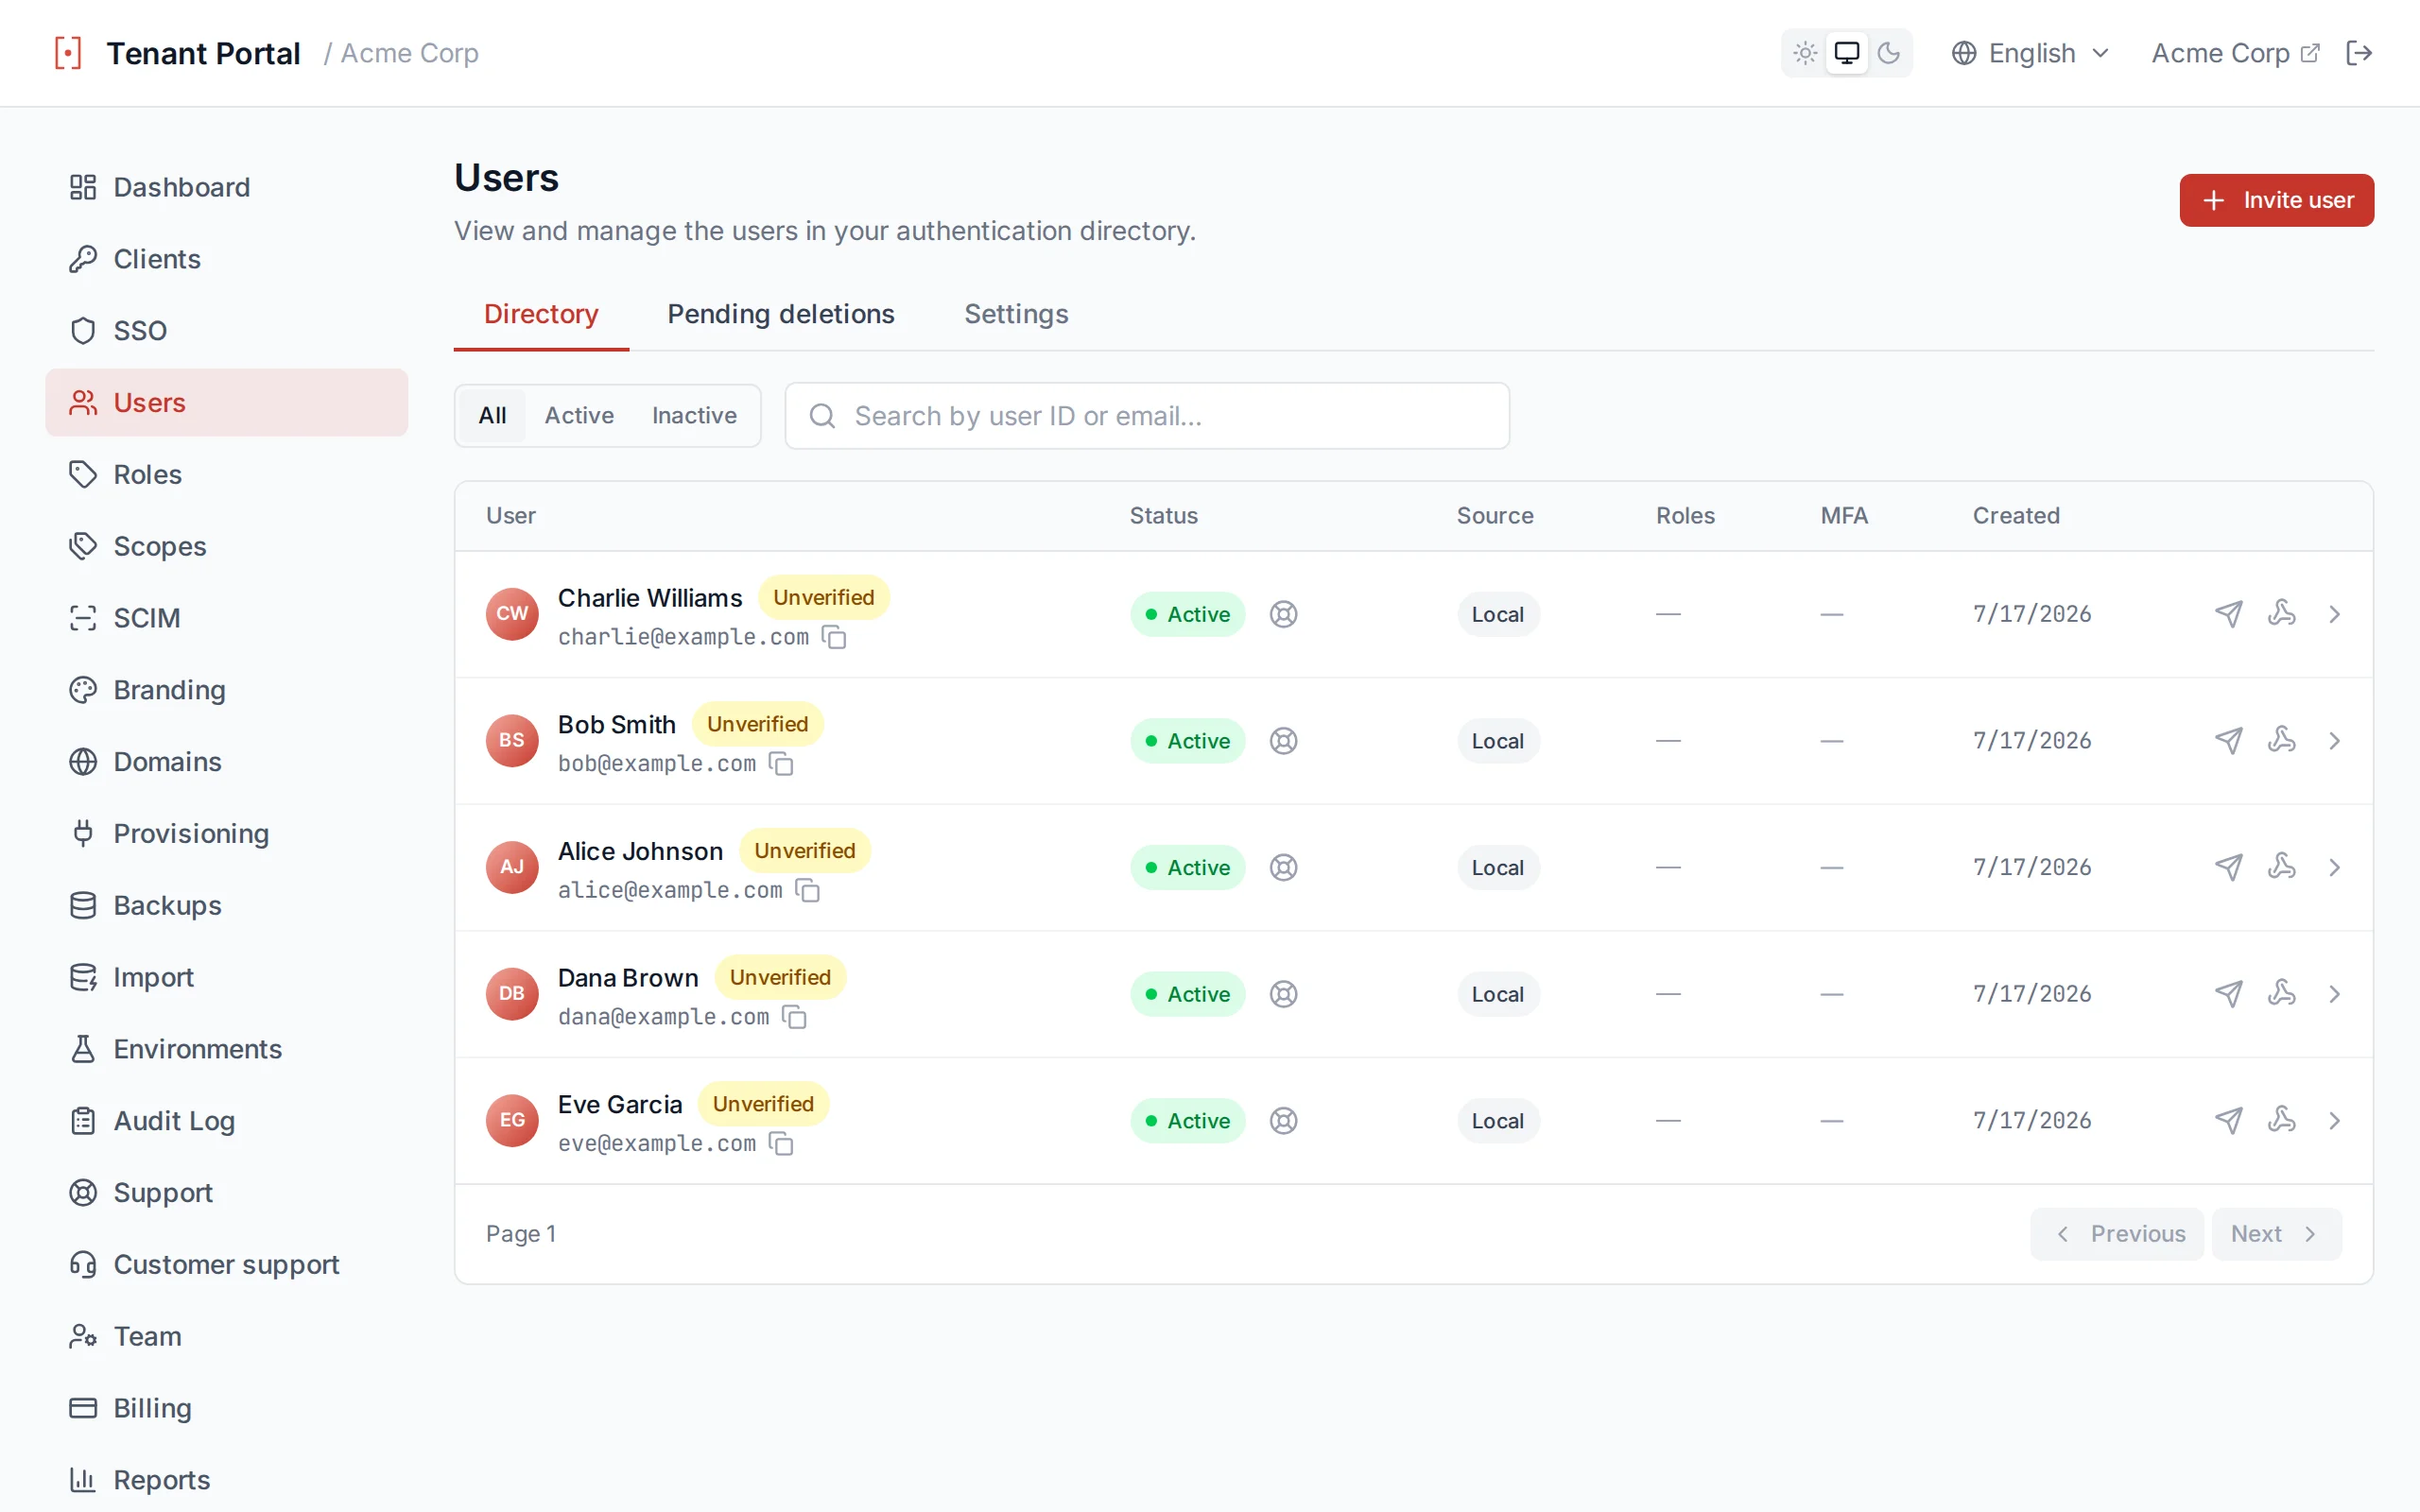
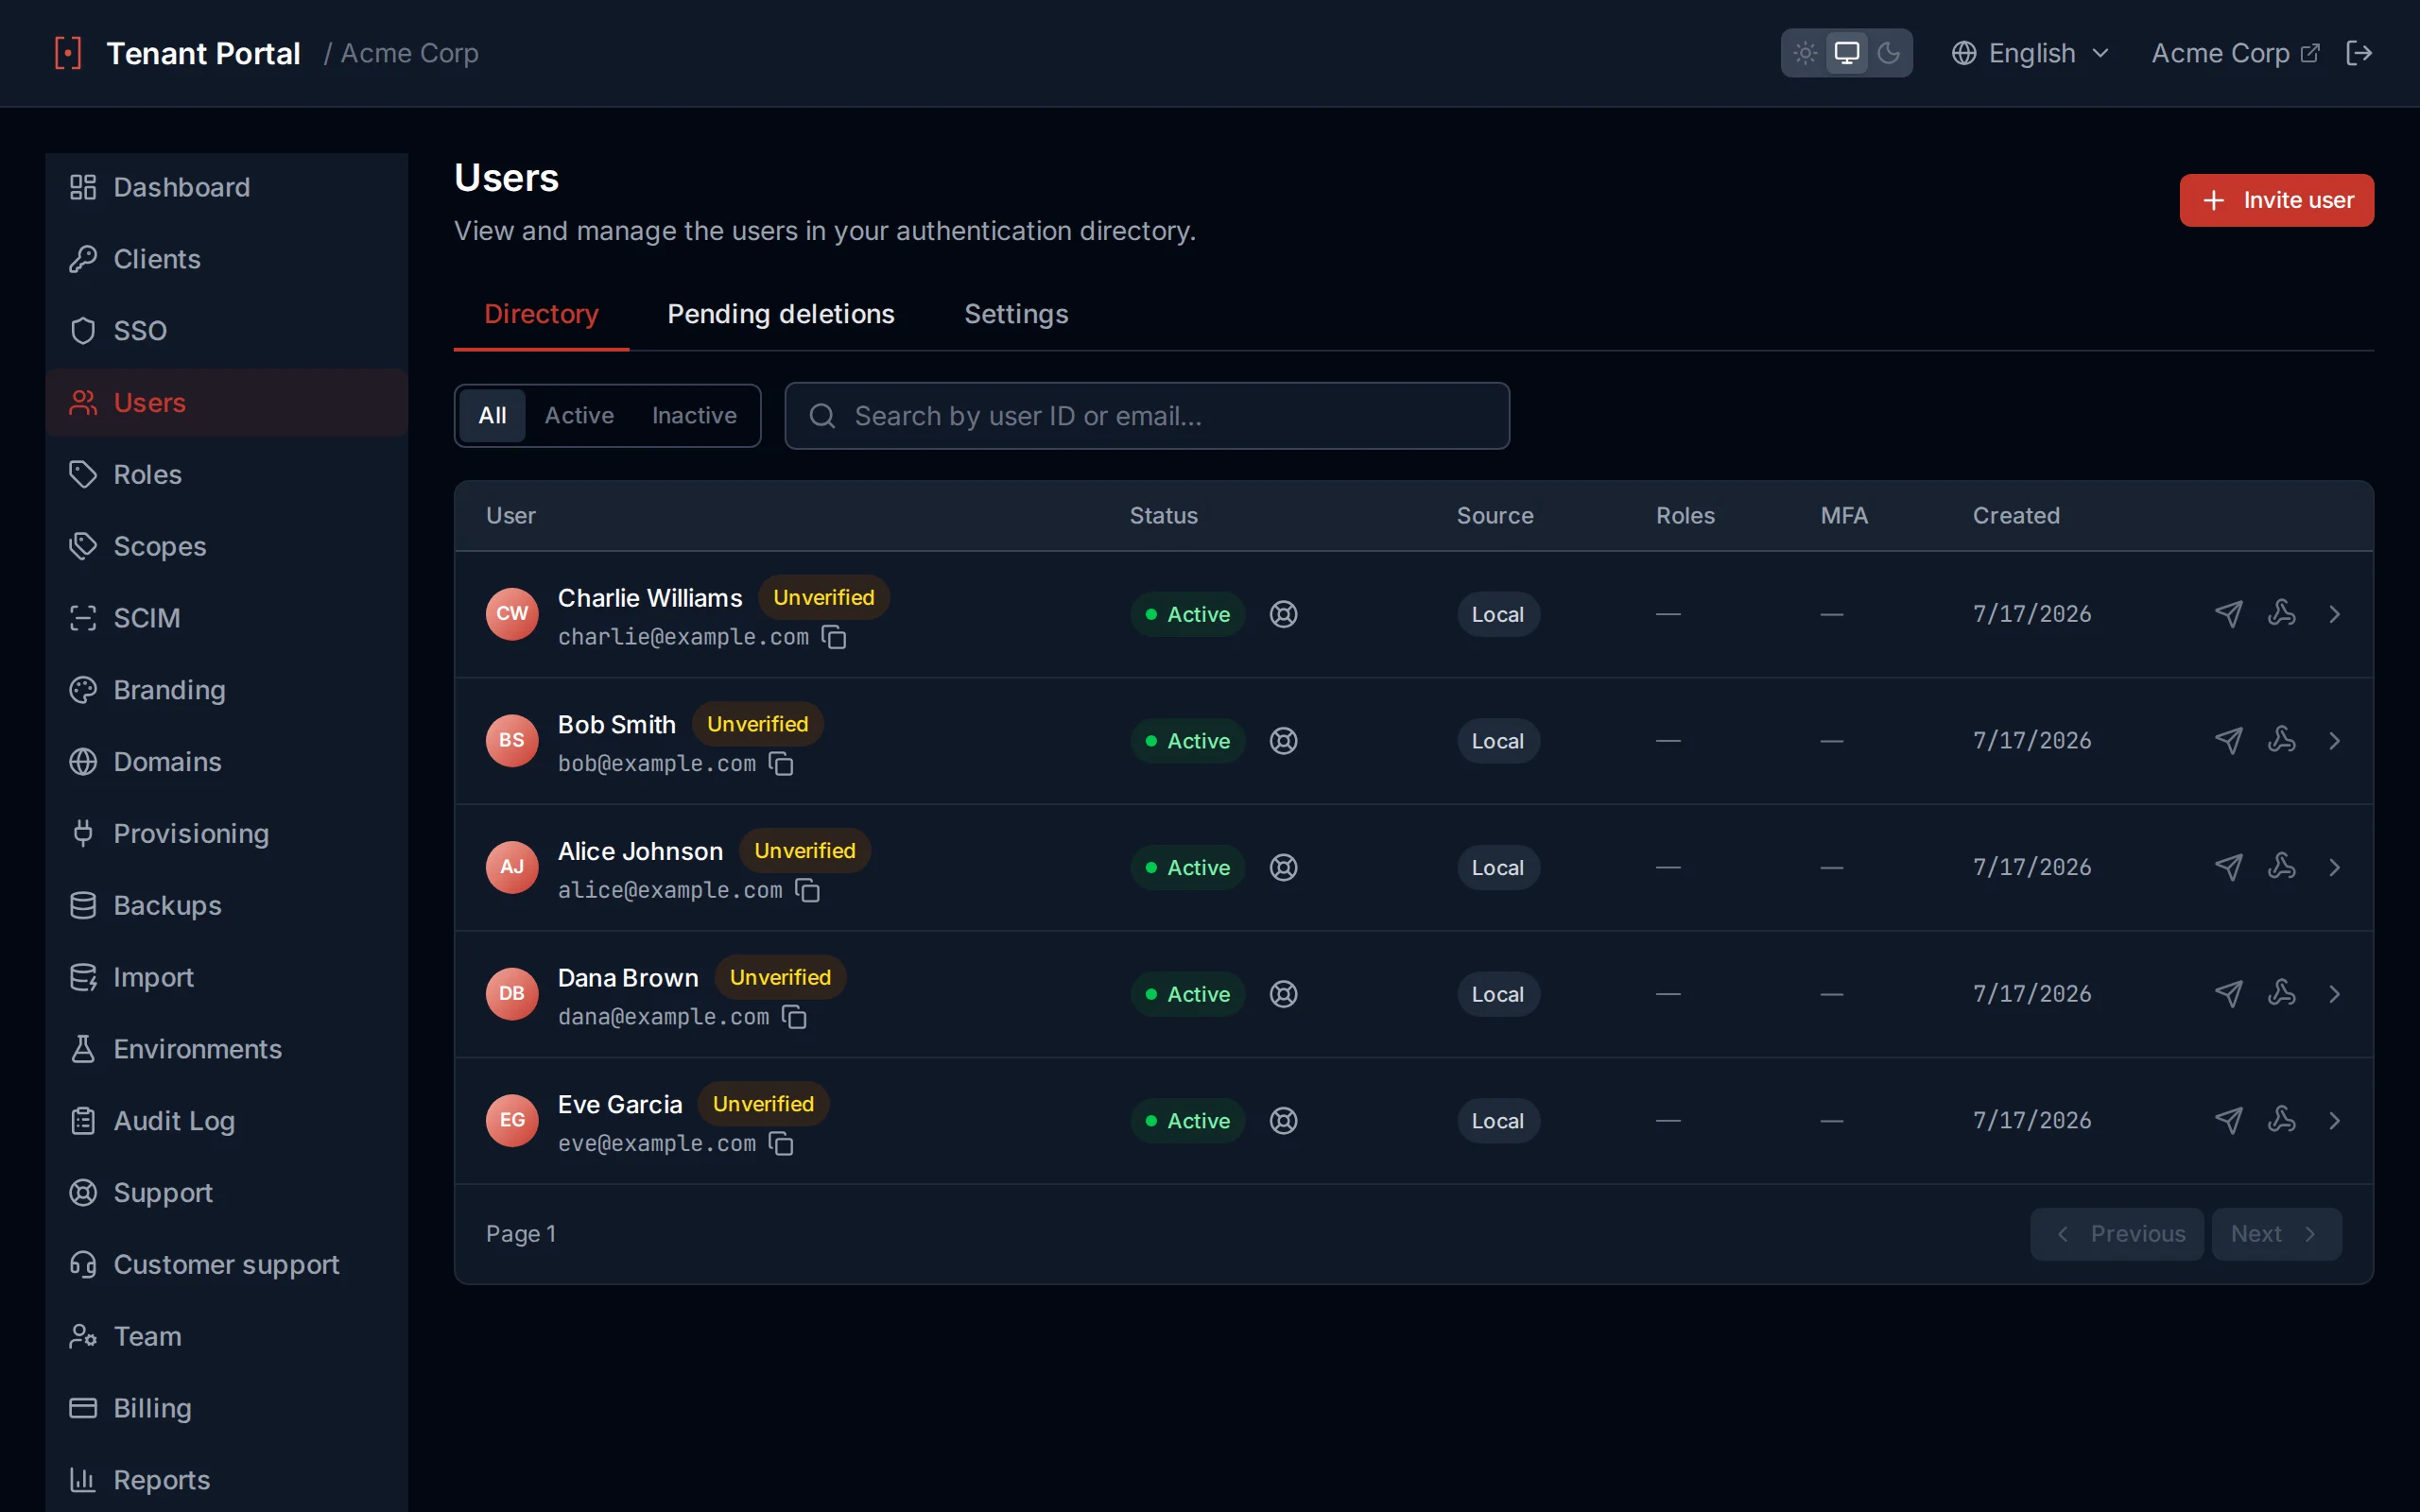
The user list with search bar and pagination
Creating Users
Click Create User to add a new local user. The form requires:
| Field | Description |
|---|---|
email | The user's email address (must be unique within the tenant) |
password | Initial password (minimum 8 characters, must meet your tenant's password policy) |
firstName | The user's first name |
lastName | The user's last name |
language | Preferred language. Sets the user's UI and email language; optional, falls back to English. |
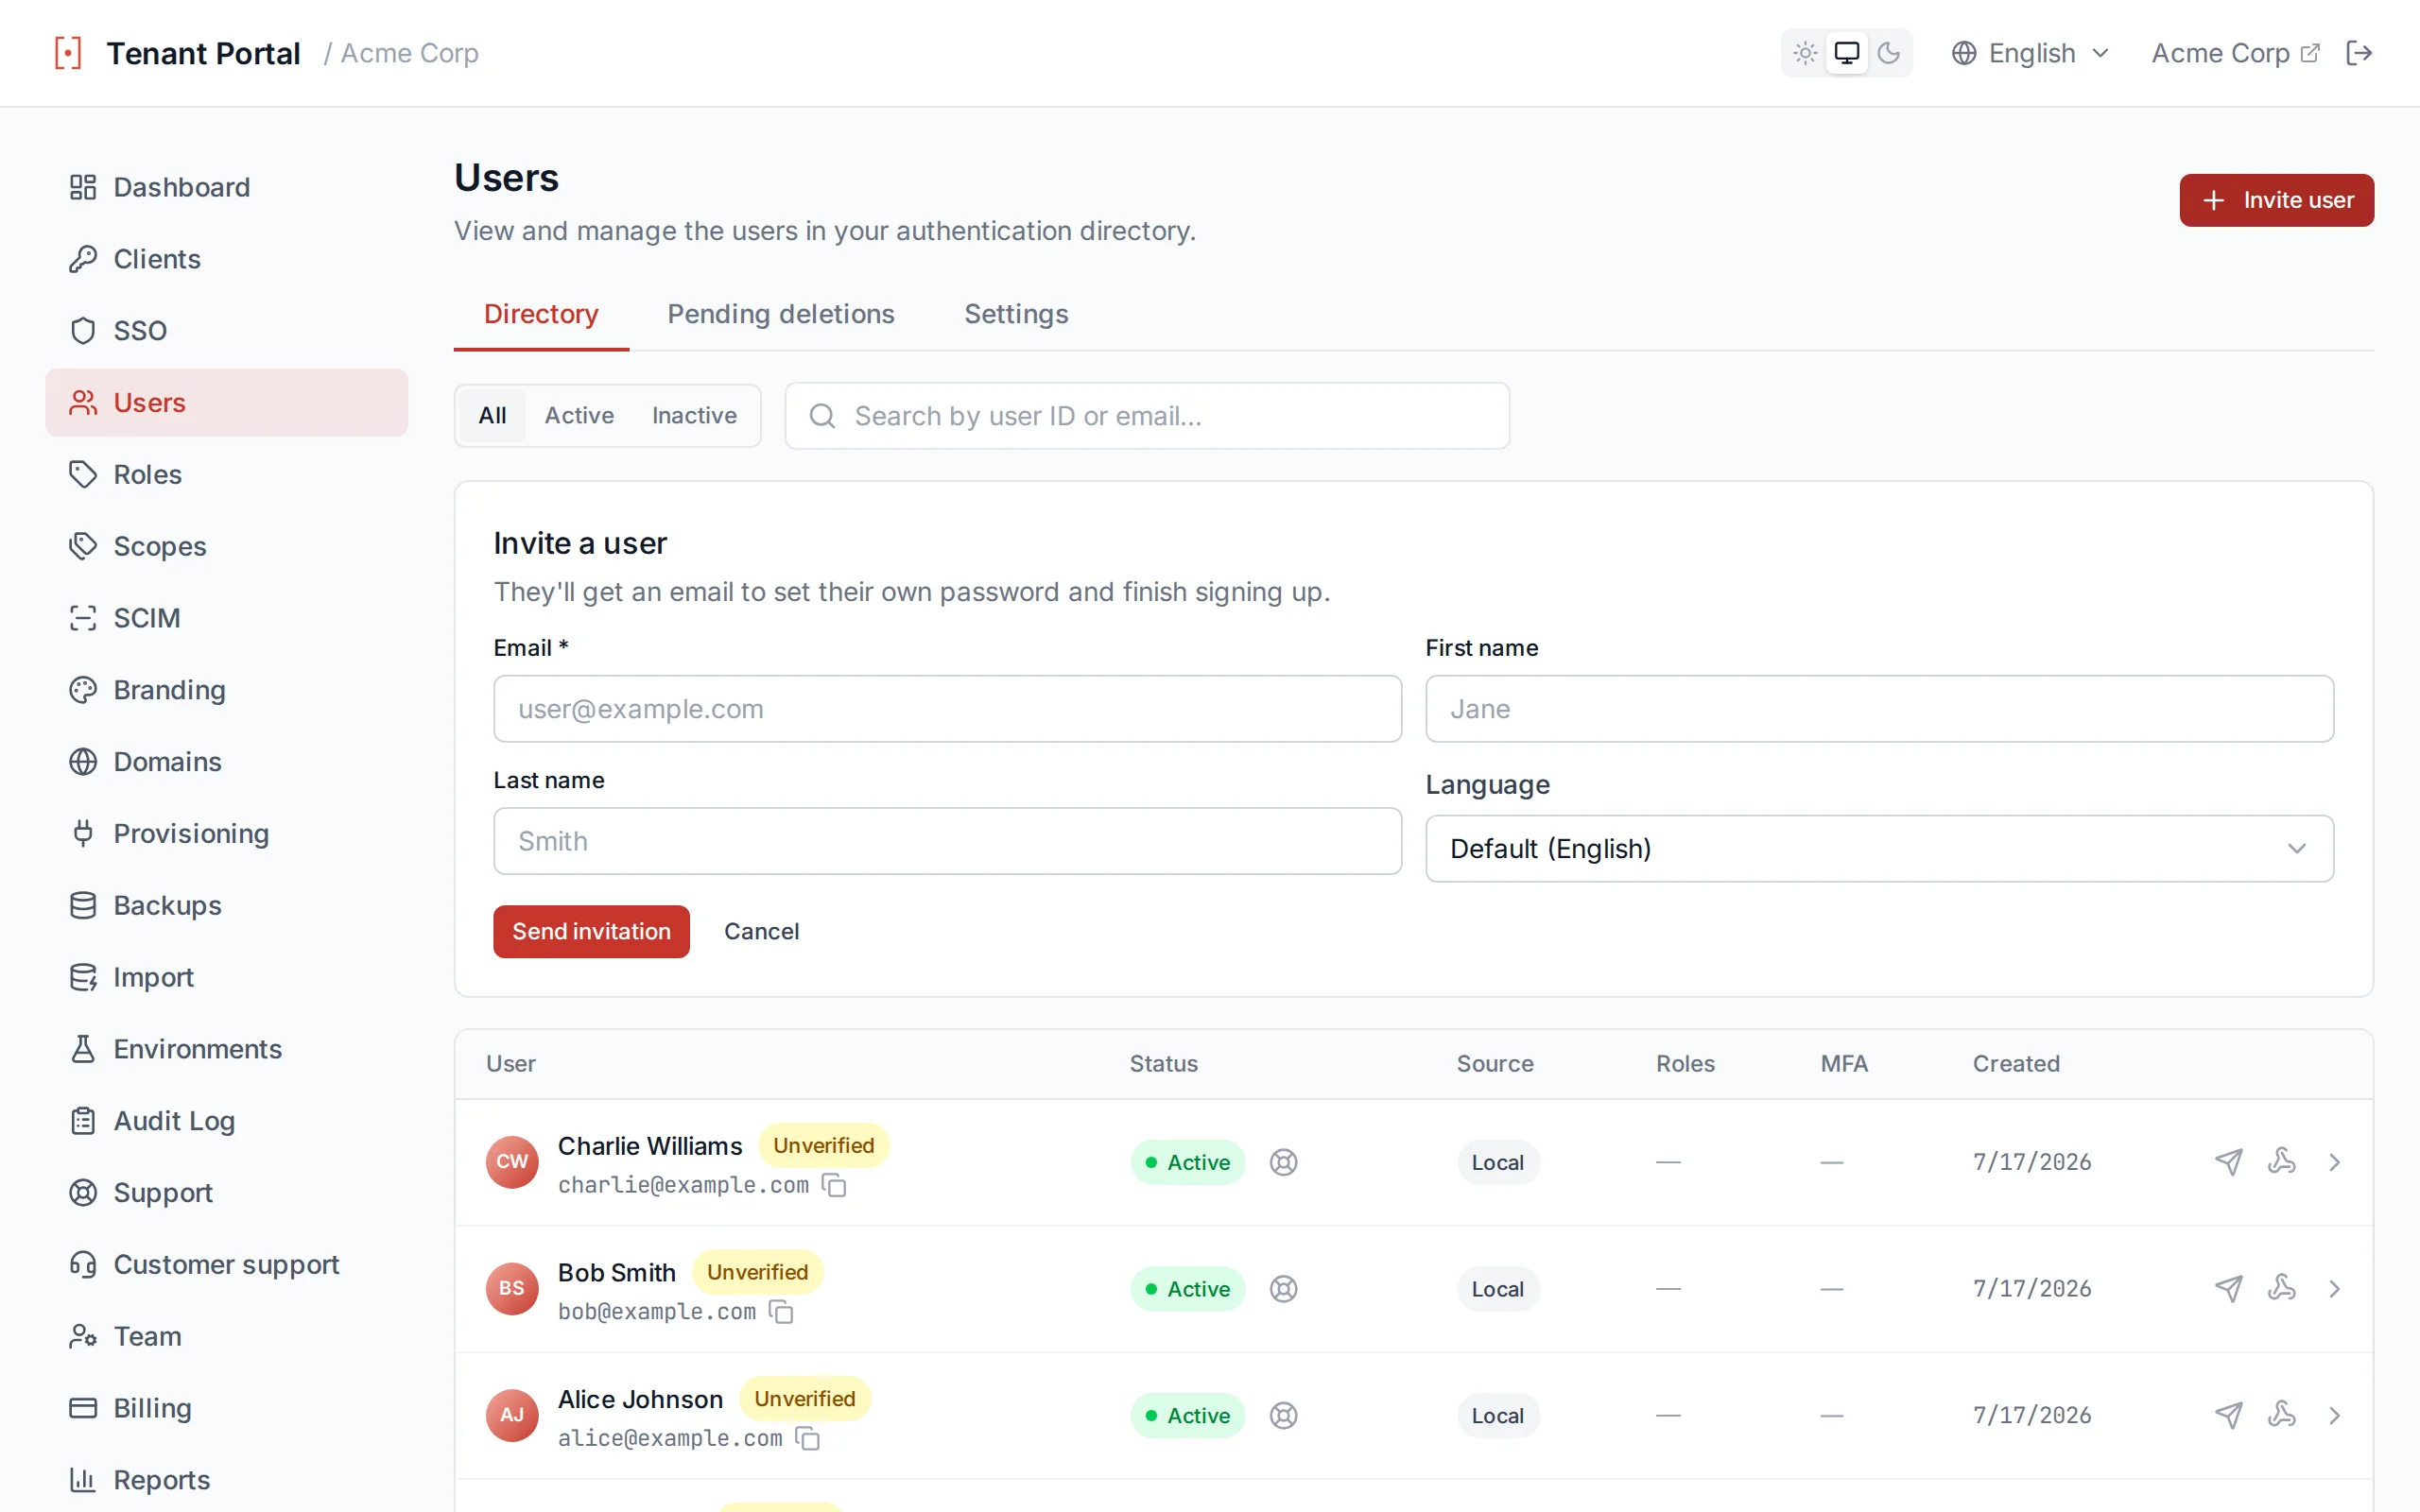
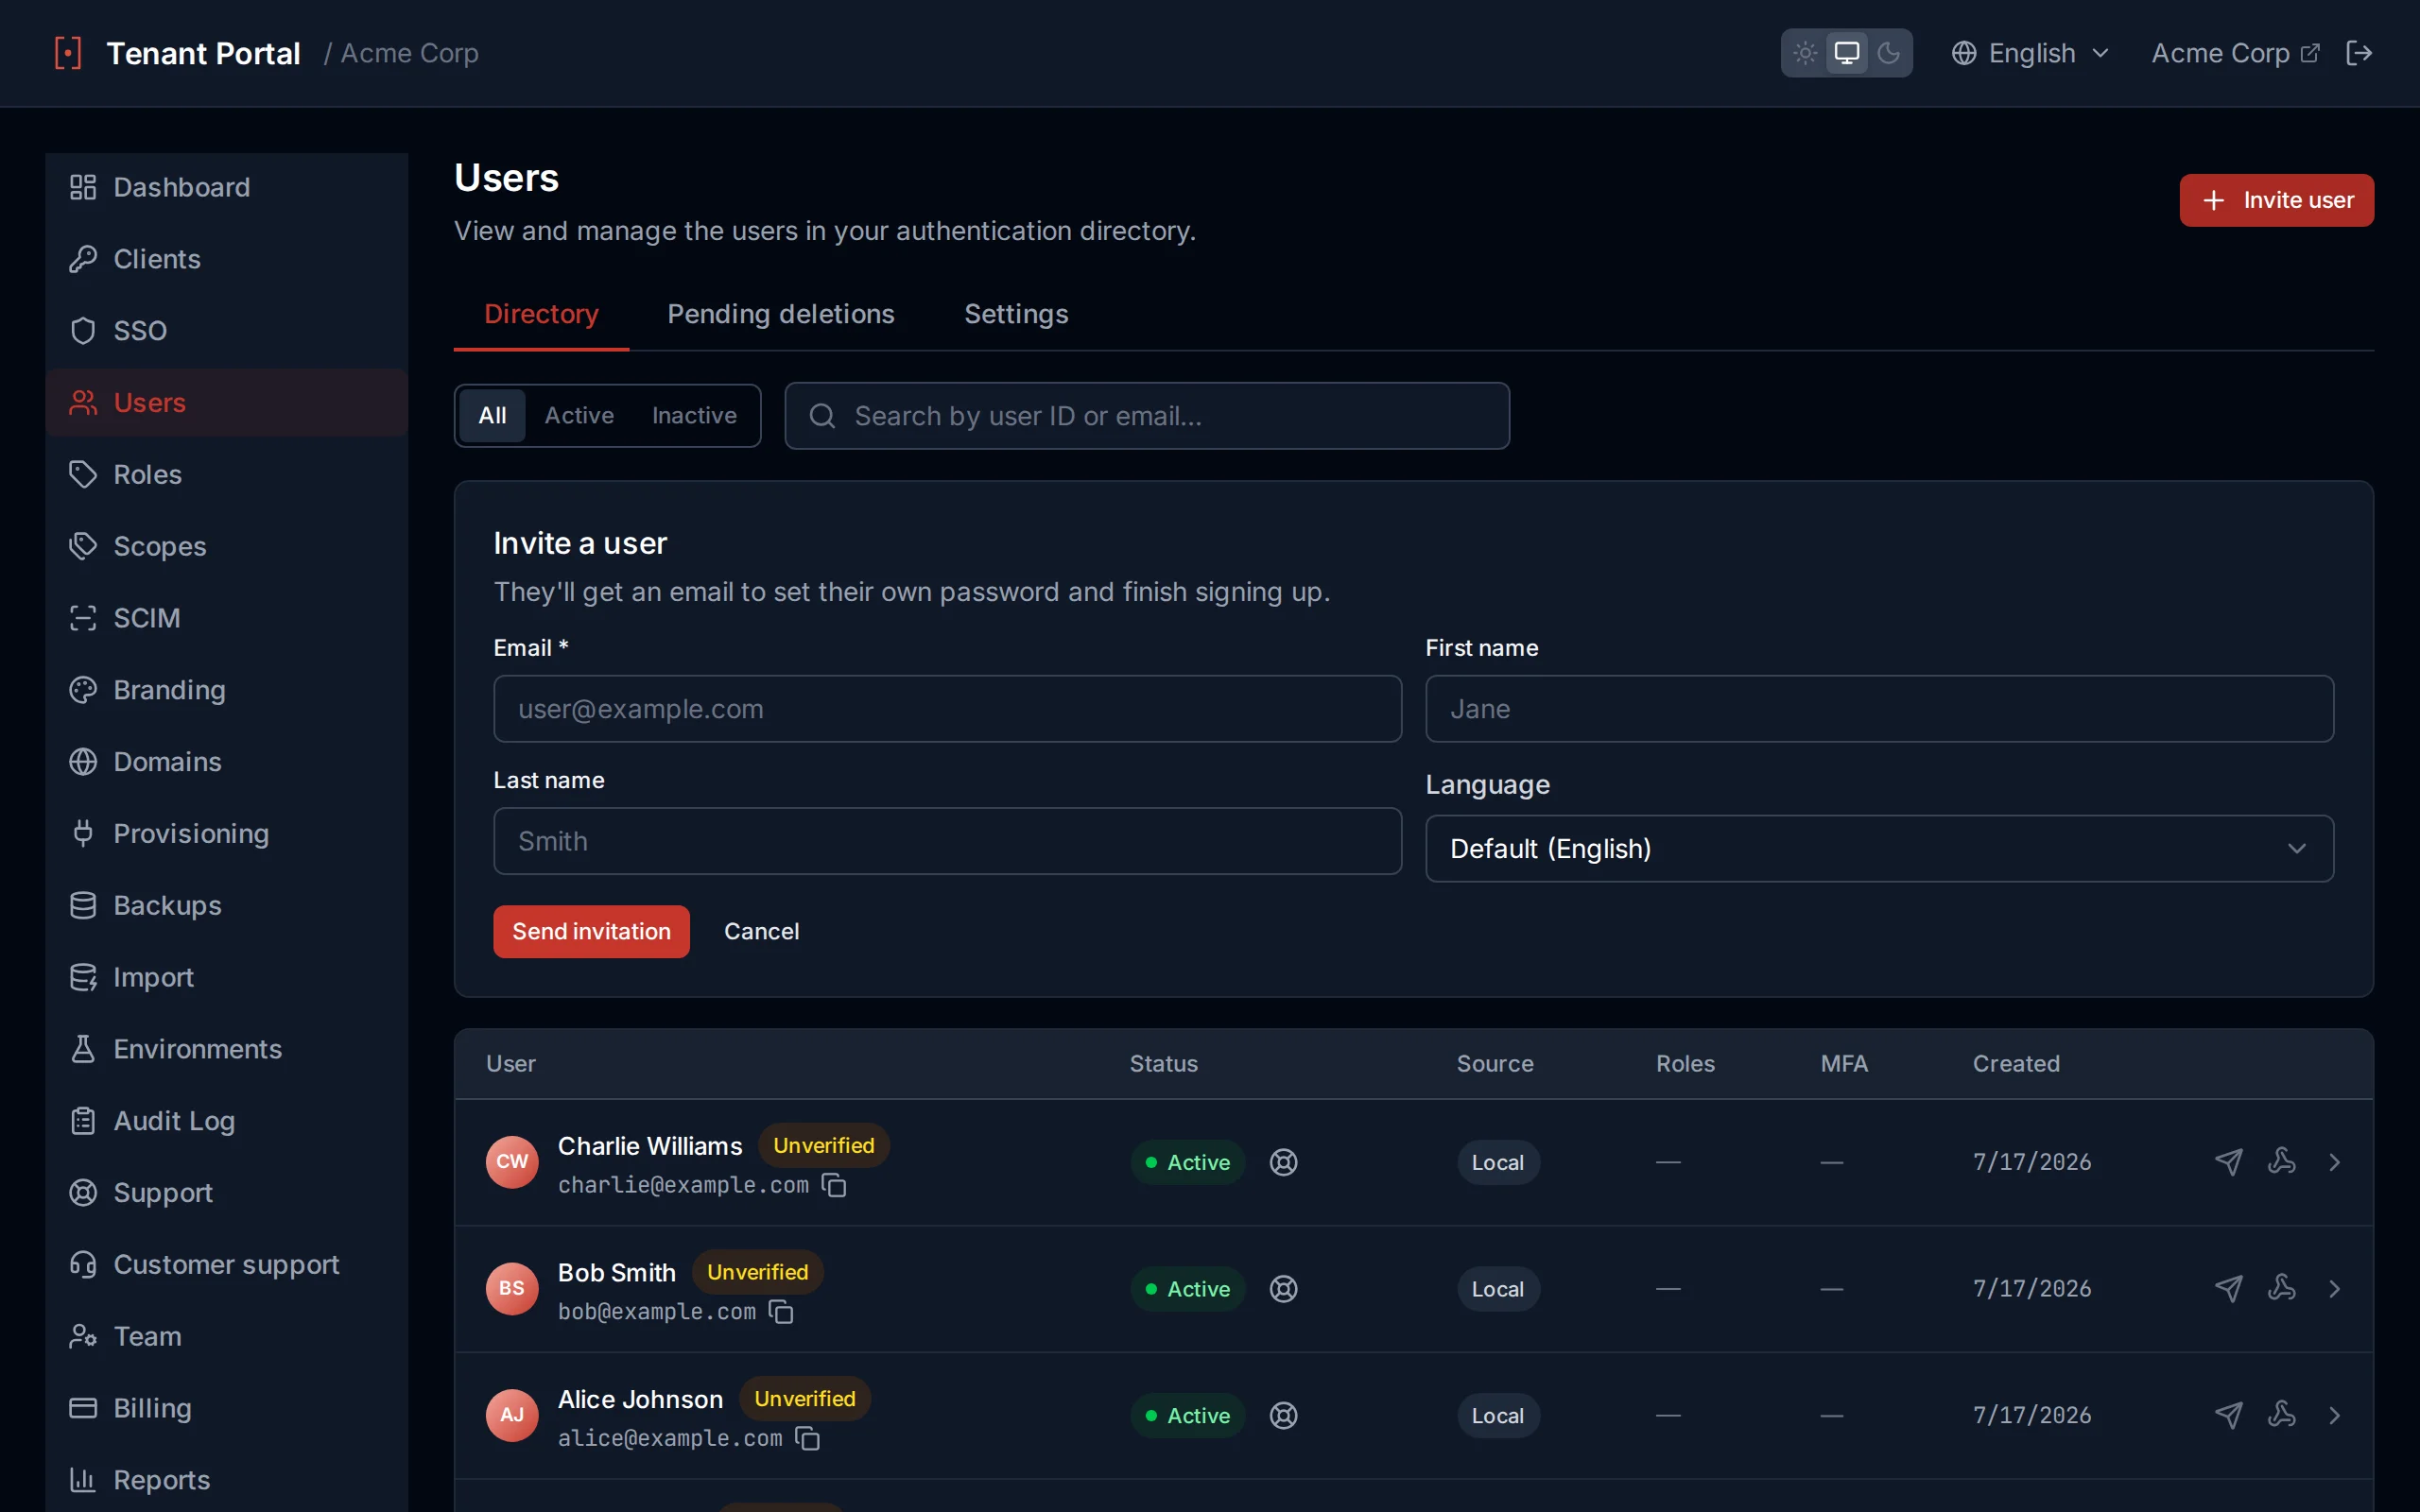
Create a new local user
SCIM-Provisioned Users
Preferred Language
Every user has a preferred language that drives both their hosted UI and the transactional emails Authagonal sends them (verification, password reset, welcome, and more). You can set it when creating a user and change it any time from the user's detail page. If a user has no preferred language set, Authagonal falls back to English. The selector offers all supported locales: English, German, French, Spanish, Portuguese, Vietnamese, and Simplified Chinese.
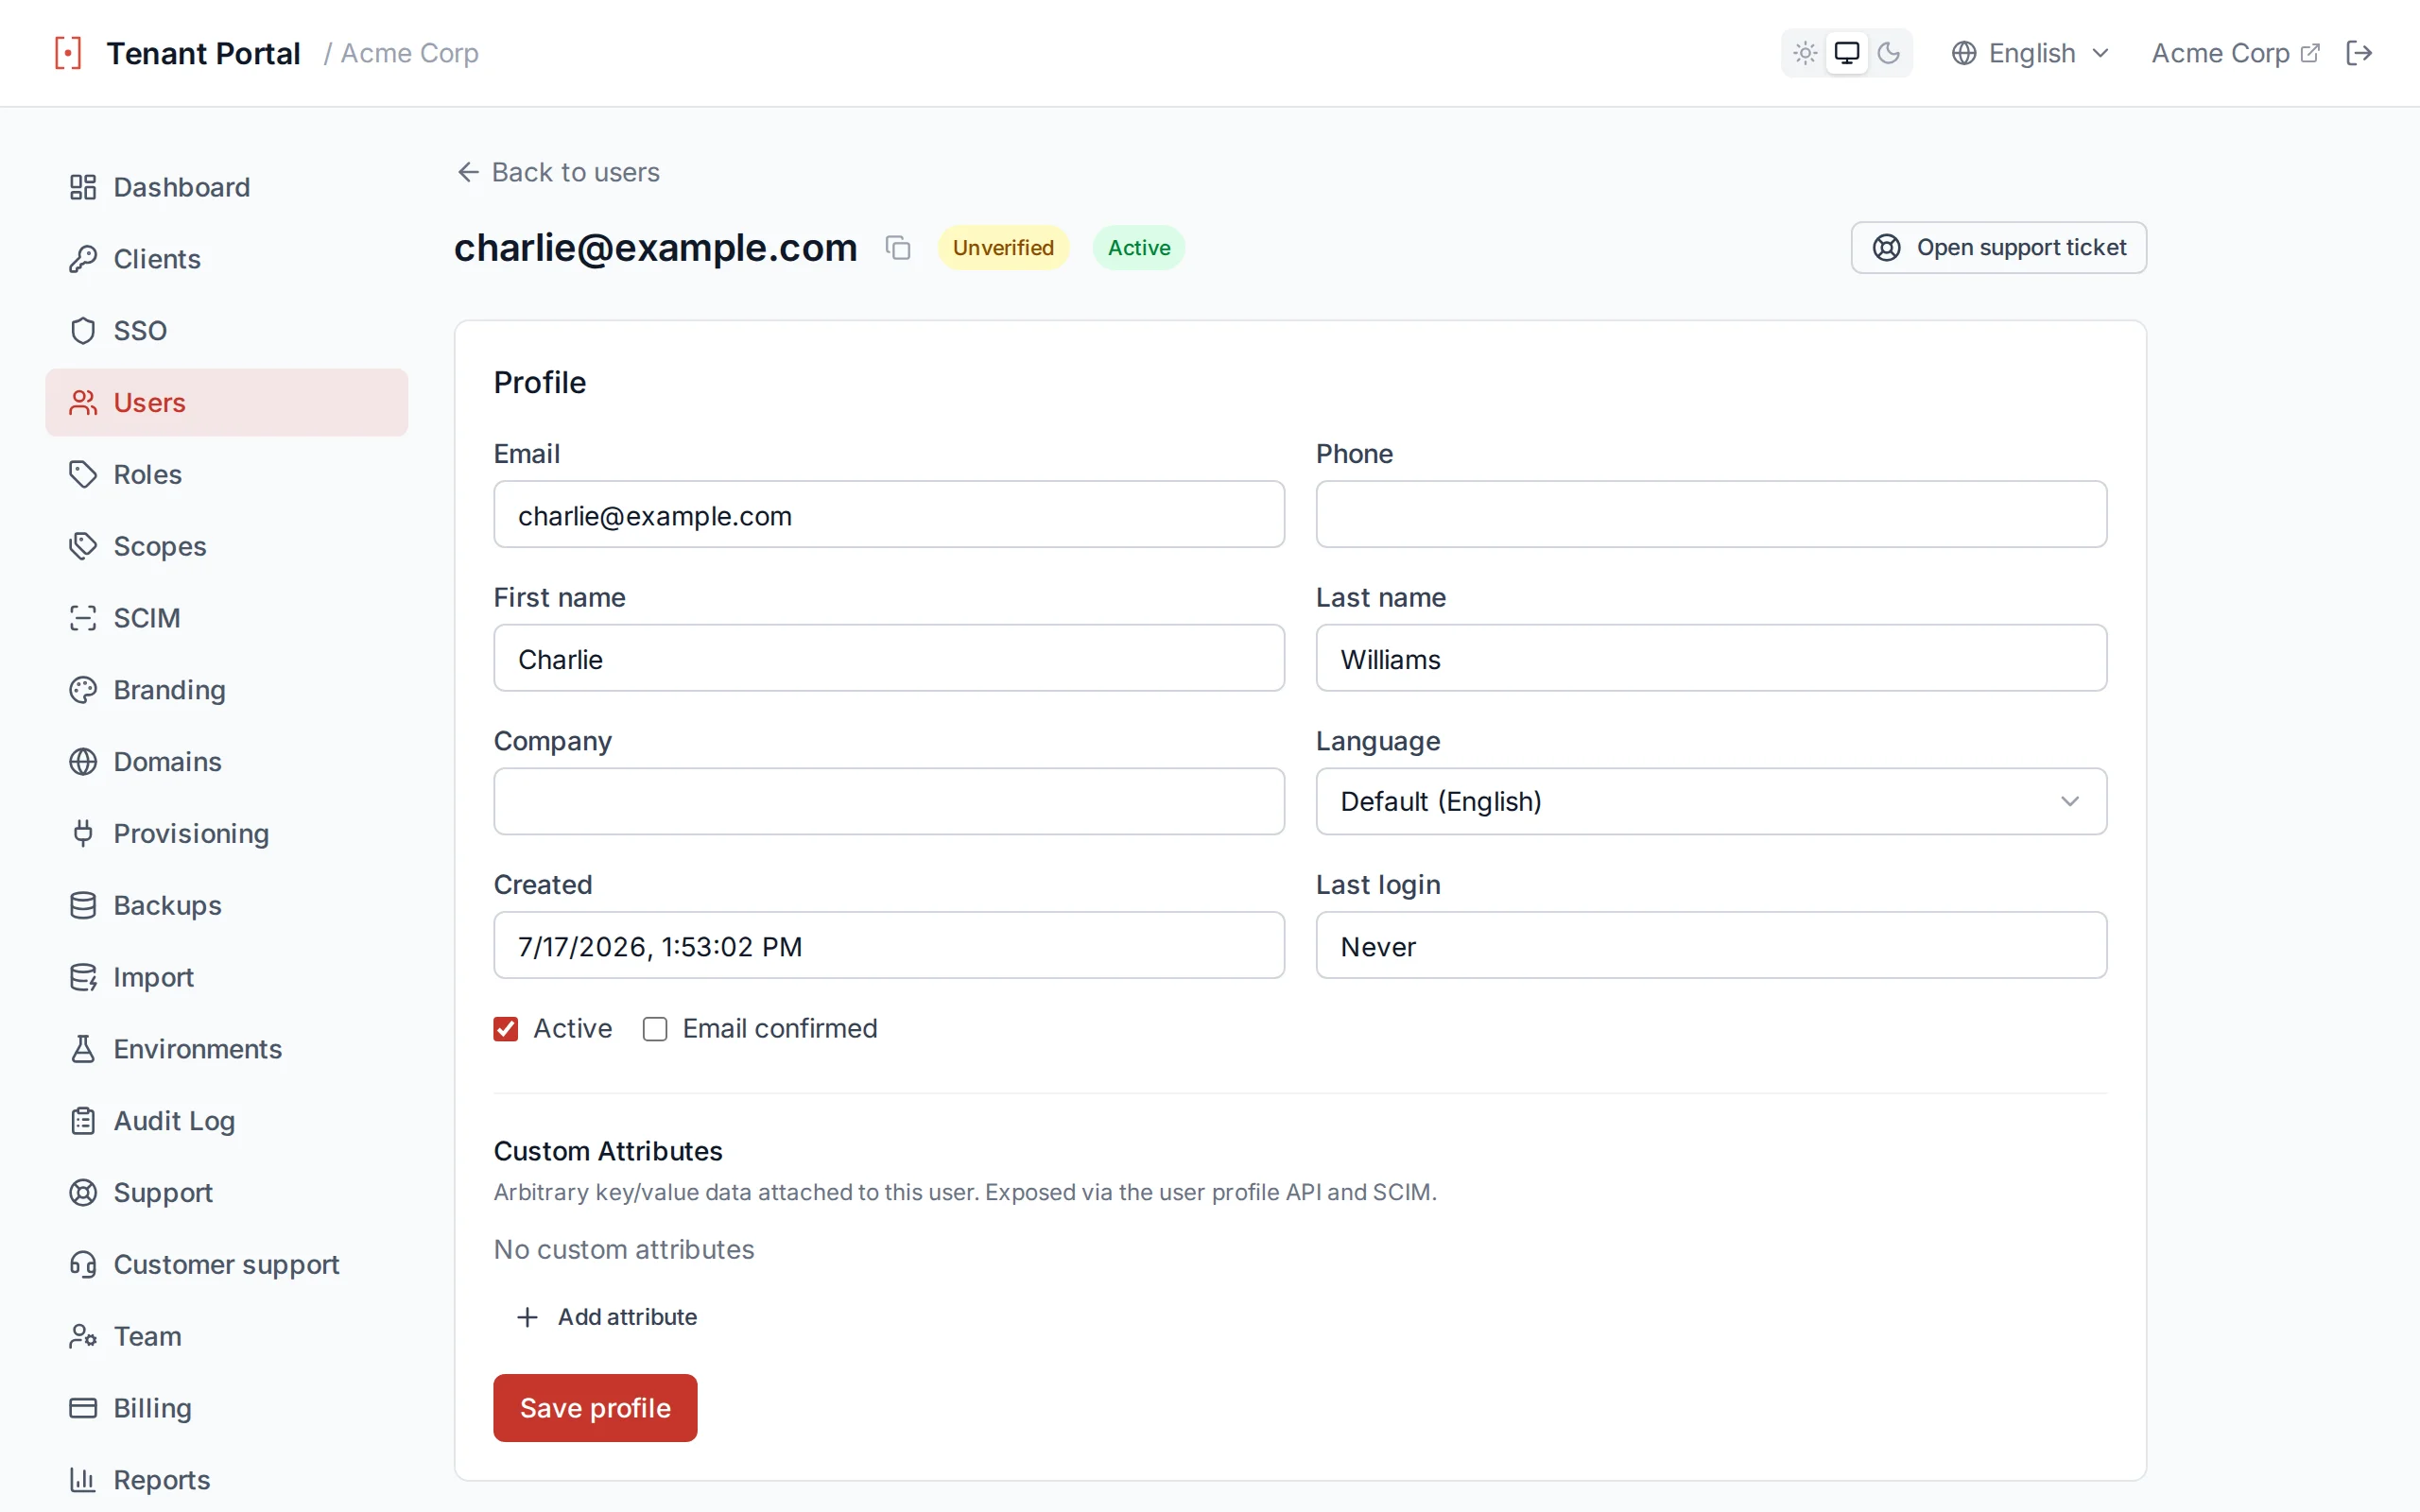
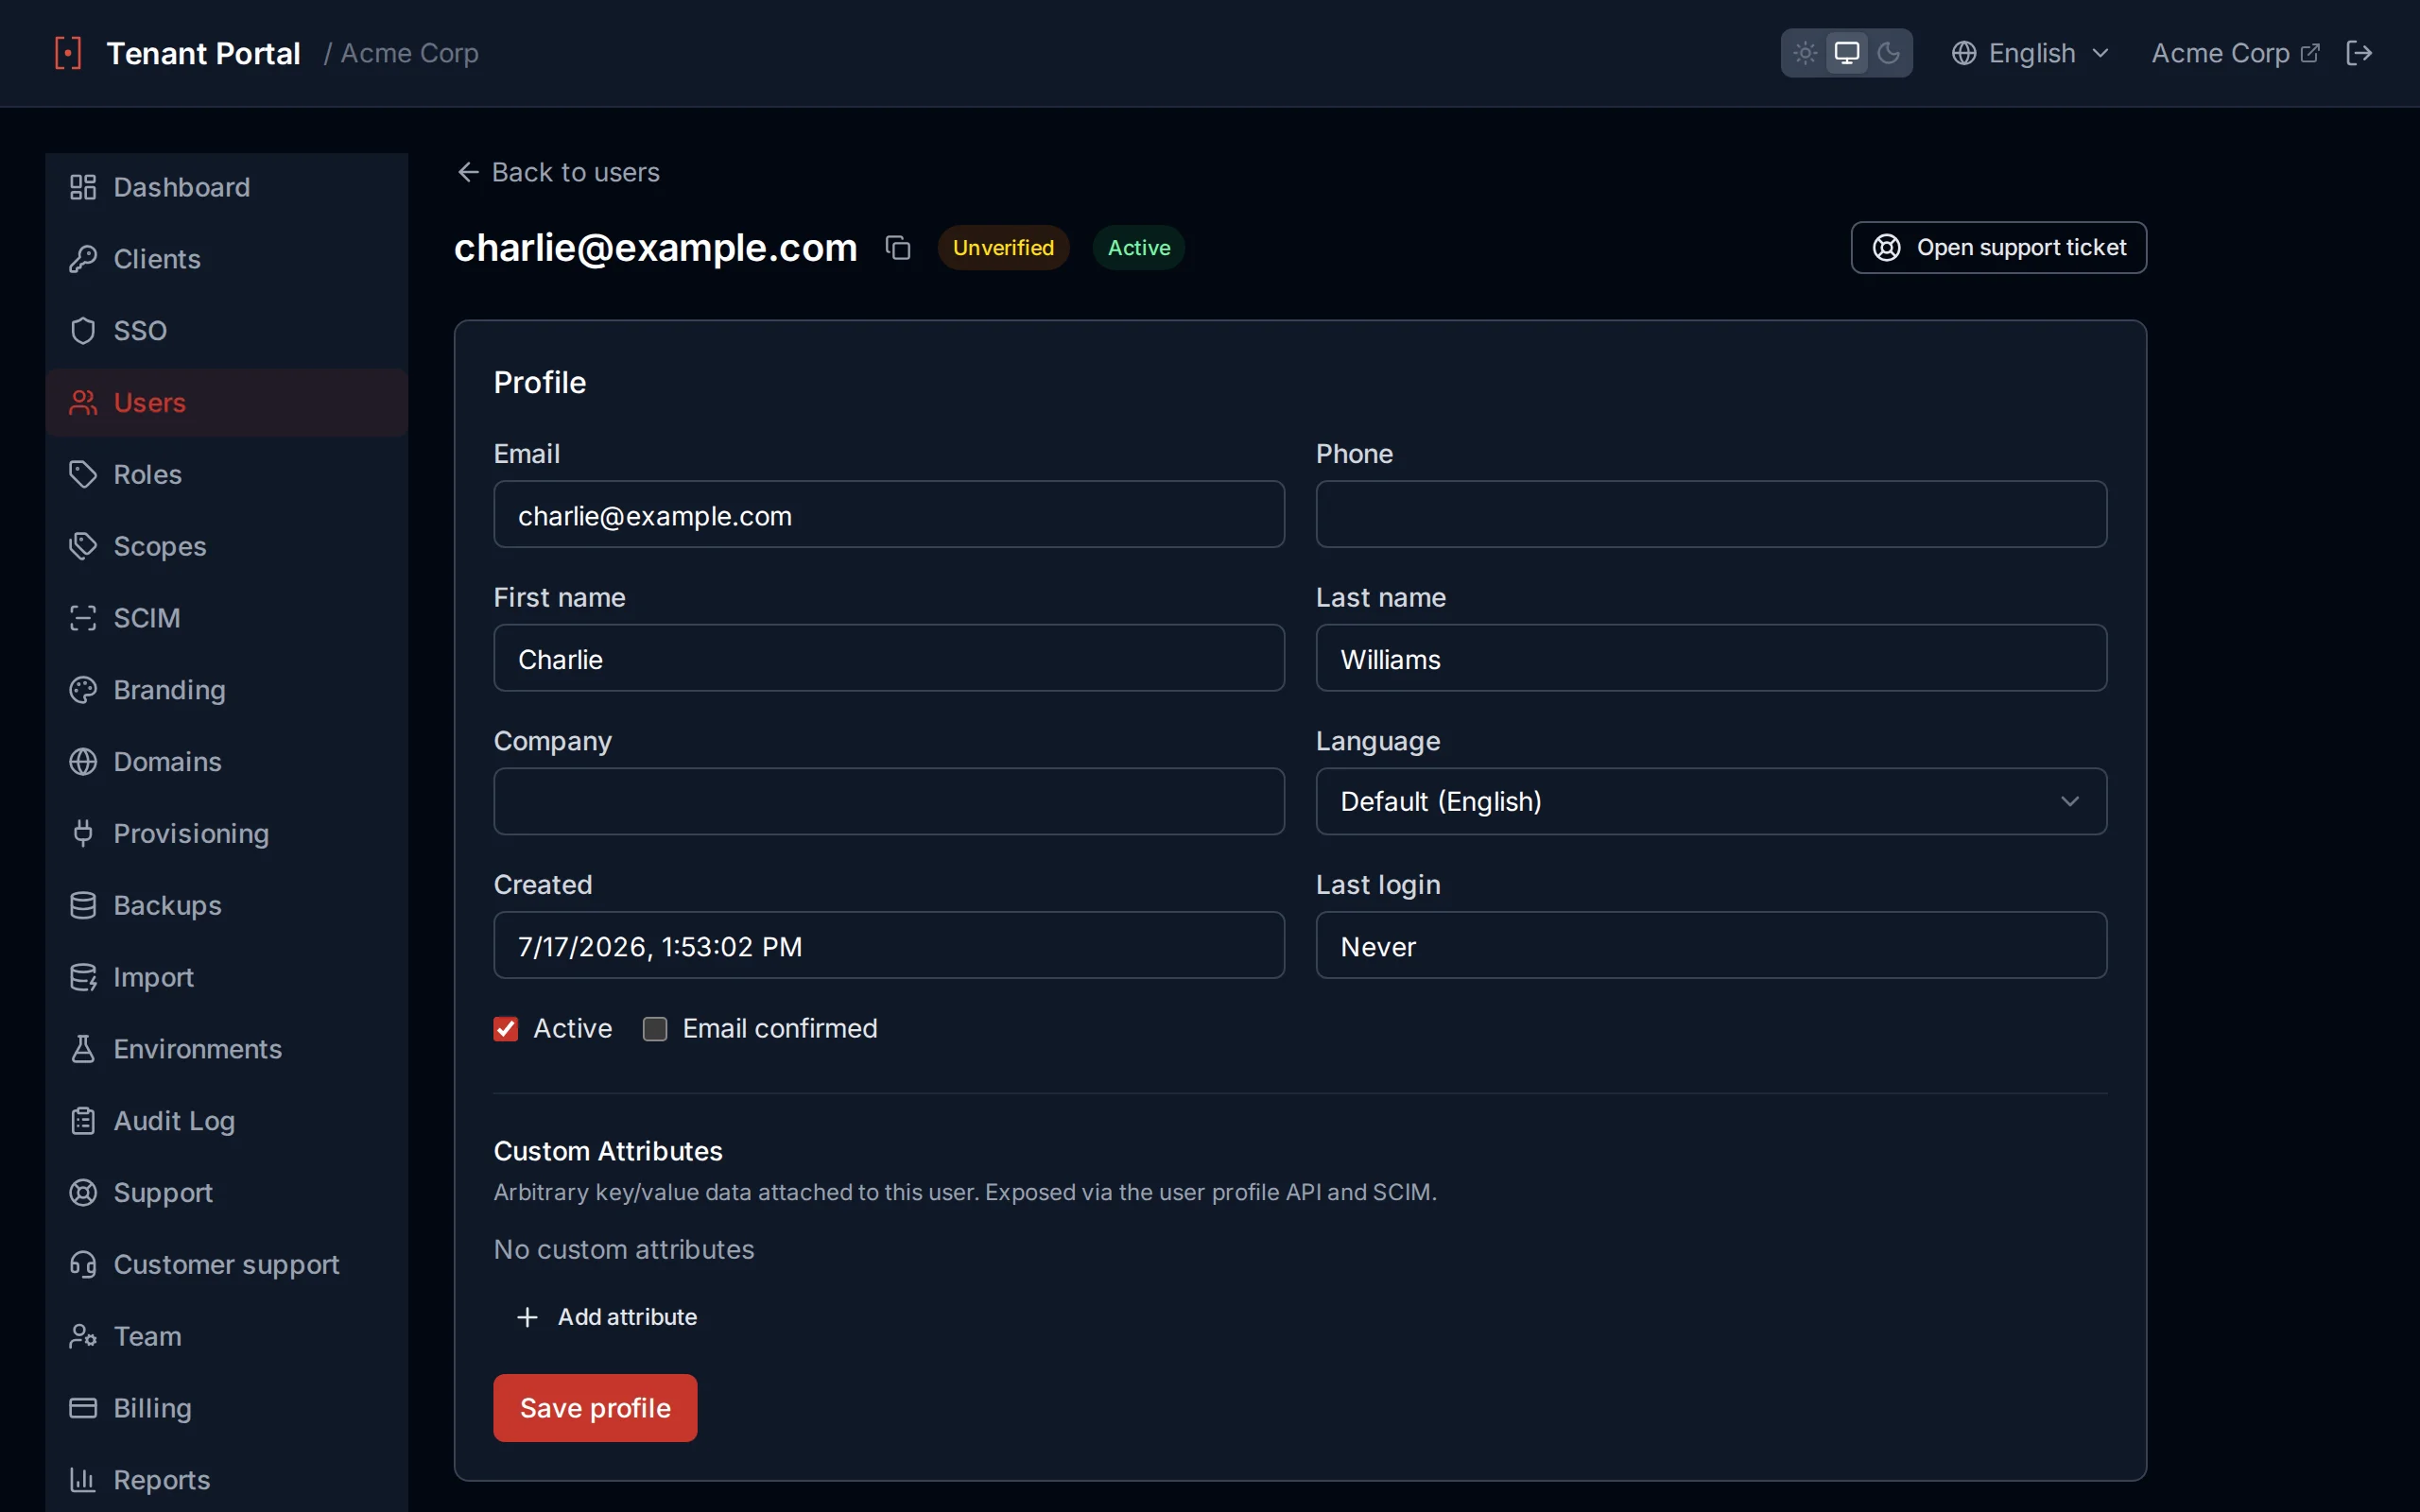
Set a user's preferred language on the detail page
User Detail
Click any row in the user list to open its detail page. From there you can edit profile data, manage roles, reset MFA, review custom attributes, and delete the user.
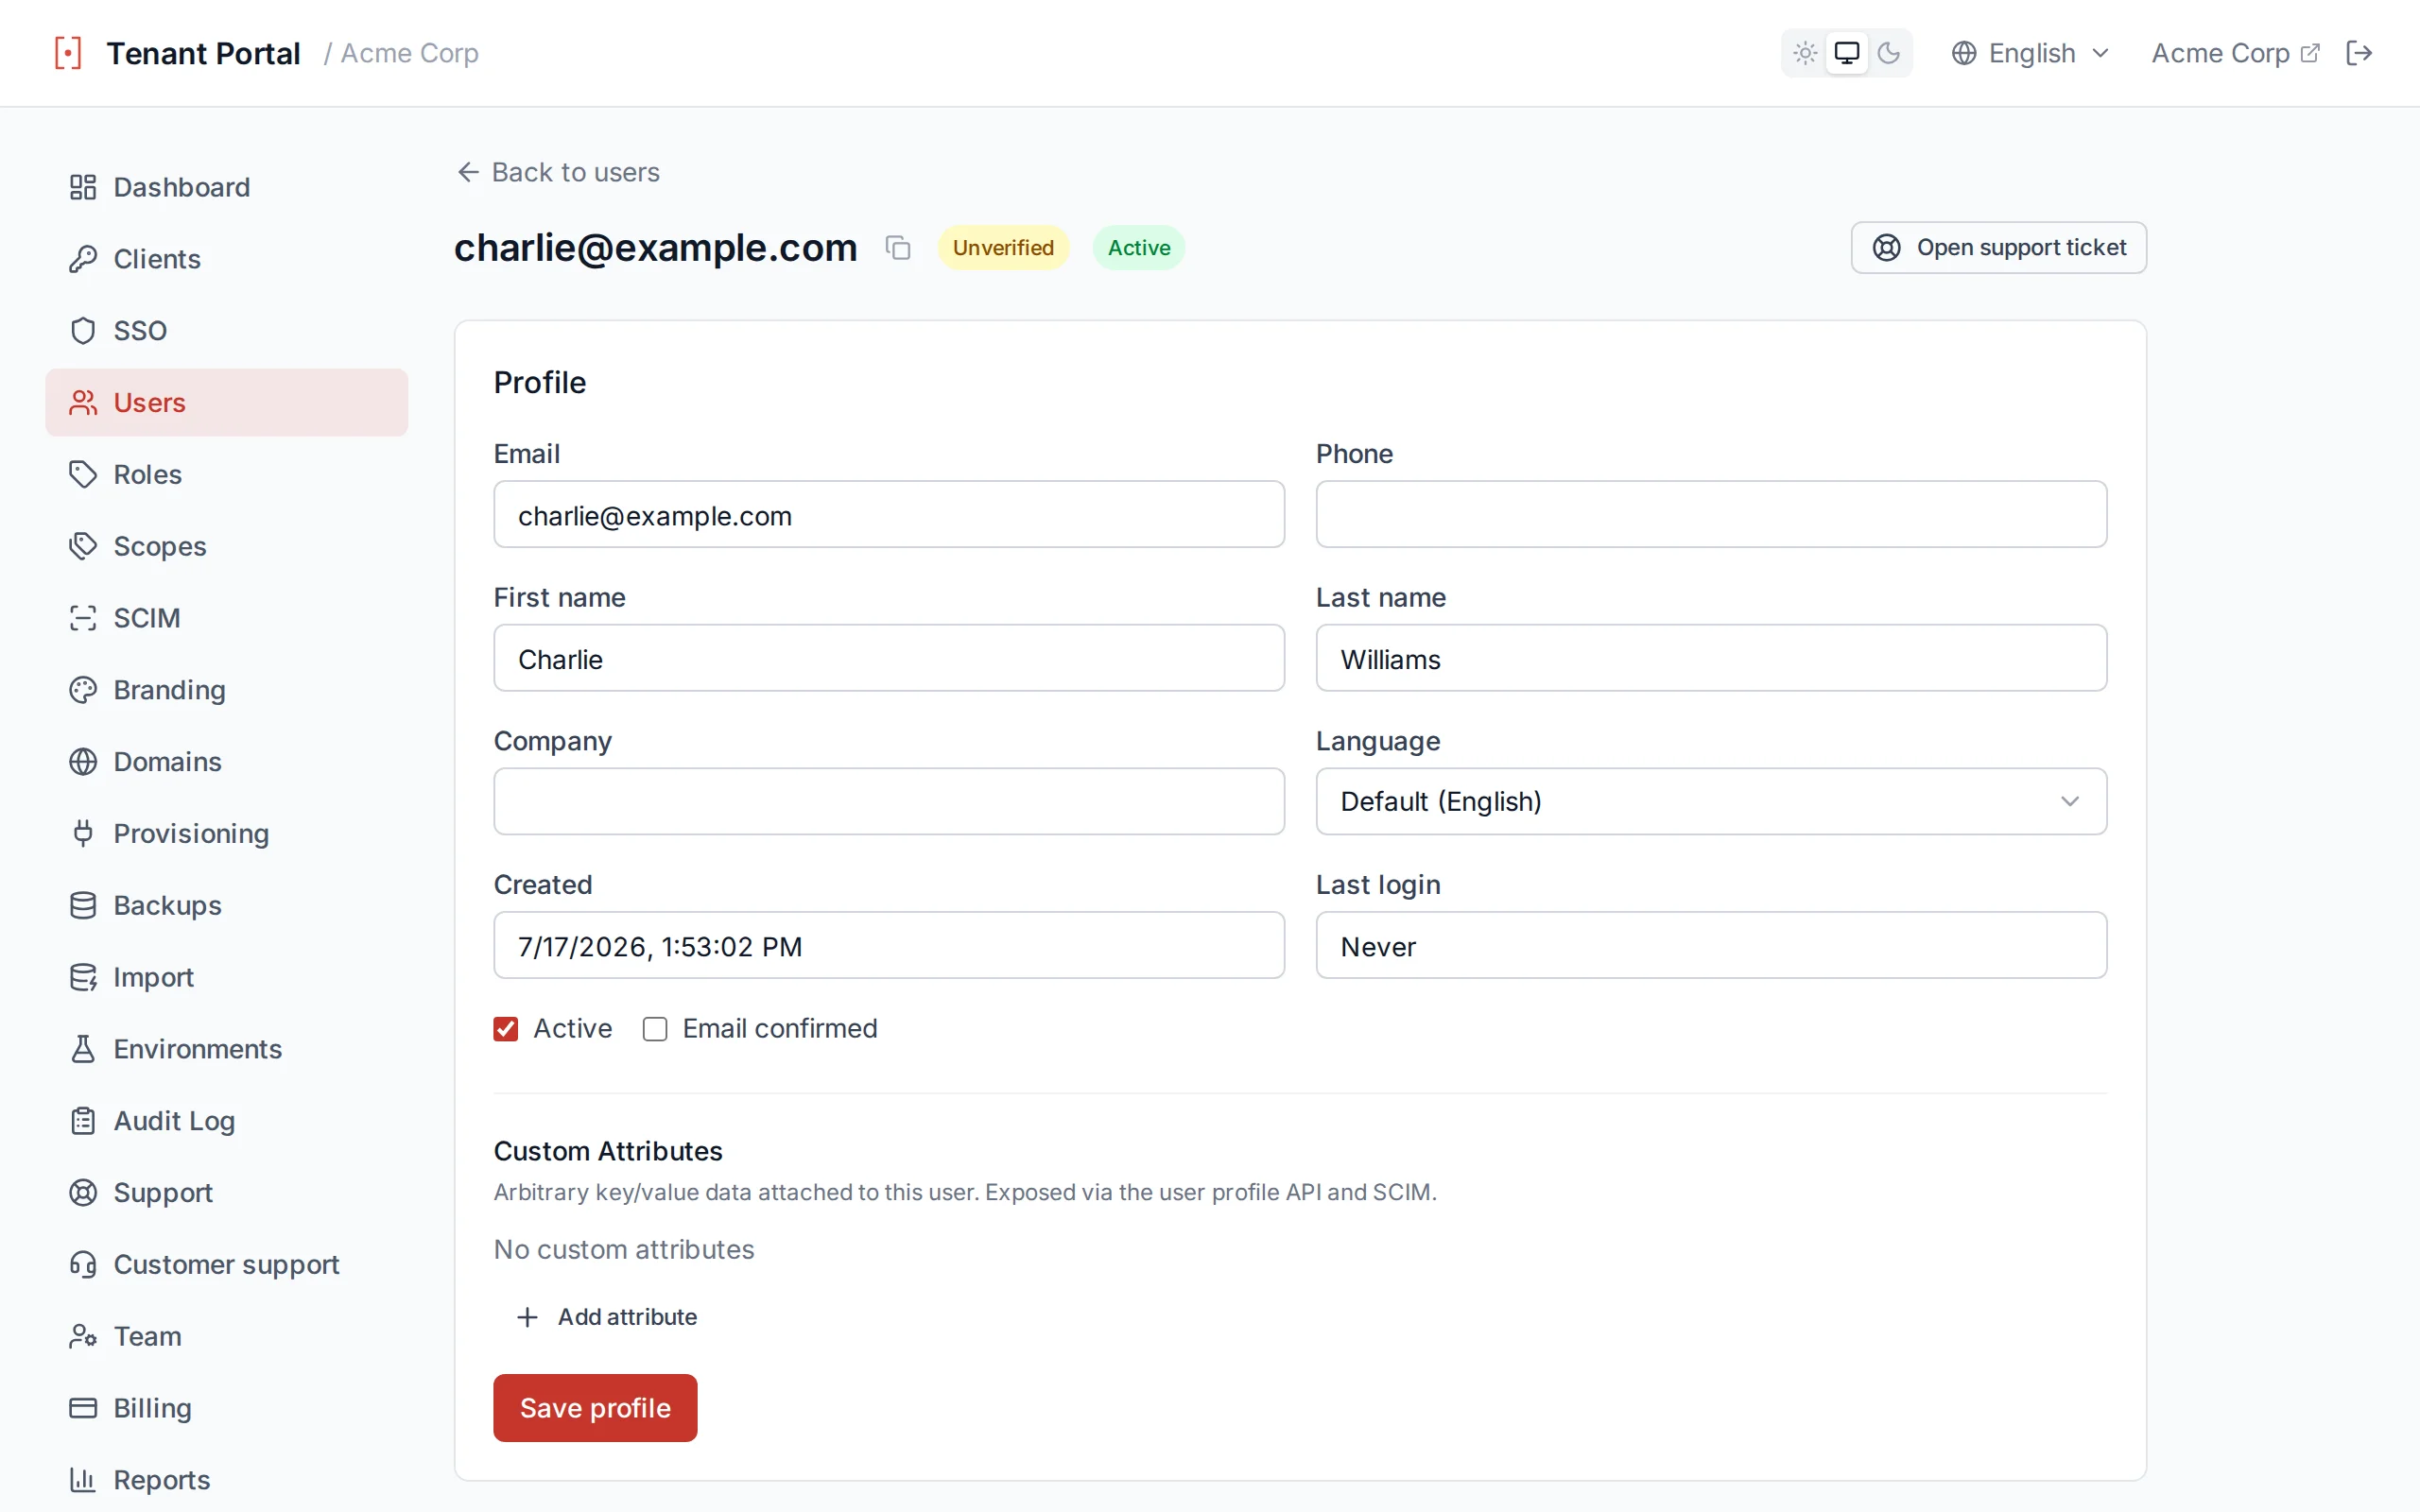
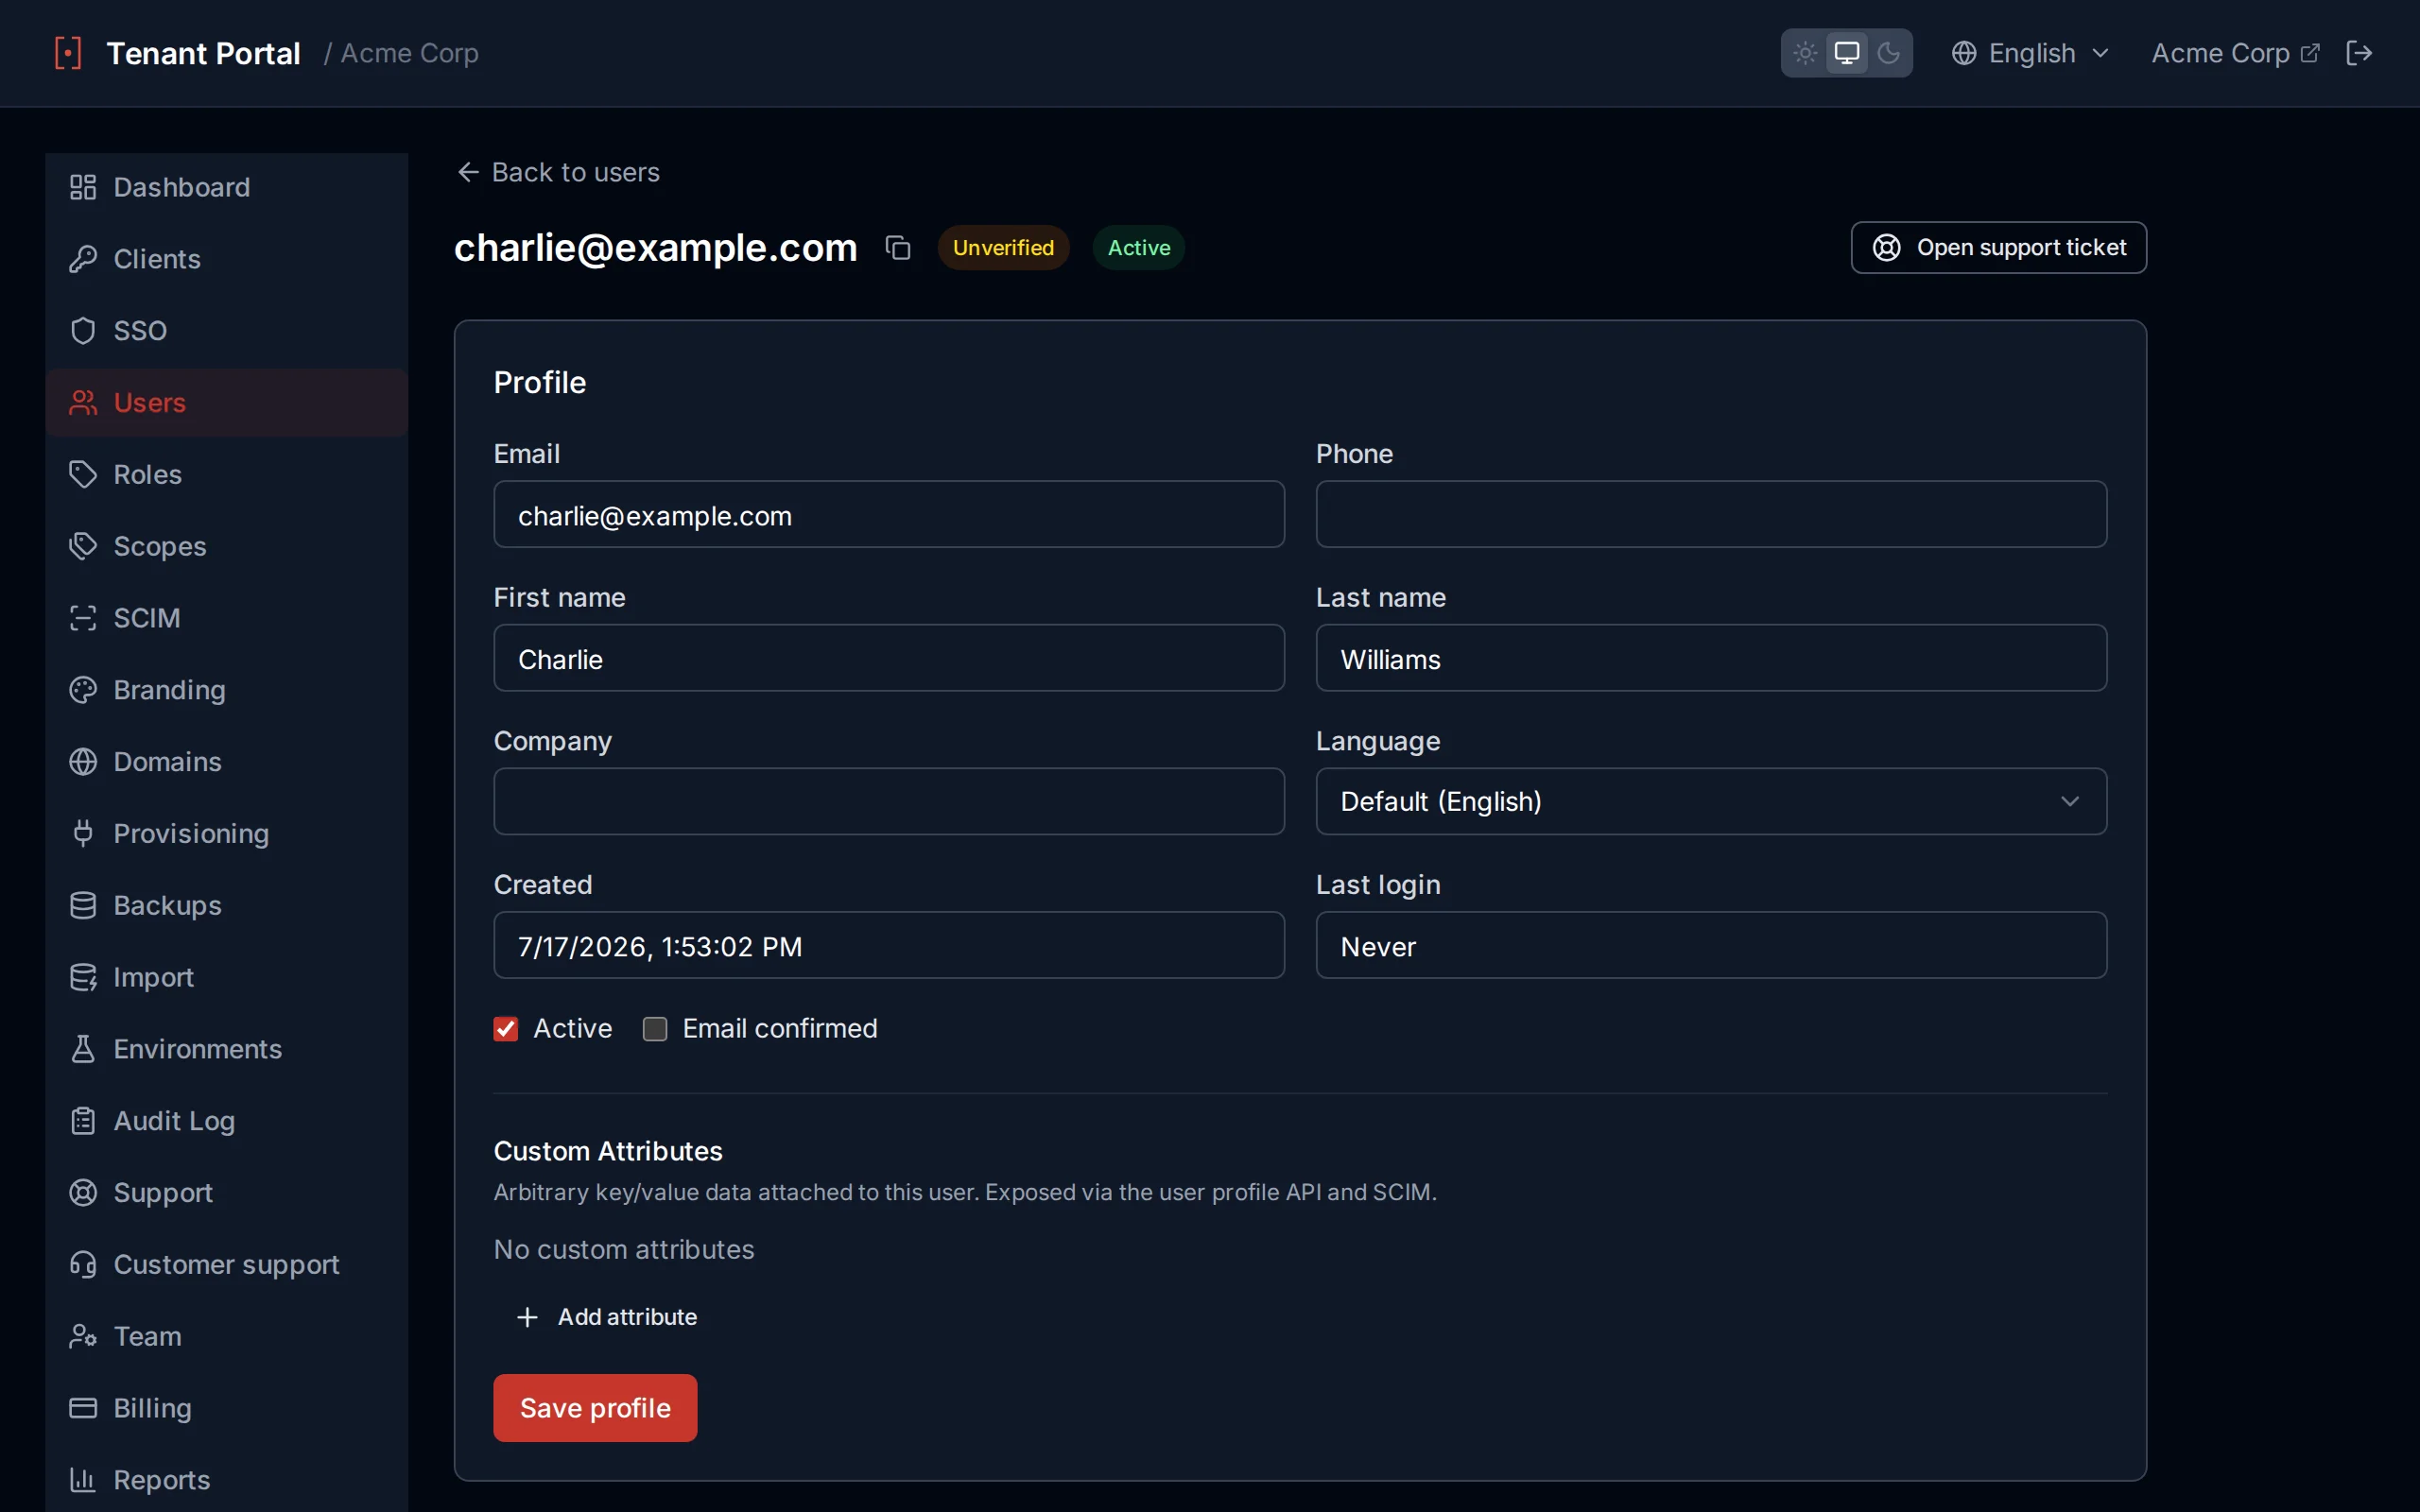
Profile
Edit email, first/last name, phone, company, external ID, and toggle the user's active flag. Email changes must remain unique across the tenant; the API returns email_in_use if taken.
Roles
Assign and unassign roles defined on the Roles page. Role membership is surfaced in ID and access tokens when the client has includeRolesInTokens enabled.
Multi-Factor Authentication
See every MFA credential registered for the user — authenticator app (TOTP), WebAuthn/passkeys, and recovery codes — each with its own registered/last-used timestamps. Remove individual credentials, or reset all MFA. Resetting forces the user to re-enroll at next login.
Custom Attributes
Arbitrary key/value data attached to the user. Keys must be unique. Attributes are exposed via the user profile API and SCIM, and can be mapped to access-token claims by configuring a custom scope's userClaims.
Organization
The organization this user belongs to. It is a free-text identifier of your own, emitted as the org_id claim on their tokens and on /connect/userinfo under the profile scope. Authagonal never derives it: it is set by your provisioning app, by the SCIM credential that created the user, or by hand here.
The link beside the field lists everyone sharing it, and the same filter is available on the API as GET /api/v1/users?organizationId=. Use it to answer who belongs to a given customer without paging the whole directory.
Delete User
Permanently removes the user and all their MFA credentials. Type the user's email to confirm — there is no undo.
Groups
Groups let you organize users and include group membership in tokens. Groups can be created manually in the portal or provisioned automatically via SCIM from an external identity provider.
Group List
The Groups page shows all groups in your tenant with the following information:
| Column | Description |
|---|---|
| Group Name | The display name of the group |
| Members | The number of users currently in the group |
| Source | SCIM or Manual — how the group was created |
| Created | The date the group was created |
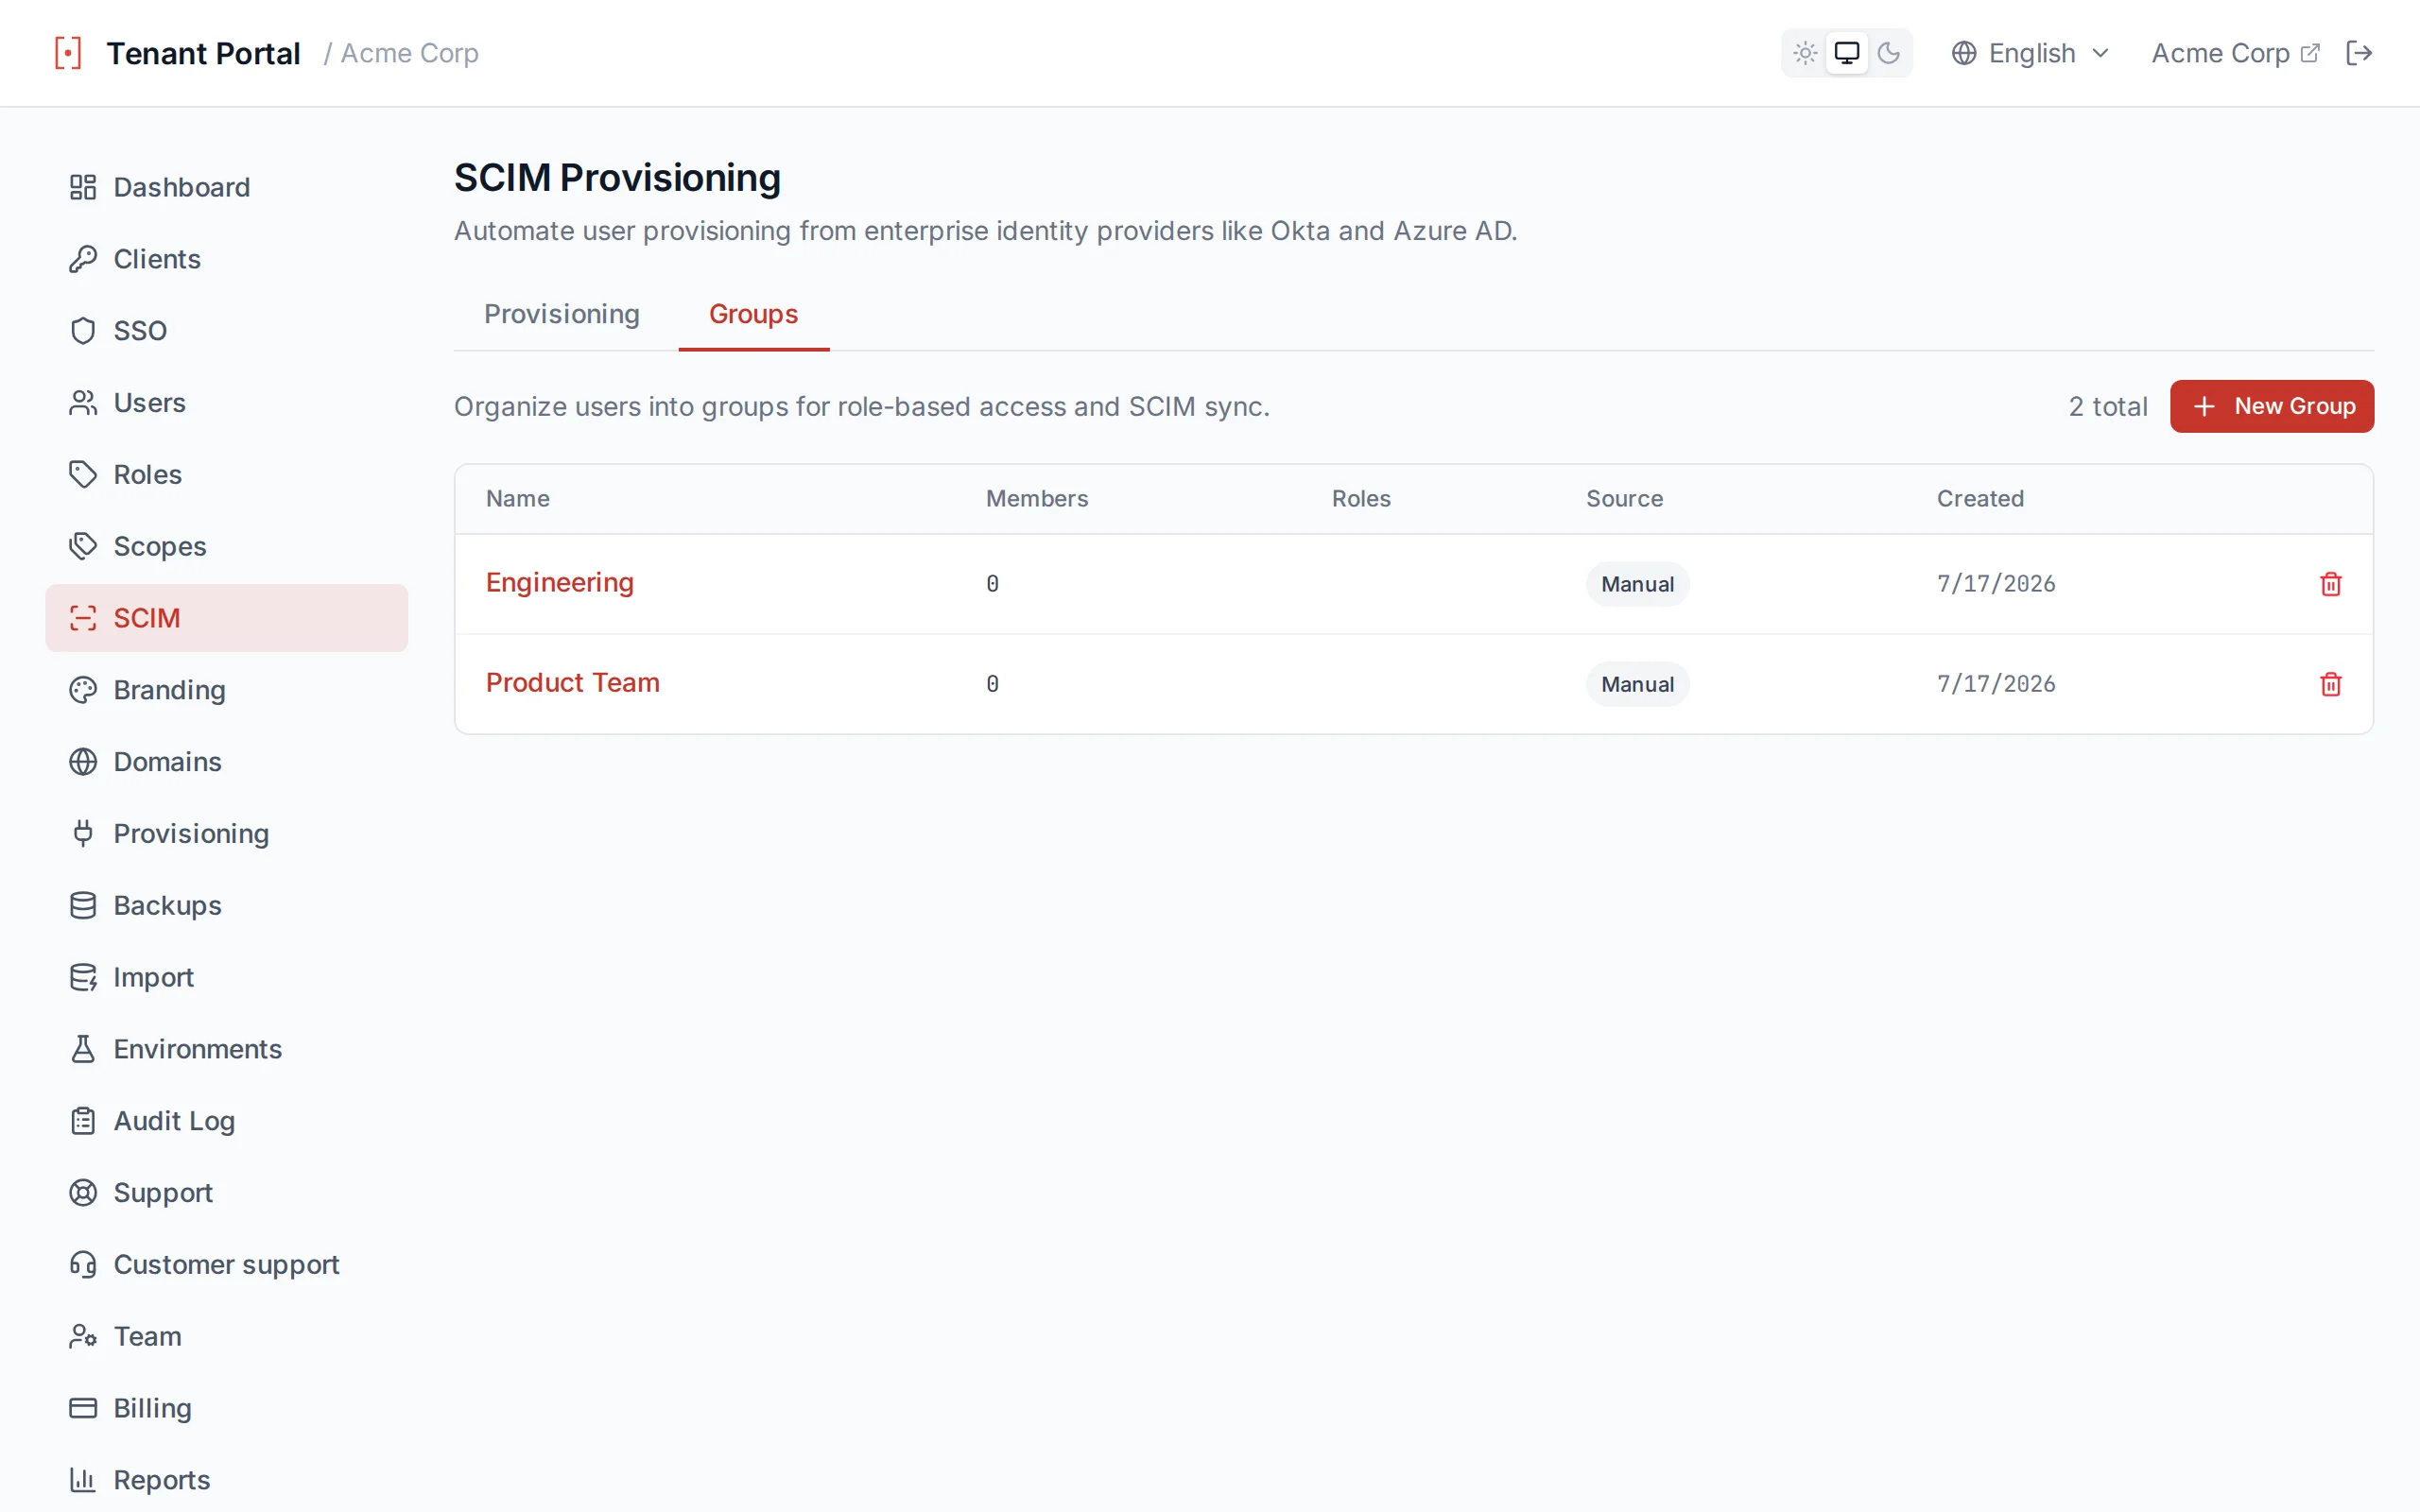
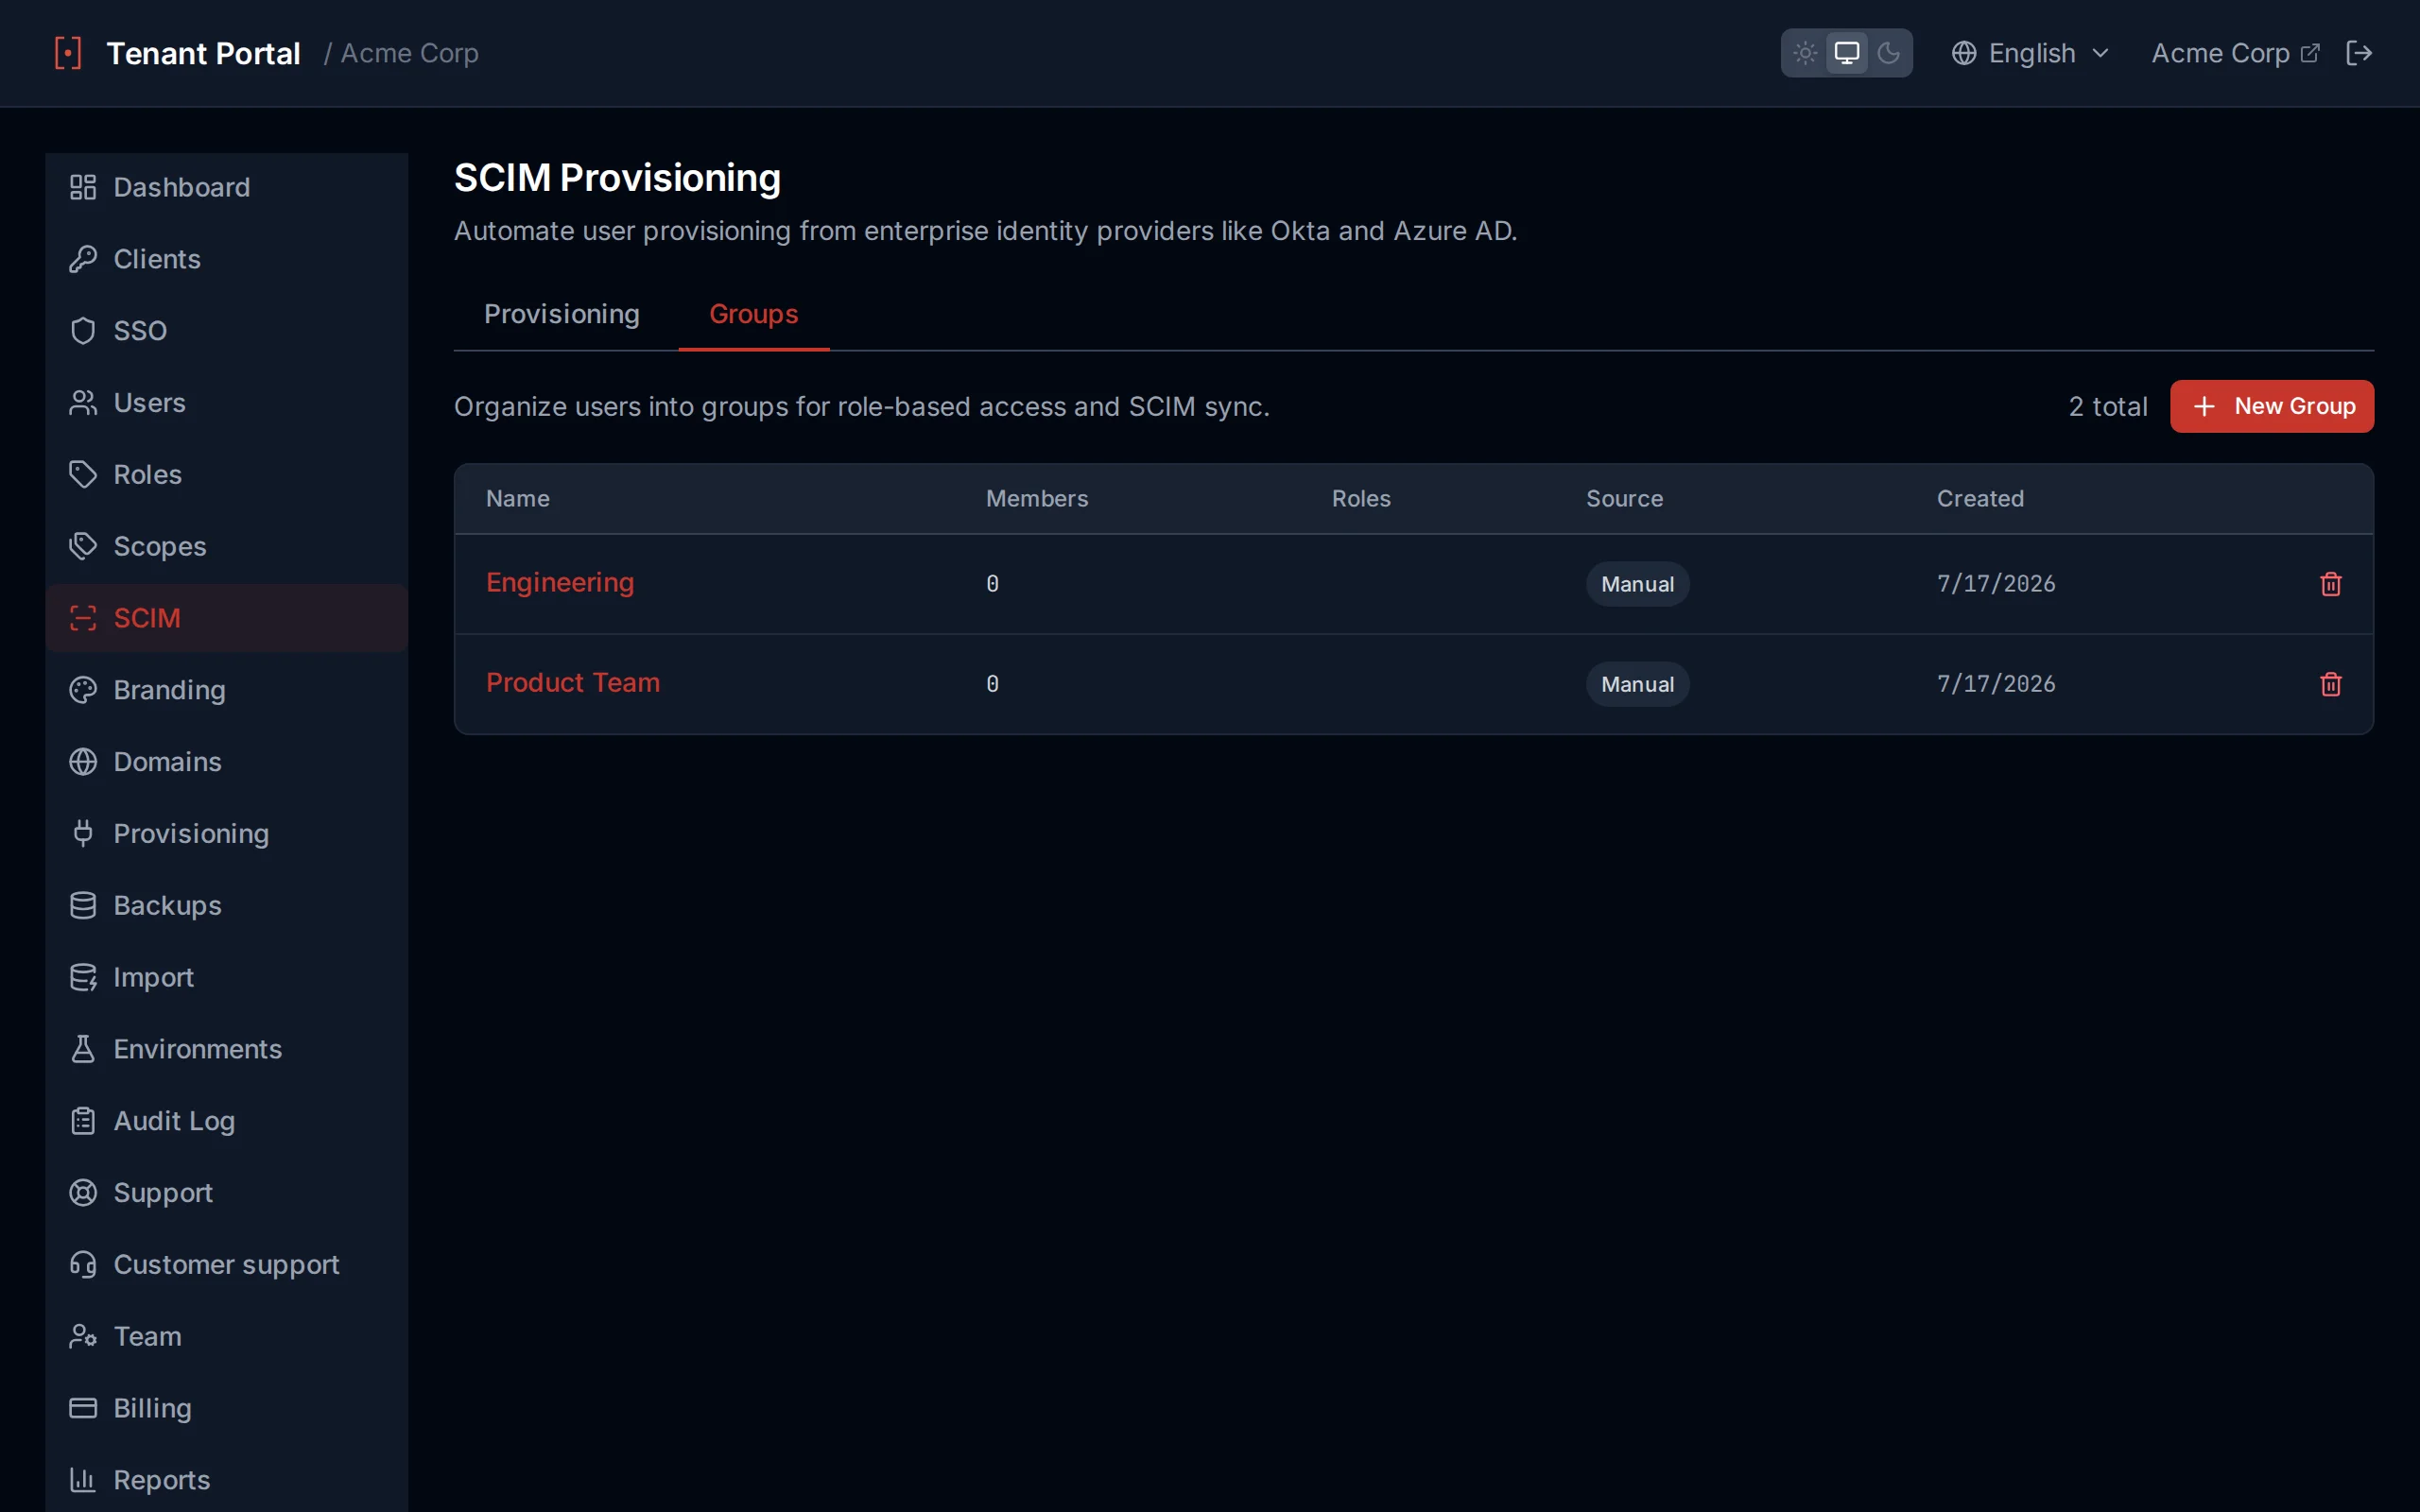
Group list with source indicators
Creating a Group
Click Create Group and enter a displayName for the group. Group names should be descriptive and unique within your tenant (e.g. "Engineering", "Billing Admins", "Beta Testers").
Group Detail & Members
Click any group to open the detail view. Here you can see all current members and manage membership:
- Add members — Enter a user ID to add a user to the group.
- Remove members — Click the remove button next to any member to remove them individually.
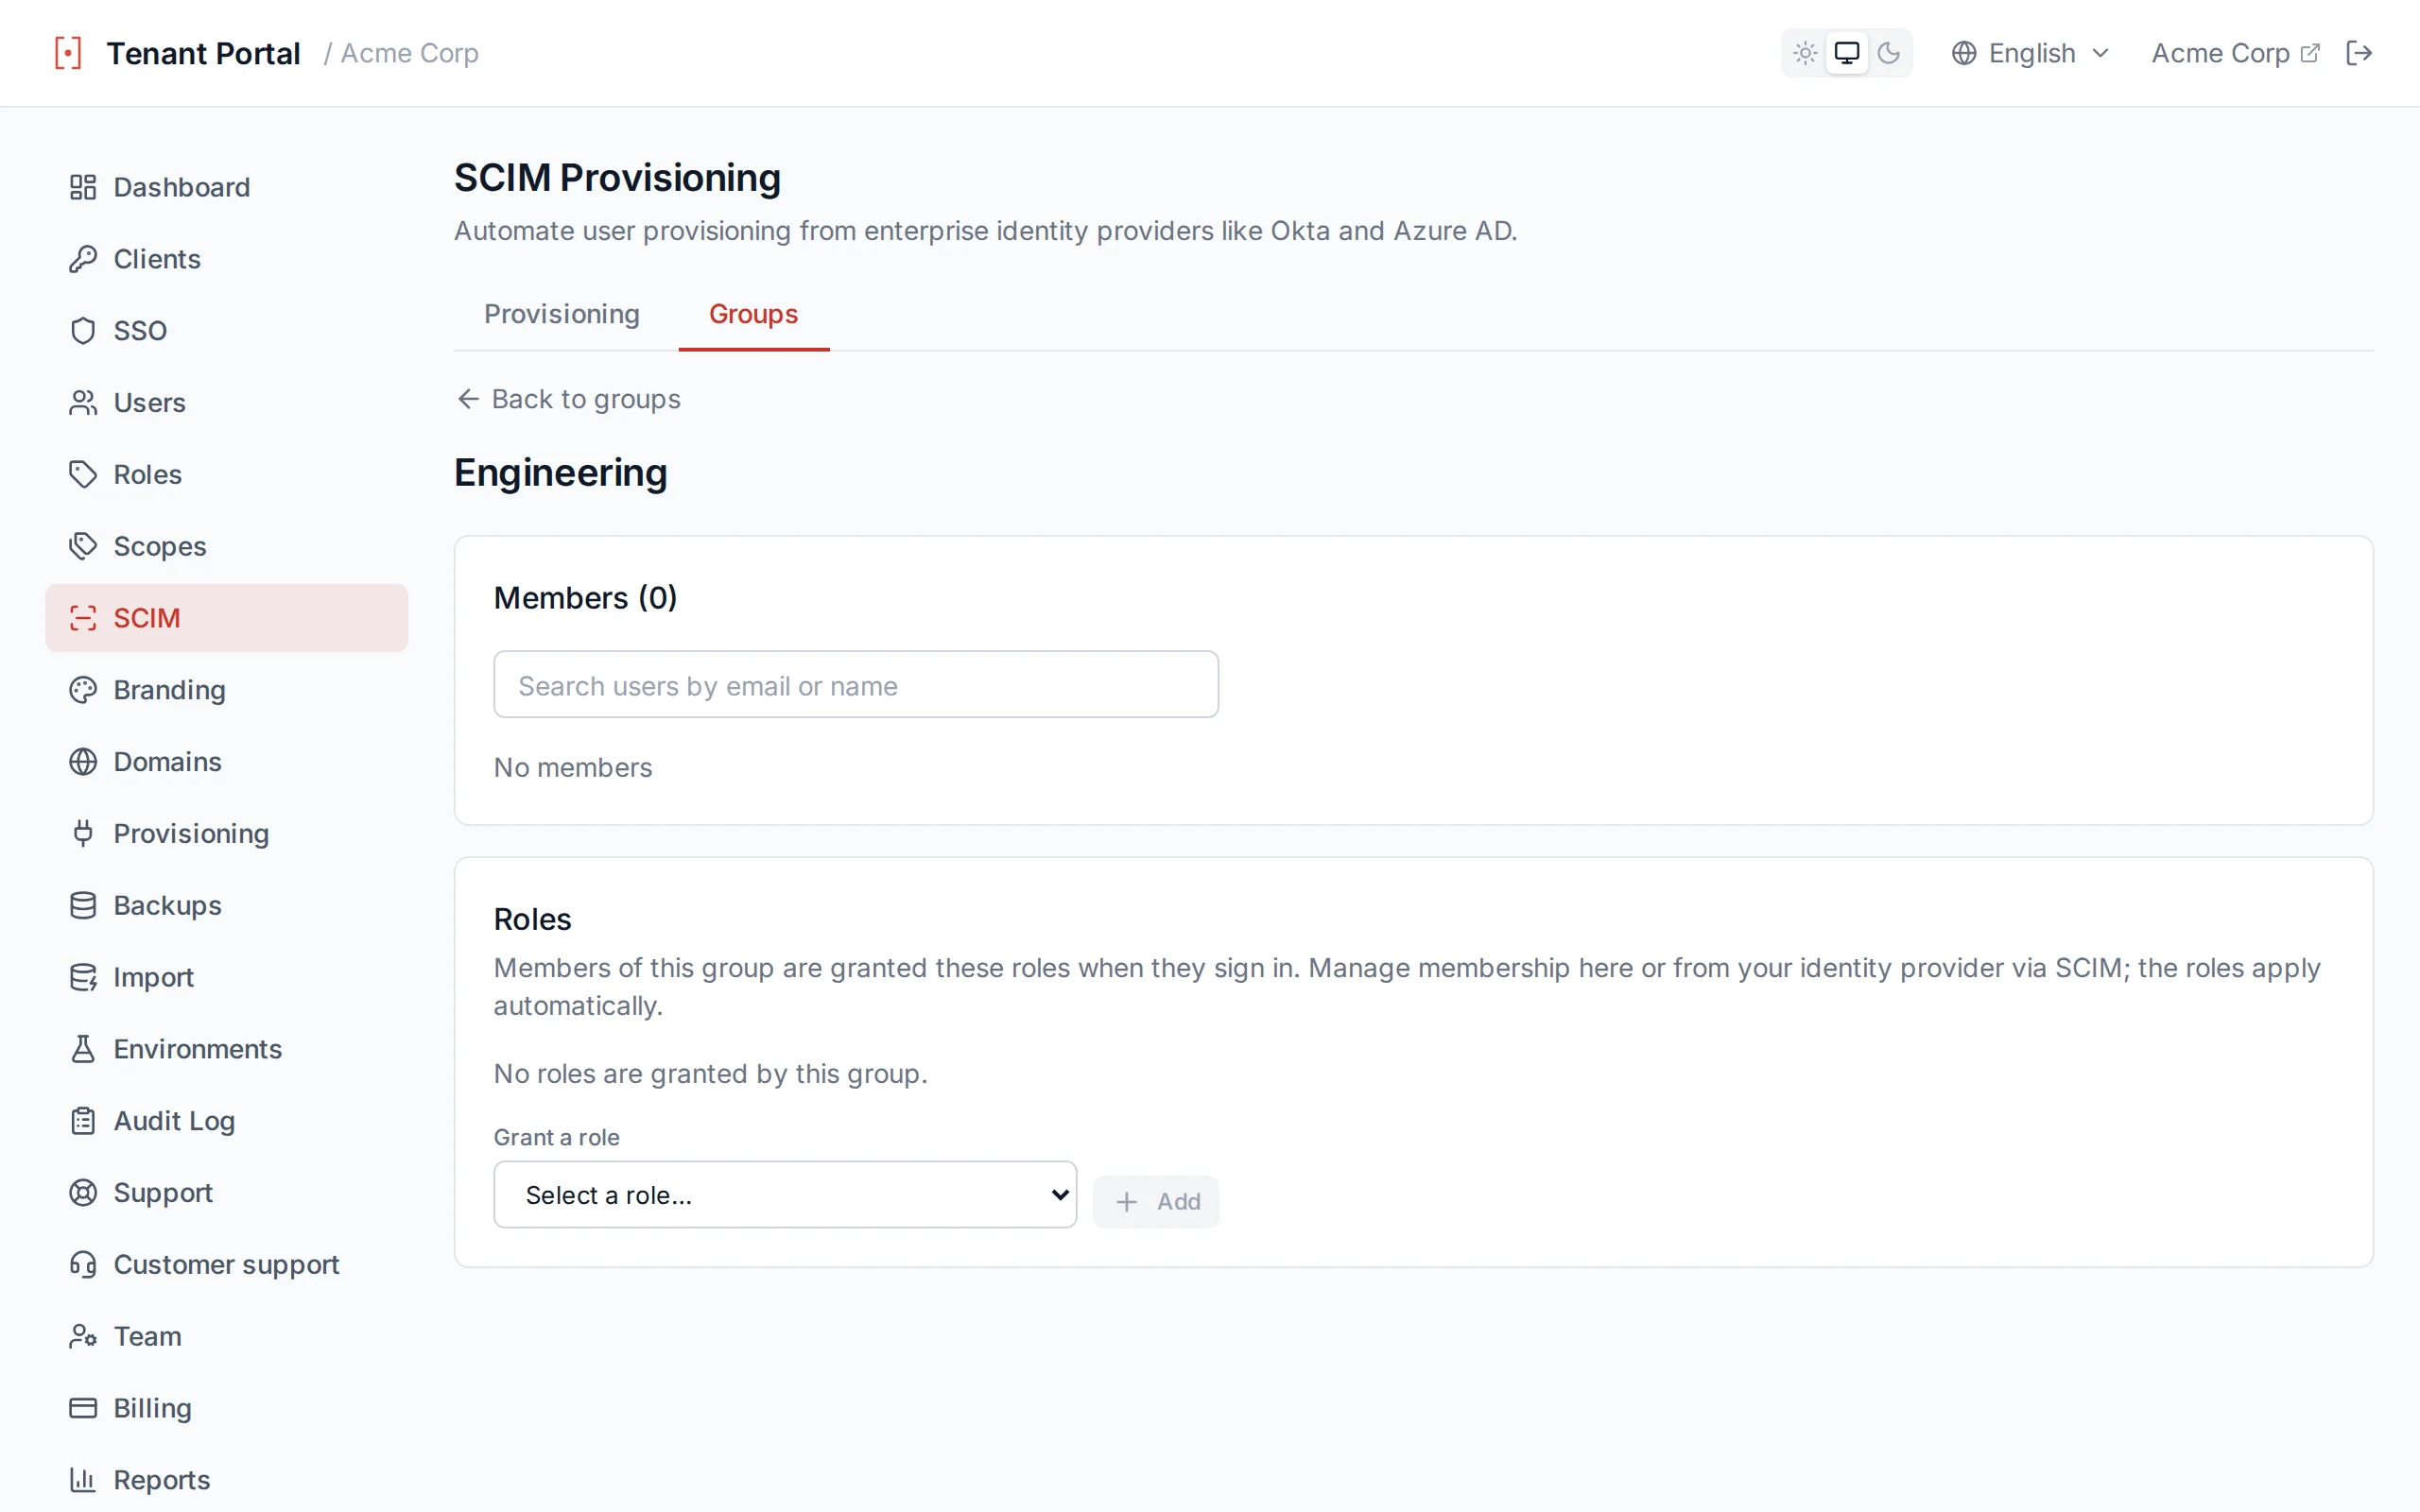
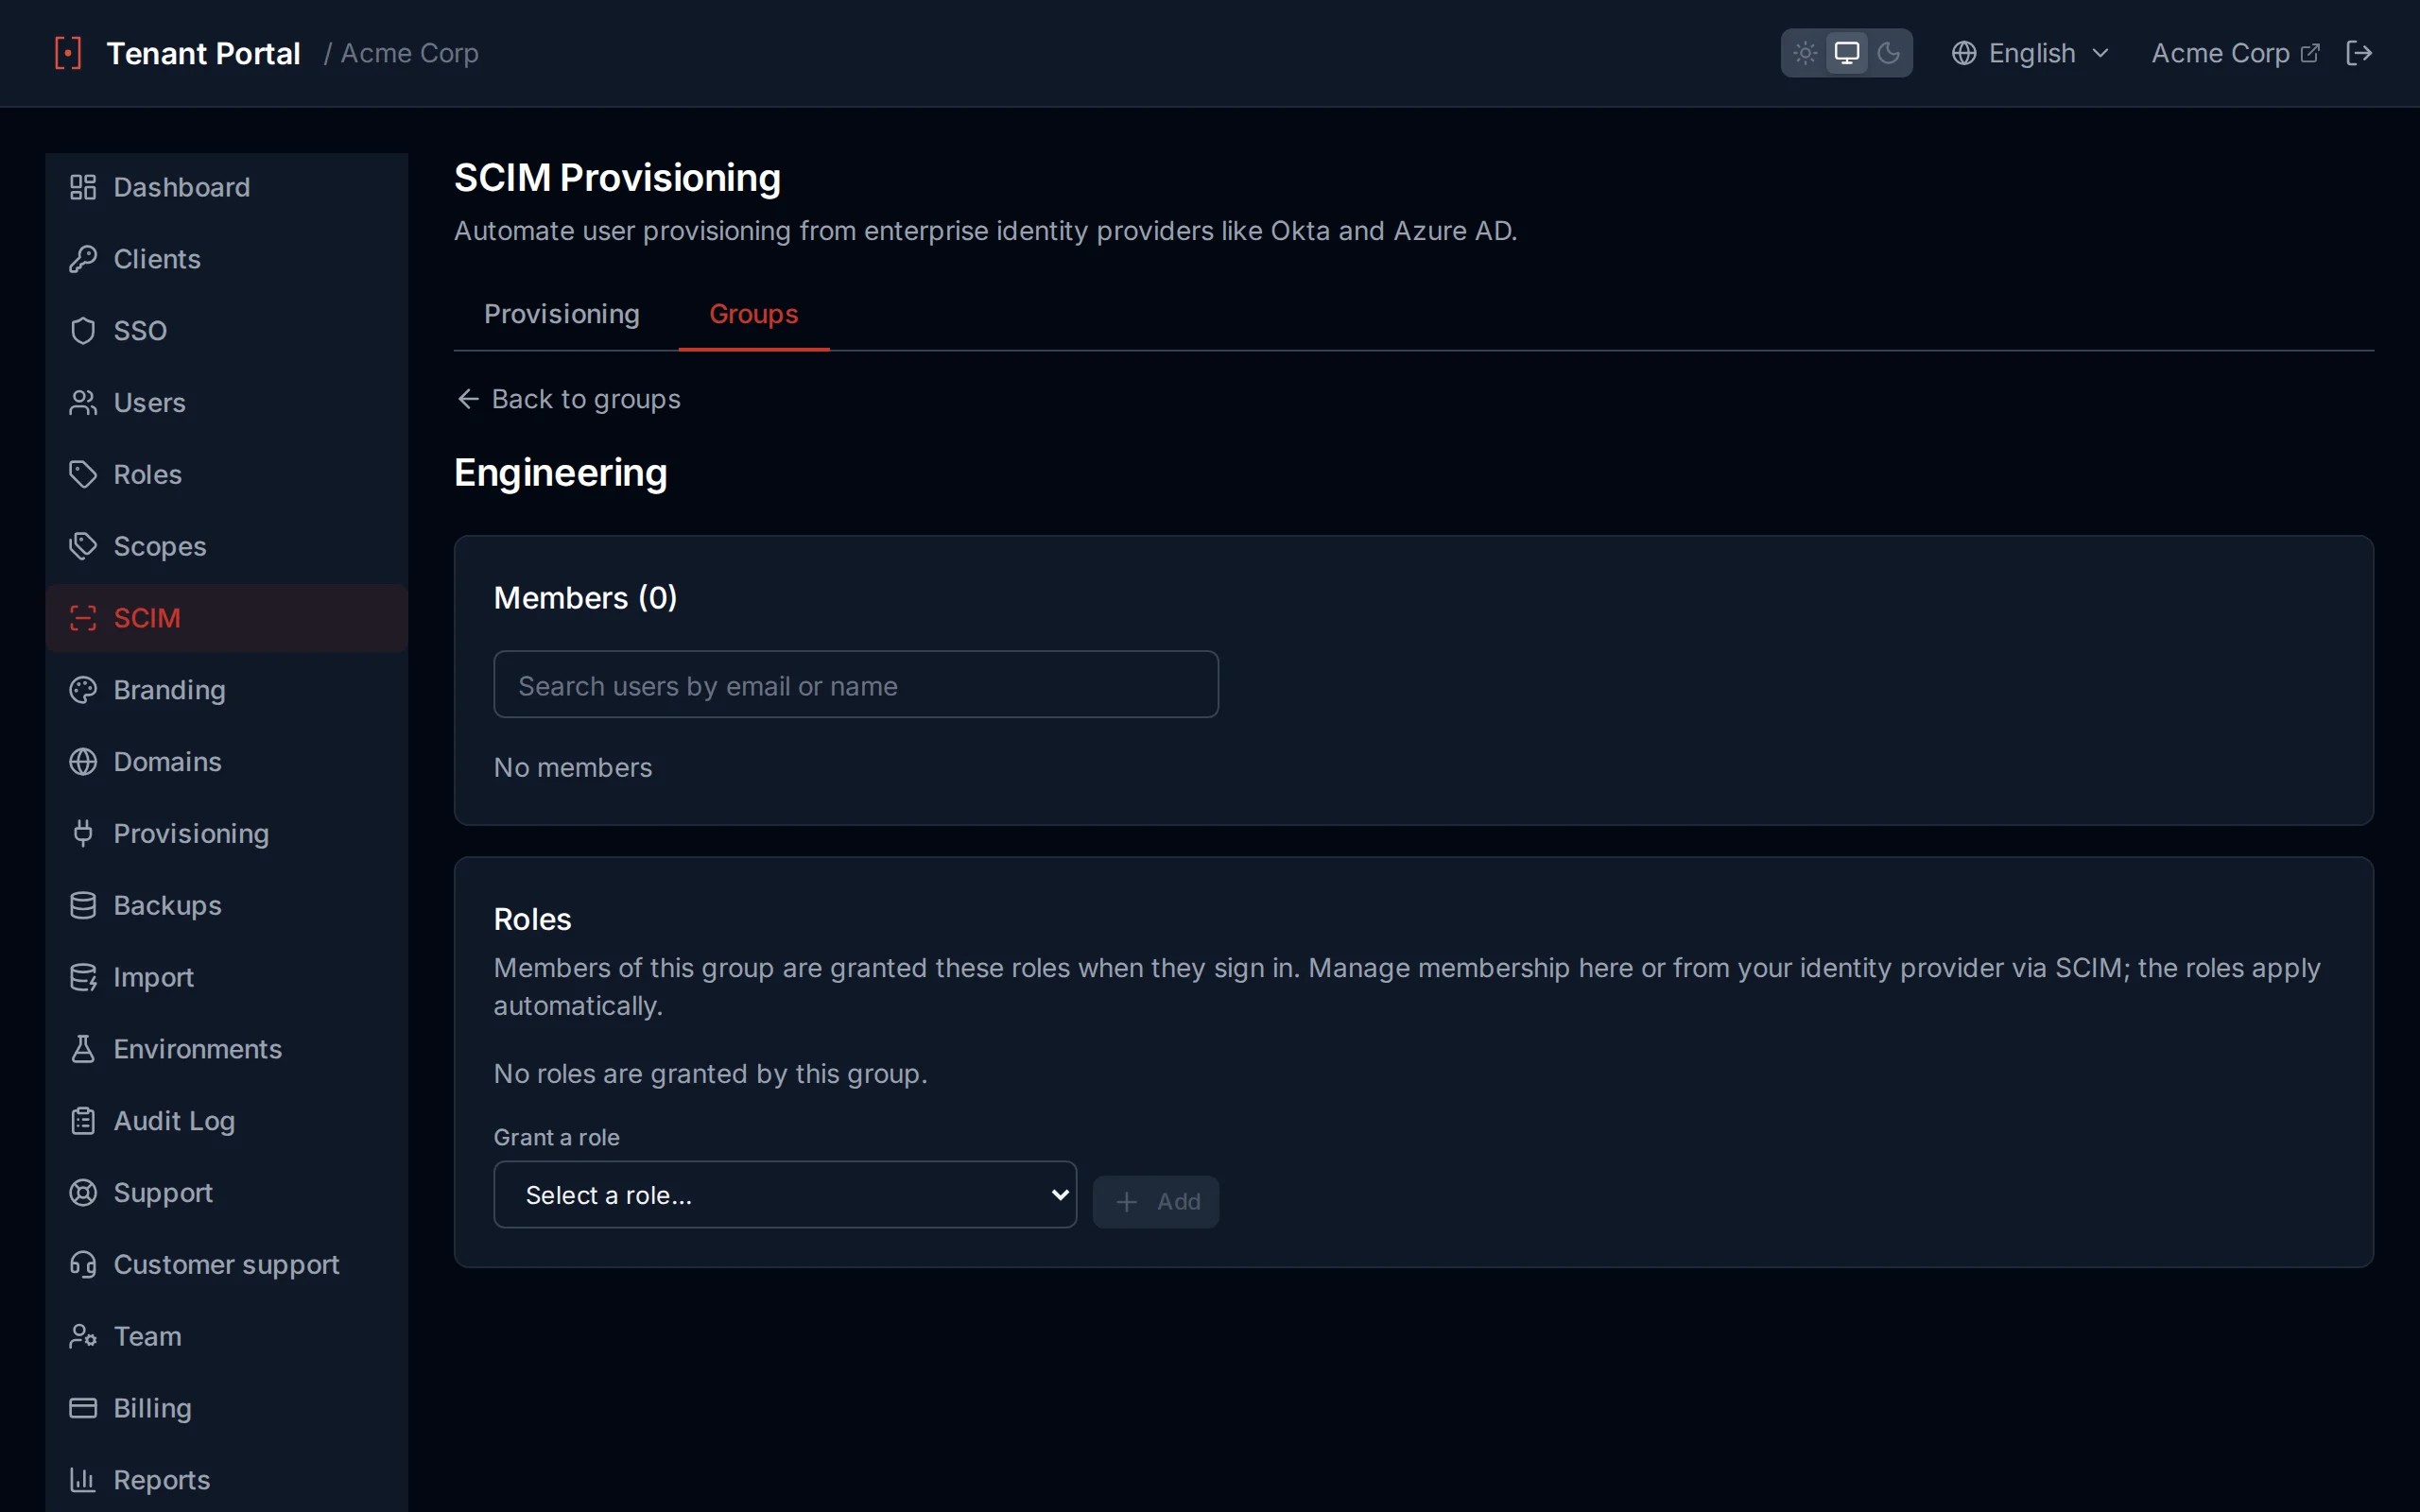
Manage group membership in the detail view
Groups in Tokens
When includeGroupsInTokens is enabled on a client, the ID token includes a groups claim containing the user's group memberships. Each entry includes the group id and name:
{
  "sub": "user-123",
  "email": "[email protected]",
  "groups": [
    { "id": "grp-001", "name": "Engineering" },
    { "id": "grp-002", "name": "Beta Testers" }
  ]
}
Enable per Client
includeGroupsInTokens setting is configured on each client individually. Navigate to the client's General Settings to enable it.Roles
Roles support role-based access control (RBAC) in your application. Define roles in Authagonal, assign them to users, and use the roles claim in tokens to enforce authorization in your application logic.
Managing Roles
The Roles page displays a table of all defined roles with inline editing. Each role has:
| Column | Description |
|---|---|
| Name | A unique identifier for the role (e.g. "admin", "editor", "viewer") |
| Description | A human-readable description of what the role grants |
| Created | The date the role was created |
Creating a Role
Click Create Role and provide a name and description. Role names should be concise and follow a consistent naming convention across your application (e.g. lowercase with hyphens: billing-admin).
Inline Editing
Roles support inline editing directly in the table. Click the pencil icon on any role to enter edit mode — the name and description fields become editable. Modify the values, then click the checkmark icon to save. Changes take effect immediately.
Deleting a Role
Click the delete icon on any role to remove it. You will be asked to confirm before the role is permanently deleted. Removing a role does not retroactively invalidate existing tokens — the role will be absent from new tokens issued after deletion.
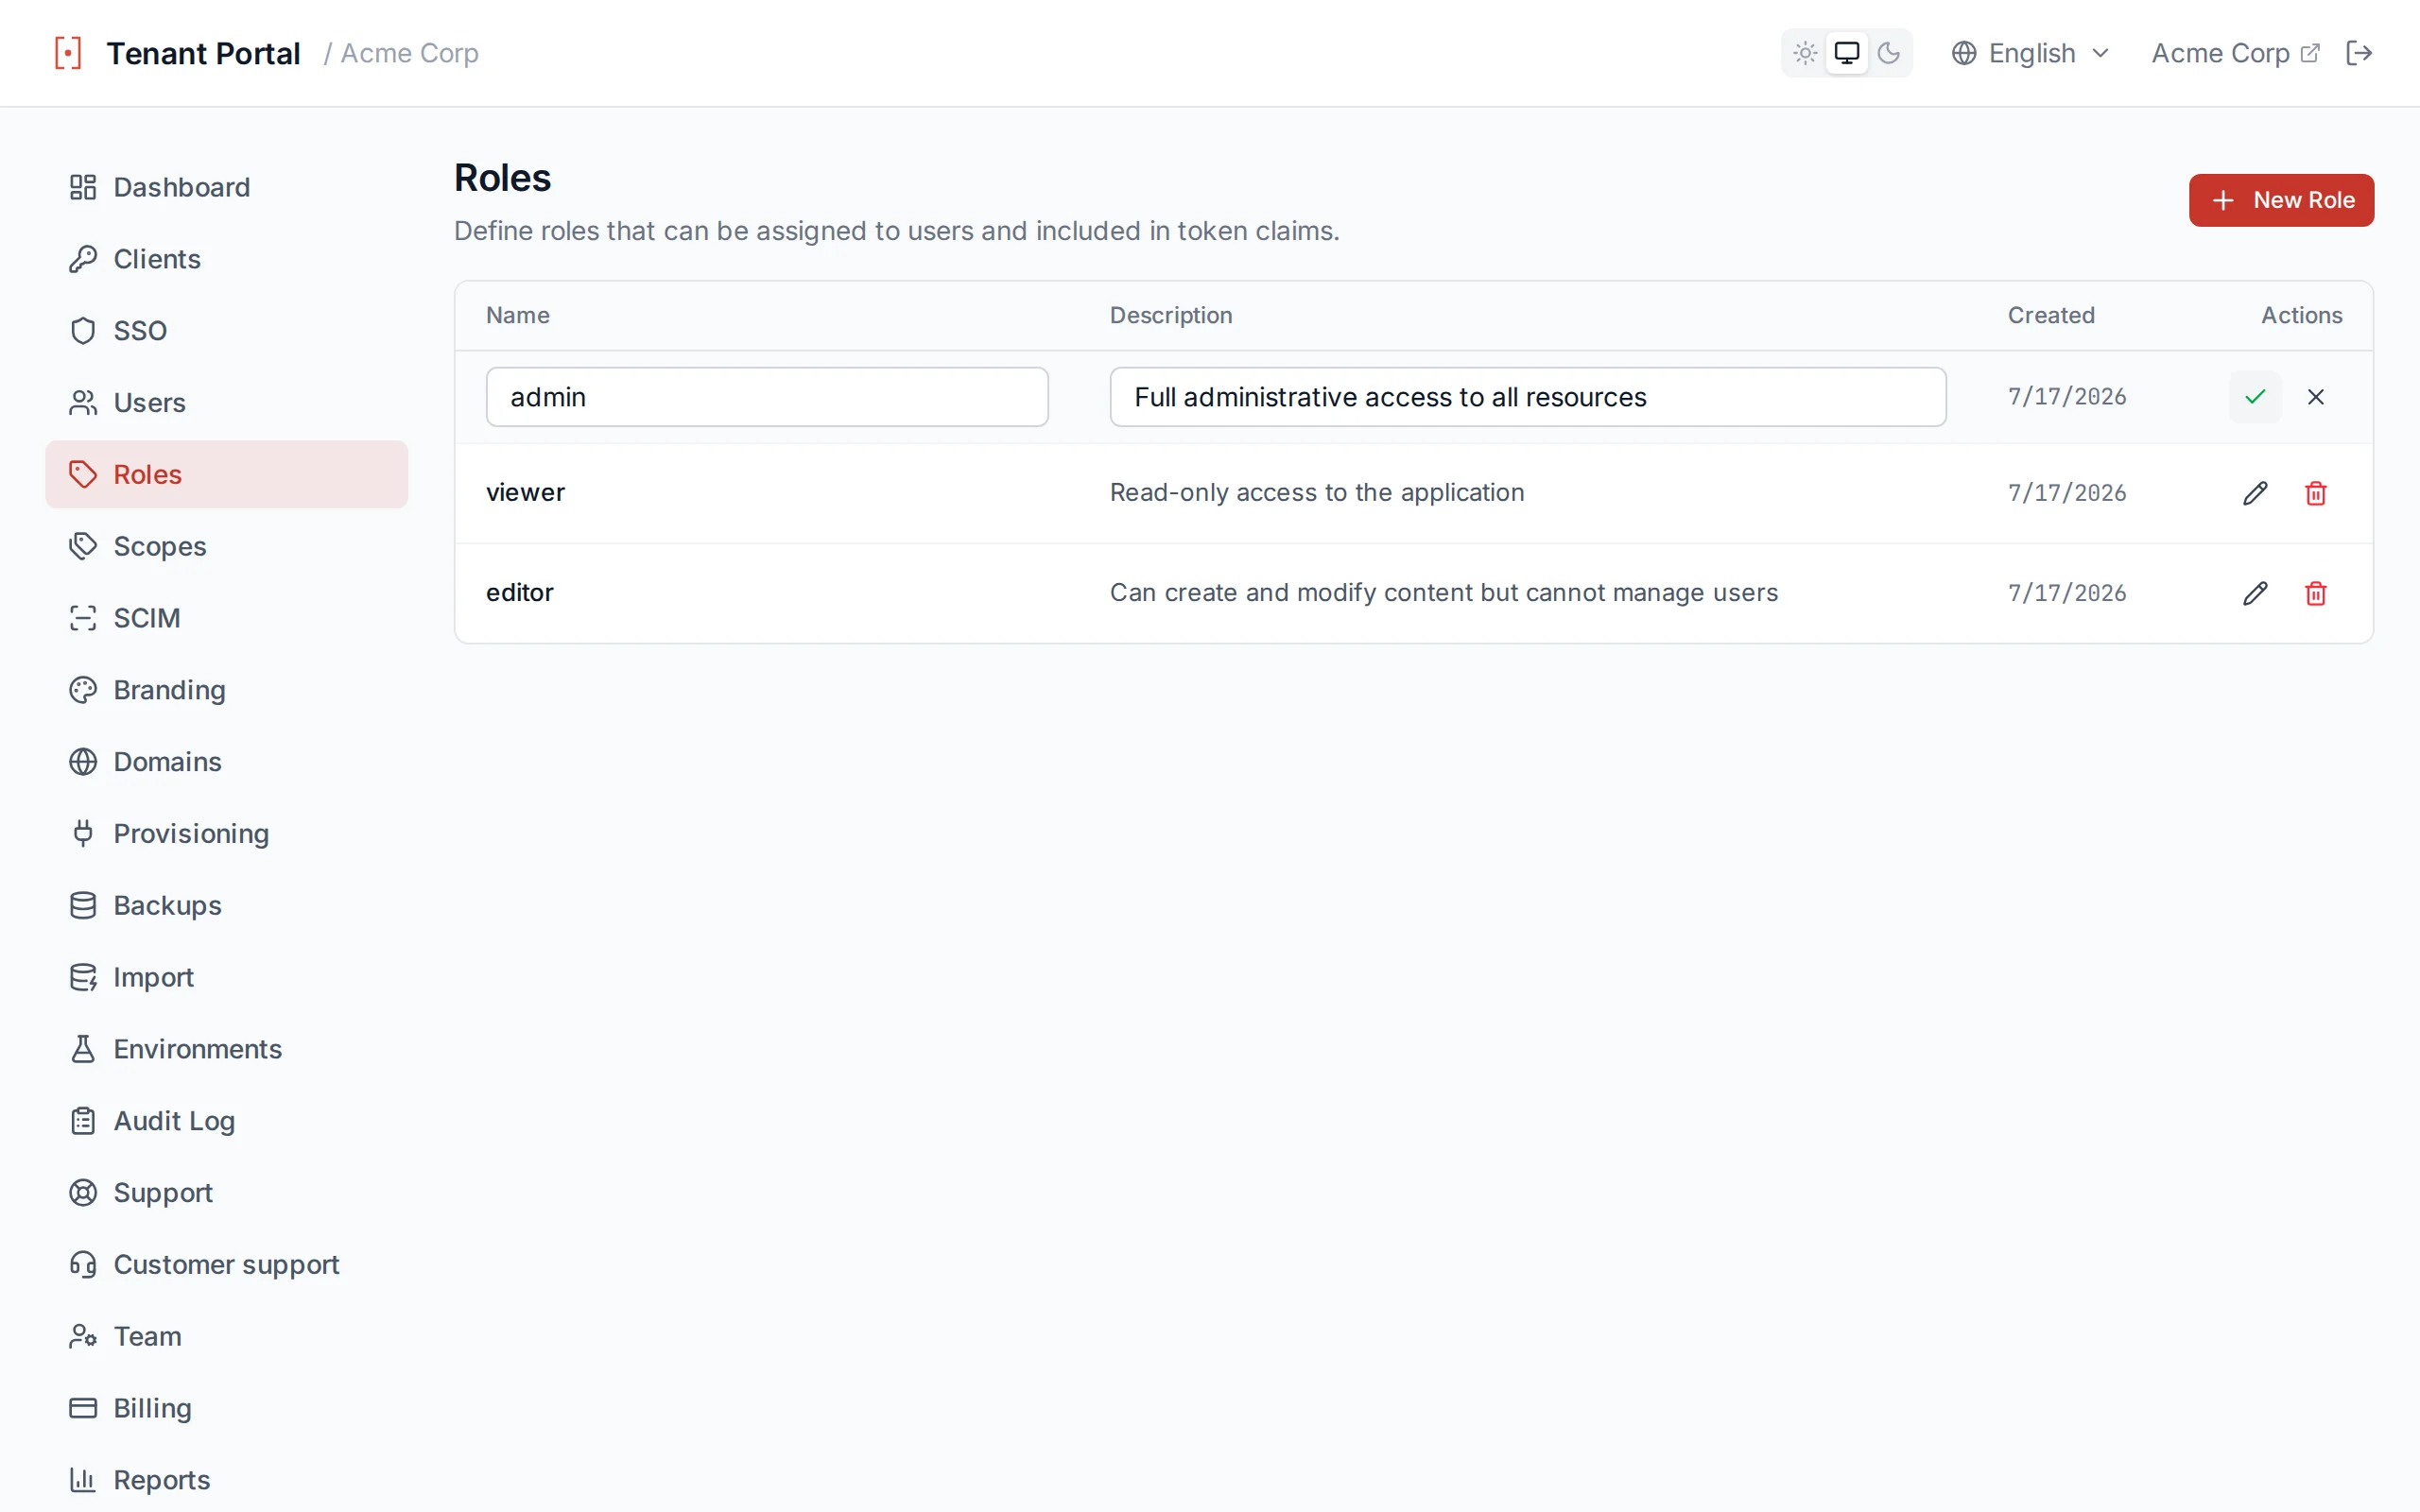
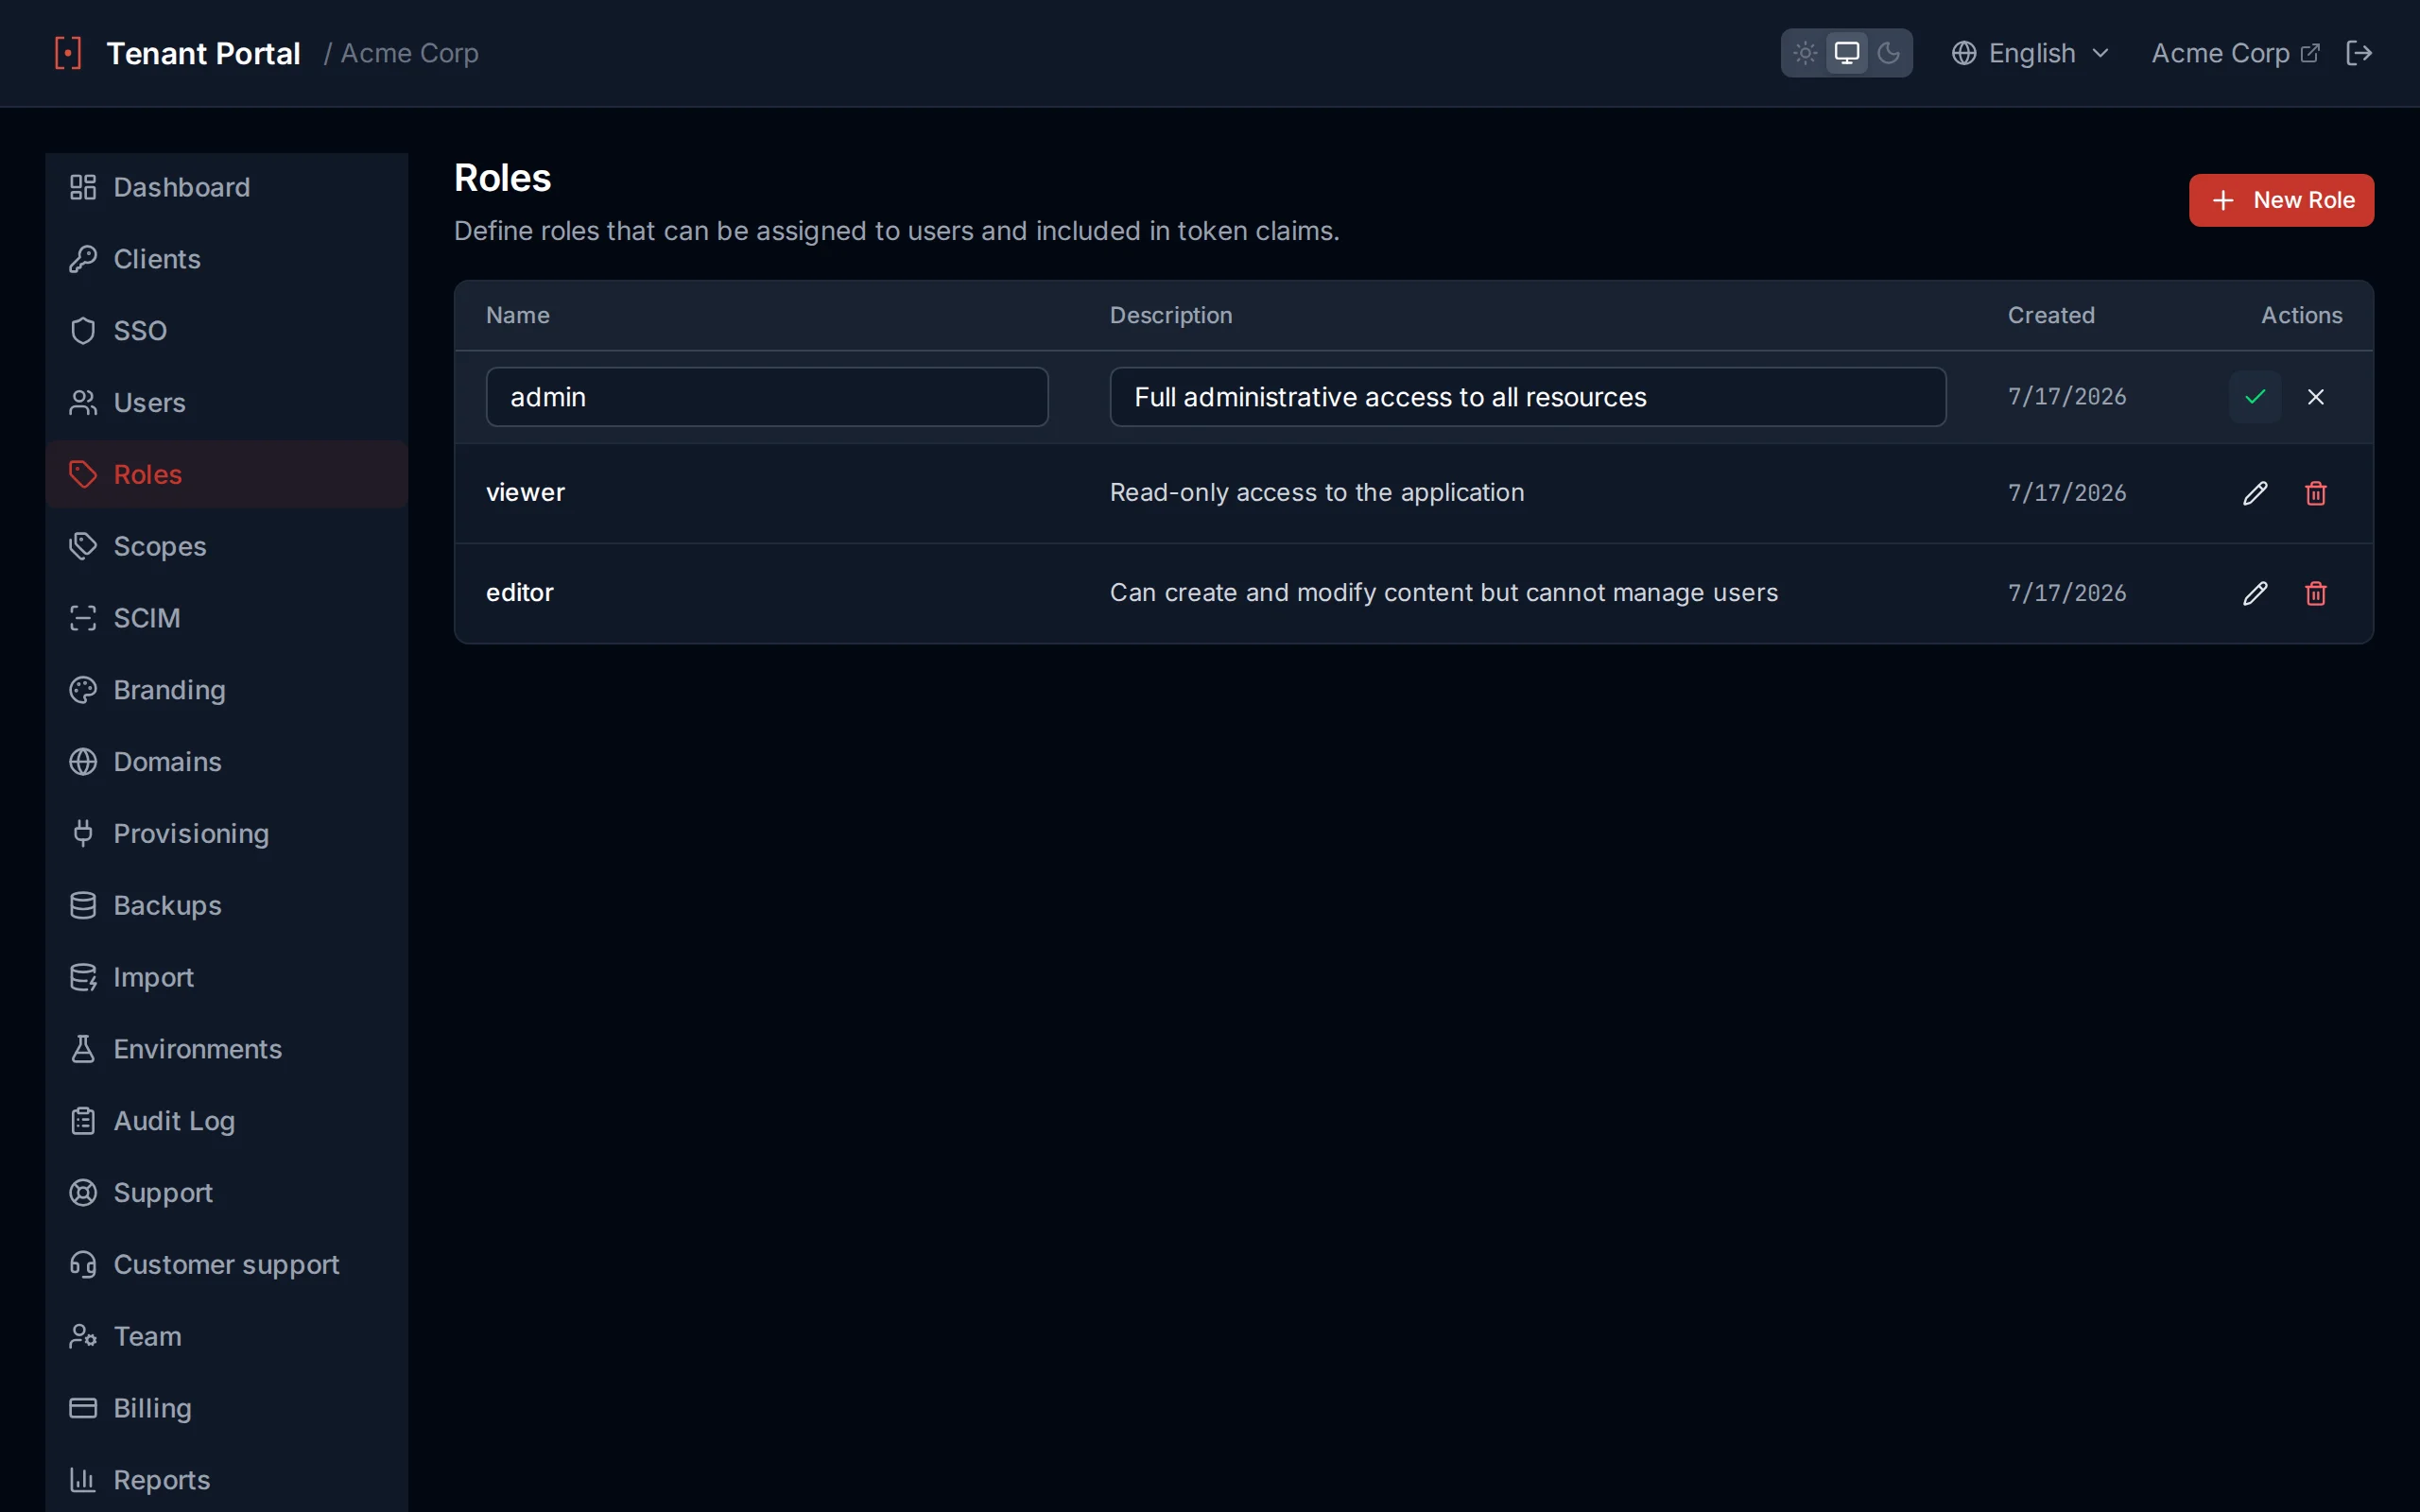
Inline editing of roles in the roles table
Roles in Tokens
Roles assigned to a user are included as a roles claim in the ID token. Your application can read this claim to make authorization decisions:
{
  "sub": "user-123",
  "email": "[email protected]",
  "roles": ["admin", "billing-admin"]
}
SCIM Provisioning
SCIM 2.0 (System for Cross-domain Identity Management) enables automatic user and group provisioning from enterprise identity providers like Okta, Azure AD, OneLogin, and JumpCloud. When configured, user accounts and group memberships are automatically synced from the upstream IdP to your Authagonal tenant.
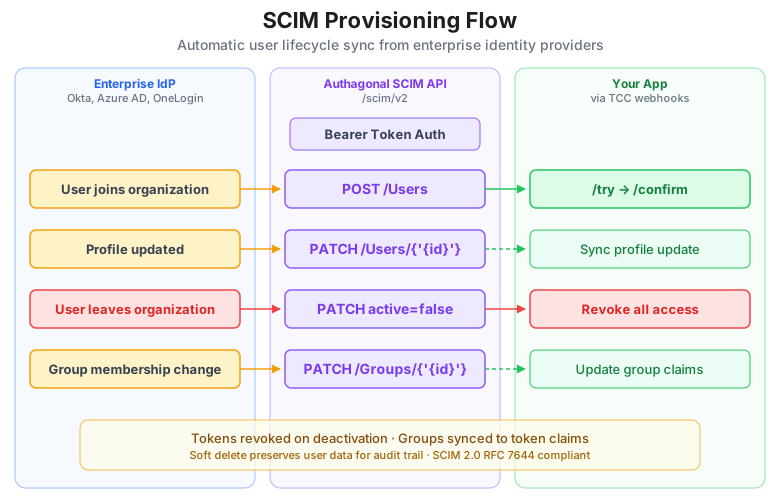
SCIM user lifecycle sync with downstream provisioning
Setup Steps
Follow these steps to enable SCIM provisioning for a client:
- Select the client application — Choose the OAuth client that the SCIM provisioning will be associated with.
- Generate a SCIM token — Provide a description and an expiry period in days, then generate the token.
- Copy the token immediately — The raw token value is displayed only once. Copy it before closing the dialog.
- Configure your IdP — In your identity provider's SCIM settings, enter the base URL and bearer token.
- Test user sync — Trigger a test sync from your IdP and verify that users appear in the Authagonal portal.
SCIM Base URL
Configure your identity provider with the following base URL:
https://{slug}.authagonal.io/scim/v2Replace {slug} with your tenant slug.
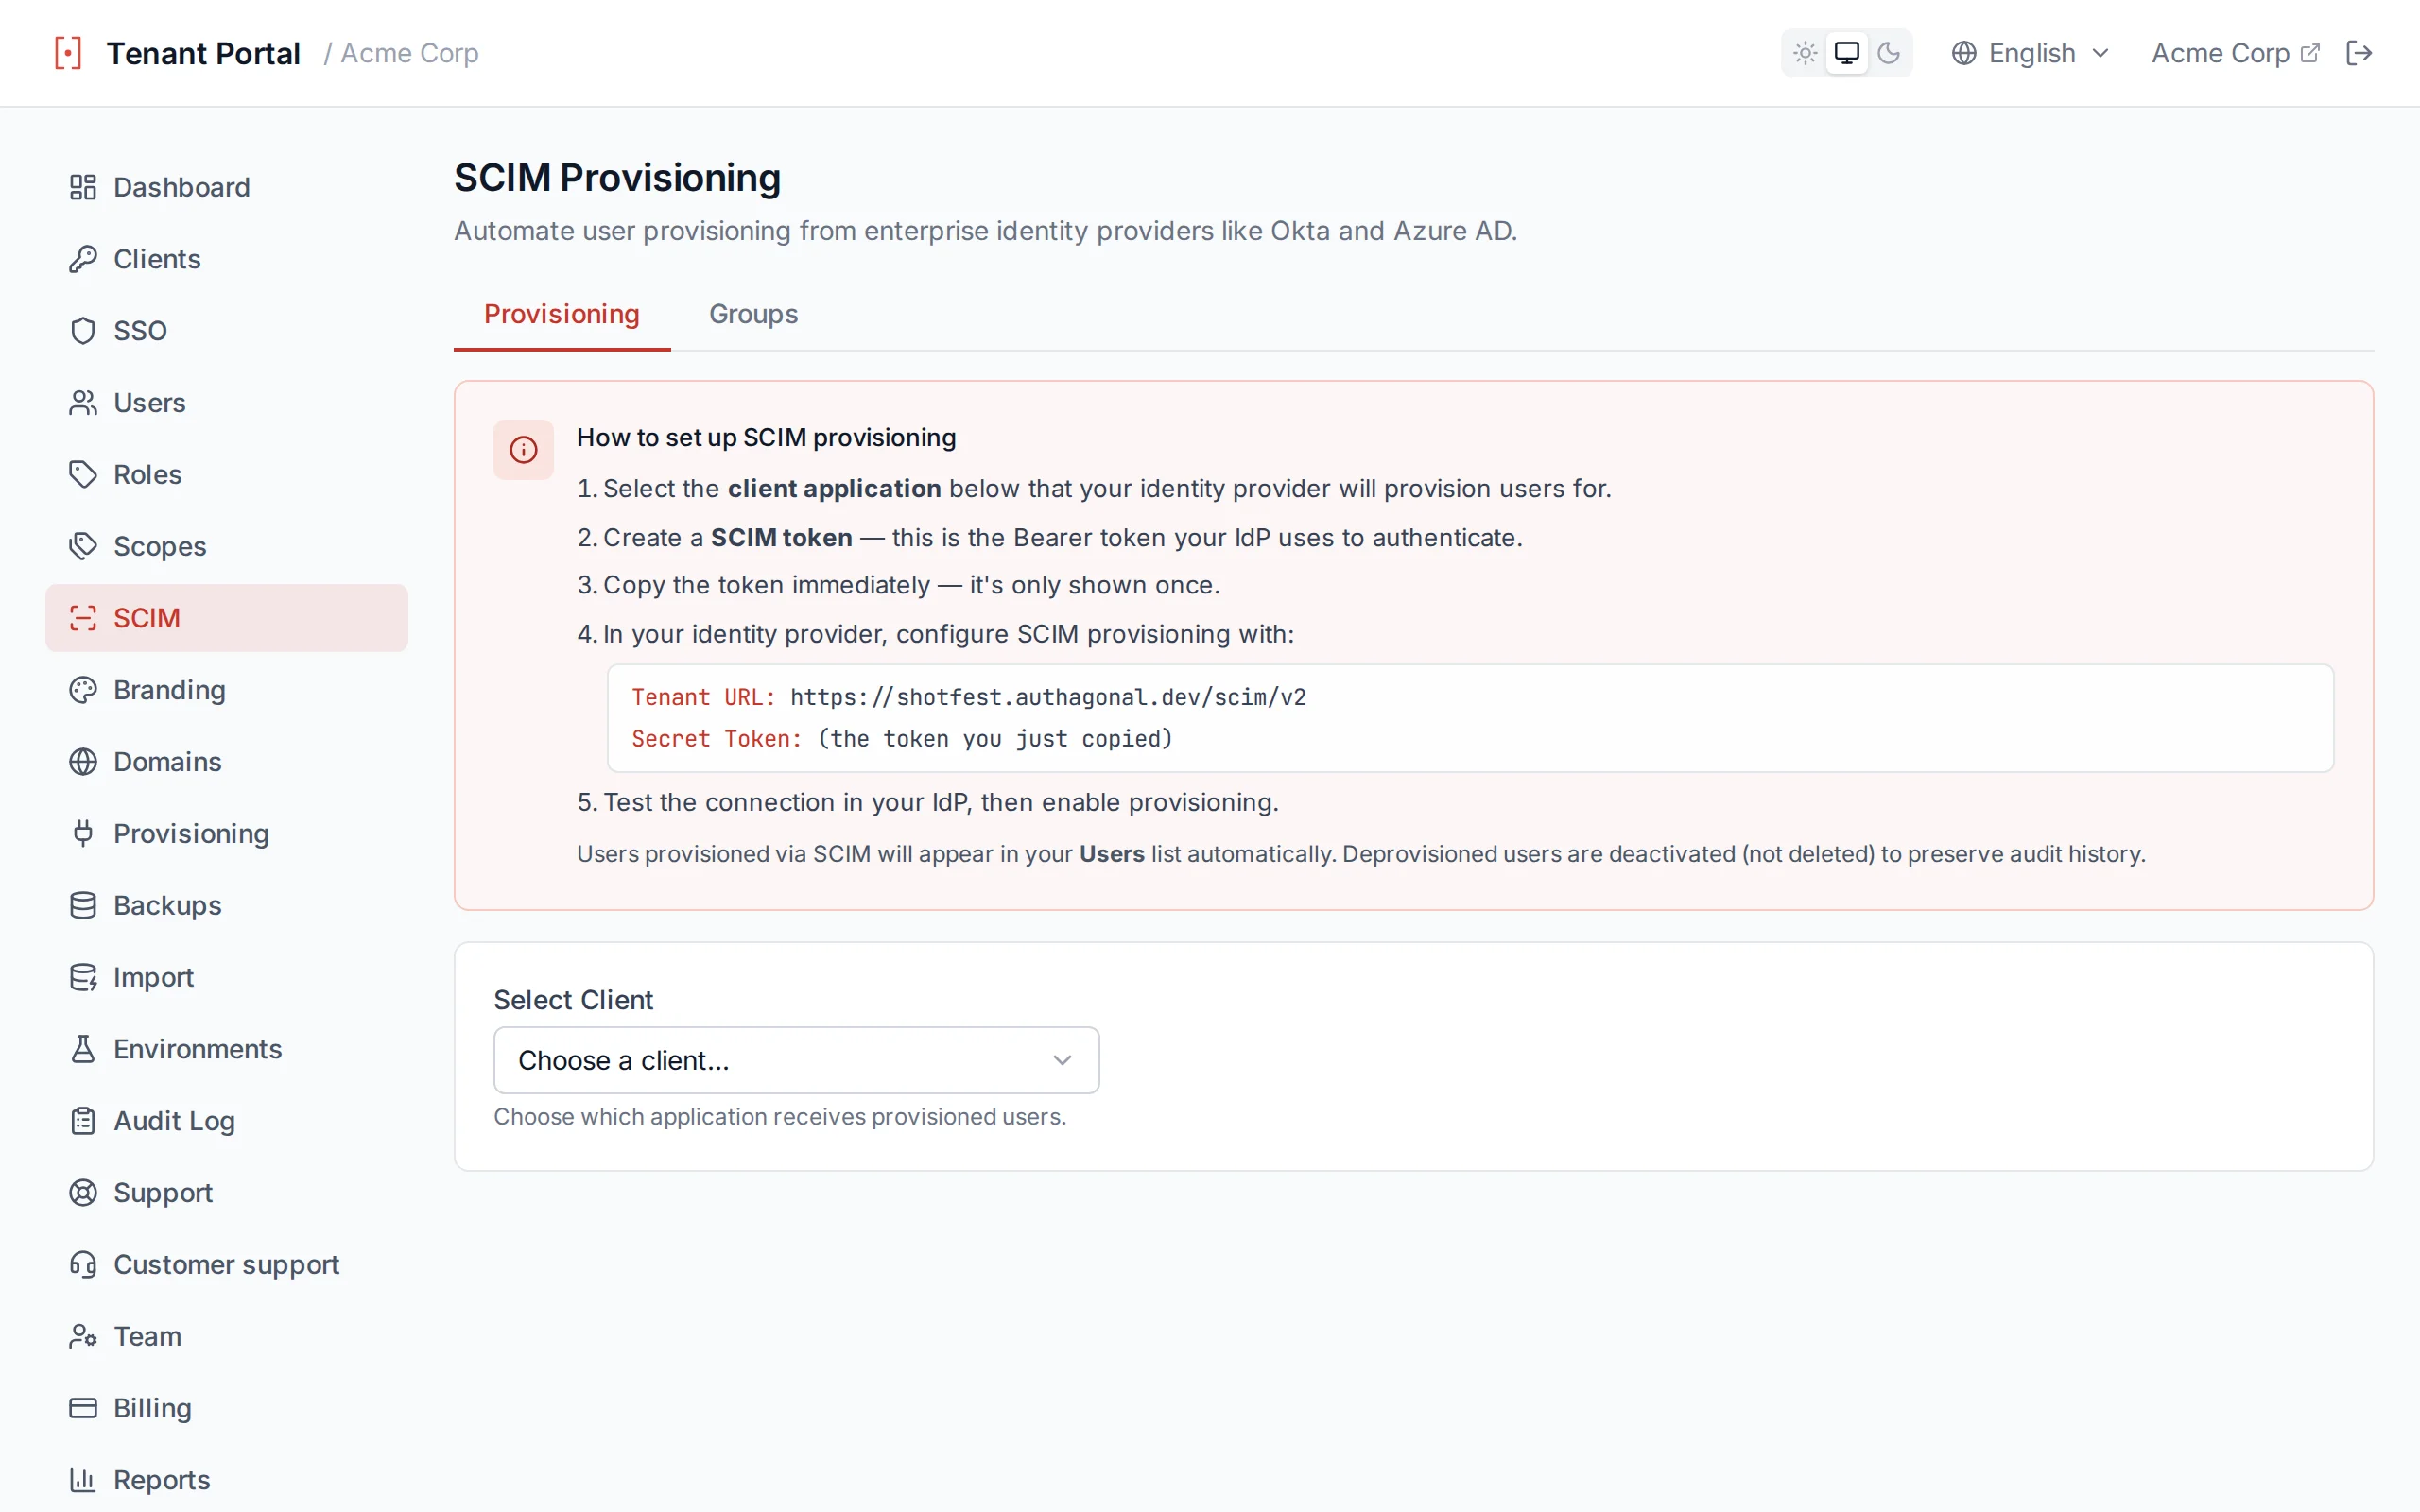
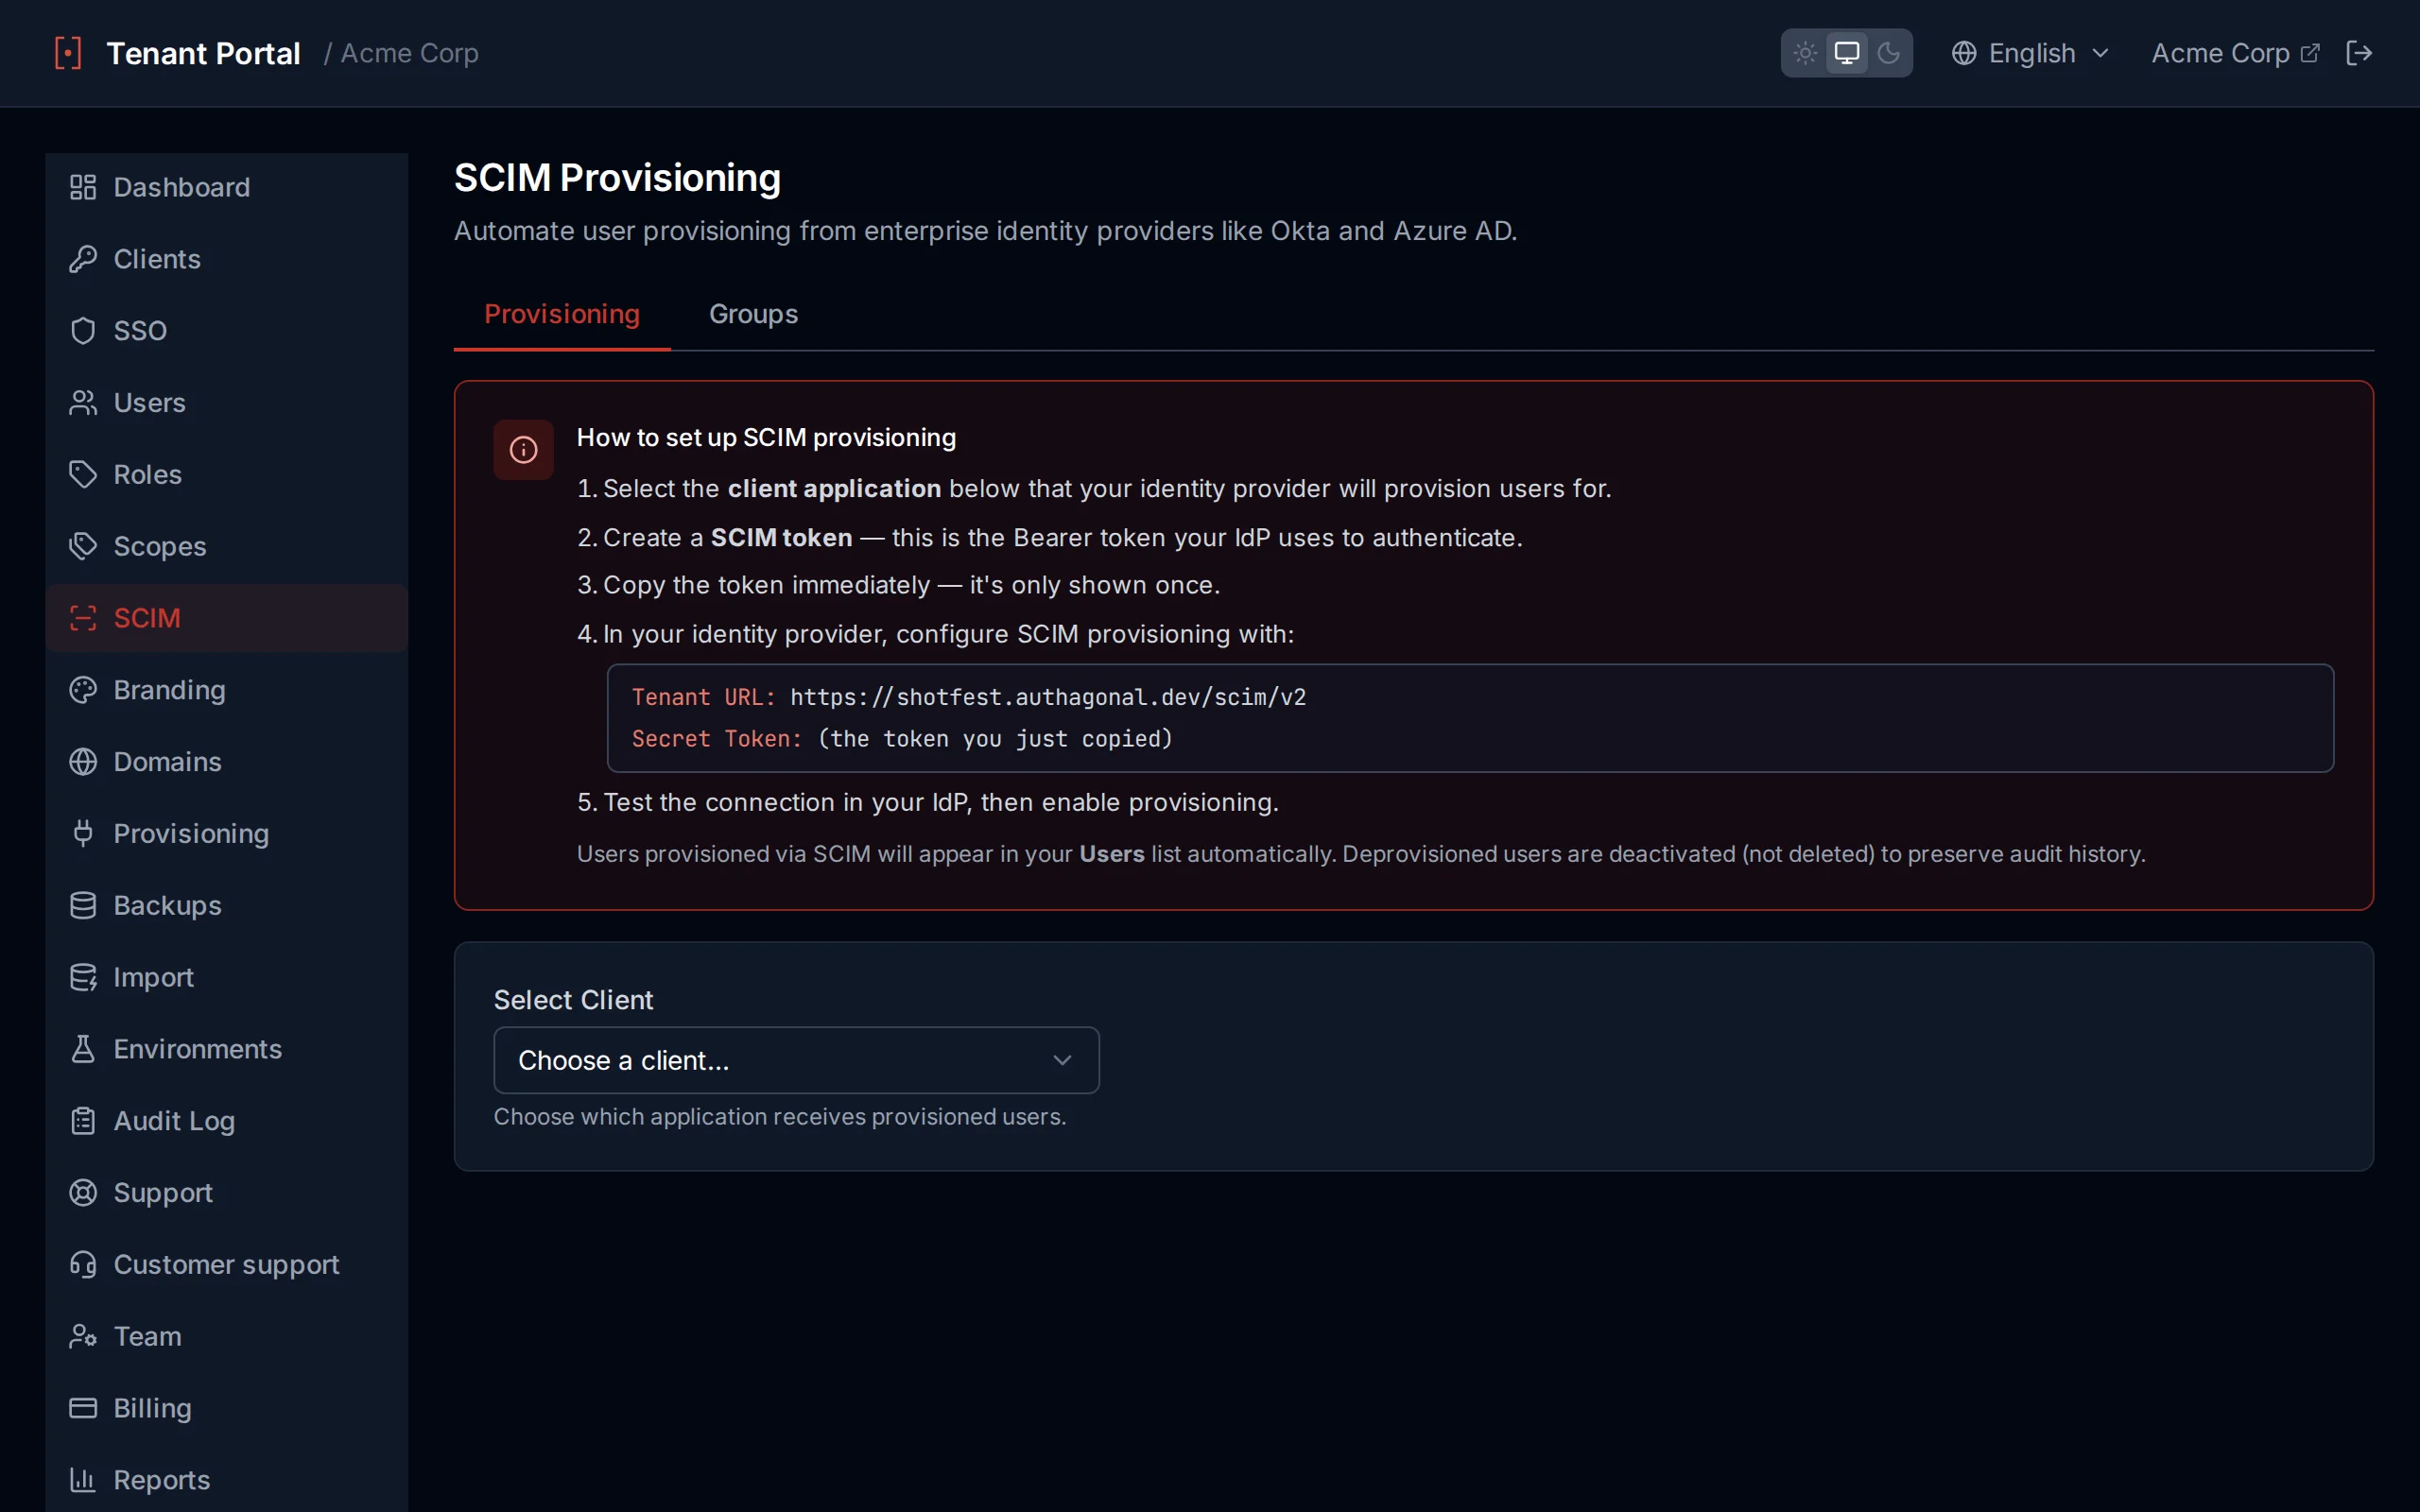
SCIM setup page with token generation
Token Management
SCIM tokens authenticate provisioning requests from your IdP. You can manage multiple tokens per client:
| Field | Description |
|---|---|
| Description | A label to identify the token (e.g. "Okta Production SCIM") |
| Expiry | Token lifetime in days (1 to 3650). Leave blank or set a long value for tokens that should not rotate frequently. |
| Status | Active tokens are in use. Revoked tokens display a Revoked badge and can no longer authenticate requests. |
To revoke a token, click the Revoke button next to it. Revoked tokens remain visible in the list for audit purposes but immediately stop accepting requests.
Token management with active and revoked token indicators
Copy Token Immediately
Testing Connectivity
Verify that your SCIM integration is working by querying the ServiceProviderConfig endpoint:
curl -H "Authorization: Bearer YOUR_TOKEN" \
  https://acme.authagonal.io/scim/v2/ServiceProviderConfig
A successful response returns a JSON document describing the supported SCIM features, including bulk operations, filtering, and change password capability.
Preferred Language
preferredLanguage attribute (falling back to locale) maps to the user's stored language. SSO users provisioned through SCIM automatically receive localised emails in the language their IdP sends.What a credential can see
A SCIM credential only sees the users and groups it provisioned. Reading, updating or deleting a user another connector created answers 404, listing returns only its own, and a group's membership may only name users the same connector provisioned. Accounts created any other way, by an administrator, by self-service signup or by SSO just-in-time provisioning, are invisible to SCIM entirely.
That boundary is per client, not per token. Two credentials issued against the same client are one identity with two secrets, and each can modify what the other created. Give mutually untrusted connectors a client each. externalId is scoped the same way, so two connectors may each use ext-001 for different people without colliding.
Deprovisioning
DELETE /scim/v2/Users/{id} deactivates the account and marks it deleted. The record is kept, as RFC 7644 allows, but it answers 404 for every subsequent operation and is omitted from listings. Their MFA enrolments and group memberships are purged, their externalId mapping is released, and any issued tokens are revoked, so access ends immediately rather than at the next token expiry.
If the same person is later re-hired and re-created, they get a new user id. Identifiers are never recycled: the id is the subject in every token you have ever issued, so reusing it would silently give the new joiner the previous holder's history at every application that trusts it.
Tagging synced users with an organization
SCIM has no way for a connector to say which of your customers it is syncing. Core SCIM defines no organization attribute, so a plain user create tells you the person's name and email and nothing about who they belong to. If several customers provision into your tenant, their users arrive indistinguishable.
The credential answers it instead of the request. When you create a SCIM token, set Organization to an identifier of your own. Every user provisioned through that token is tagged with it, and it is emitted as the org_id claim on their tokens from then on. Issue one credential per customer against the same client, and their synced users come out correctly attributed without a client registration each. Leave it blank and users are untagged, which is how every credential behaved before this existed.
Tagging is not isolation
The tag is applied when the user is created and never on a later update, so a routine incremental sync cannot silently move an existing account. If you also run a provisioning app, an explicit credential tag wins: a /try response only fills an organization that is still empty.
Supported schemas
We implement the core SCIM 2.0 User and Group schemas (RFC 7643). Supported user attributes are userName, name.givenName, name.familyName, displayName, emails, active, externalId and preferredLanguage / locale.
The enterprise user extension is not implemented, so department, manager, employeeNumber, costCenter, division and organization are accepted and ignored rather than stored, on create, replace and PATCH alike. Entra and Okta both map some of these by default, so you do not need to remove them from your attribute mapping. To attribute a user to one of your customers, set the organization on the SCIM credential instead: the enterprise organization attribute is asserted by your customer's identity provider, and deliberately does not become their org_id.
OAuth Scopes
Scopes let clients request specific slices of a user's data or permissions. Authagonal supports both standard OIDC scopes and custom scopes you define for your APIs.
Built-in Scopes
| Scope | Description |
|---|---|
openid | Required for any OpenID Connect flow. Issues an ID token. |
profile | Returns standard profile claims (name, given_name, family_name). |
email | Returns the user's email address and verification status. |
offline_access | Issues a refresh token alongside the access token. |
Custom Scopes
Define your own scopes on the Scopes page. Each scope describes a permission or resource a client can request (for example, billing.read, orders.write).
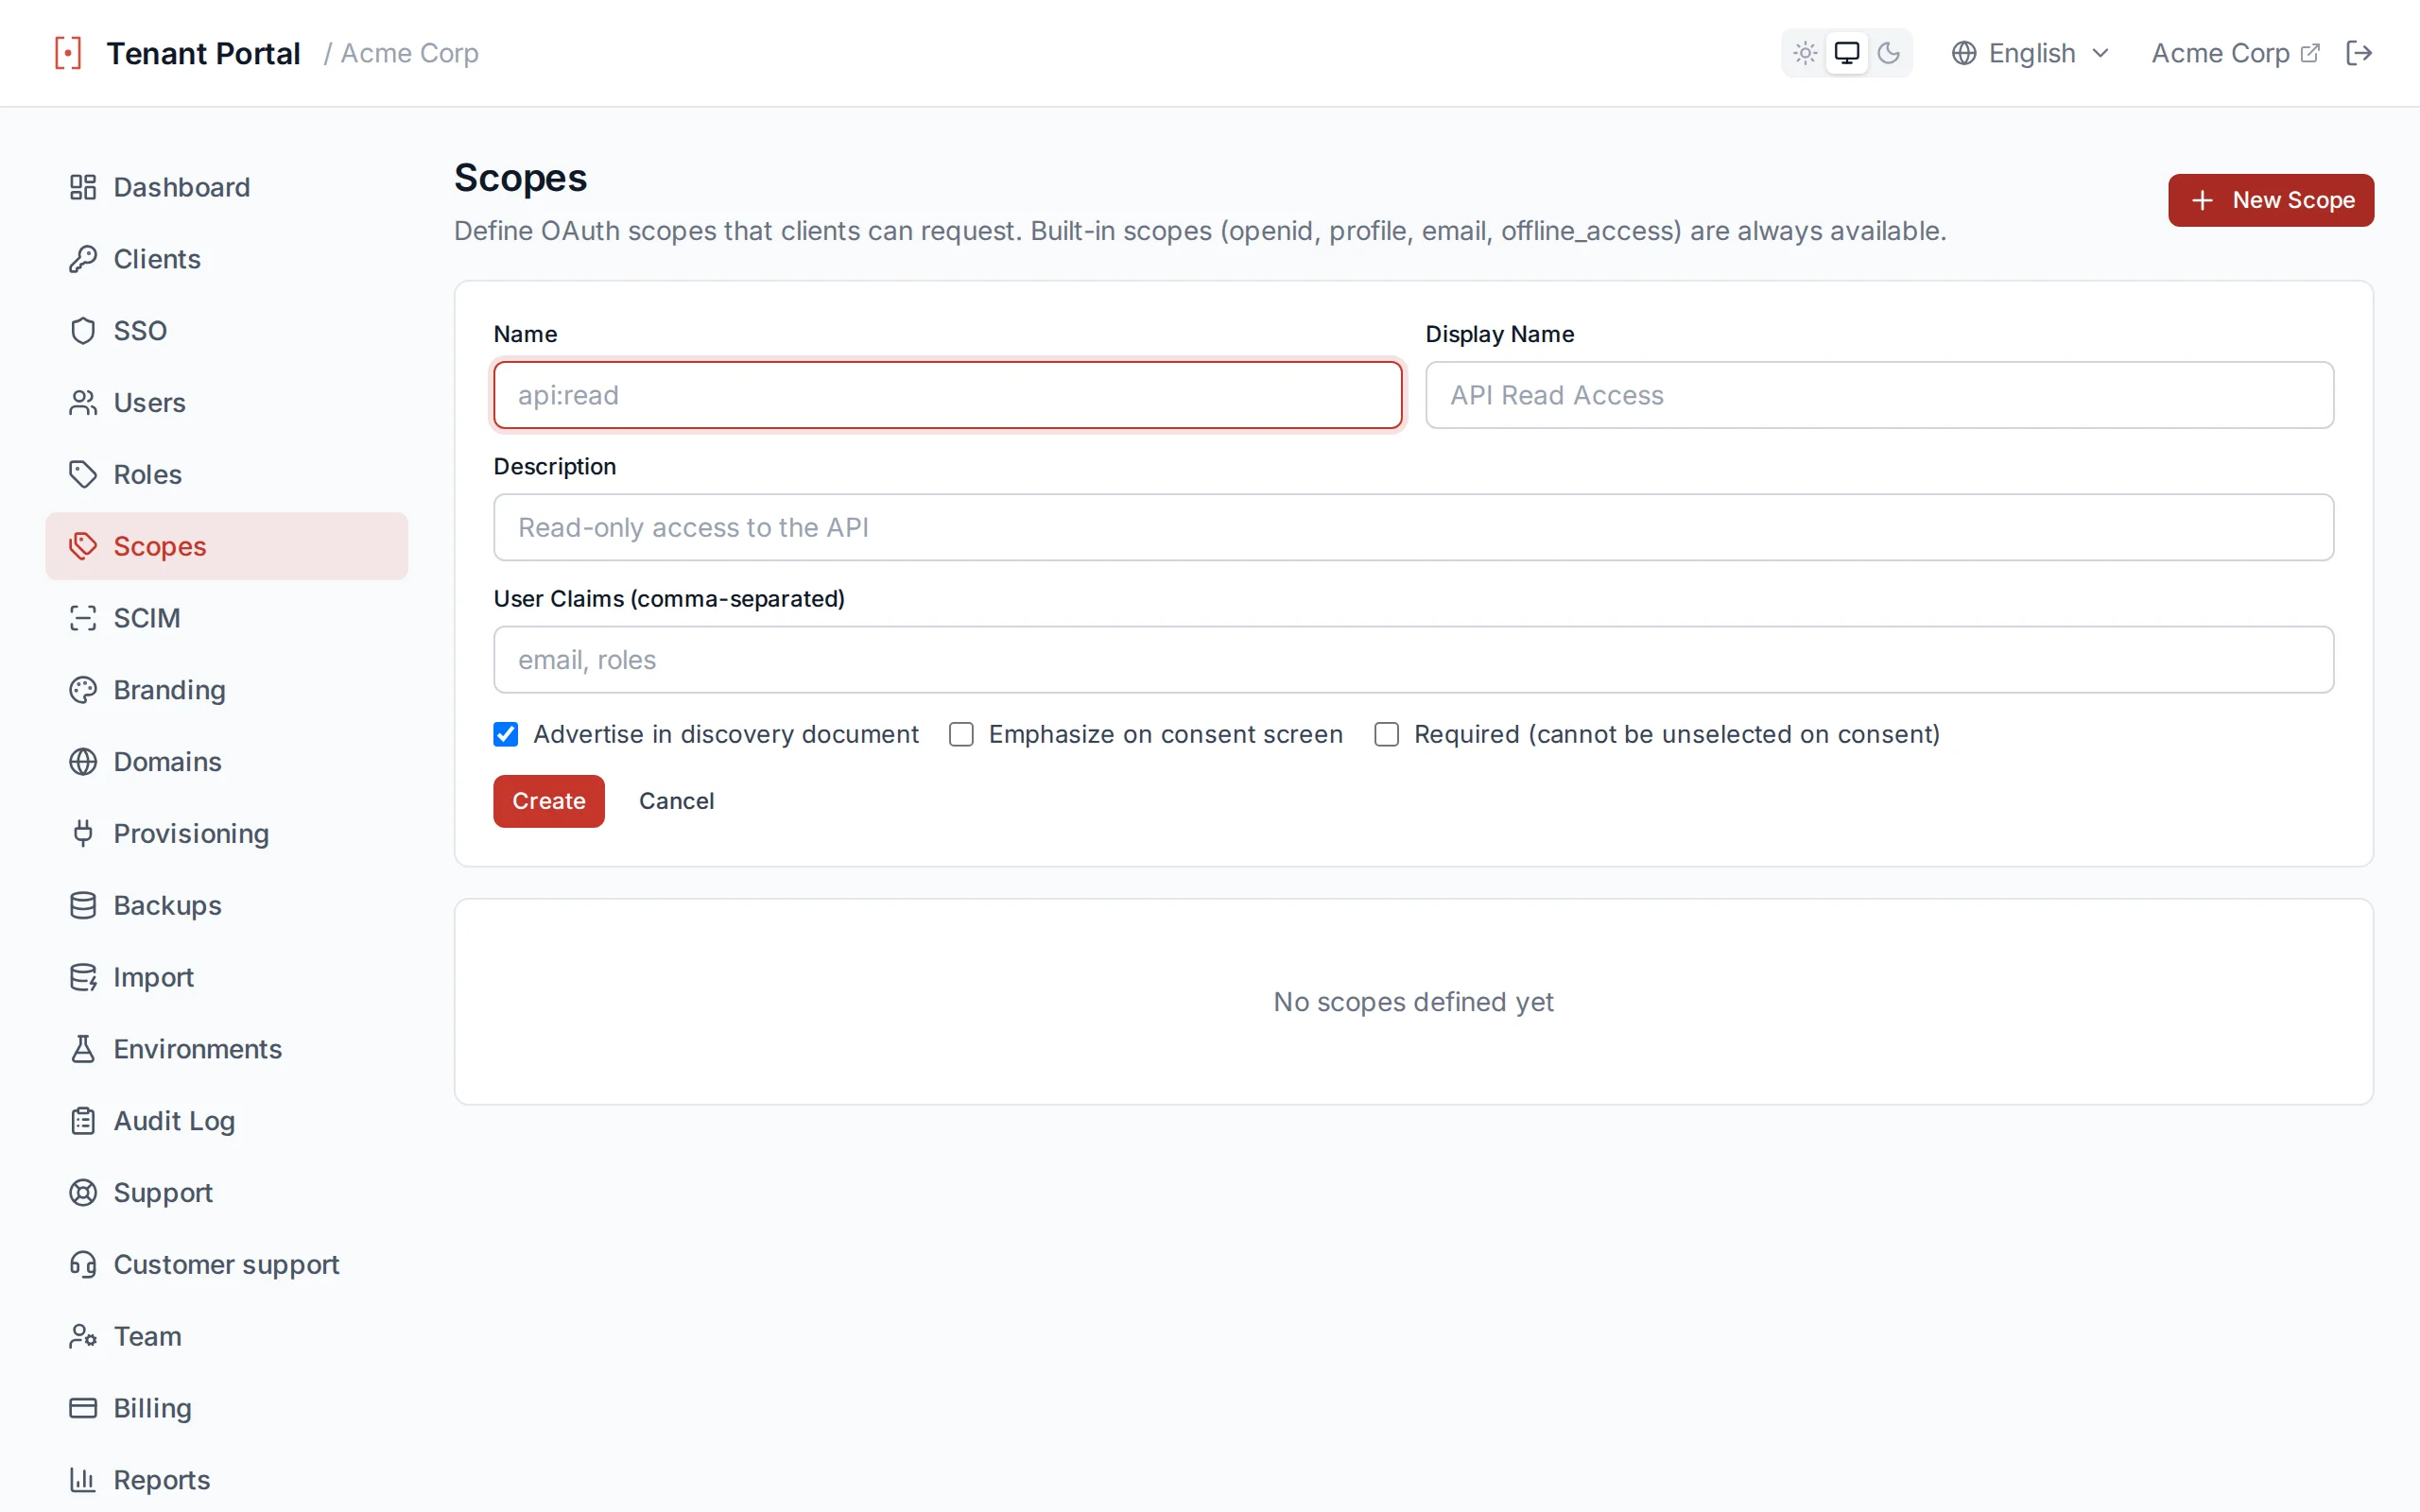
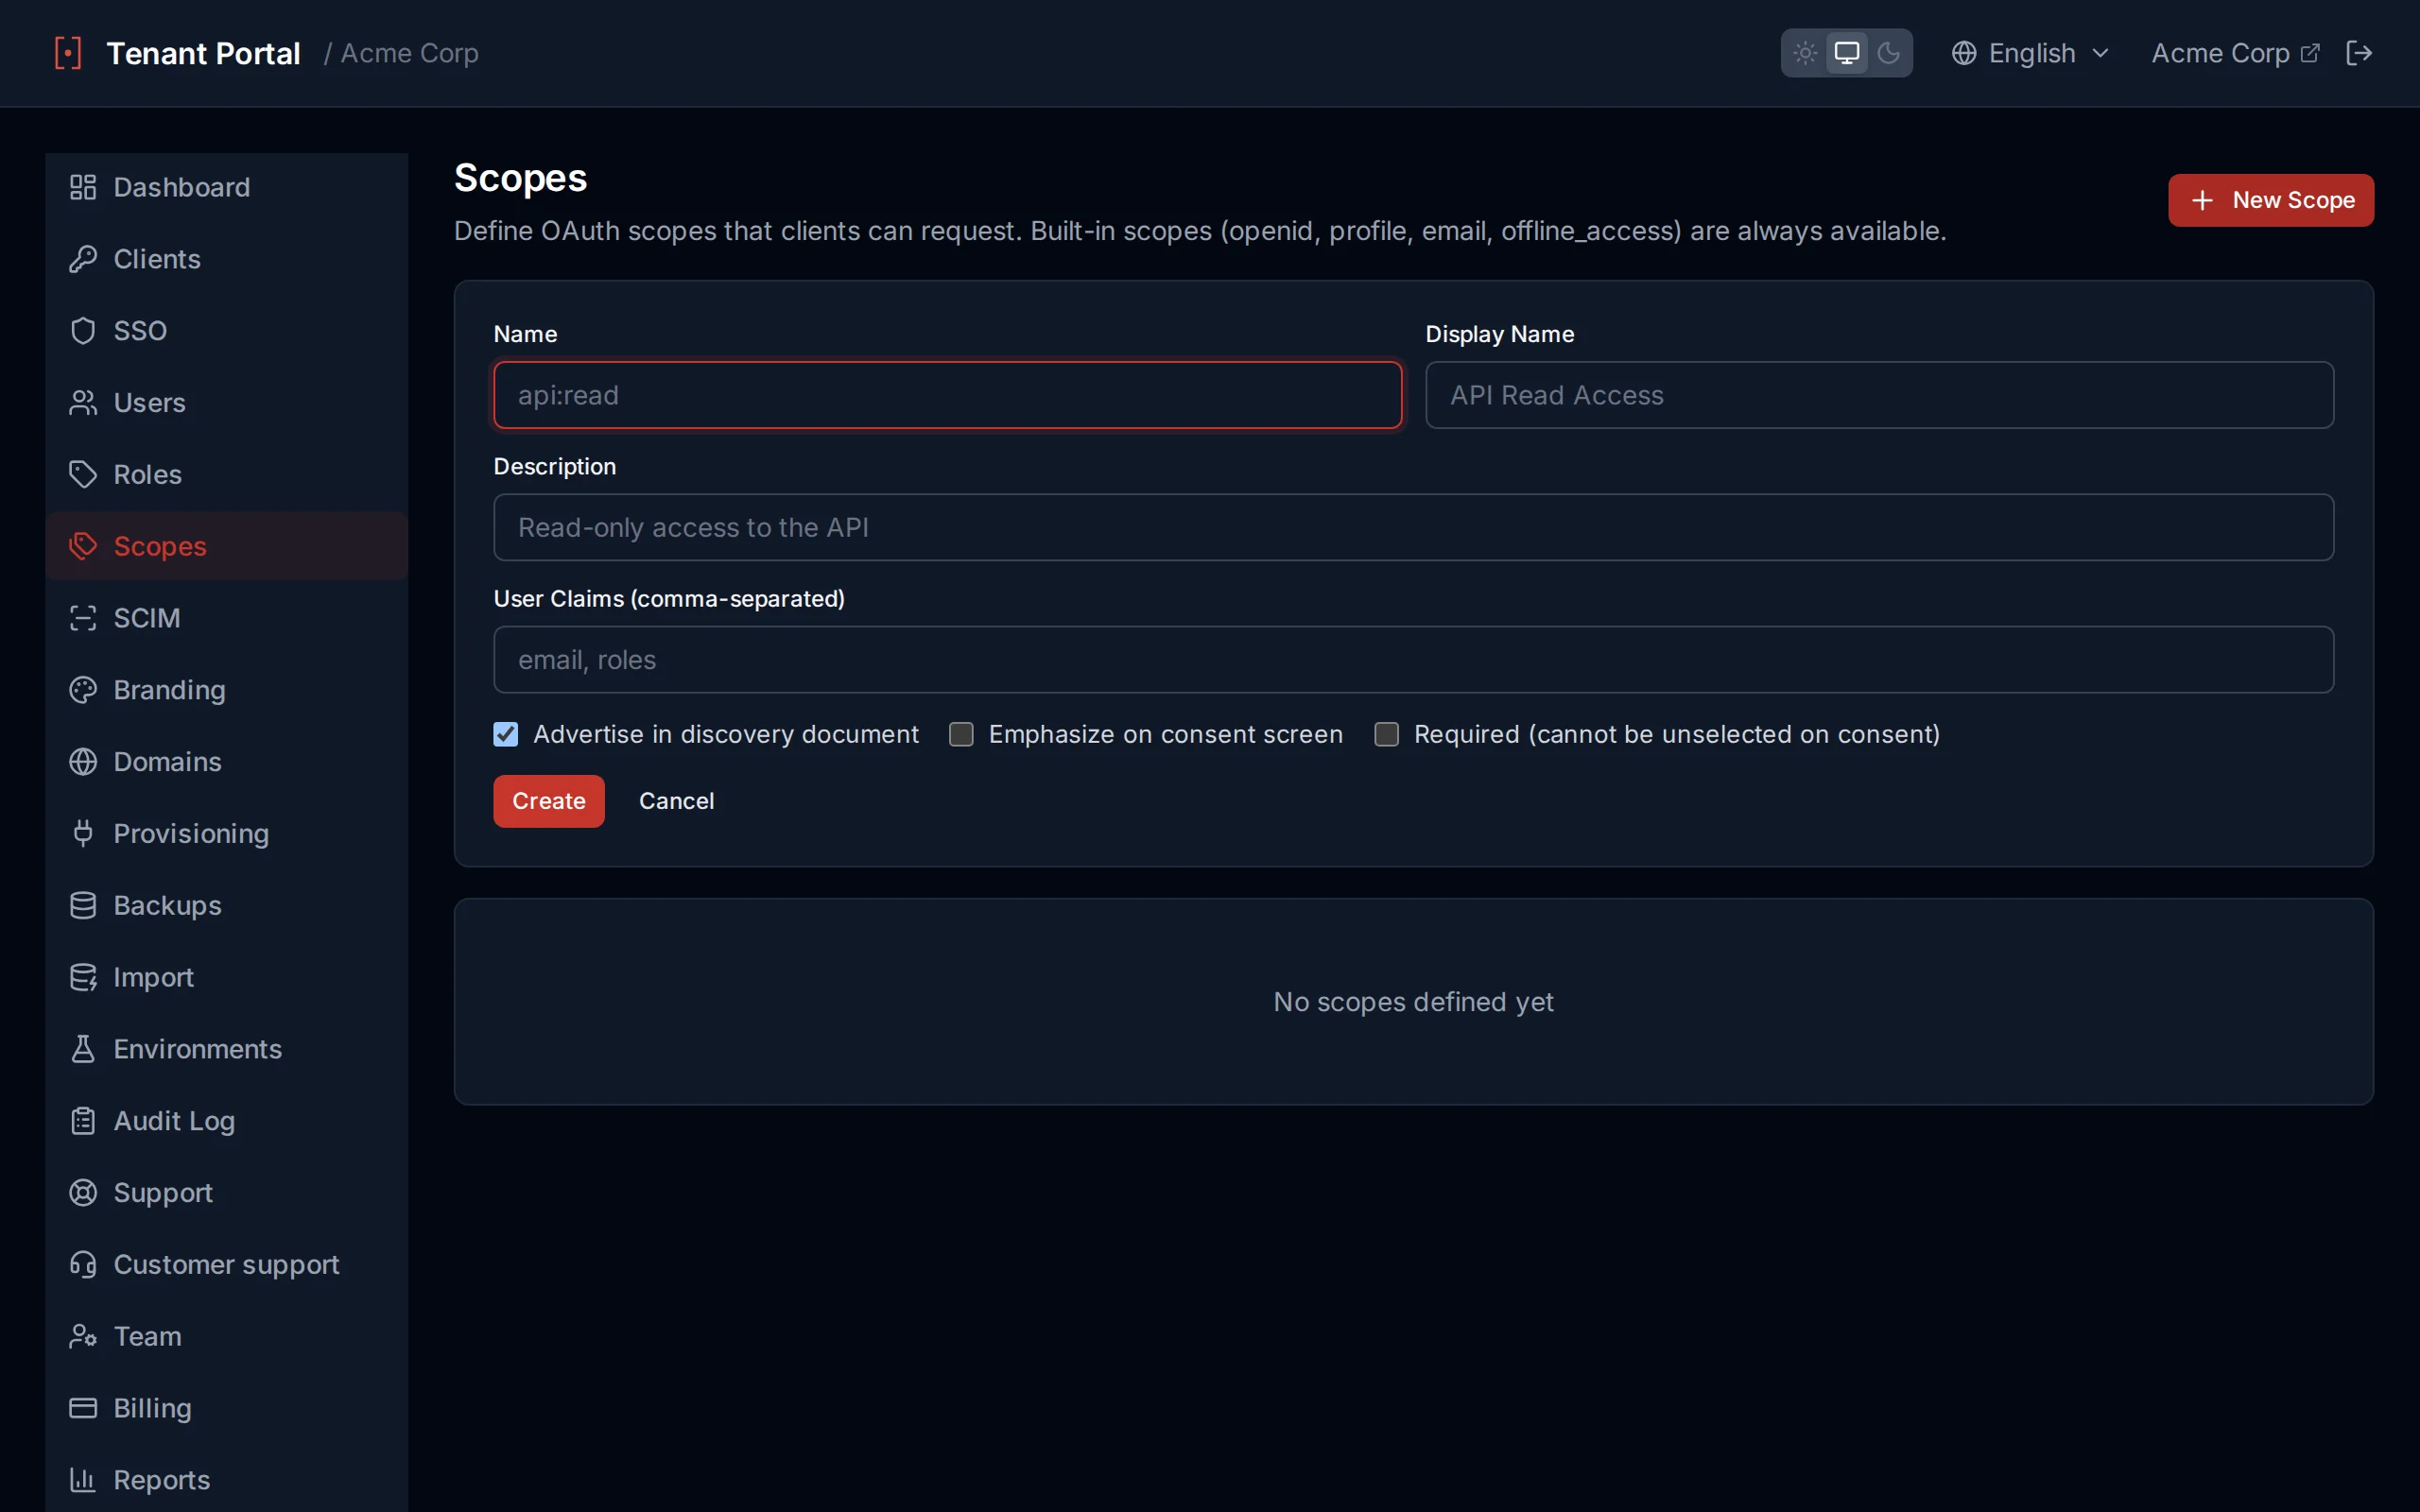
| Field | Description |
|---|---|
name | The scope identifier sent in token requests (e.g. billing.read). |
displayName | Human-readable label shown on the consent screen. |
description | Longer explanation shown under the display name on consent. |
userClaims | Extra claims added to the access token when this scope is granted. |
showInDiscoveryDocument | If on, the scope appears in /.well-known/openid-configuration. |
emphasize | Highlights the scope on the consent screen as sensitive. |
required | Prevents the user from deselecting the scope during consent. |
Consent integration
Custom claims on tokens
Custom claims have two halves. The source is per-user data: each AuthUser has a customAttributes dictionary you can populate from the Portal (Users → user → Custom Attributes), via SCIM, or via a TCC provisioning hook. The release is per-scope: each scope's userClaims list names the keys it permits to leave the server.
When a client requests scopes, Authagonal walks the granted scopes, unions their userClaims lists, and emits only those keys from the user's customAttributes. Unknown keys are silently dropped — a client cannot read an attribute by guessing the name. Standard OIDC claims (sub, email, name, etc.) follow the spec and are not subject to the whitelist.
# 1. On the user (Portal → Users → {user} → Custom Attributes)
department = "engineering"
employee_id = "E-1042"
seat_tier = "enterprise"

# 2. On a custom scope (Portal → Scopes → projects.read)
name        = "projects.read"
userClaims  = ["department", "seat_tier"]   # <-- whitelist

# 3. Client requests scope=openid projects.read
# Decoded access token (relevant fields only):
{
  "sub": "u-9b…",
  "scope": "openid projects.read",
  "department": "engineering",
  "seat_tier":  "enterprise"
  // employee_id is NOT emitted — it's not in the whitelist for any granted scope.
}
Federation claims override per-session
department attribute mapped from a SAML assertion — flow through the same scope whitelist but win on key collision against the persisted customAttributes. They are emitted on this session's tokens (and survive refresh rotations) without being written back to the user record.Assigning Scopes to Clients
Add allowed scopes on the Clients → Scopes & Grants tab. A client can only request scopes it has been granted; unknown scopes are rejected with invalid_scope.
Branding
Customize the look and feel of your tenant's login pages. Branding settings let you match the authentication experience to your product's visual identity — from logos and colors to advanced CSS overrides.
Appearance
| Setting | Description |
|---|---|
appName | The application name displayed on the login page header and browser tab |
logoUrl | URL to your logo image. Displayed at the top of the login page. Recommended size: 200x60px or similar aspect ratio. |
primaryColor | The primary brand color used for buttons, links, and focus states. Set via a color picker or hex input. A live preview updates as you change the value. |
customCssUrl | URL to an external CSS file loaded after the default styles. Use this for advanced styling overrides. |
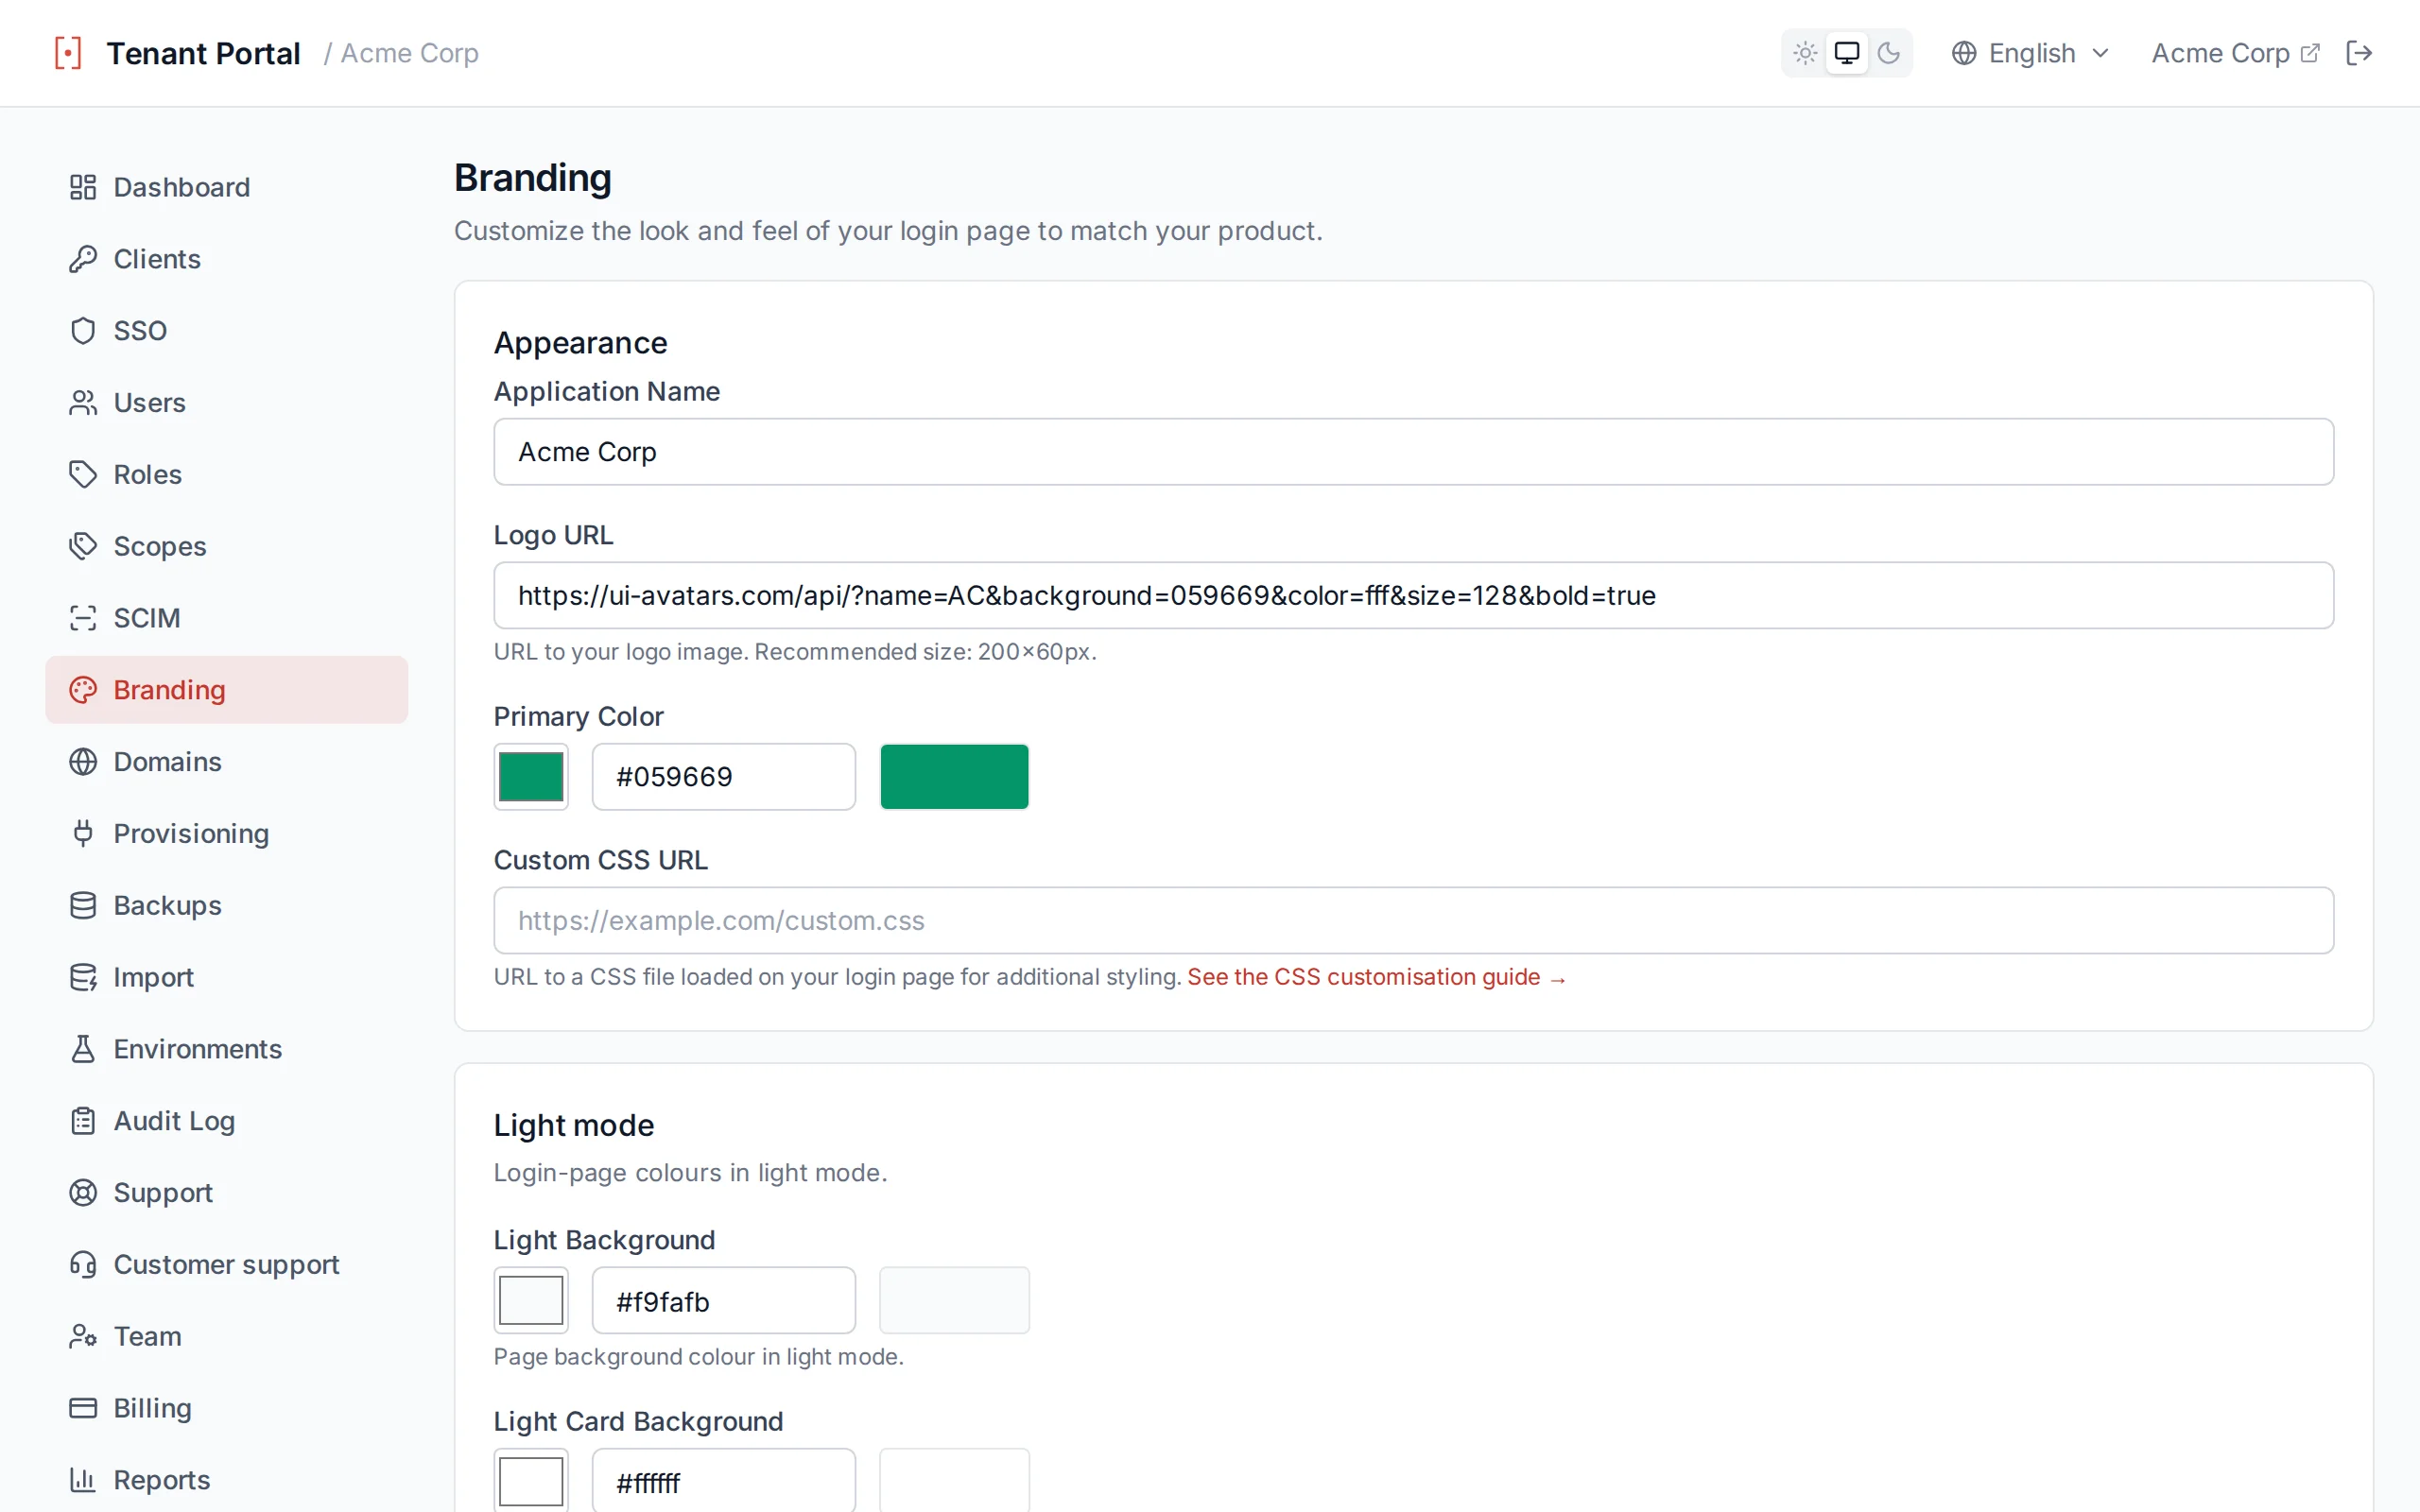
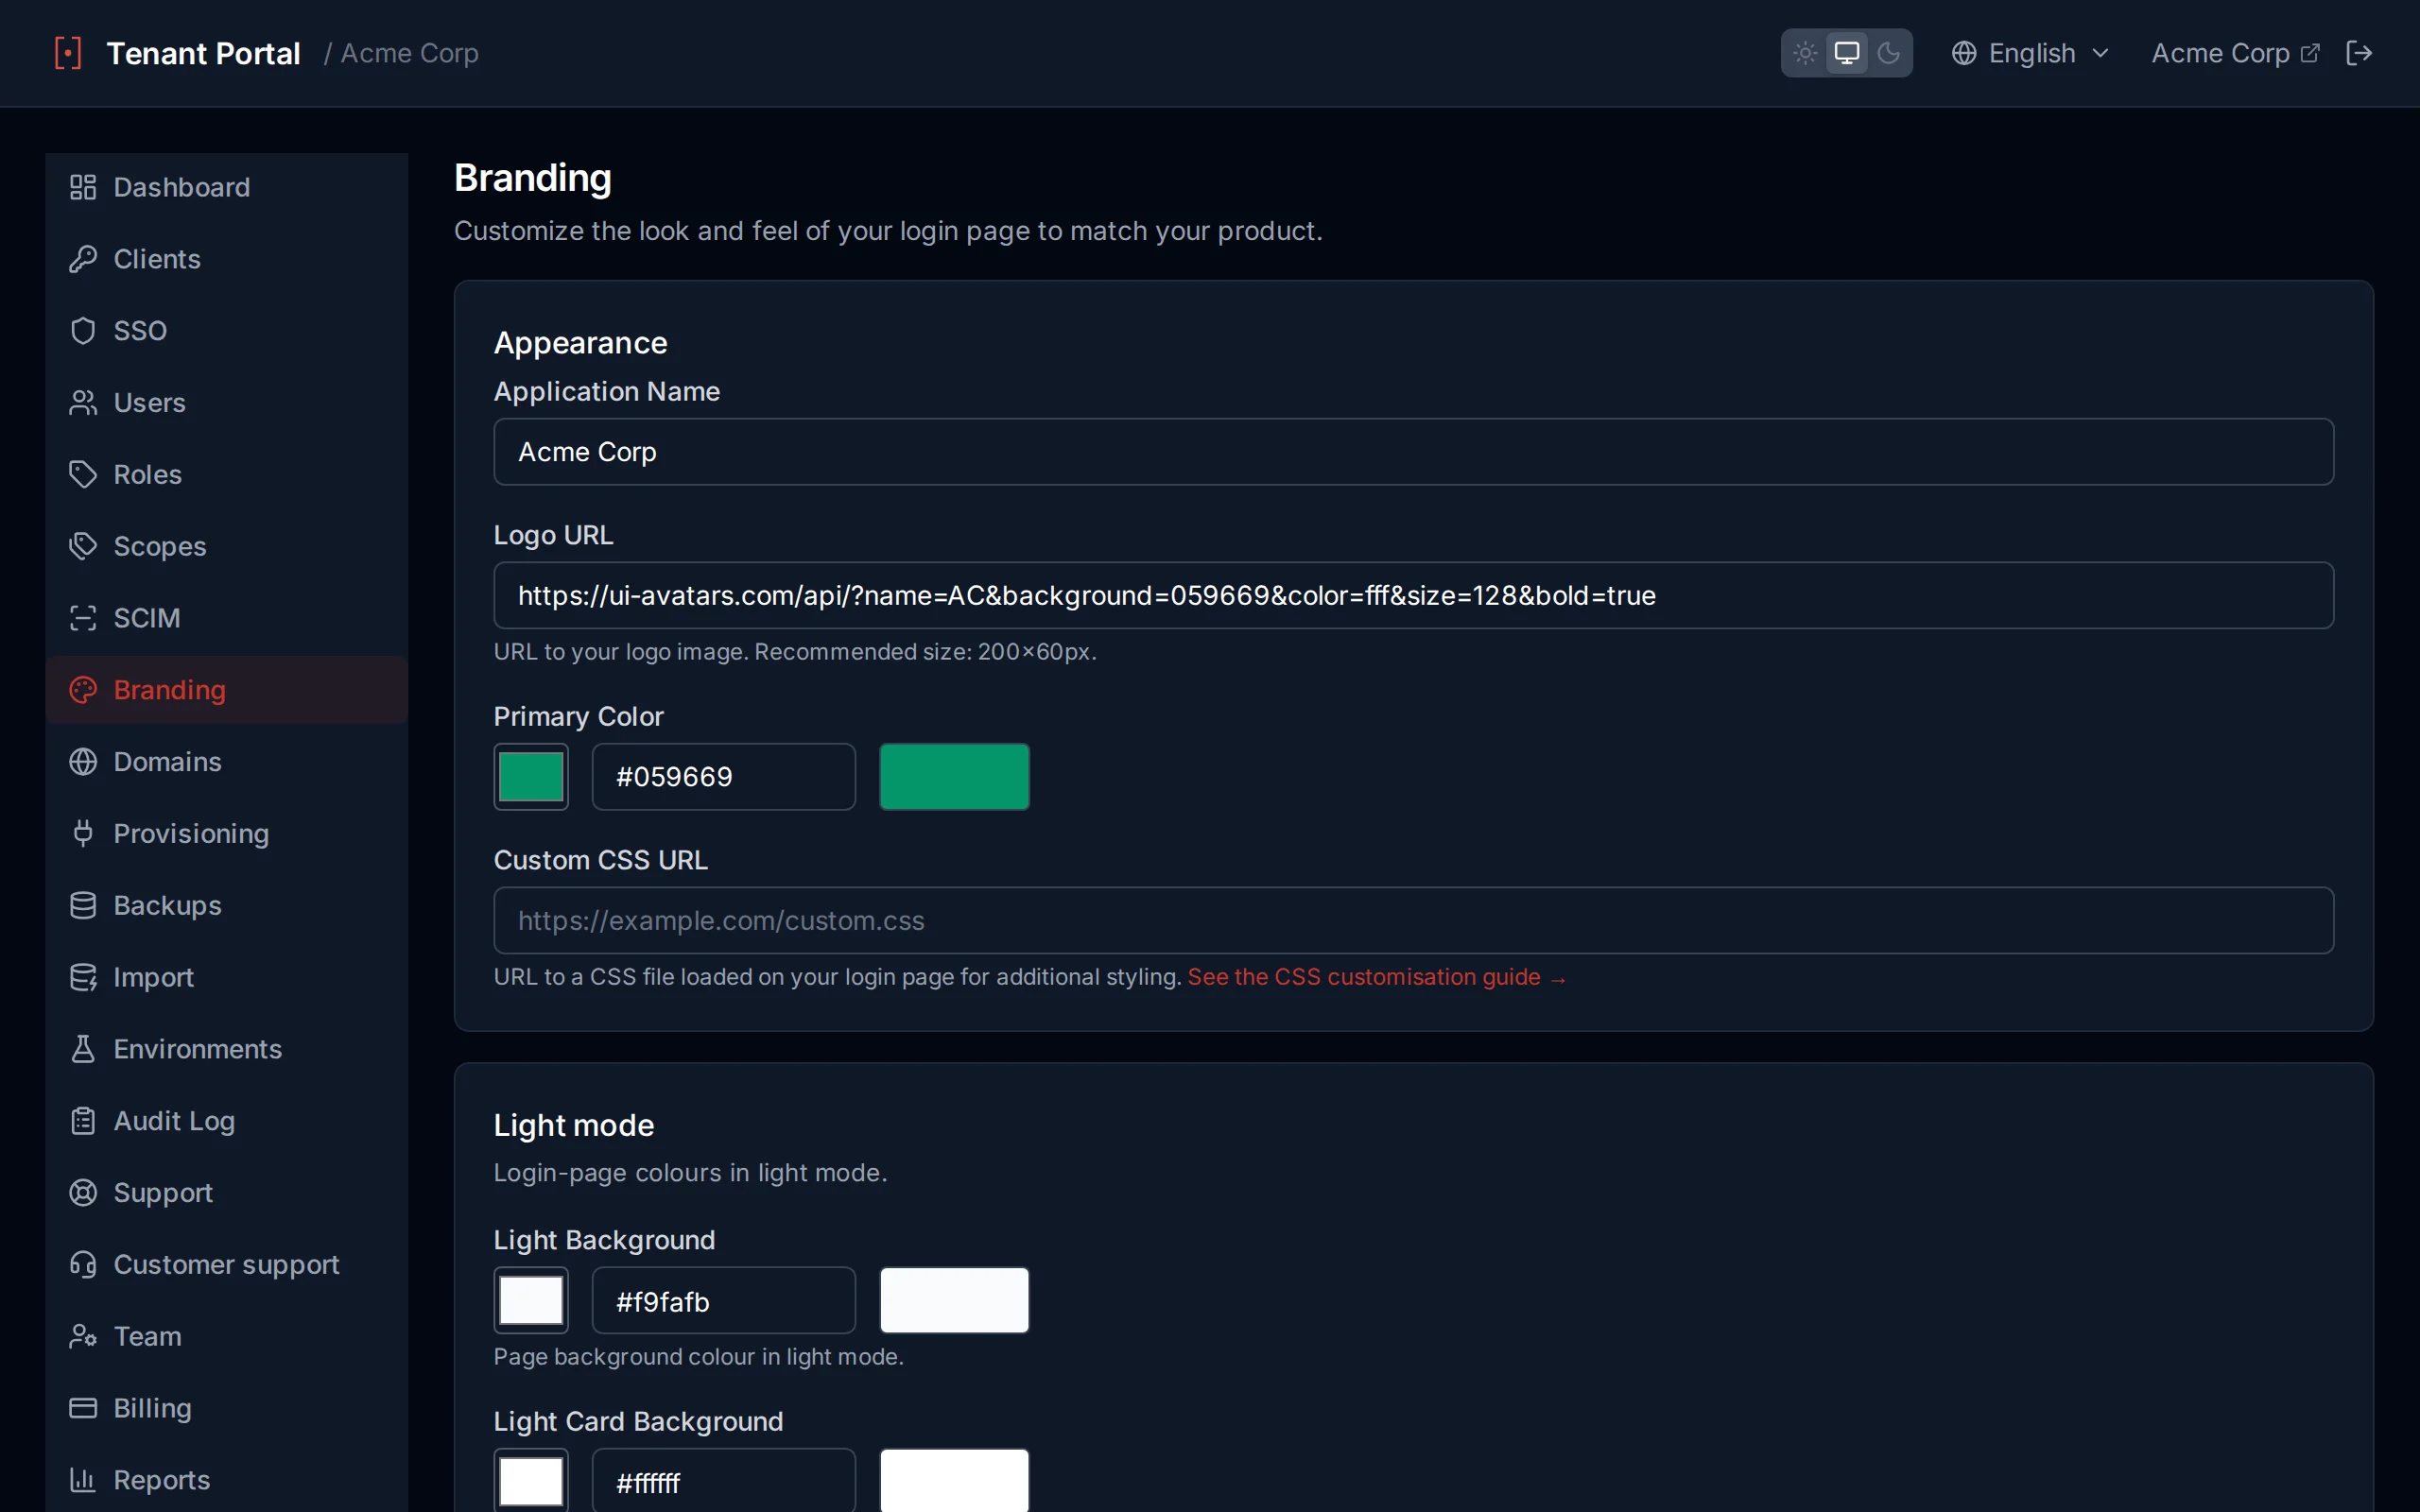
Appearance settings with live color preview
Contact Information
| Setting | Description |
|---|---|
supportEmail | A support email address displayed on login pages. Users see this when they need help with their account. |
Login Page Toggles
Control which elements appear on your tenant's login page:
| Toggle | Description | Default |
|---|---|---|
showForgotPassword | Display the "Forgot password?" link on the login form | On |
showRegistration | Display the "Sign up" link for self-service user registration | On |
showPoweredBy | Display the "Powered by Authagonal" badge at the bottom of the login page | On |
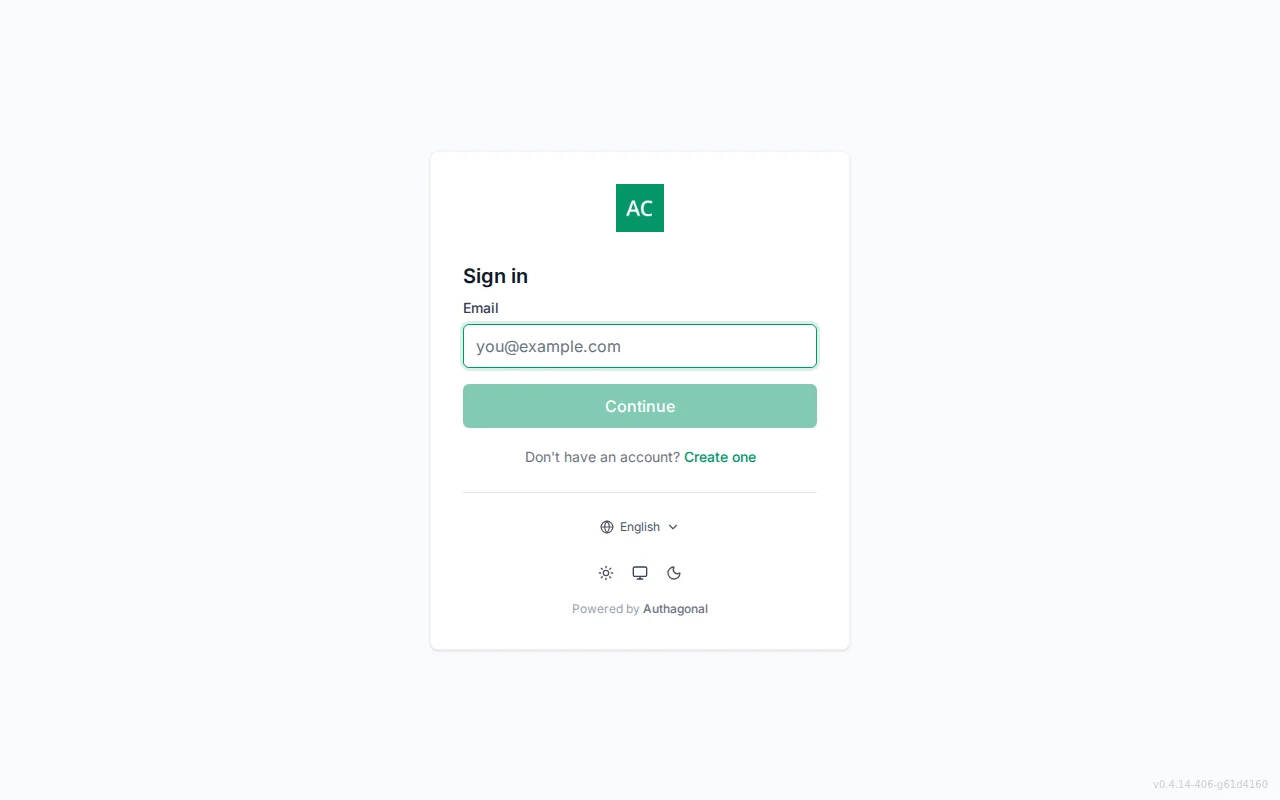
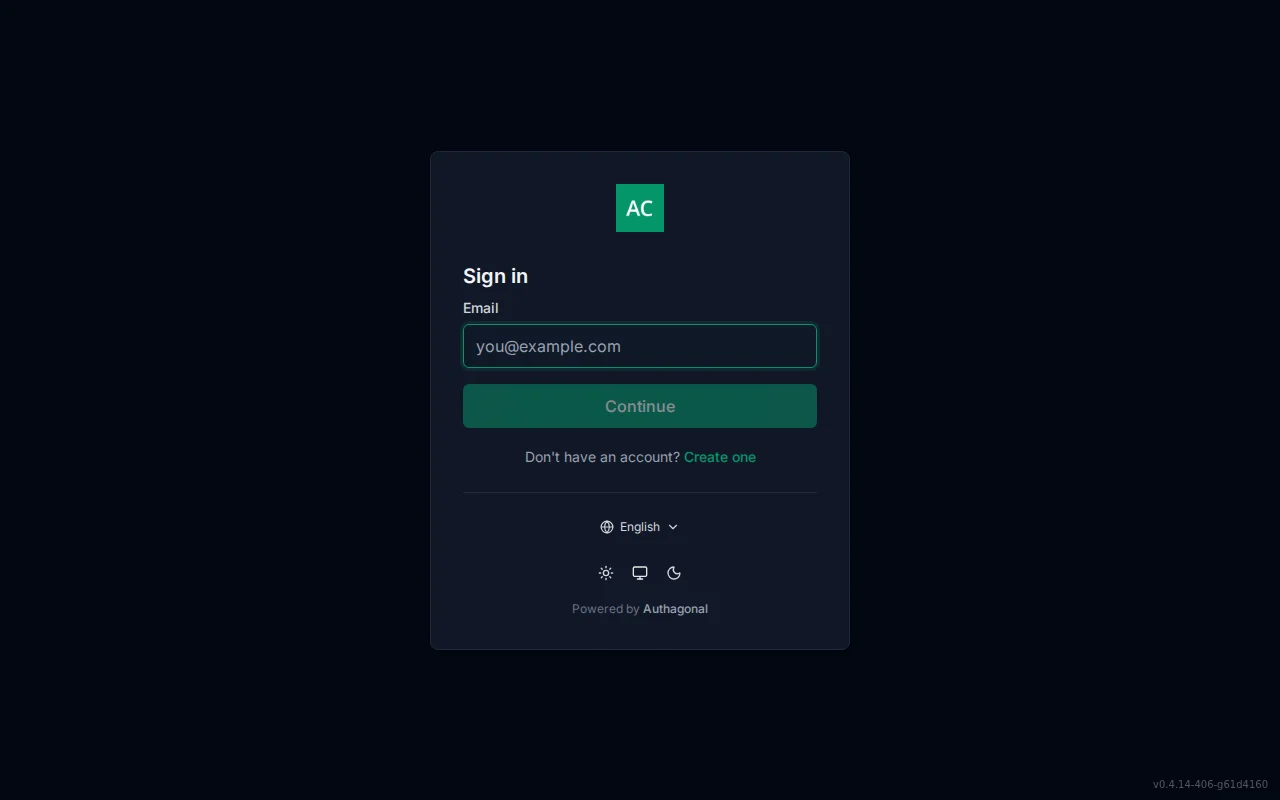
Example login page with custom branding applied
Custom CSS
For full control over the login page appearance, provide a CSS file URL in your branding settings. The file is loaded after the default styles, so your rules take precedence.
CSS Custom Properties
| Variable | Description | Default |
|---|---|---|
--auth-bg | Page background color | #f3f4f6 |
--auth-card-bg | Login card background | white |
--auth-heading | Heading text color | #111827 |
--auth-radius | Card border radius | 0.5rem |
--auth-font | Font family | inherit |
Dark Mode
The login app ships with light, dark, and system themes. Users pick from a toggle on the login page; the choice persists across sessions. When set to system, the SPA tracks prefers-color-scheme live.
Light values are declared at :root; dark overrides are scoped to .dark. Tenant branding set via customCssUrl always wins — so your colors persist regardless of the user's theme.
Element Selectors
data-auth attributes. These selectors are stable across updates — they won't break when we change internal class names.| Selector | Element |
|---|---|
[data-auth="page"] | Full-page background container |
[data-auth="header"] | Logo and app name area |
[data-auth="logo"] | Logo image |
[data-auth="app-name"] | App name heading (when no logo is set) |
[data-auth="content"] | Main content area (forms, messages) |
[data-auth="login-form"] | Login form element |
[data-auth="email-field"] | Email input wrapper |
[data-auth="password-field"] | Password input wrapper |
[data-auth="submit-button"] | Sign-in button |
[data-auth="languages"] | Language selector bar |
Settings
Configure tenant-wide security policies, webhooks, and environment settings. These settings apply globally across all clients unless overridden at the client level.
Password Policy
Define the password complexity requirements for all users in your tenant:
| Setting | Range | Default |
|---|---|---|
minPasswordLength | 6 – 128 | 8 |
requireUppercase | On / Off | On |
requireLowercase | On / Off | On |
requireDigit | On / Off | On |
requireSpecialChar | On / Off | On |
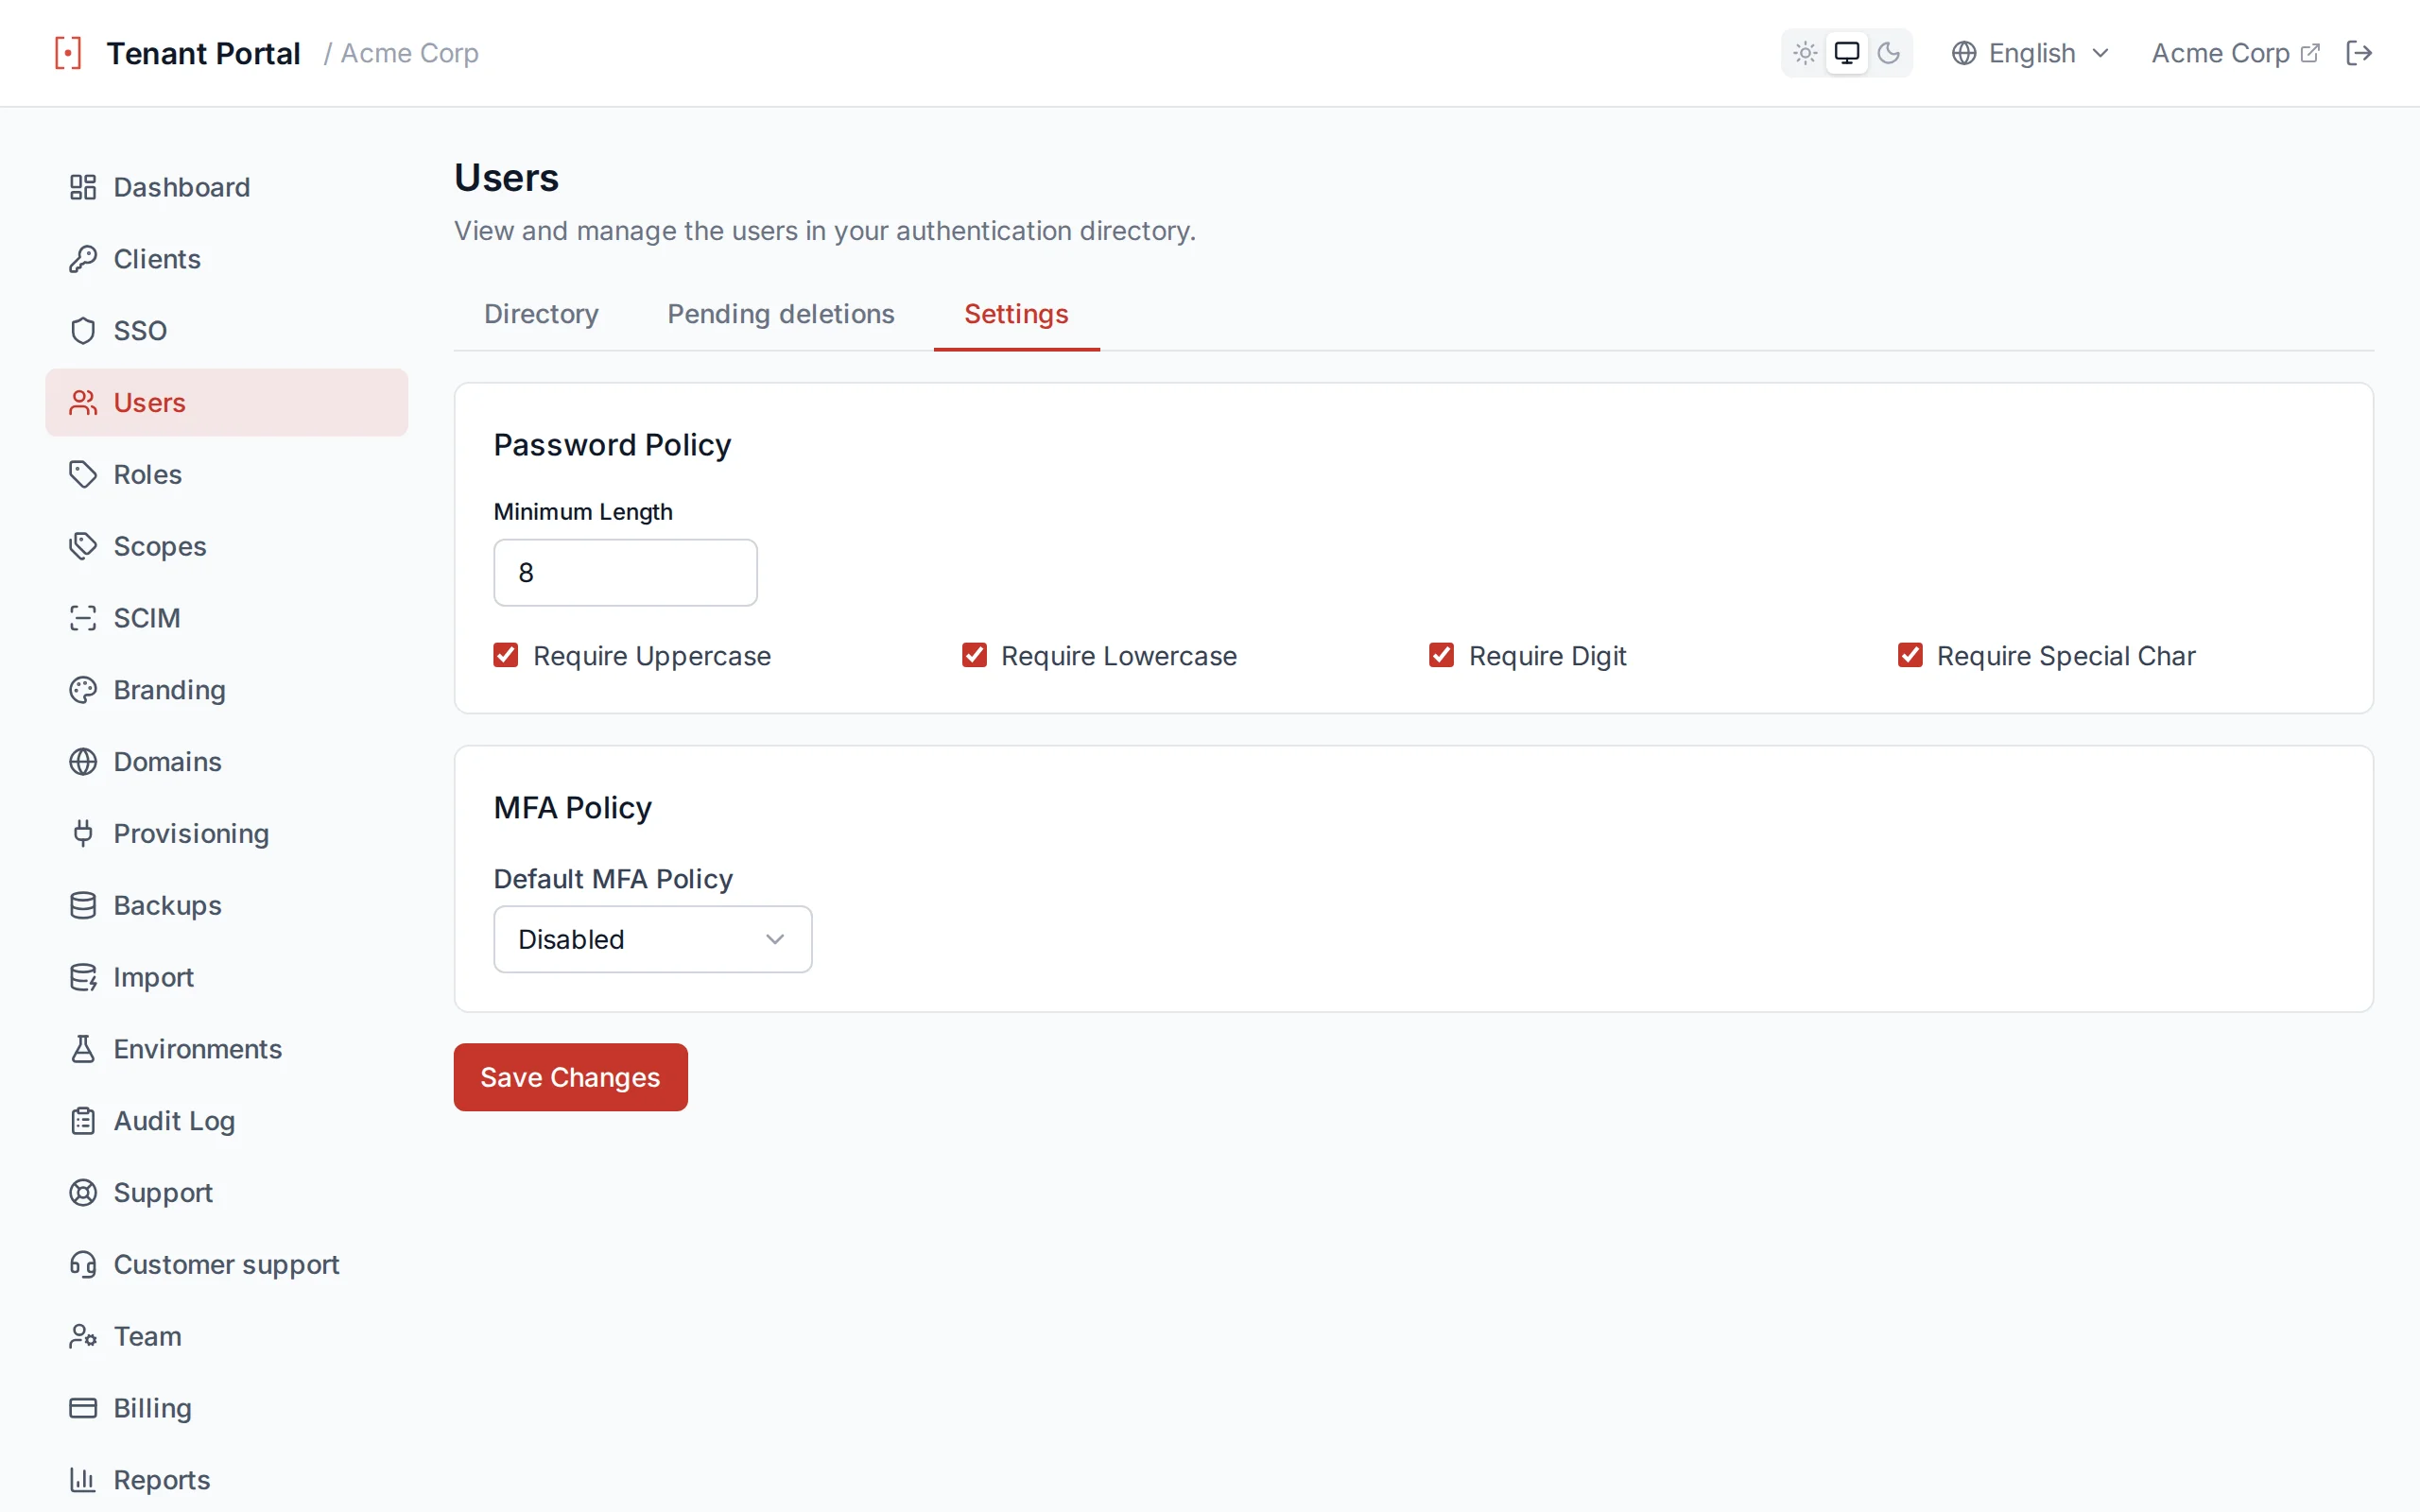
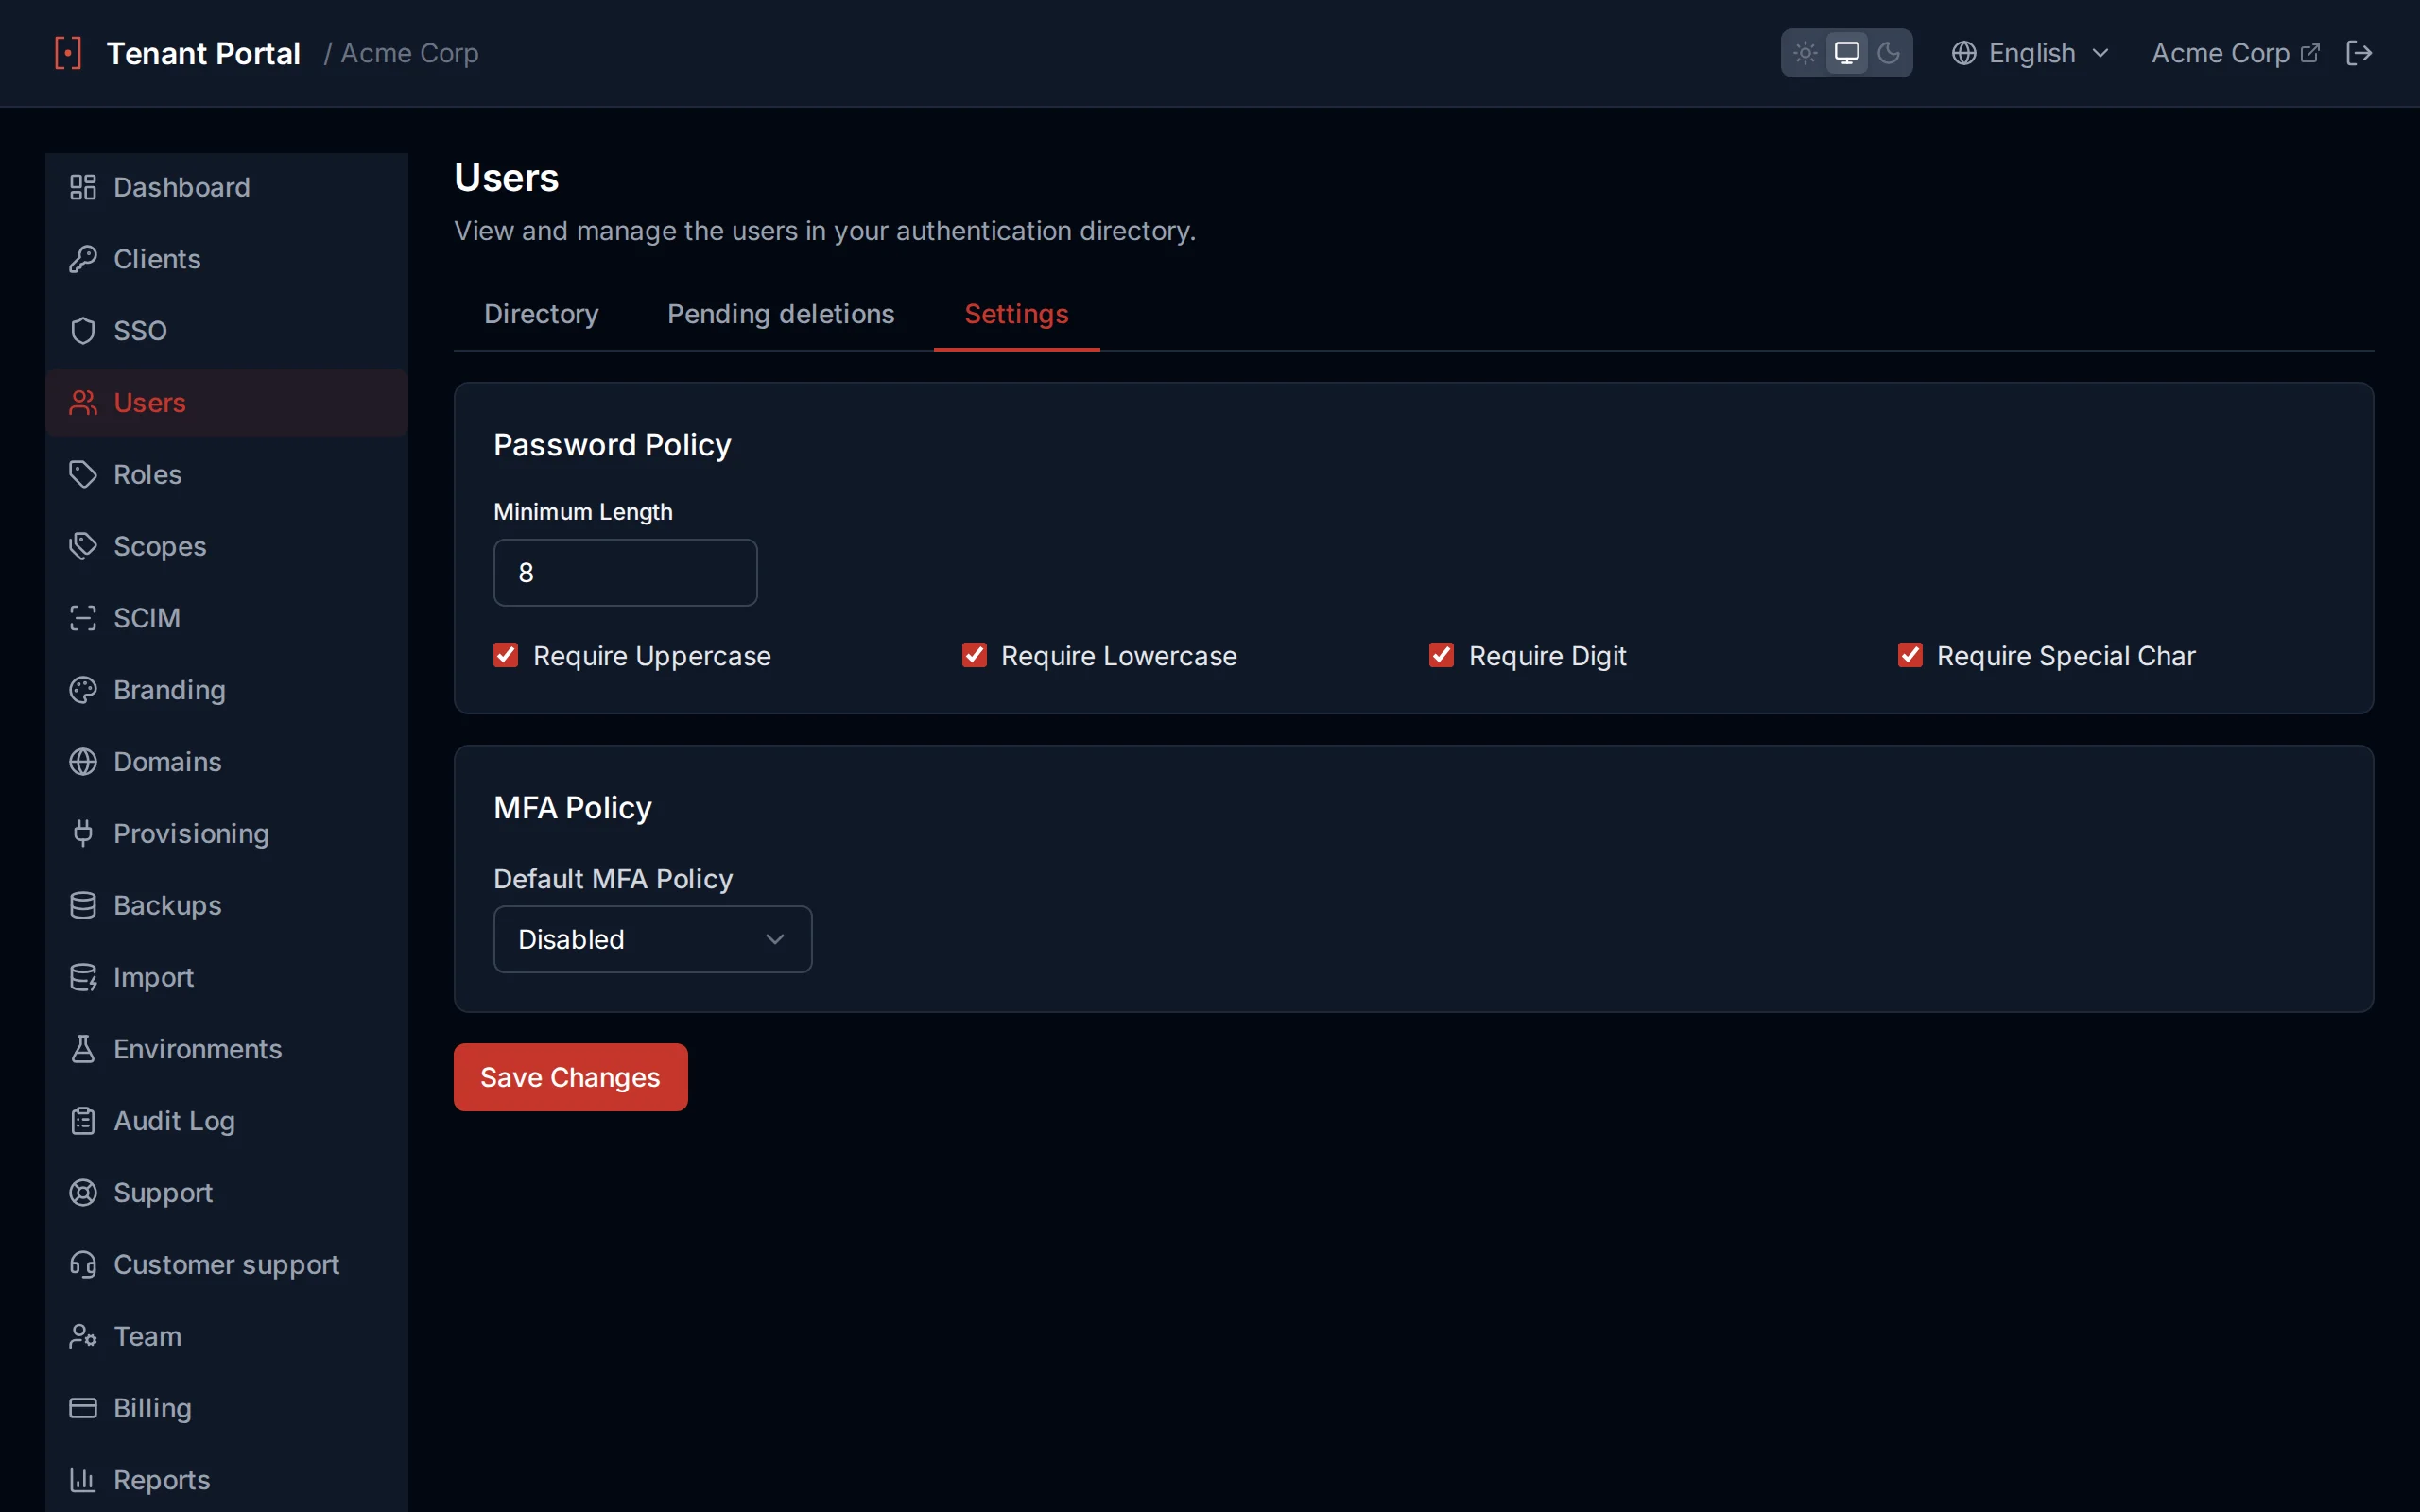
Password policy configuration
MFA Policy
The tenant-wide MFA policy sets the default multi-factor authentication behavior. Individual clients can override this setting.
| Policy | Behavior |
|---|---|
Disabled | MFA is not available. Users cannot enroll in MFA. |
Enabled | MFA is optional. Users can choose to enroll and will be prompted at login if enrolled. |
Required | MFA is mandatory. All users must enroll in MFA and complete a second factor at every login. |
Session & Lockout
Control session duration and account lockout behavior:
| Setting | Range | Default |
|---|---|---|
sessionLifetimeMinutes | 5 – 43,200 (30 days) | 60 |
maxFailedAttempts | 1 – 100 | 5 |
lockoutDurationMinutes | 1 – 1,440 (24 hours) | 10 |
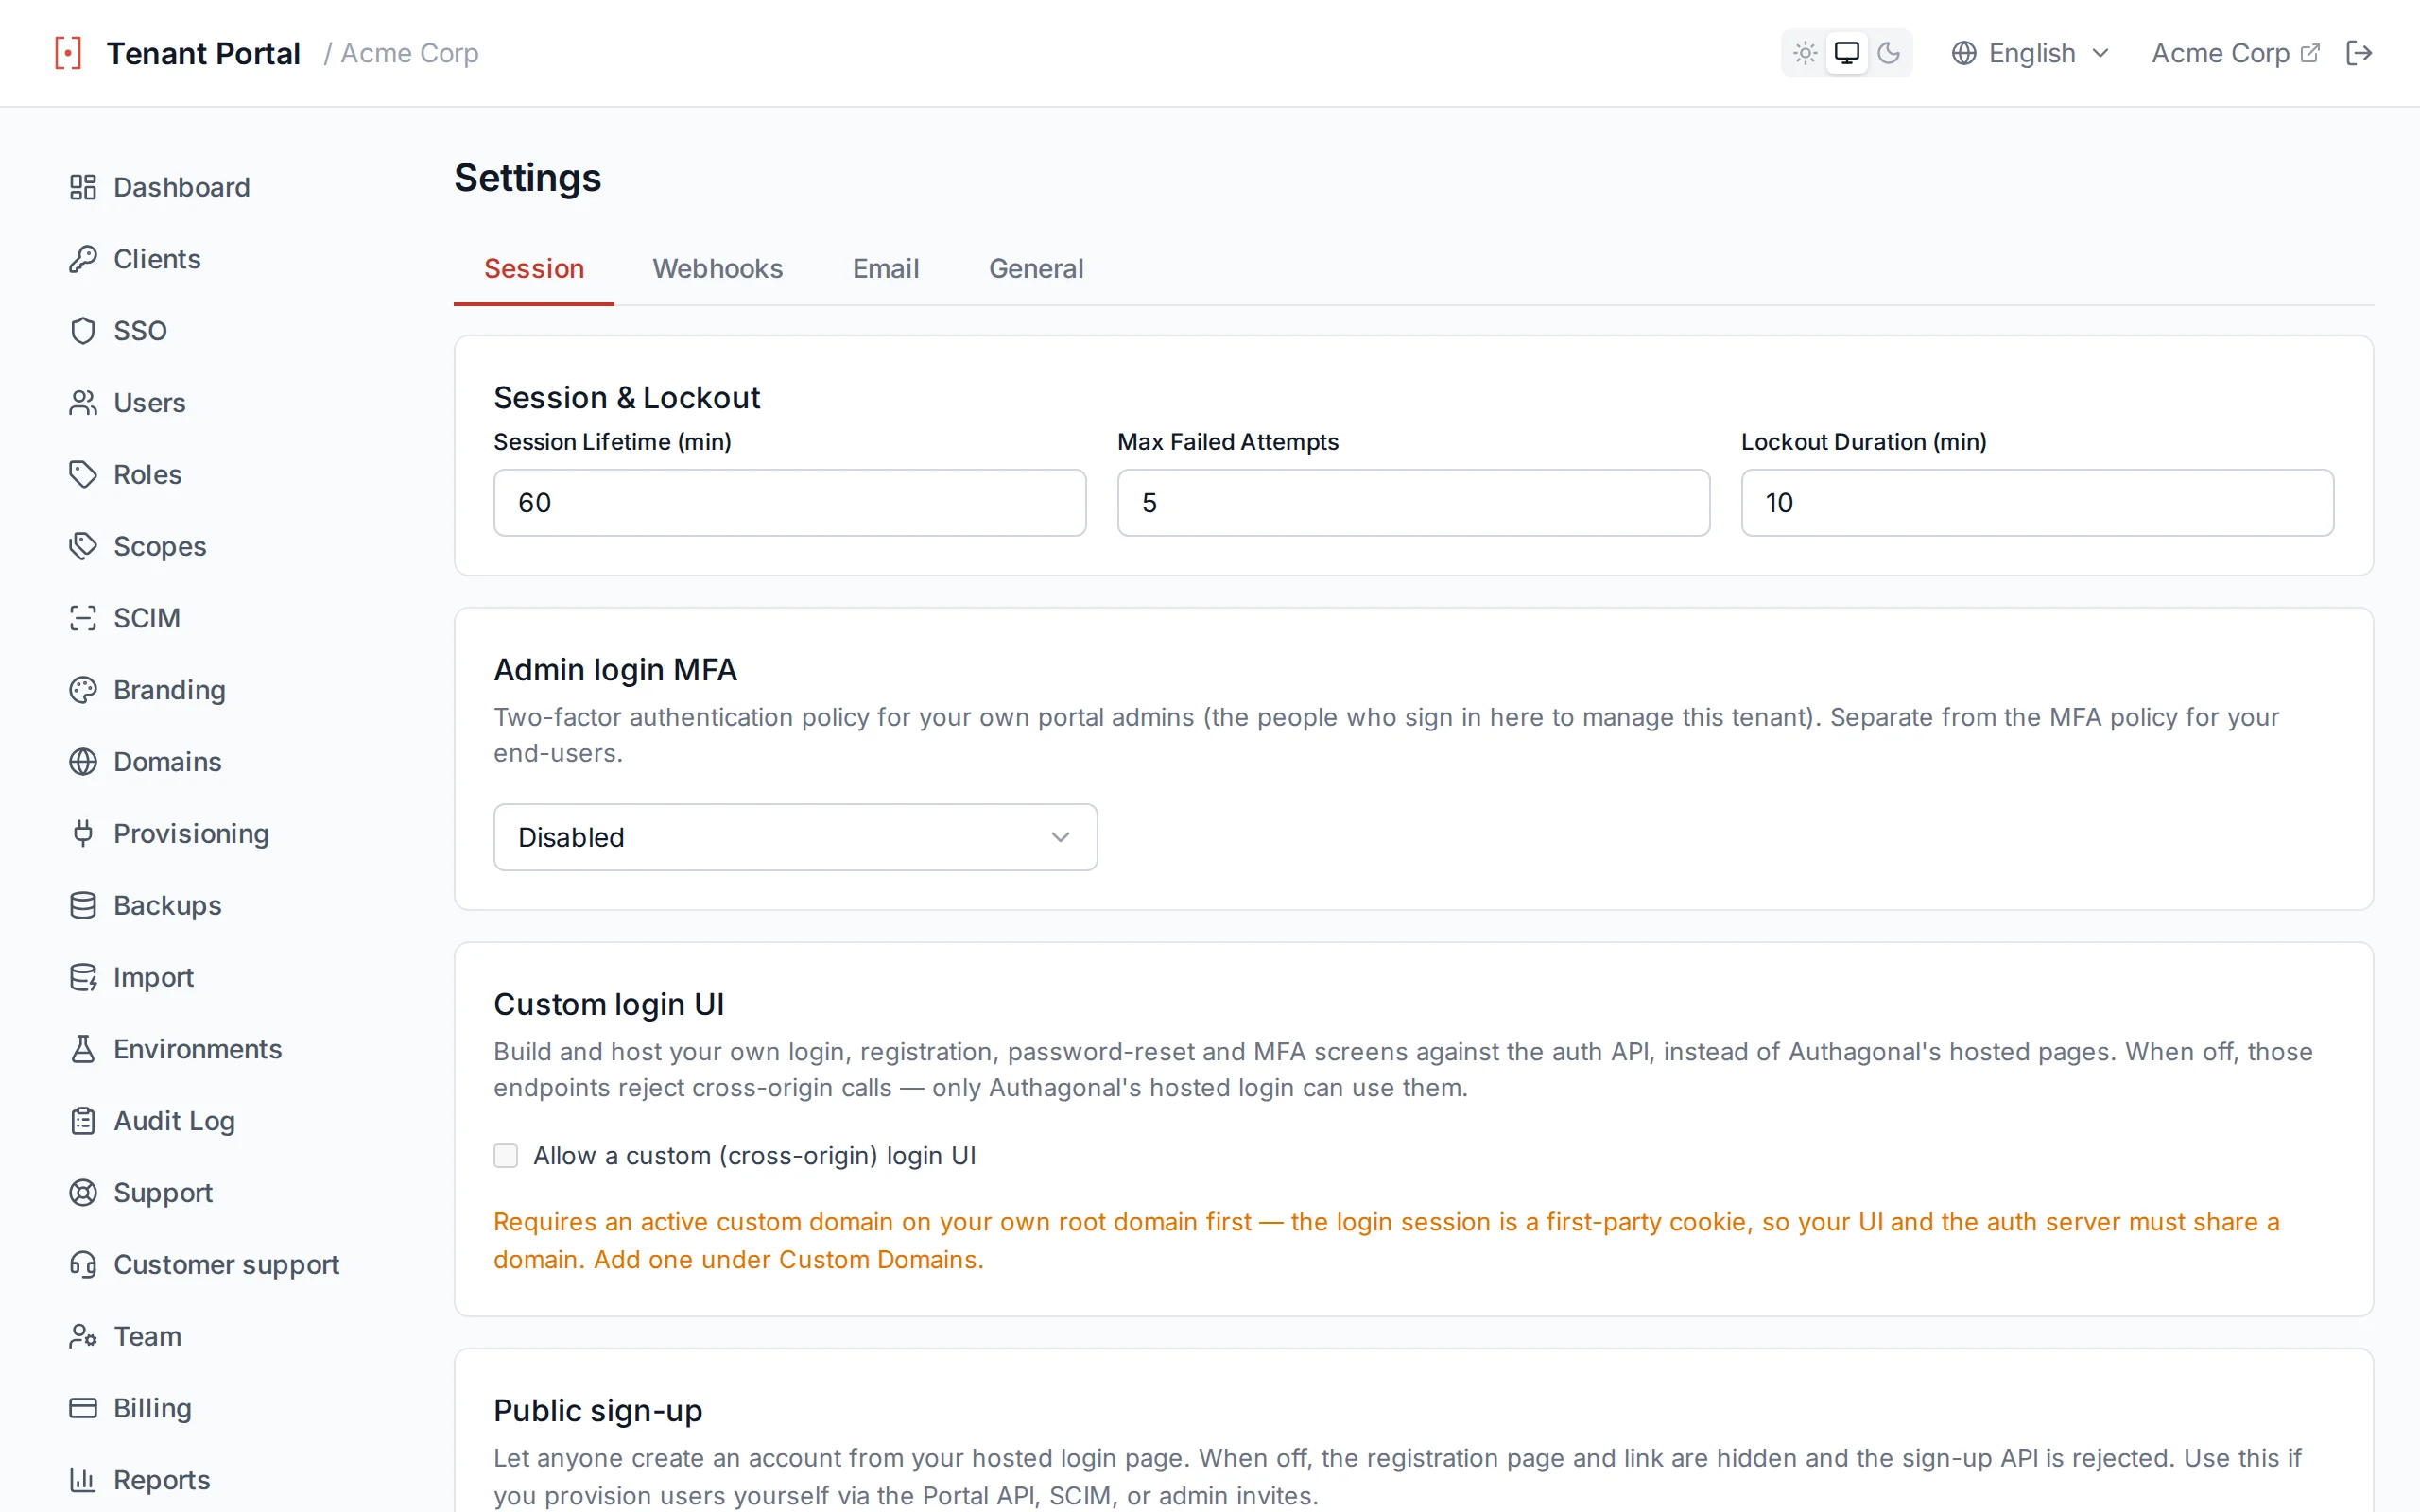
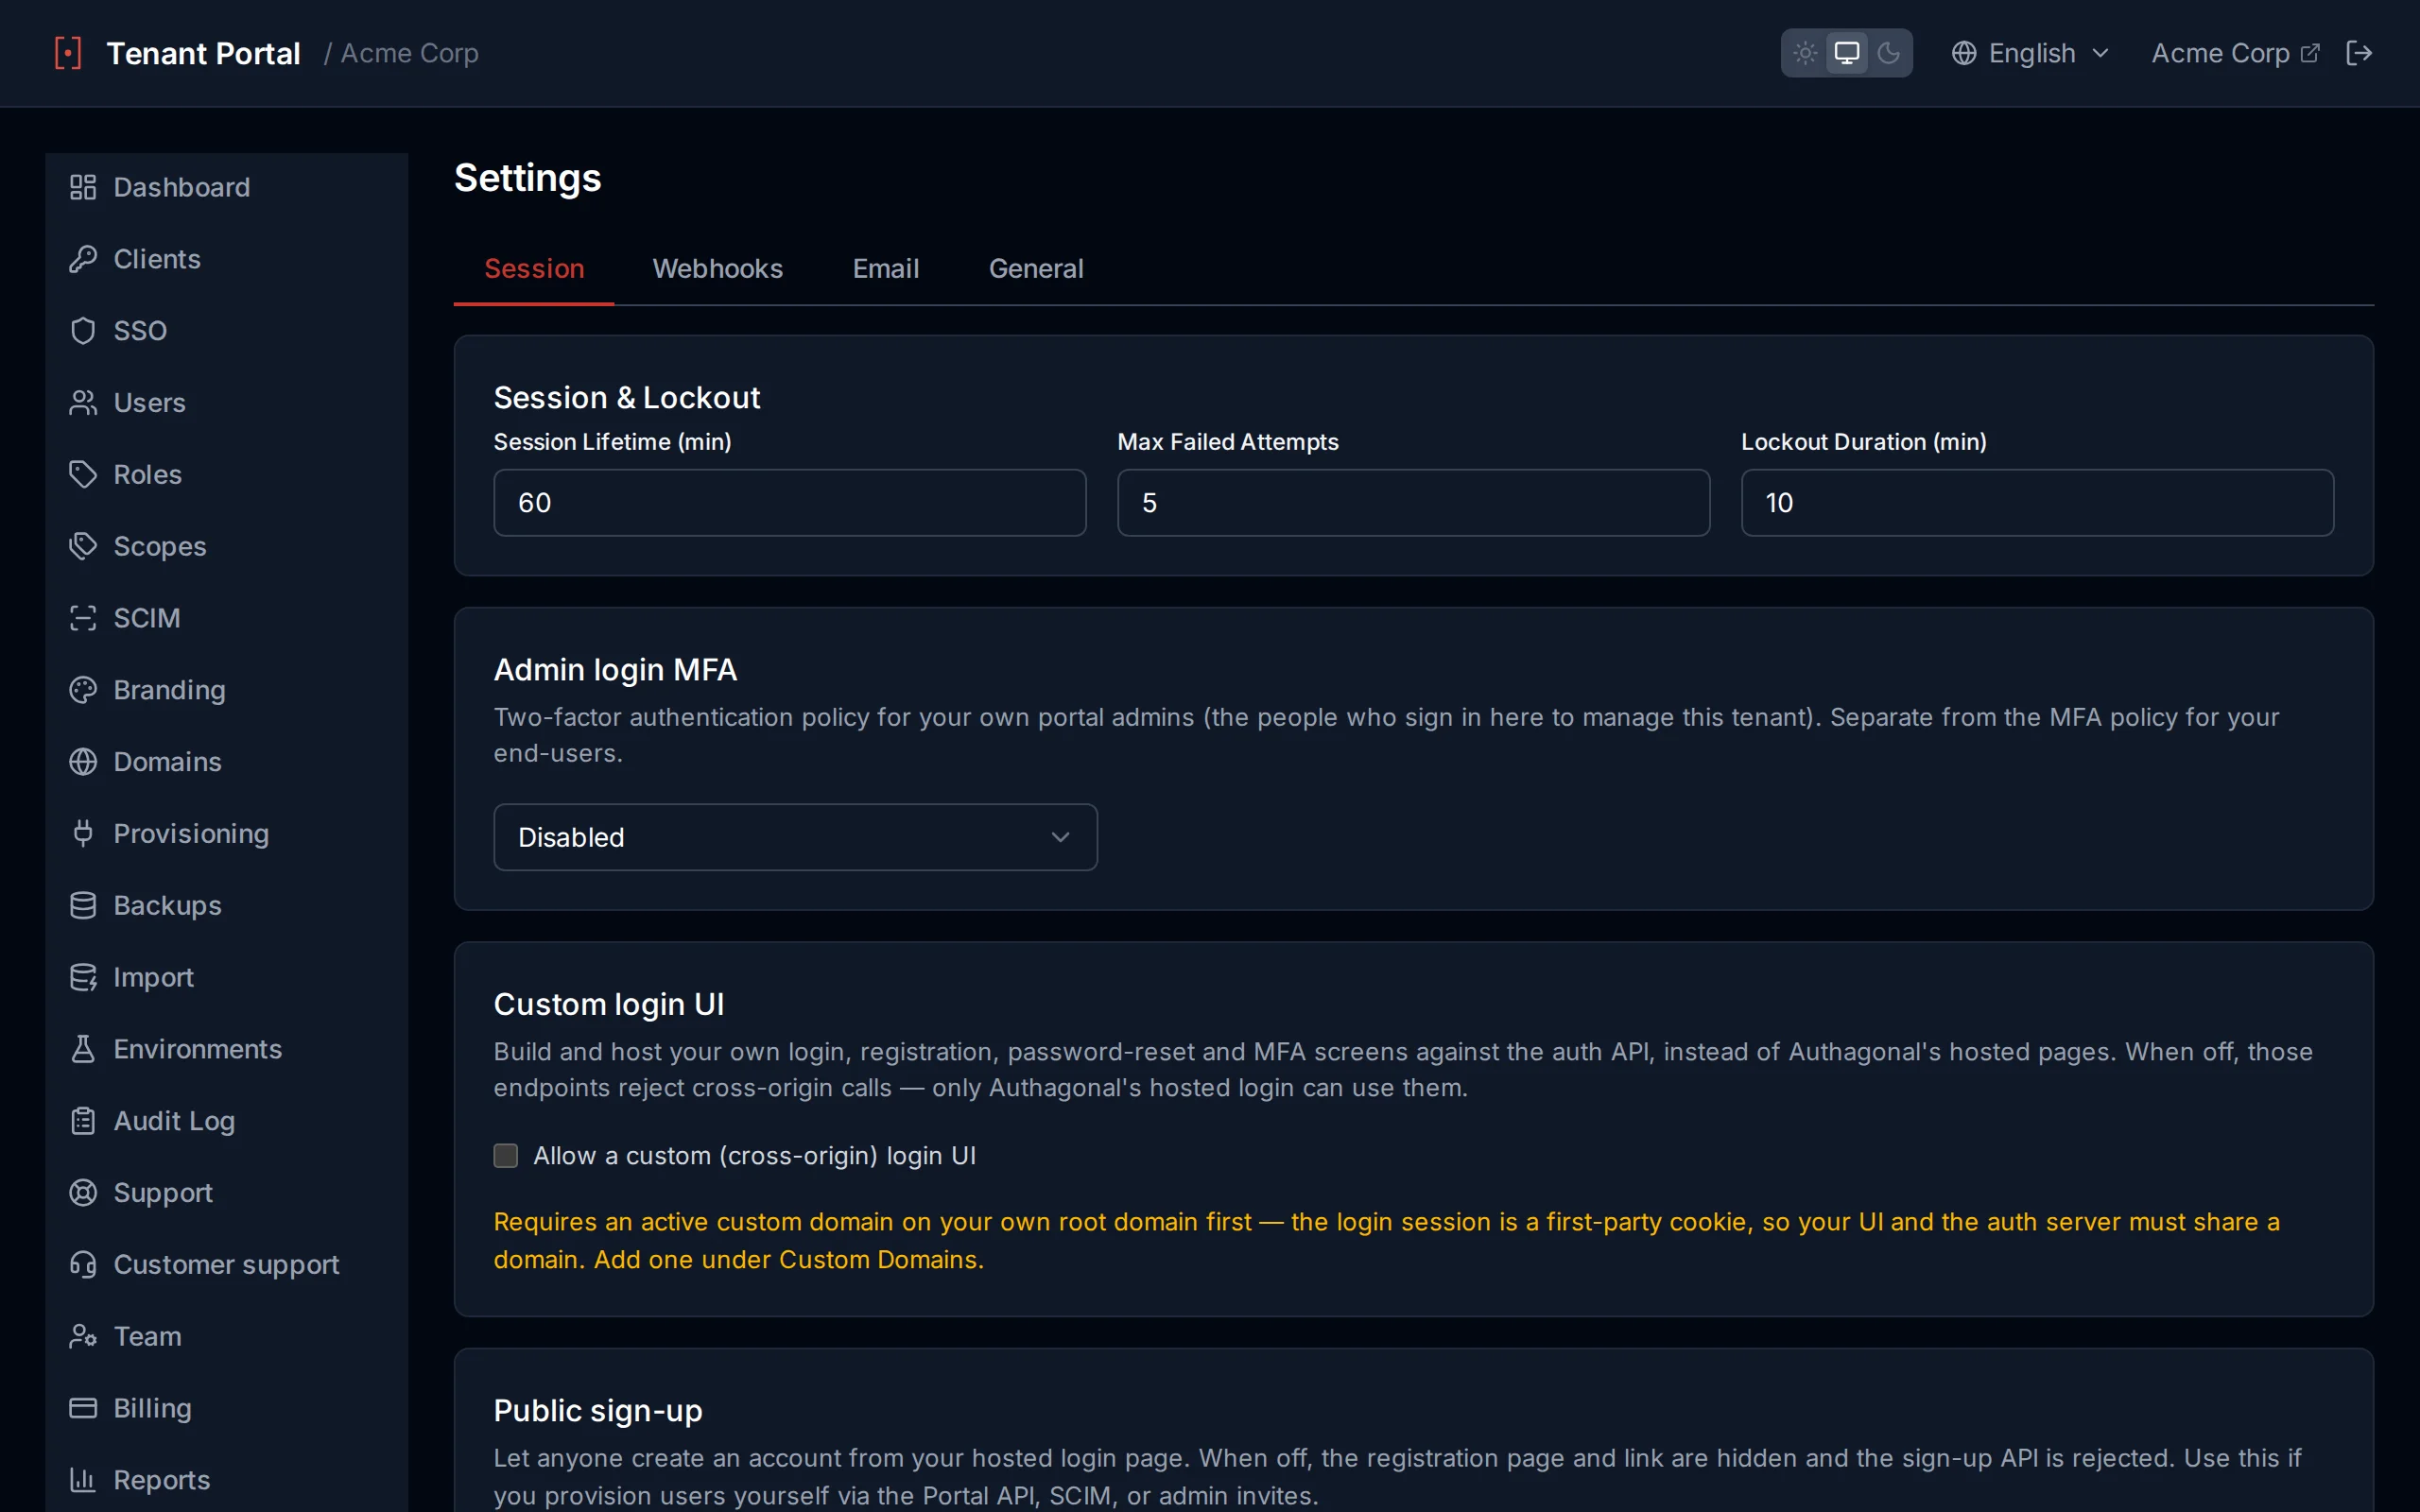
Session and lockout configuration
Webhooks
Webhooks let you react to authentication events in real time. Two events (onUserAuthenticated, onTokenIssued) are enforceable — by default they fire asynchronously and don't block the user, but you can opt in to enforcement per event so a non-2xx response or {"allow": false} body rejects the action. The remaining events are notifications — always fire-and-forget, never block.
| Event | Type | Description |
|---|---|---|
onUserAuthenticated | Enforceable | Fired after a successful login. Defaults to fire-and-forget so login latency is unaffected. Toggle <code>webhookEnforceUserAuthenticated</code> to make it blocking — a non-2xx response or <code>{"allow": false}</code> body then rejects the login. |
onTokenIssued | Enforceable | Fired before tokens are minted (authorization_code, refresh_token, client_credentials). Defaults to fire-and-forget. Toggle <code>webhookEnforceTokenIssued</code> to make it blocking — a non-2xx response or <code>{"allow": false}</code> body then prevents token issuance. |
onUserCreated | Notification | Fire-and-forget notification when a new user registers or is provisioned via SCIM. |
onUserUpdated | Notification | Fire-and-forget notification when a user record is updated (profile changes, role changes, SCIM updates). |
onUserDeleted | Notification | Fire-and-forget notification when a user is deleted, either via Portal/SCIM or by retention policy. |
onLoginFailed | Notification | Fire-and-forget notification when a login attempt fails due to bad credentials, lockout, or policy rejection. |
Additional webhook settings:
| Setting | Range | Default | Description |
|---|---|---|---|
webhookTimeoutSeconds | 1 – 30 | 5 | Maximum time to wait for an enforcement webhook response before timing out |
webhookFailOpen | On / Off | On | When enabled, if an enforcement webhook is unreachable or times out, the operation is allowed to proceed |
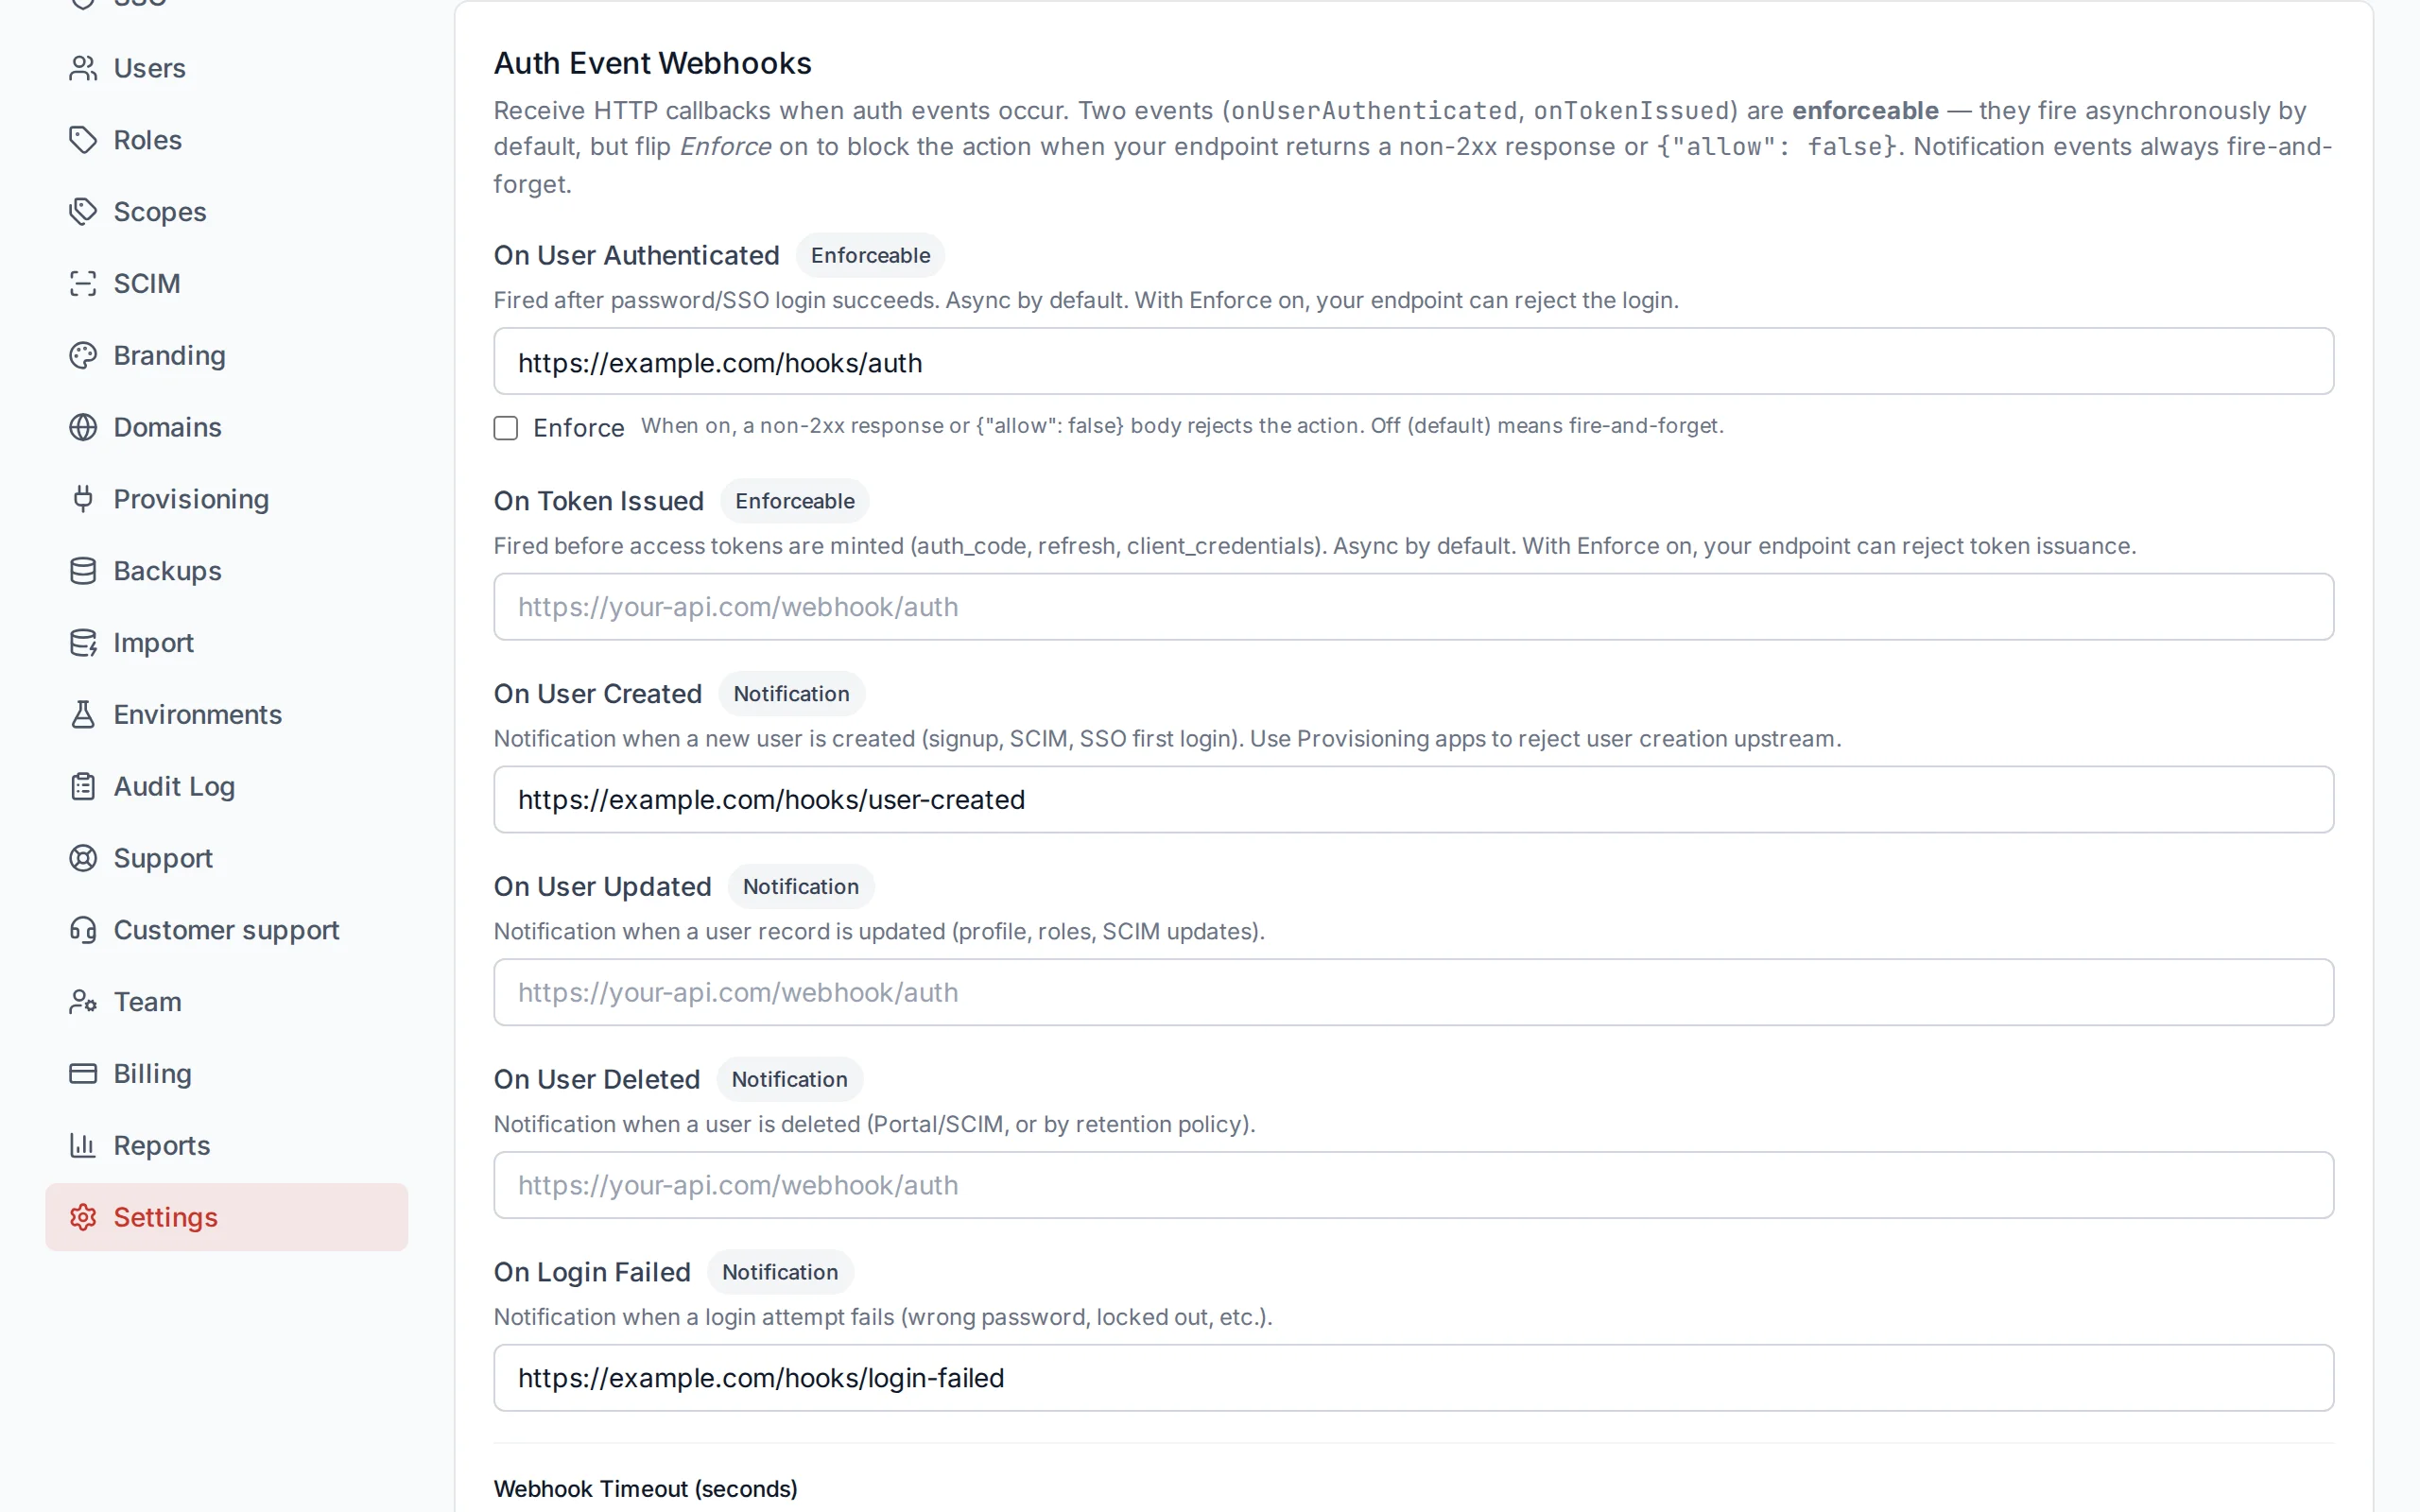
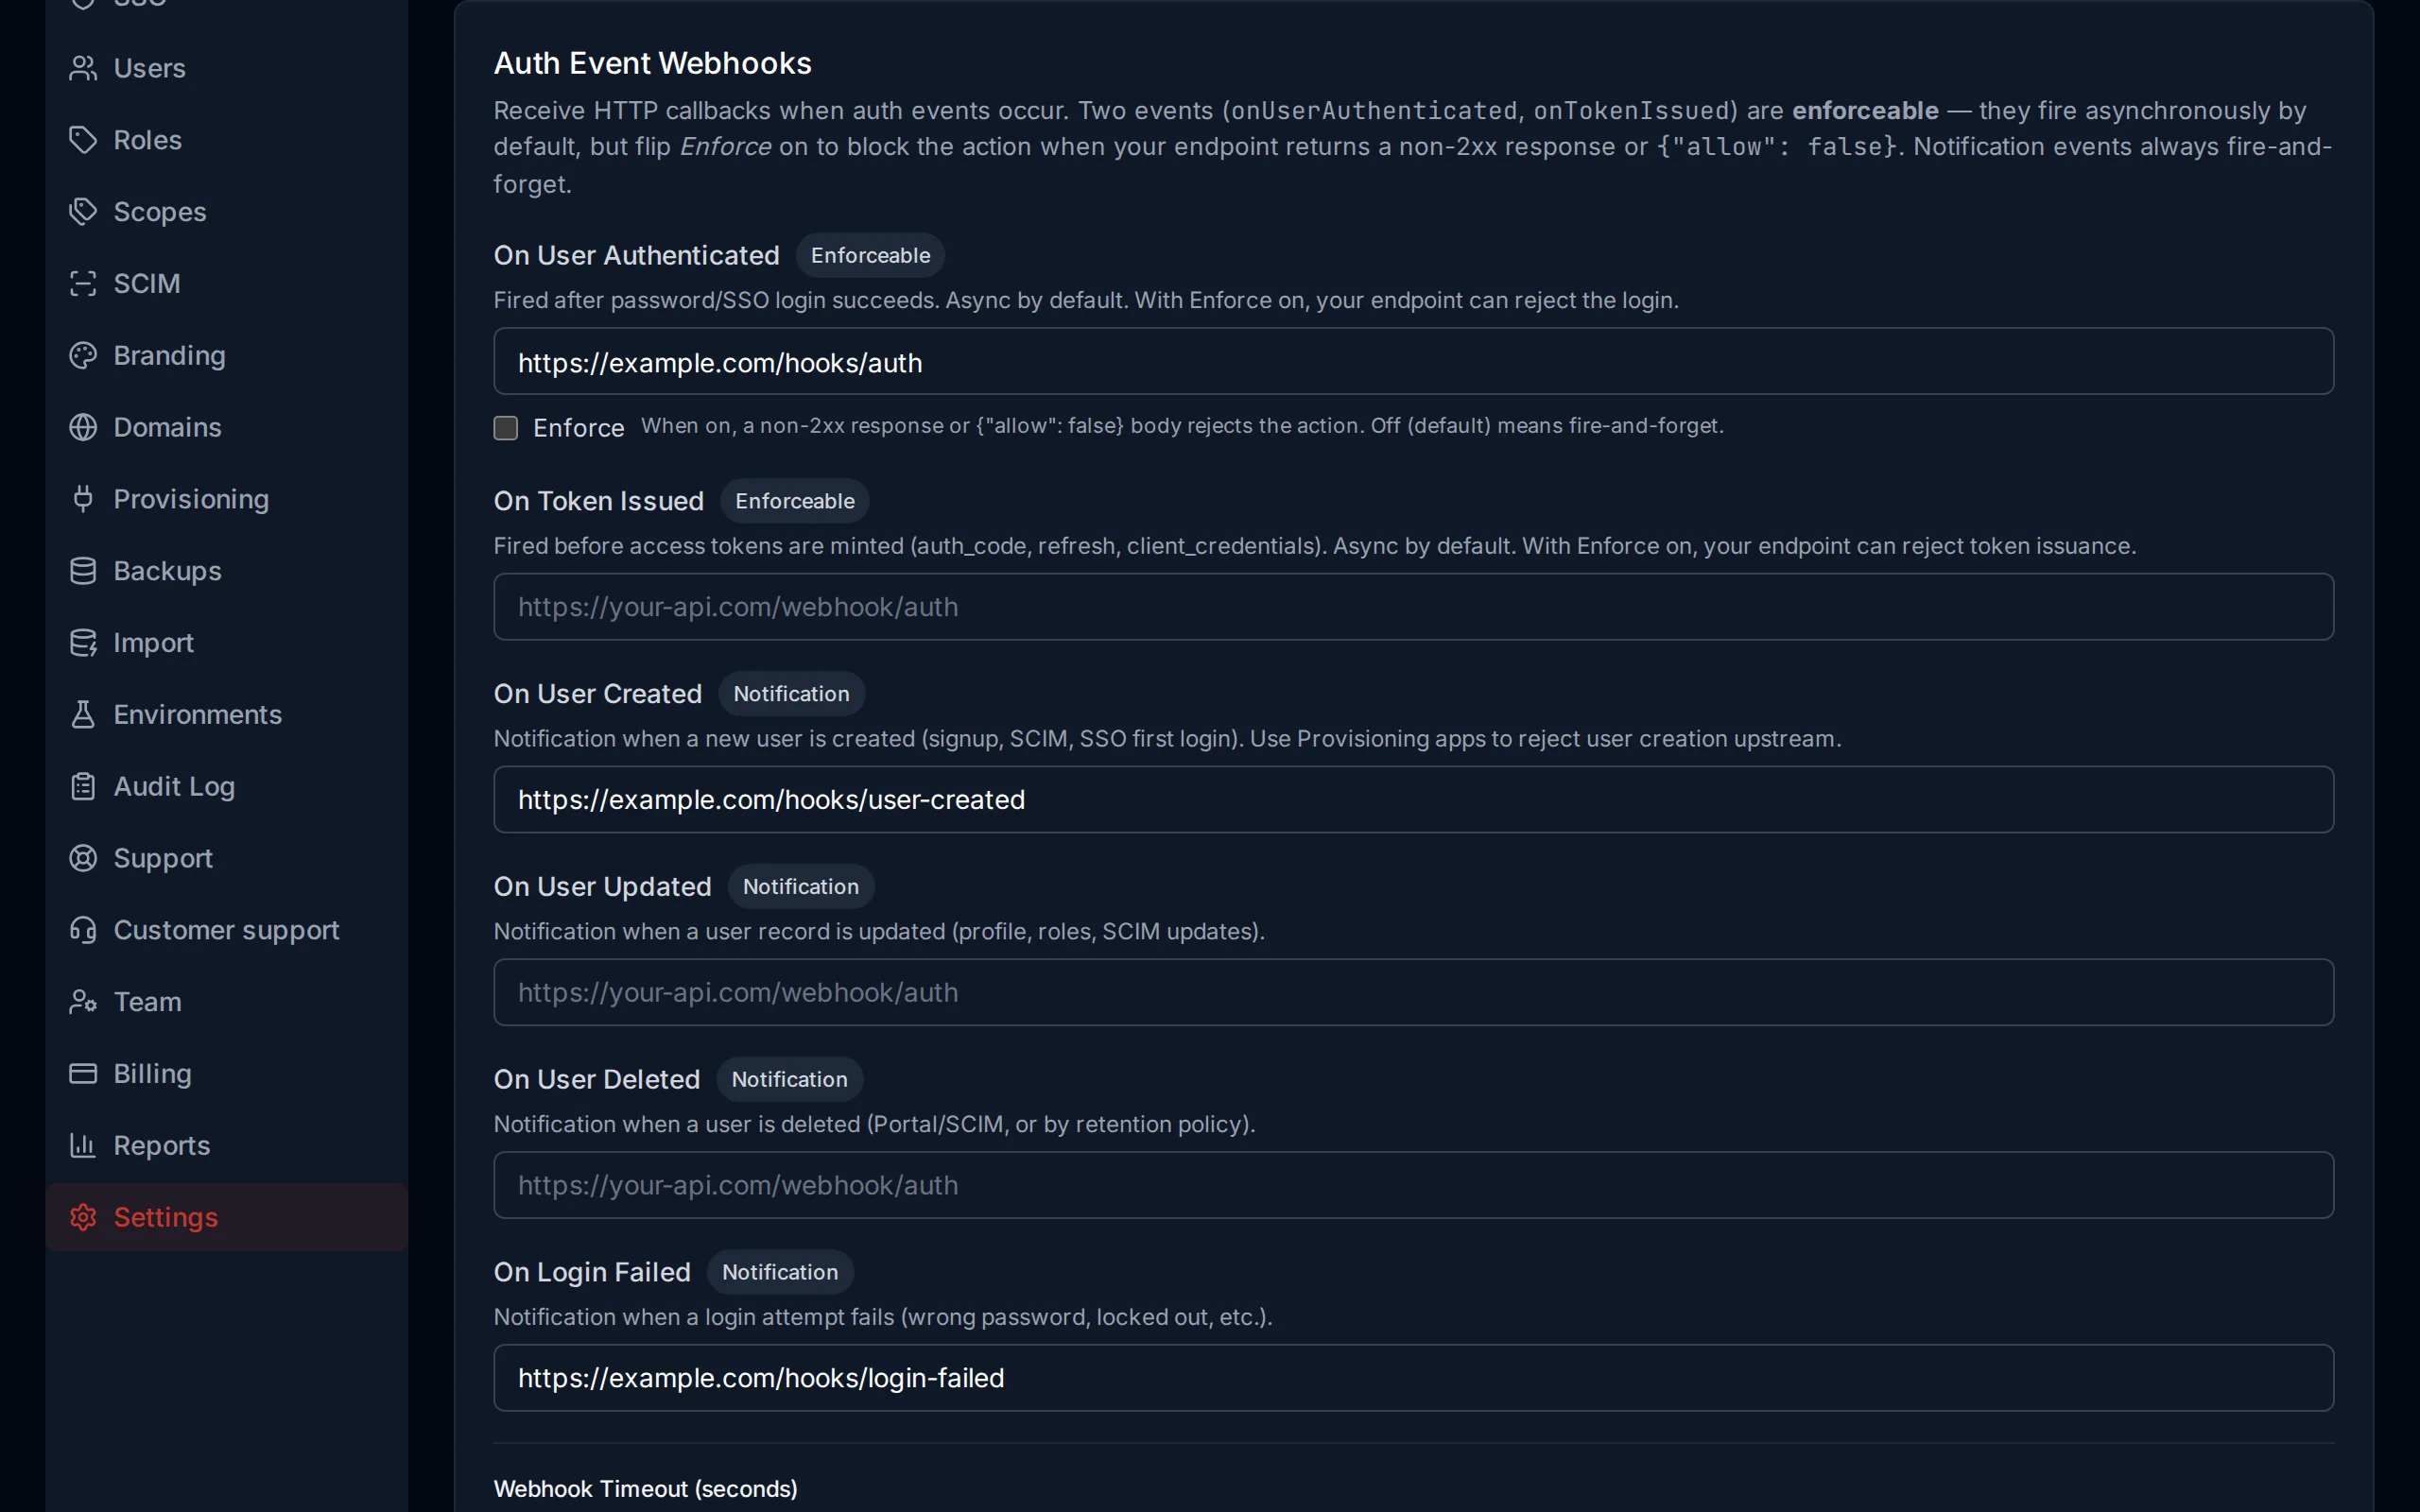
Webhook event configuration
Enforcement Webhook Availability
webhookFailOpen is disabled, no users will be able to log in. Use fail-open mode unless you have strict compliance requirements that mandate blocking on webhook failure.Verifying webhooks
Once any webhook URL is configured, Authagonal mints a per-tenant signing secret (a whsec_… value shown read-only under Settings → Webhooks). Every outbound delivery carries an X-Authagonal-Signature: t=<unix>,v1=<hex> header, where v1 is HMAC-SHA256(secret, "{t}.{body}") computed over the raw request body. Recompute it on your endpoint and constant-time-compare to confirm the request genuinely came from Authagonal and wasn't tampered with — and reject deliveries whose t is too old to block replays.
import crypto from 'node:crypto';

// rawBody MUST be the exact bytes Authagonal sent — verify before any JSON re-serialization.
function verifyAuthagonalWebhook(signatureHeader, rawBody, signingSecret) {
  const parts = Object.fromEntries(signatureHeader.split(',').map((p) => p.split('=')));
  const { t, v1 } = parts;

  // Replay protection: reject deliveries older than 5 minutes.
  if (Math.abs(Date.now() / 1000 - Number(t)) > 300) return false;

  const expected = crypto
    .createHmac('sha256', signingSecret)
    .update(`${t}.${rawBody}`)
    .digest('hex');

  return v1.length === expected.length &&
    crypto.timingSafeEqual(Buffer.from(v1), Buffer.from(expected));
}
Rotating the signing secret
Maintenance Window
Set a preferred maintenance window for disruptive operations such as certificate rotations and infrastructure updates. Choose a UTC hour (0–23) — the portal also displays the equivalent time in your local timezone for convenience.
Signup and access
Who is allowed to become a user in your tenant, and under what conditions they can sign in.
| Setting | Default | Description |
|---|---|---|
| Public signup | On | Whether anyone can register themselves. Turning it off hides the registration page and rejects the registration API, which matters: hiding the link alone would leave the endpoint open. Use it when you provision users yourself through SCIM, the API or invitations. |
| Require email verification to sign in | On | An unconfirmed address cannot sign in. Turn it off if your own app gates on verification instead; the email_verified claim still rides the token either way, so you keep the signal. |
| Dynamic client registration | Off | Lets a client register itself at runtime under RFC 7591, which is what an AI agent or MCP connector needs before it can start a flow. Off by default, and enabling it opens the door for your tenant alone. Registrations stay rate-limited, PKCE-required and consent-required regardless. |
| Portal MFA policy | Disabled | Multi-factor for your own team signing in to the portal, set independently of the policy for your end users. Disabled, offered at login, or required. |
| Maximum users | Your plan's limit | A hard cap on total users, enforced at the single creation chokepoint so every route is bounded: self-registration, the API, portal creation, SCIM, just-in-time provisioning, bulk import and team invitations. |
Inactive user retention
Optionally deactivate and then delete accounts that have gone unused, so a directory does not accumulate dormant identities forever. Both are off unless you set them, and deletion is permanent.
| Setting | Default | Description |
|---|---|---|
| Deactivate after (days of inactivity) | Never | Deactivates an account that has not signed in for this long. The record is kept and can be reactivated. |
| Delete after (days of inactivity) | Never | Permanently deletes the account. There is no undo, so set the warning window and webhook below before you turn this on. |
| Warning days | 7 | How many days ahead of a deactivation or deletion the warning webhook fires, giving you time to intervene. |
| Retention webhook | - | Where those warnings and the executed actions are posted, so you can notify the person or hold the account open. |
Audit export and remote backups
Two ways to get your data out on a schedule rather than on request. Audit export pushes each completed day of audit events to a URL you nominate, signed so you can verify it came from us, for feeding a SIEM or a compliance archive. Remote backups send copies of your daily and weekly backups to a destination you control, with no authentication, basic authentication or a bearer token. Both are configured in Settings and are yours to hold, independent of the backups we keep.
Sandbox Environment
The sandbox environment is a full clone of your production tenant, available at a separate URL. Use it to test configuration changes, SSO integrations, and webhook endpoints without affecting live users.
| Action | Description |
|---|---|
| Enable Sandbox | Creates a sandbox copy of your production tenant. The sandbox URL is your tenant slug with a -sandbox suffix. |
| Refresh from Live | Syncs the sandbox environment with the current production configuration and user data. |
| Disable Sandbox | Permanently deletes the sandbox environment and all its data. |
The sandbox is accessible at {slug}-sandbox.authagonal.io.
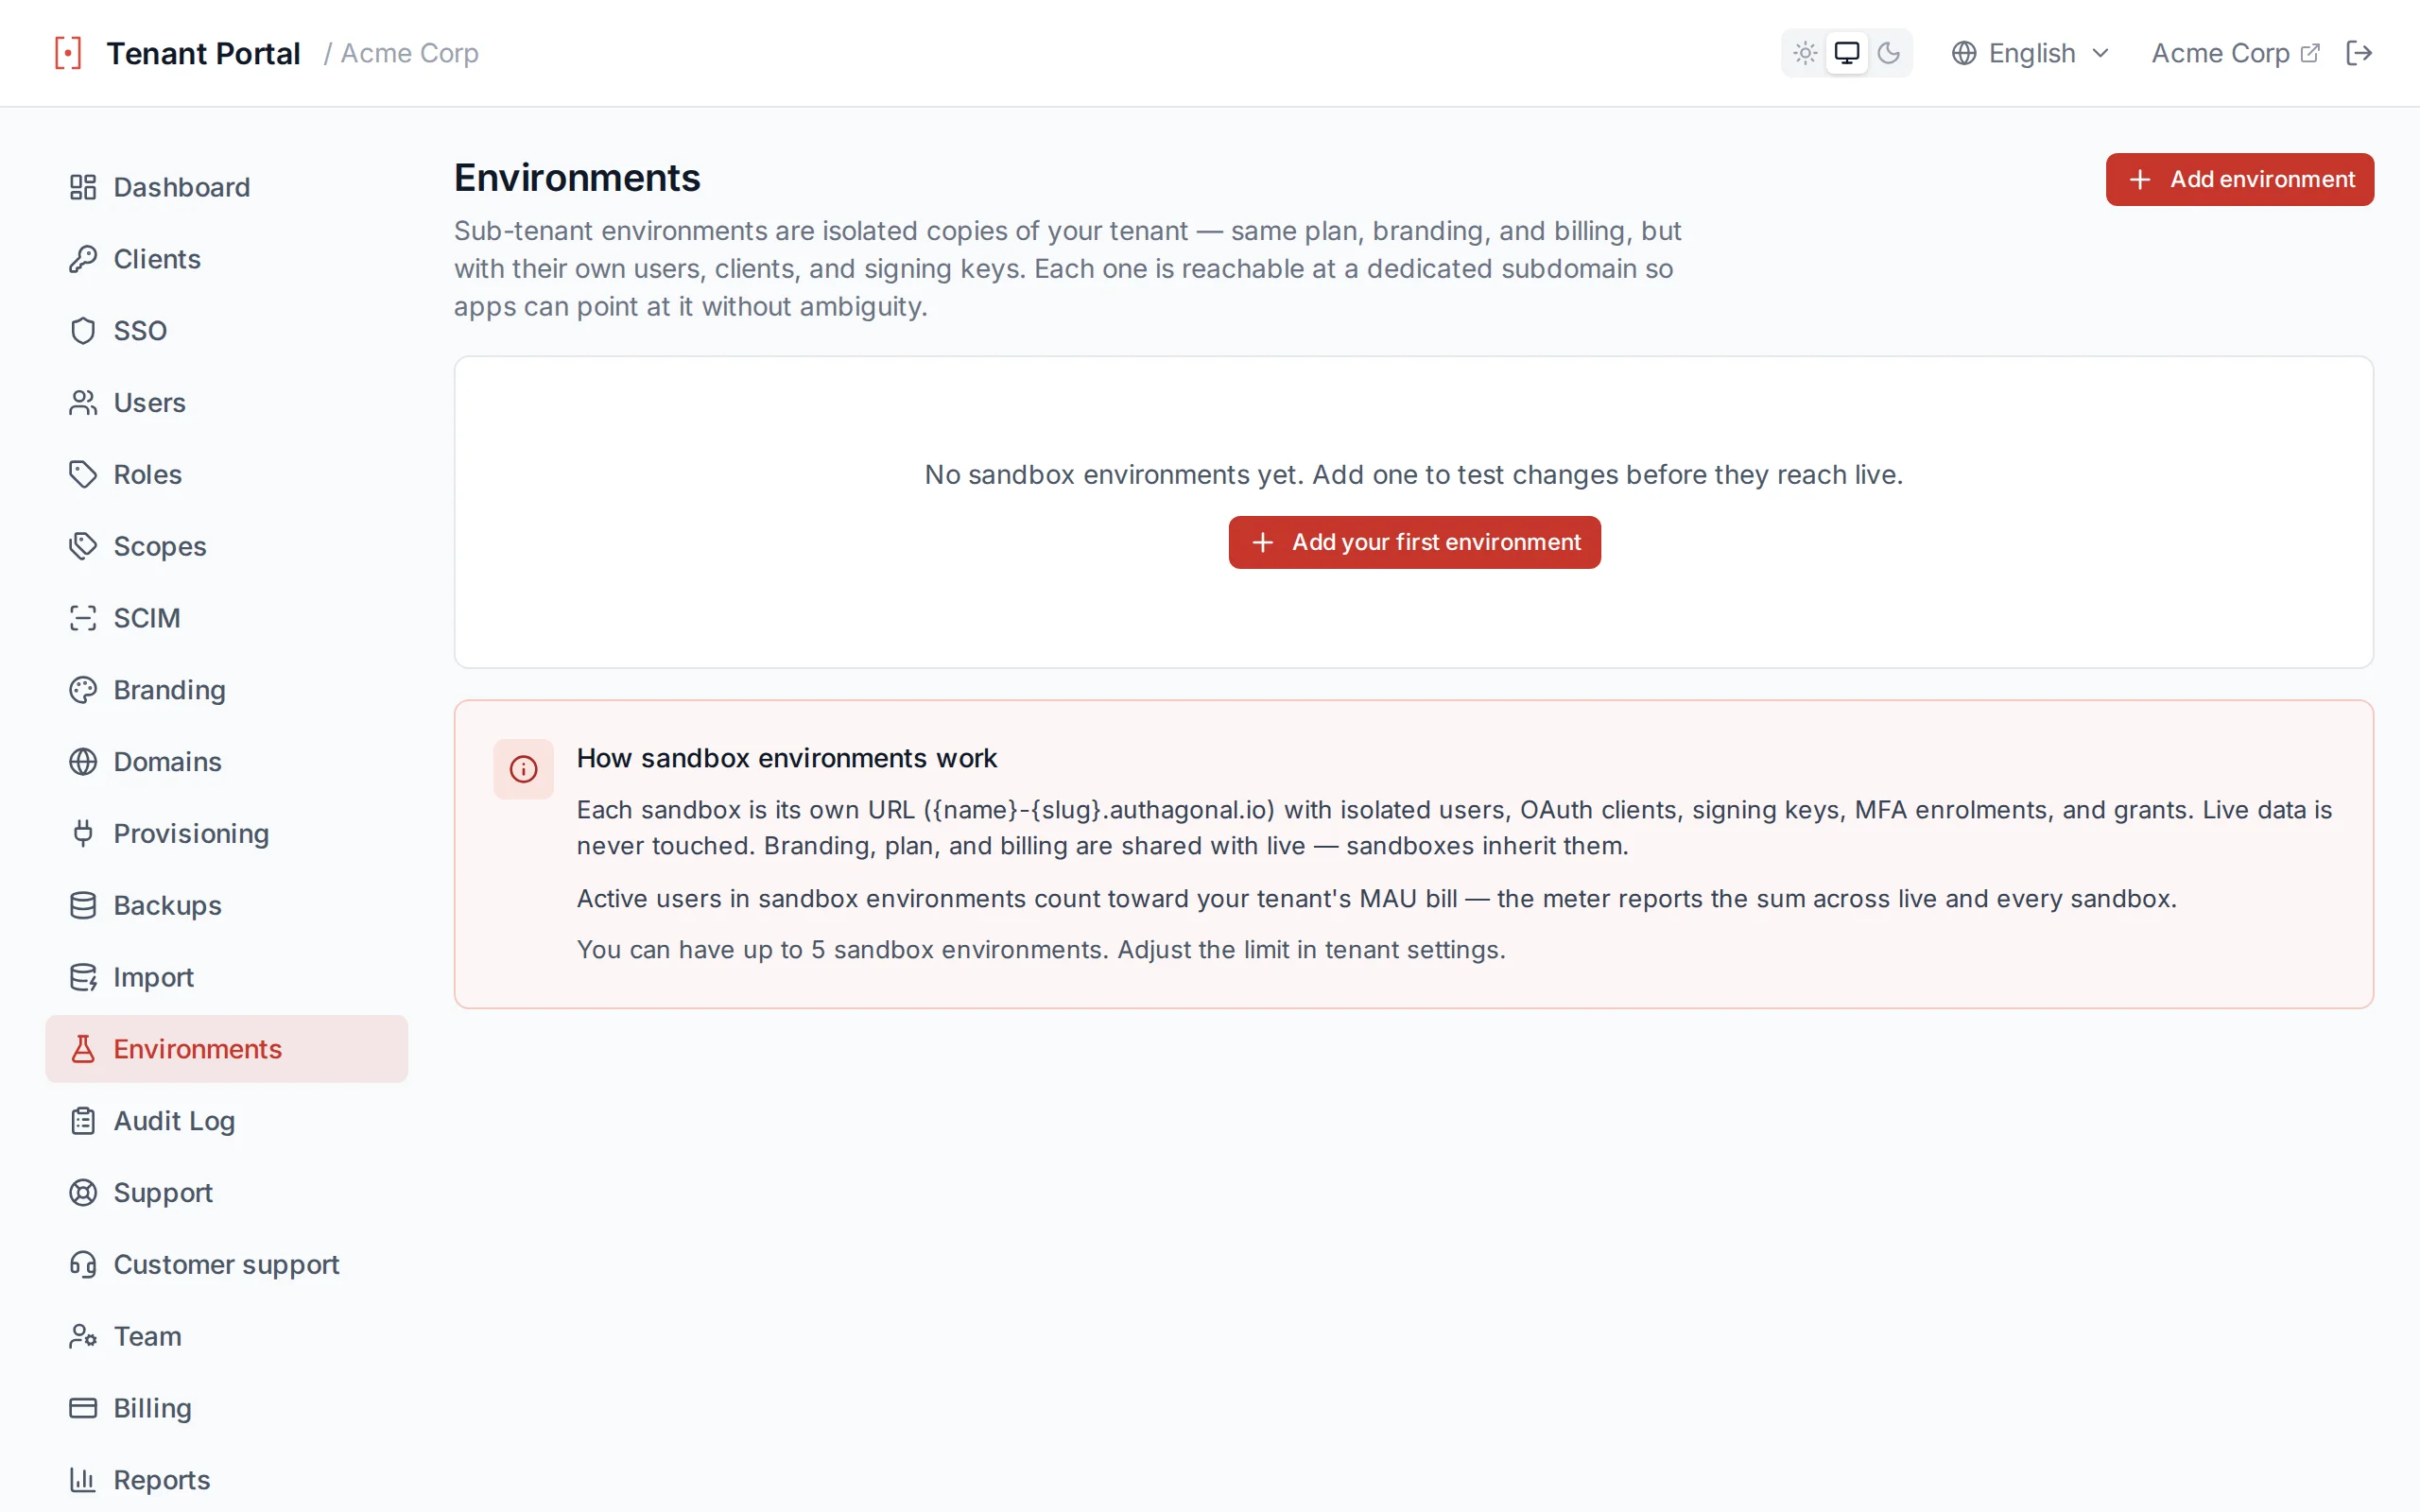
Sandbox environment controls
Billing
Manage your subscription and billing through the portal's Billing page. This page gives you an overview of your current plan and provides access to the Stripe billing portal for managing payment methods, invoices, and plan changes.
Subscription Information
The billing page displays your current subscription details at a glance. You'll see a status badge indicating your subscription state — active, trialing, past_due, canceled, or unpaid — along with your plan name, the current billing period (start and end dates), and whether your subscription is set to cancel at the end of the current period.
Manage Subscription
Click the Manage Subscription button to open the Stripe billing portal in a new window. From there you can update your payment methods, view and download invoices, change your plan, or cancel your subscription.
If no subscription exists yet, a Setup Billing call-to-action is shown instead, which guides you through selecting a plan and entering payment details.
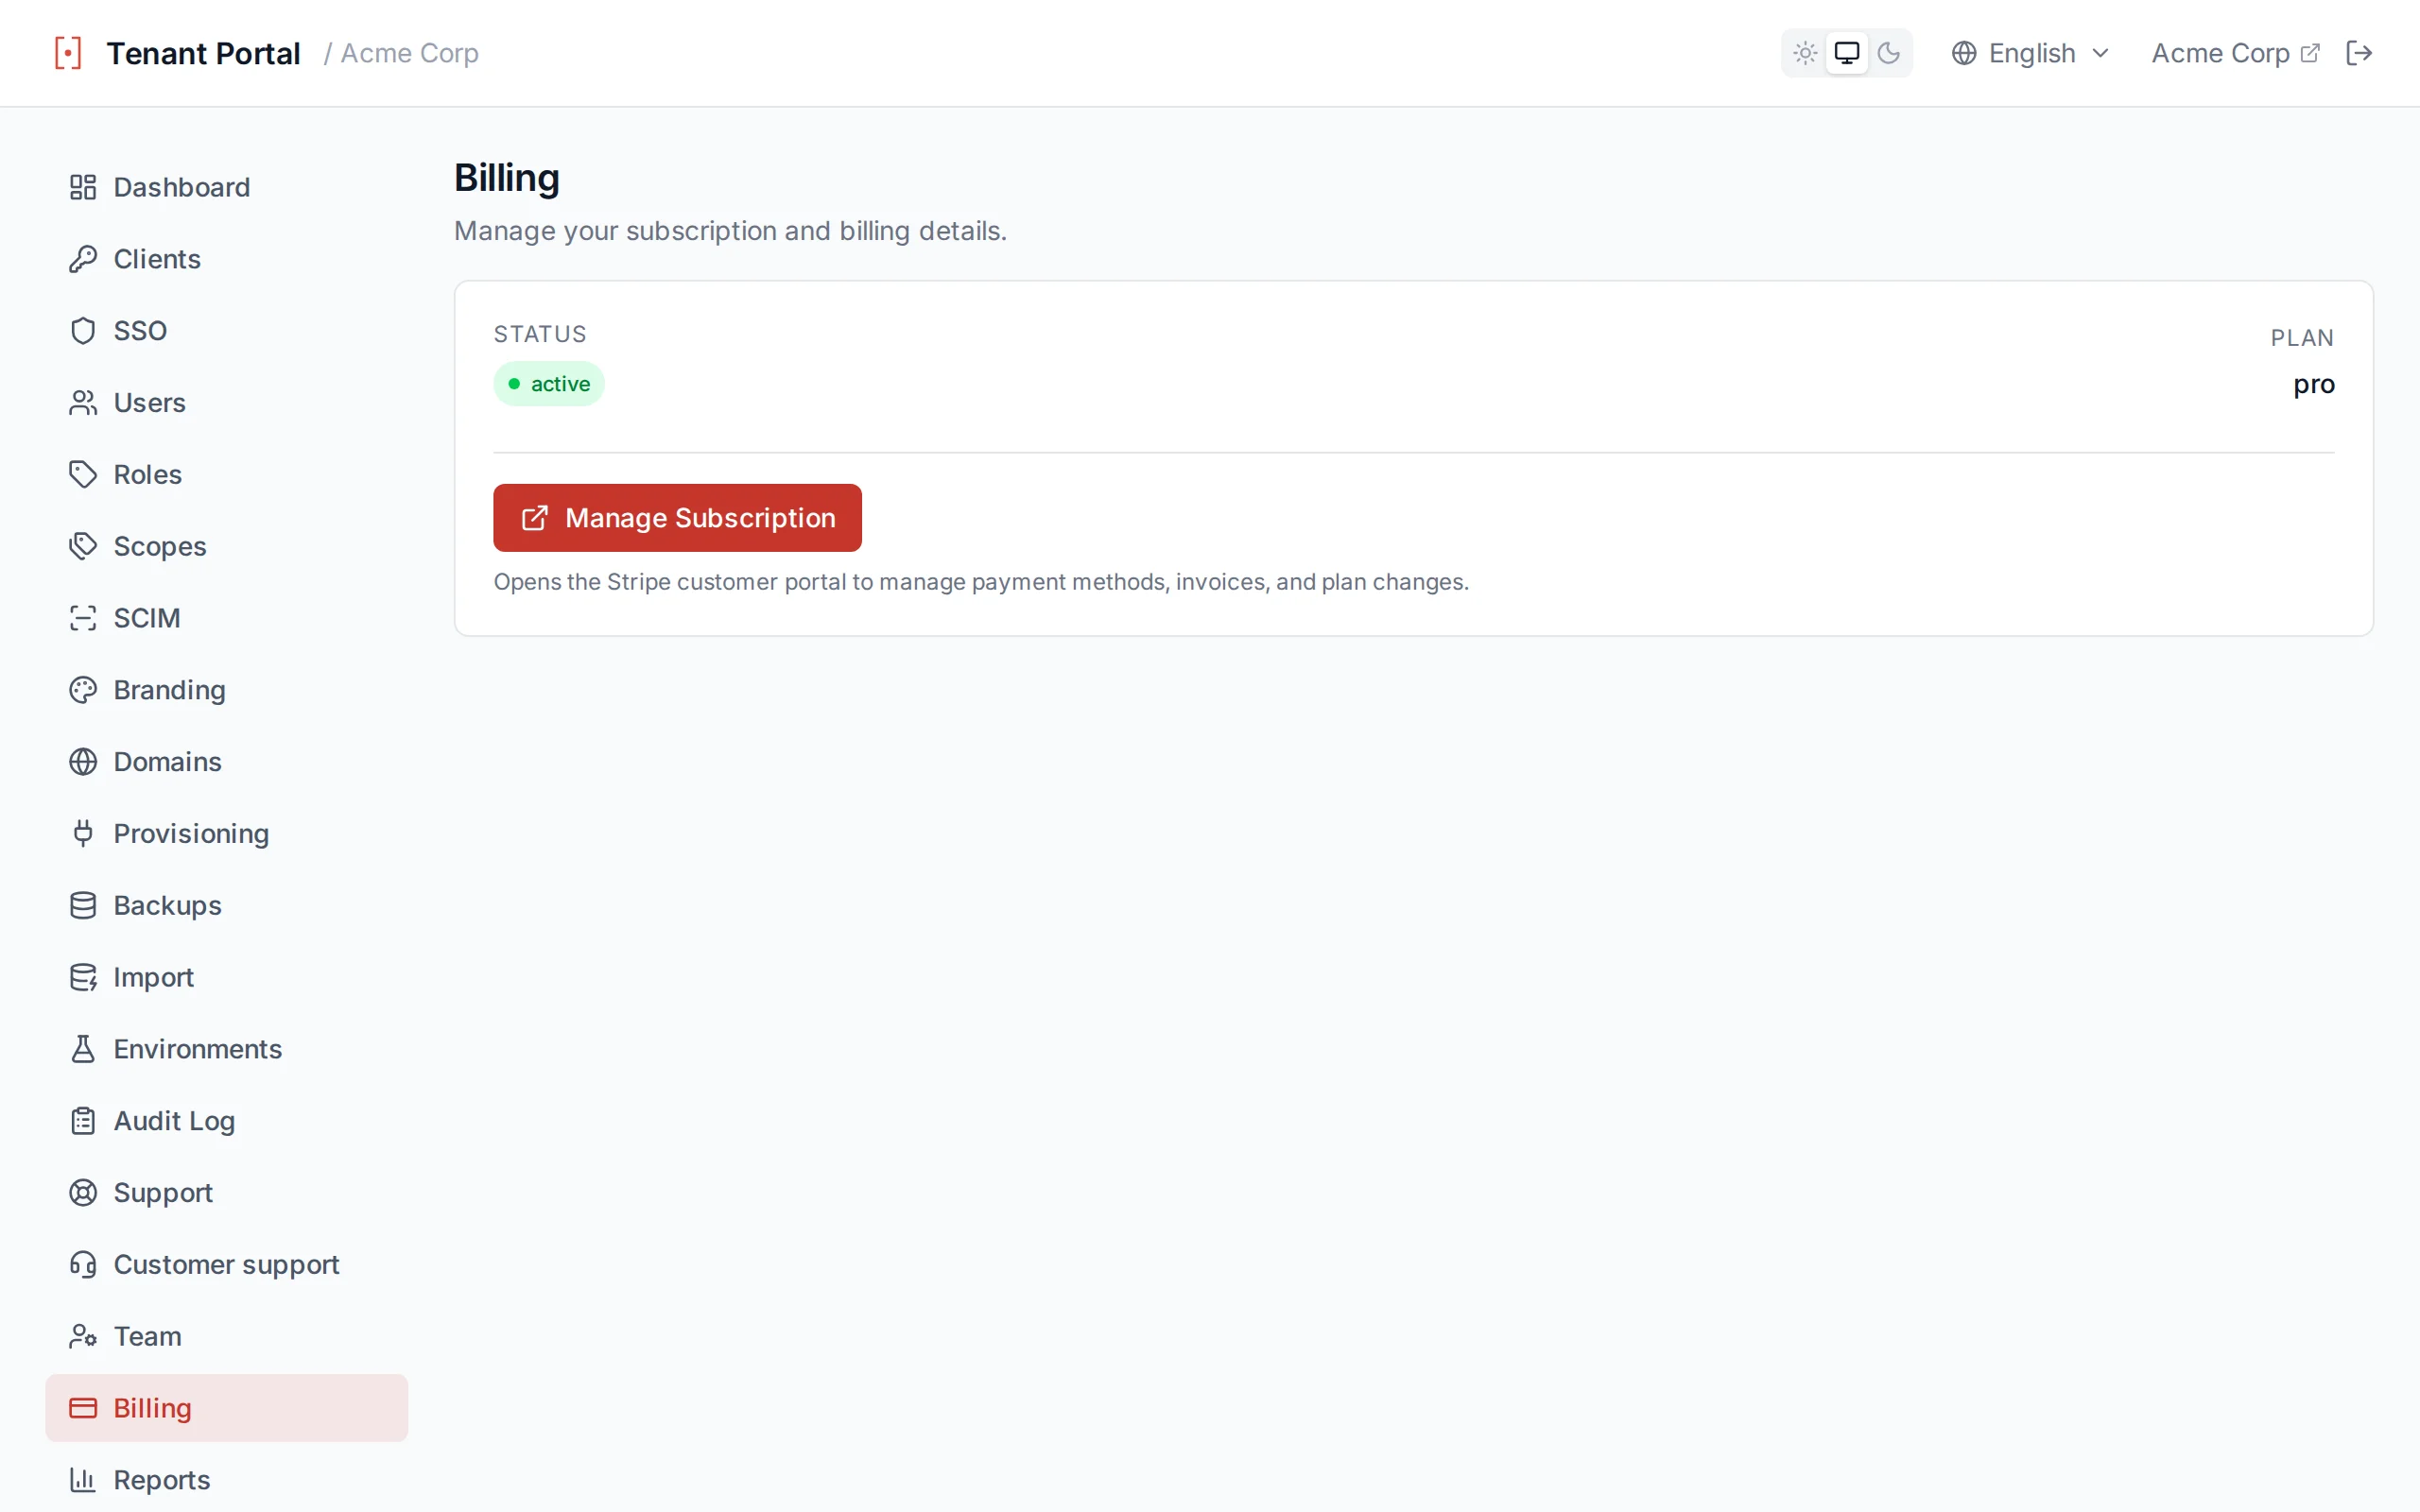
The billing page displays your current subscription details and provides access to Stripe
Payment Security
Custom Domains
Serve your authentication pages from your own domain (e.g., auth.yourdomain.com) instead of the default {slug}.authagonal.io. Custom domains give your users a seamless, branded authentication experience.
Adding a Domain
Enter the hostname you want to use in the add domain form (e.g., auth.yourdomain.com). Once added, the domain will appear in your domain list with a pending_verification status.
DNS Verification
Create a CNAME record pointing your domain to {slug}.authagonal.io. Once the DNS record is in place, click Verify to check DNS propagation.
auth.yourdomain.com. CNAME acme.authagonal.io.
DNS Propagation
TLS Certificates
Once your domain is verified, you need a TLS certificate so users can connect securely over HTTPS. Authagonal supports two options:
Automatic (cert-manager) — Authagonal provisions and renews TLS certificates automatically using cert-manager. This is the recommended option for most users. No additional configuration is required.
Bring Your Own (BYO) — Upload your own certificate and private key in PEM format. This option is useful if your organization requires certificates from a specific certificate authority. Certificate expiry is tracked so you can renew before it lapses.
Domain Status
Each domain displays a status badge indicating its current state: pending_verification (DNS not yet confirmed), verified (DNS confirmed, TLS pending), active (fully operational), or failed (configuration issue detected).
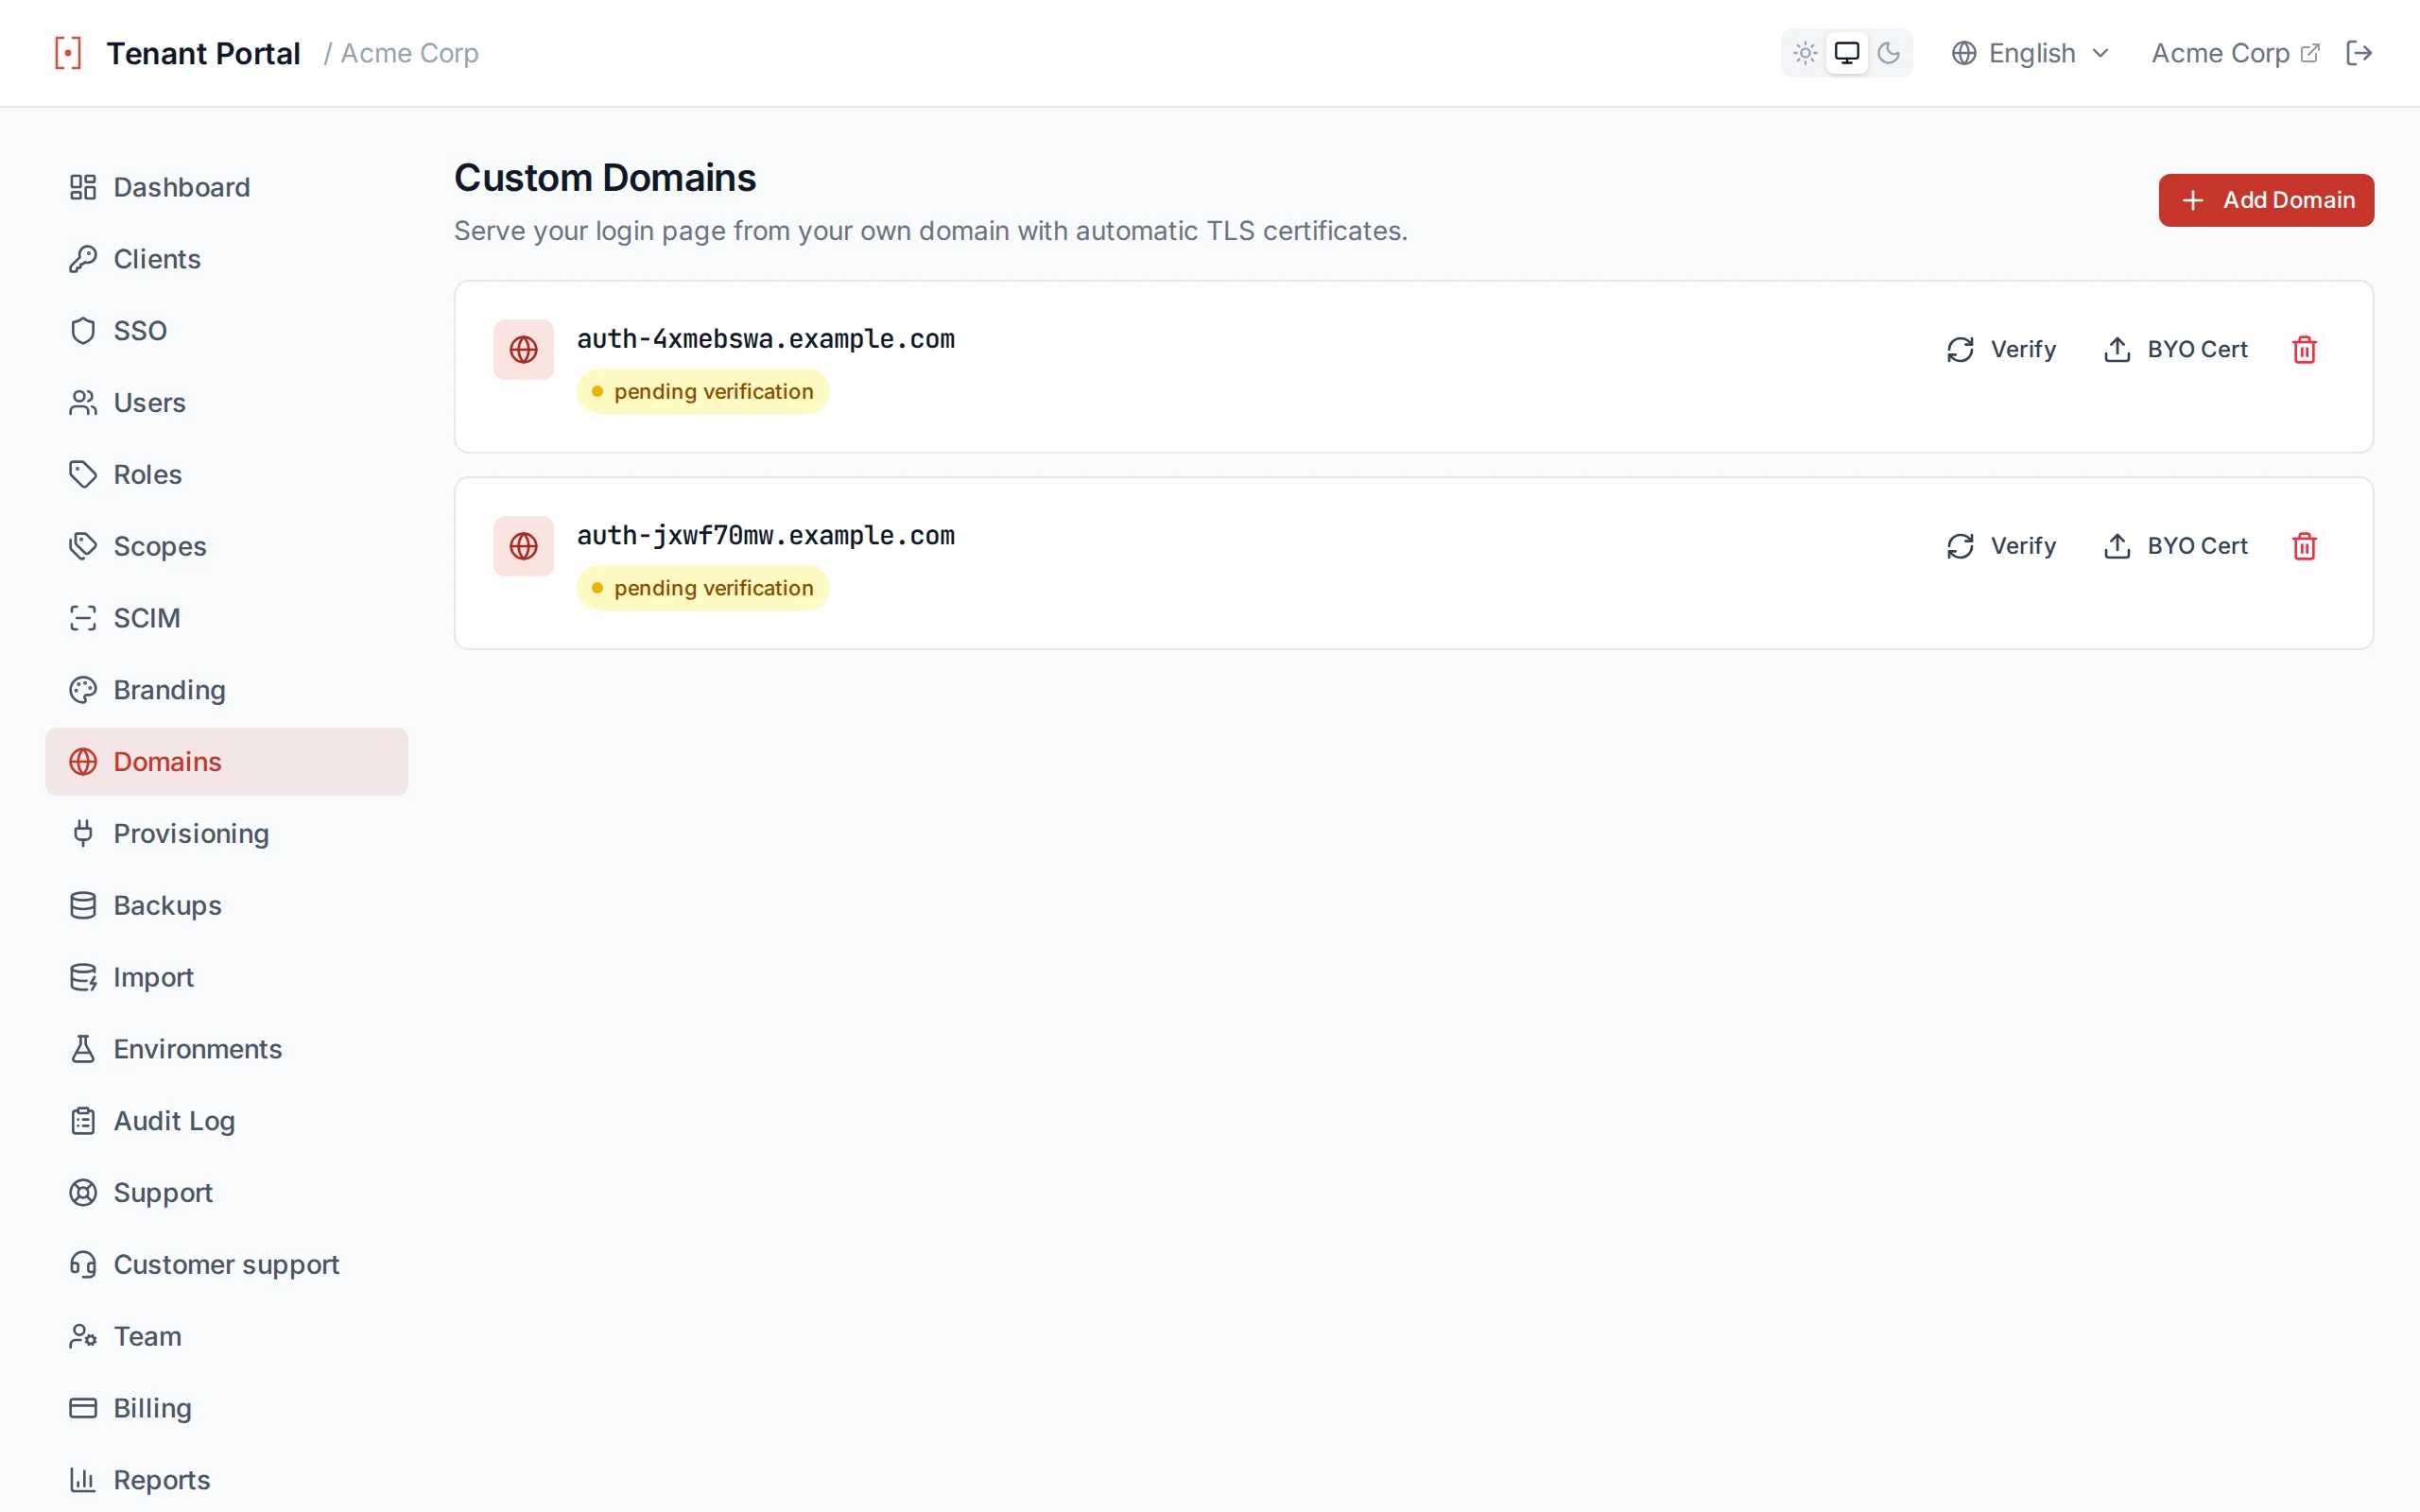
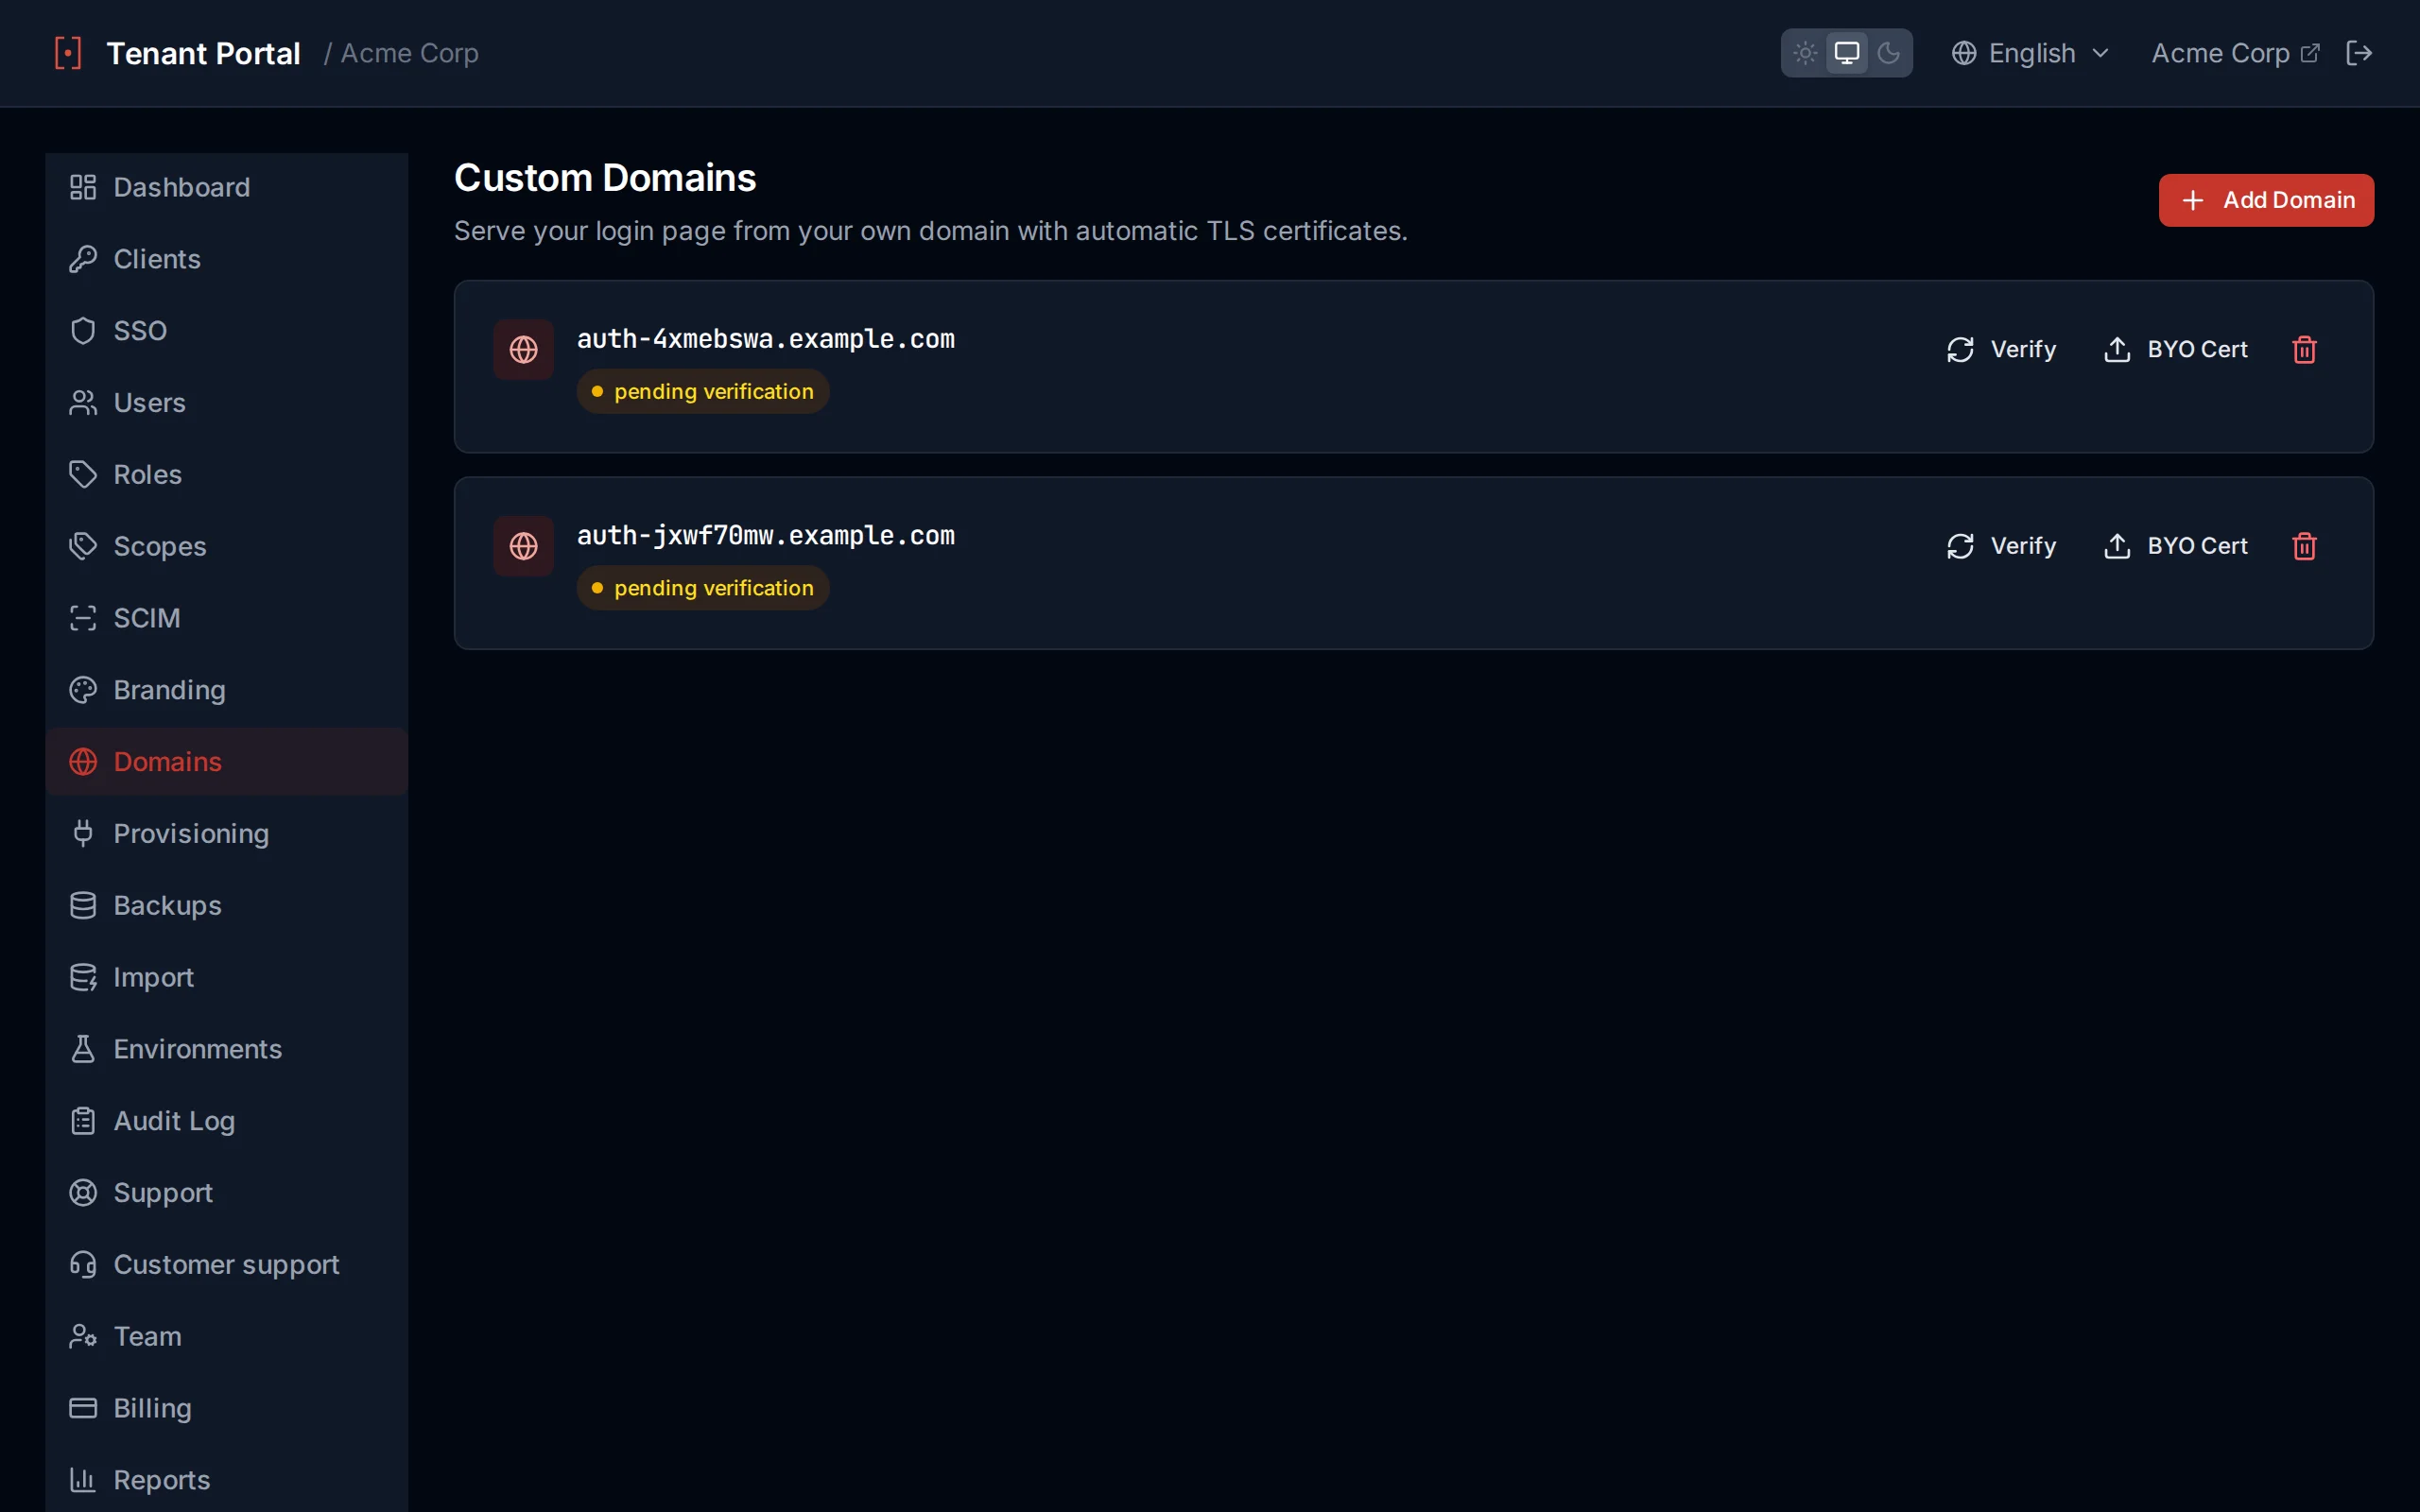
The domain list displays each custom domain and its current status
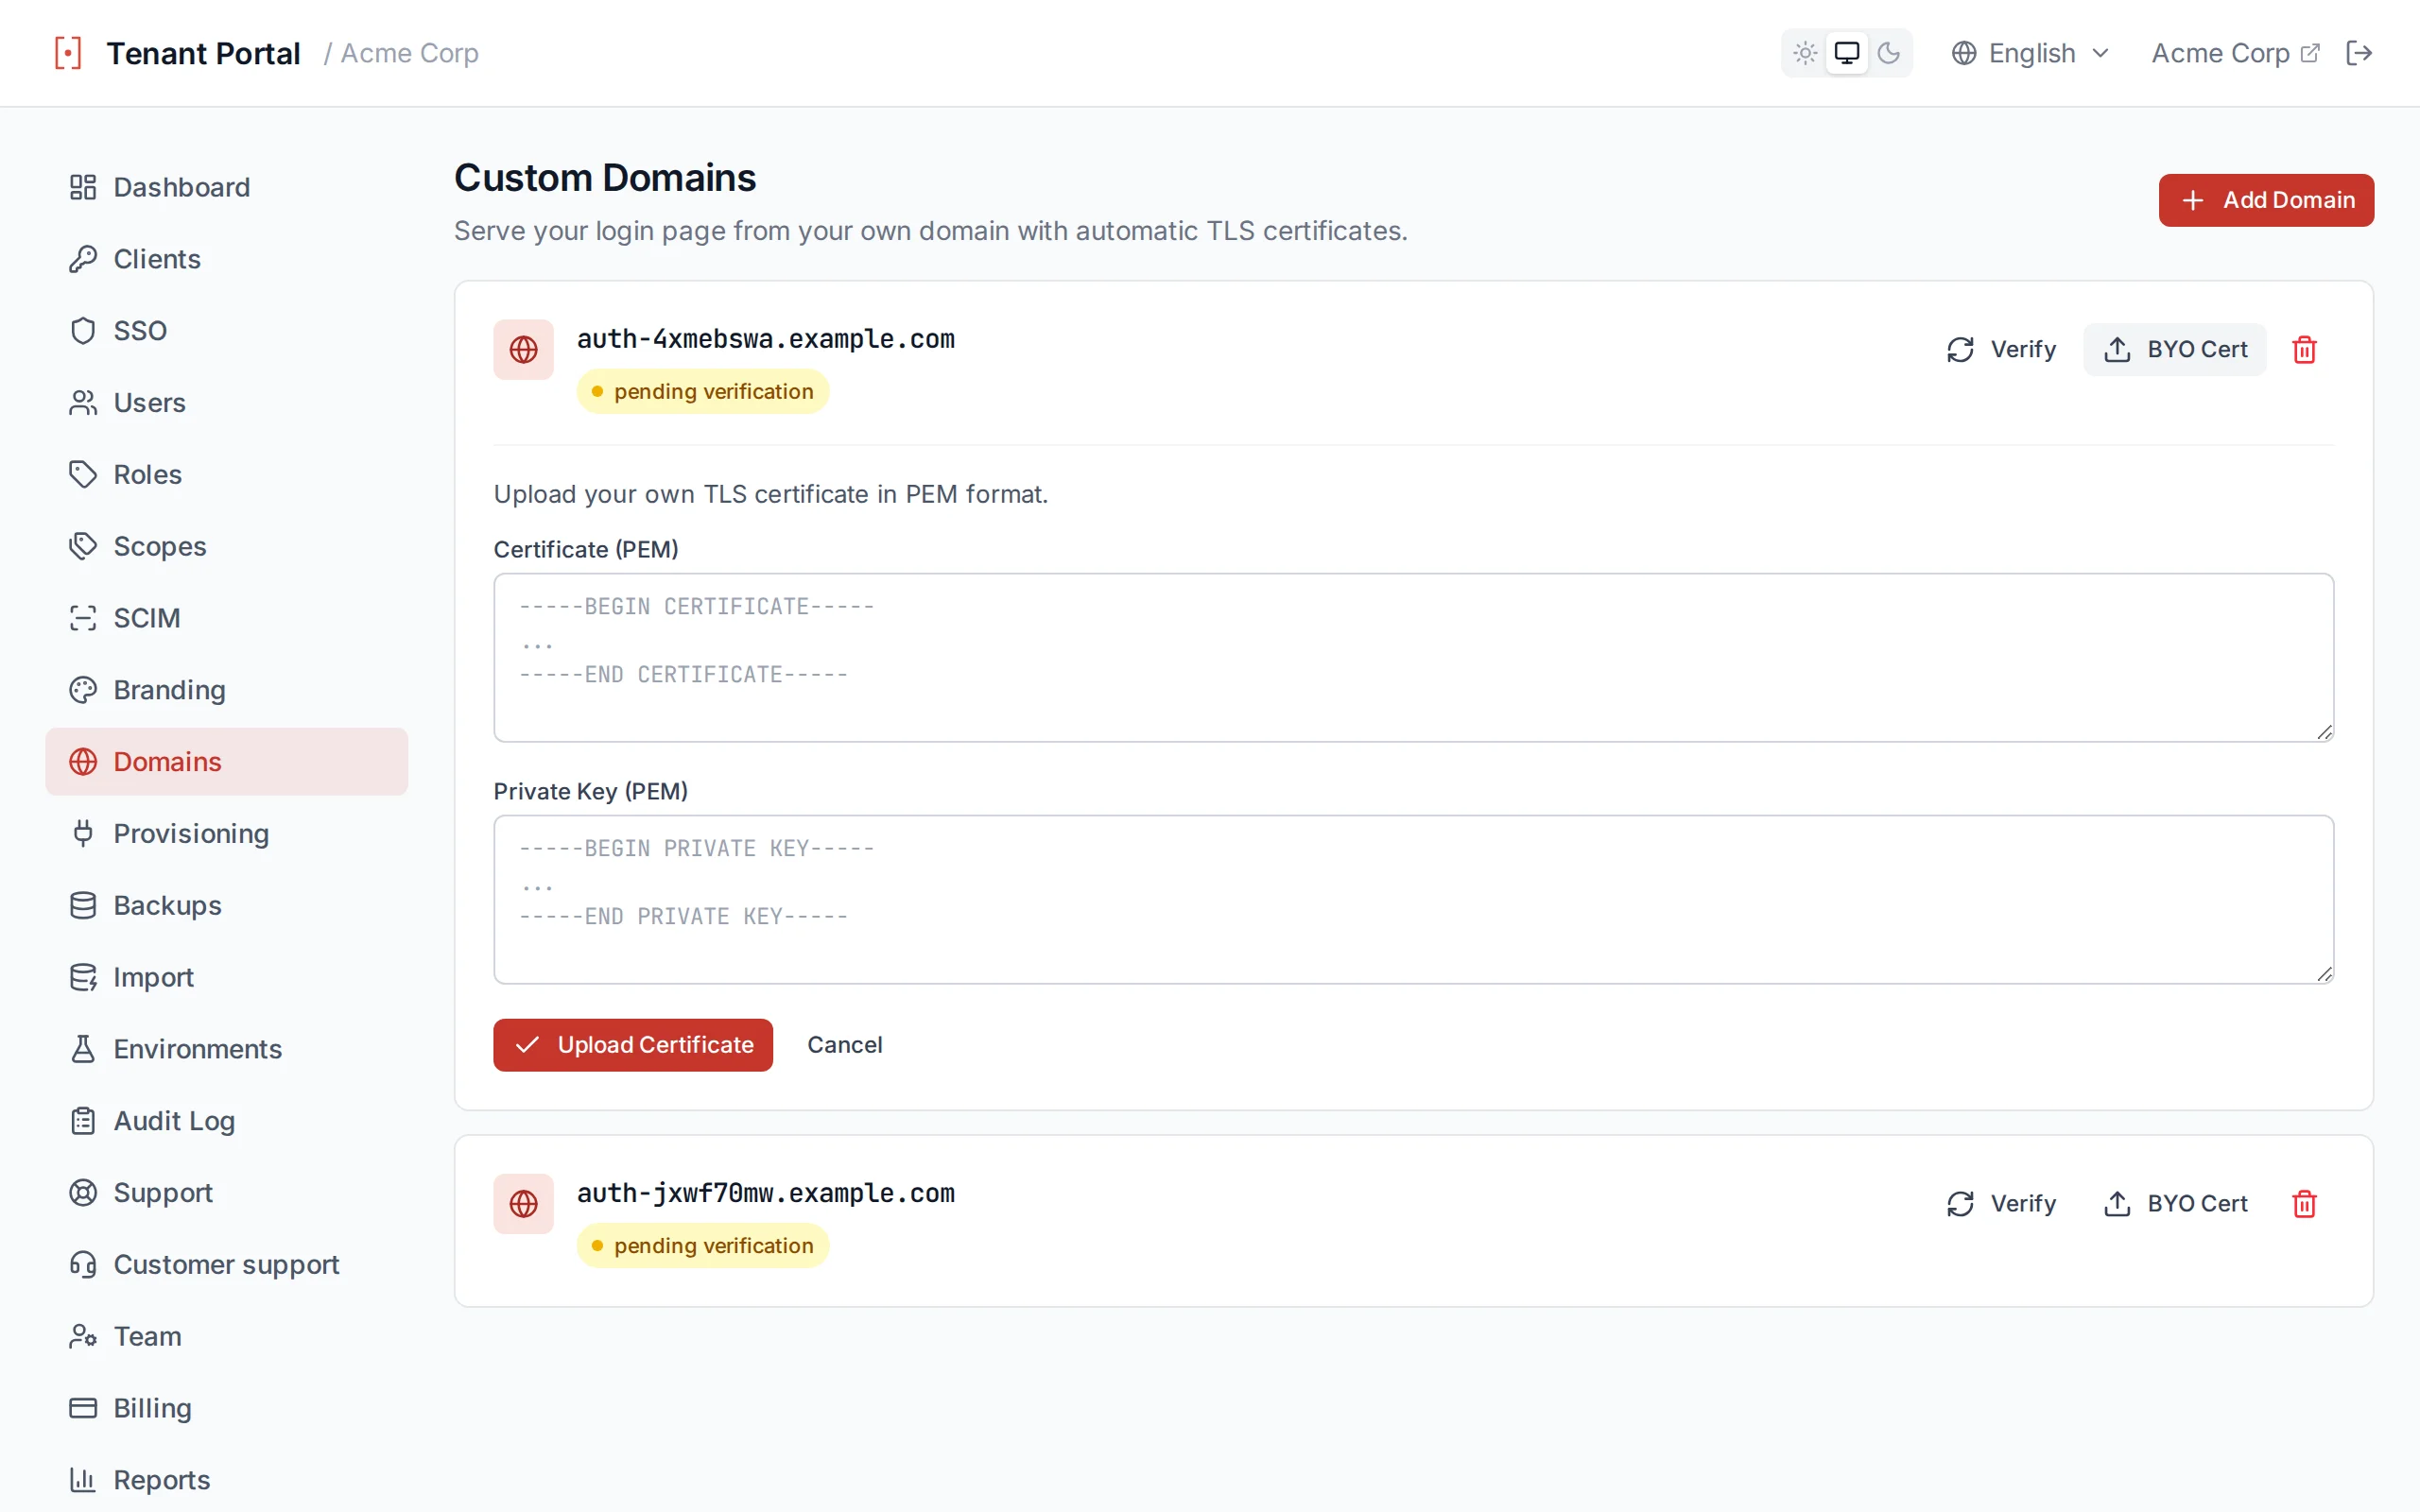
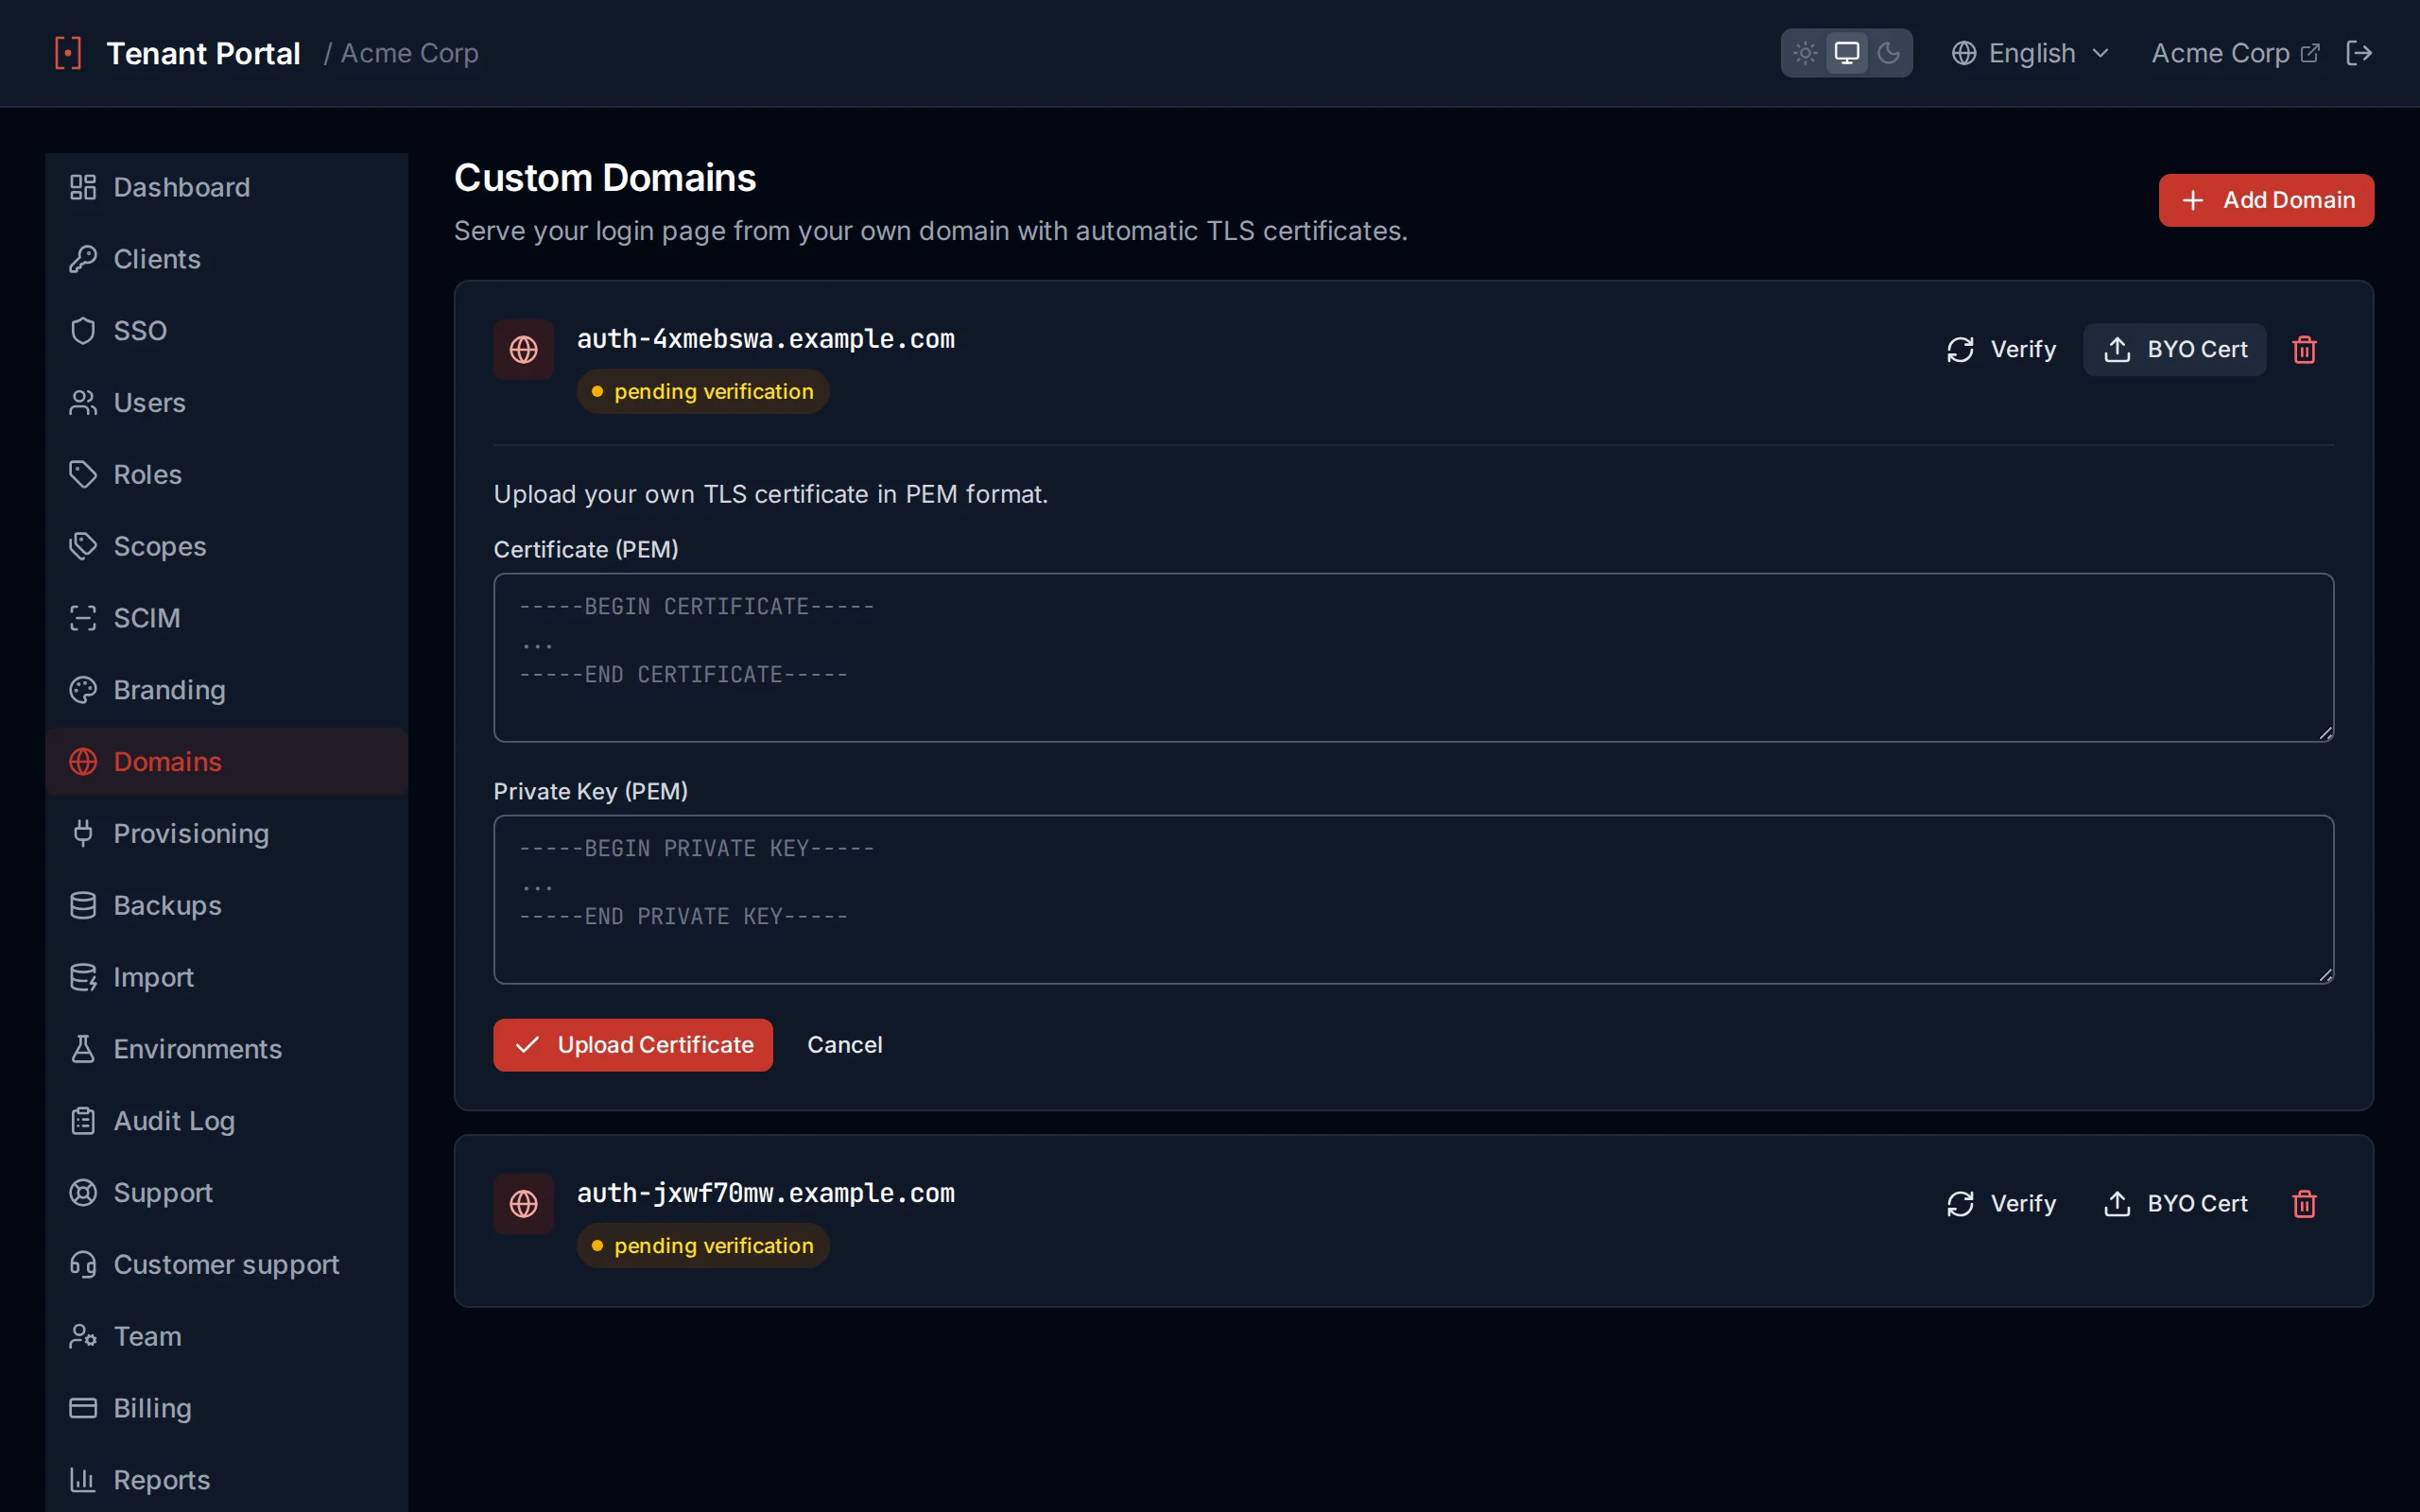
Upload your own TLS certificate and private key in PEM format
BYO Certificate Renewal
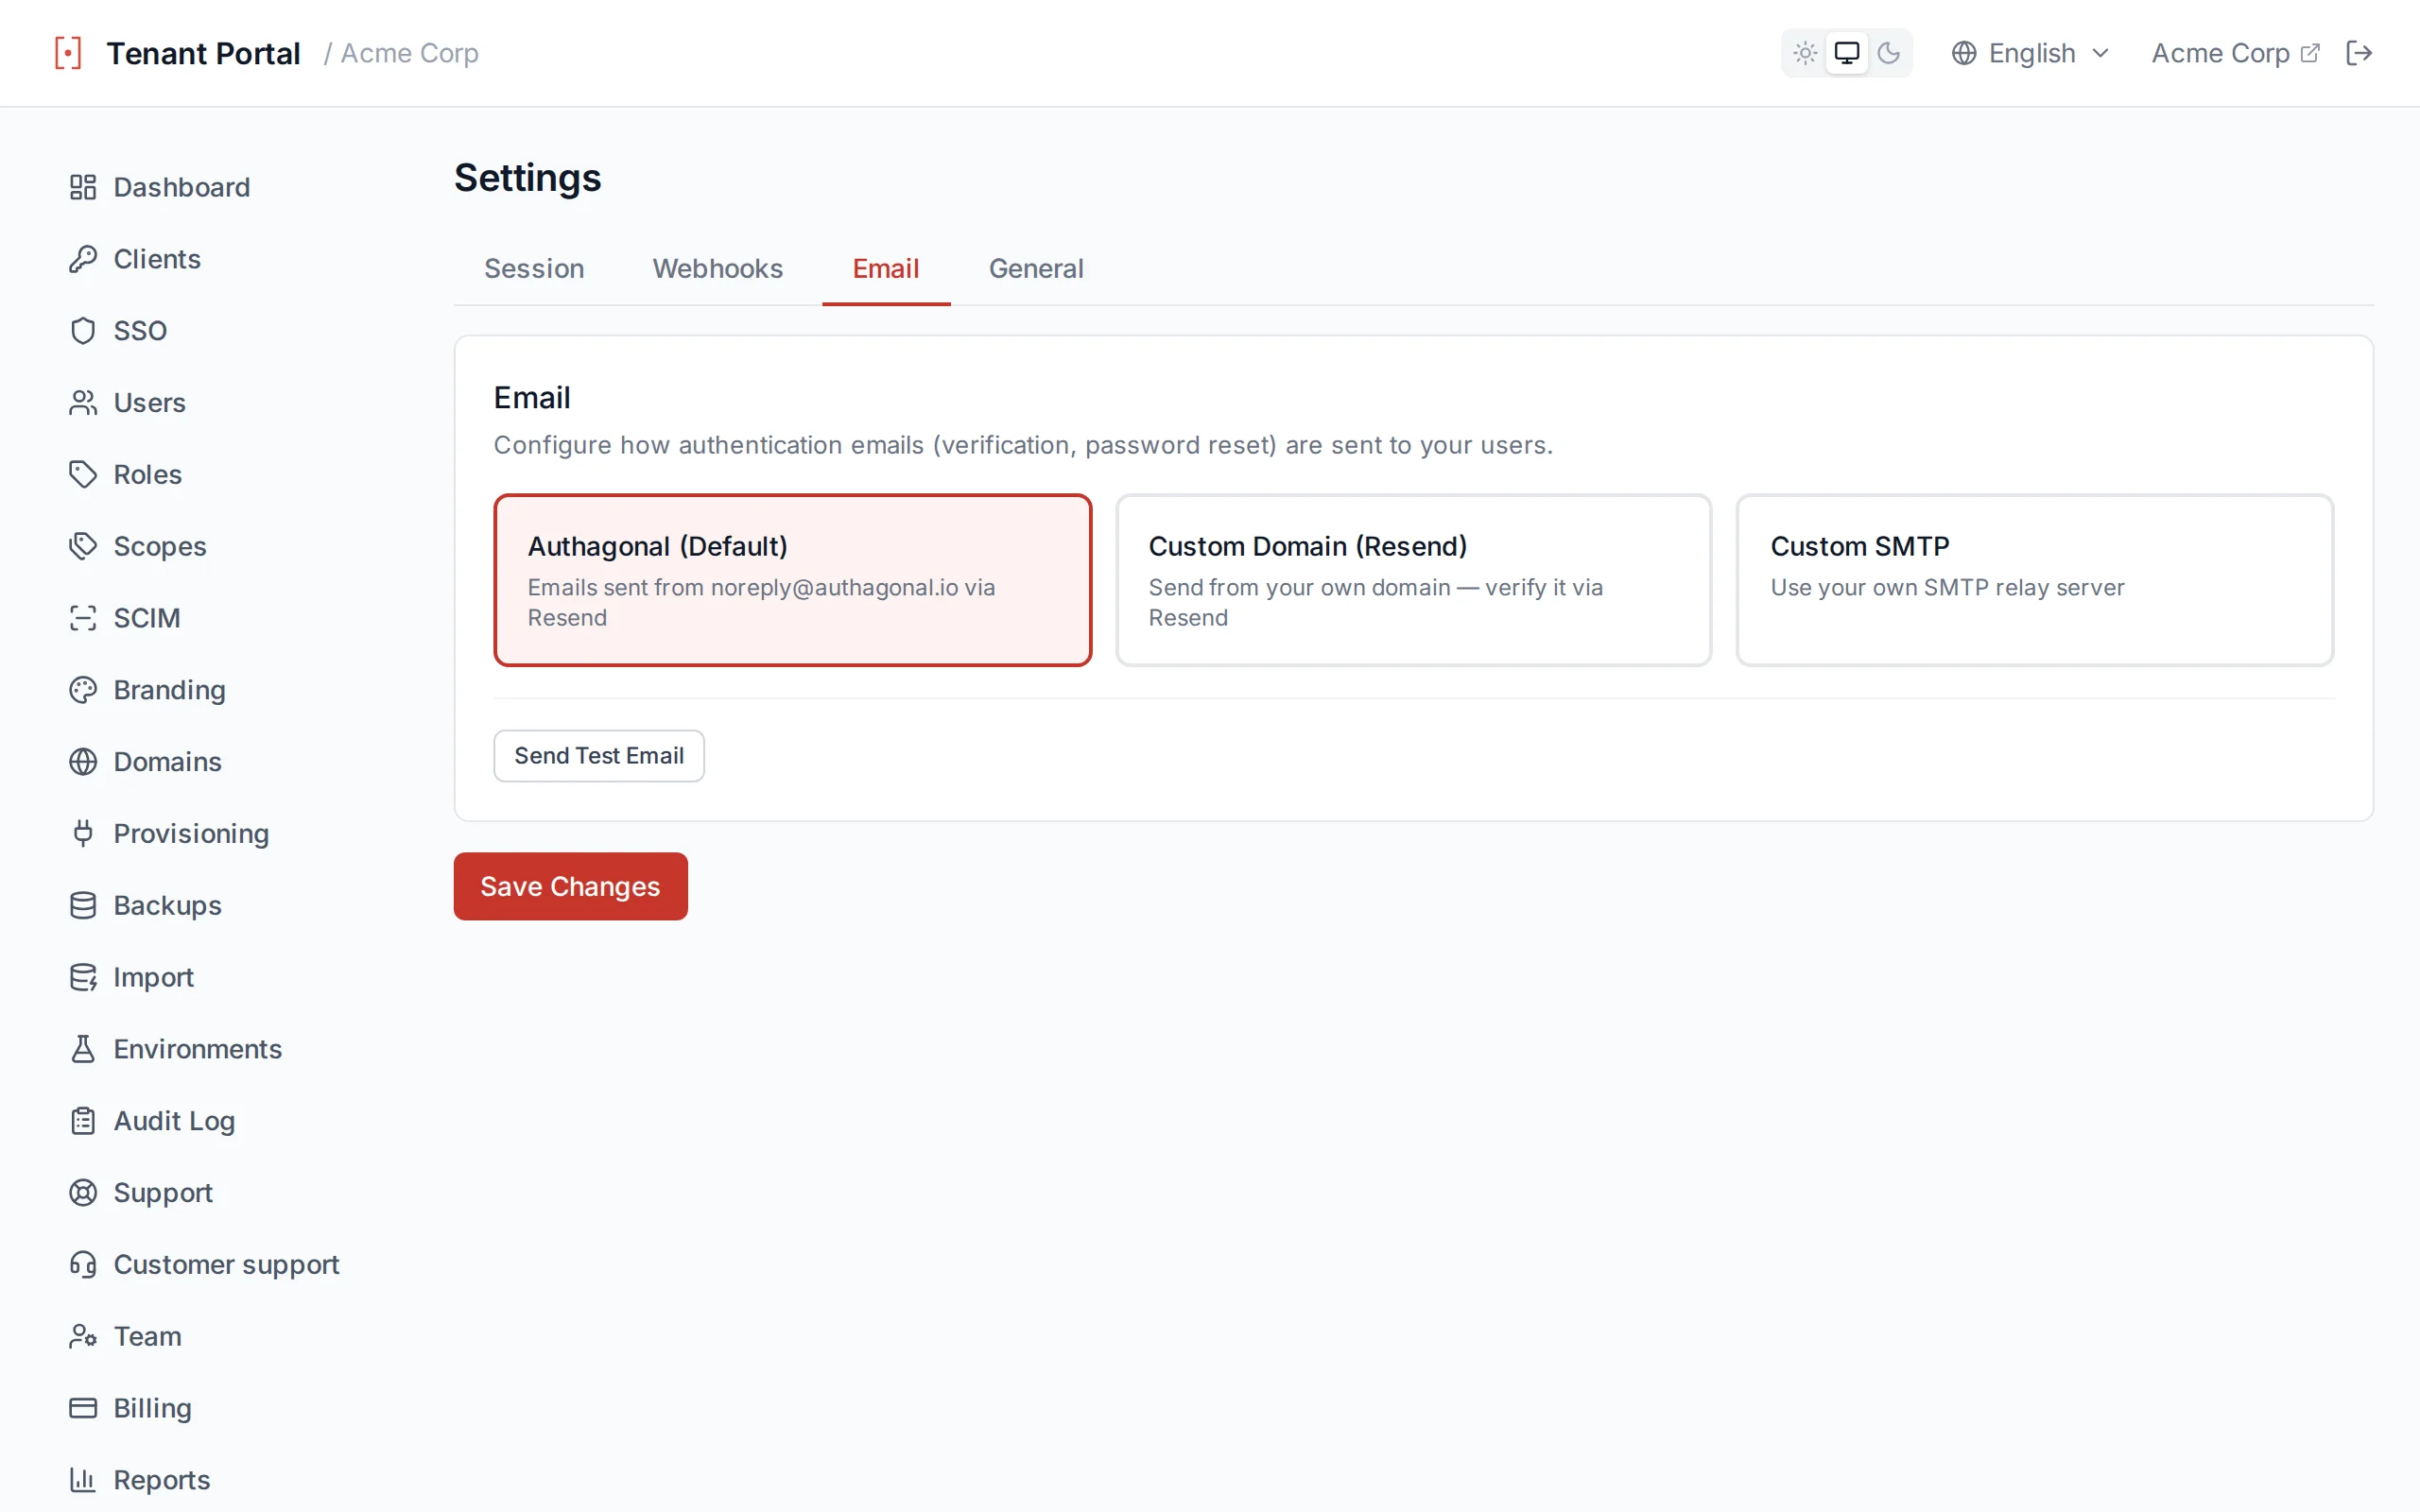
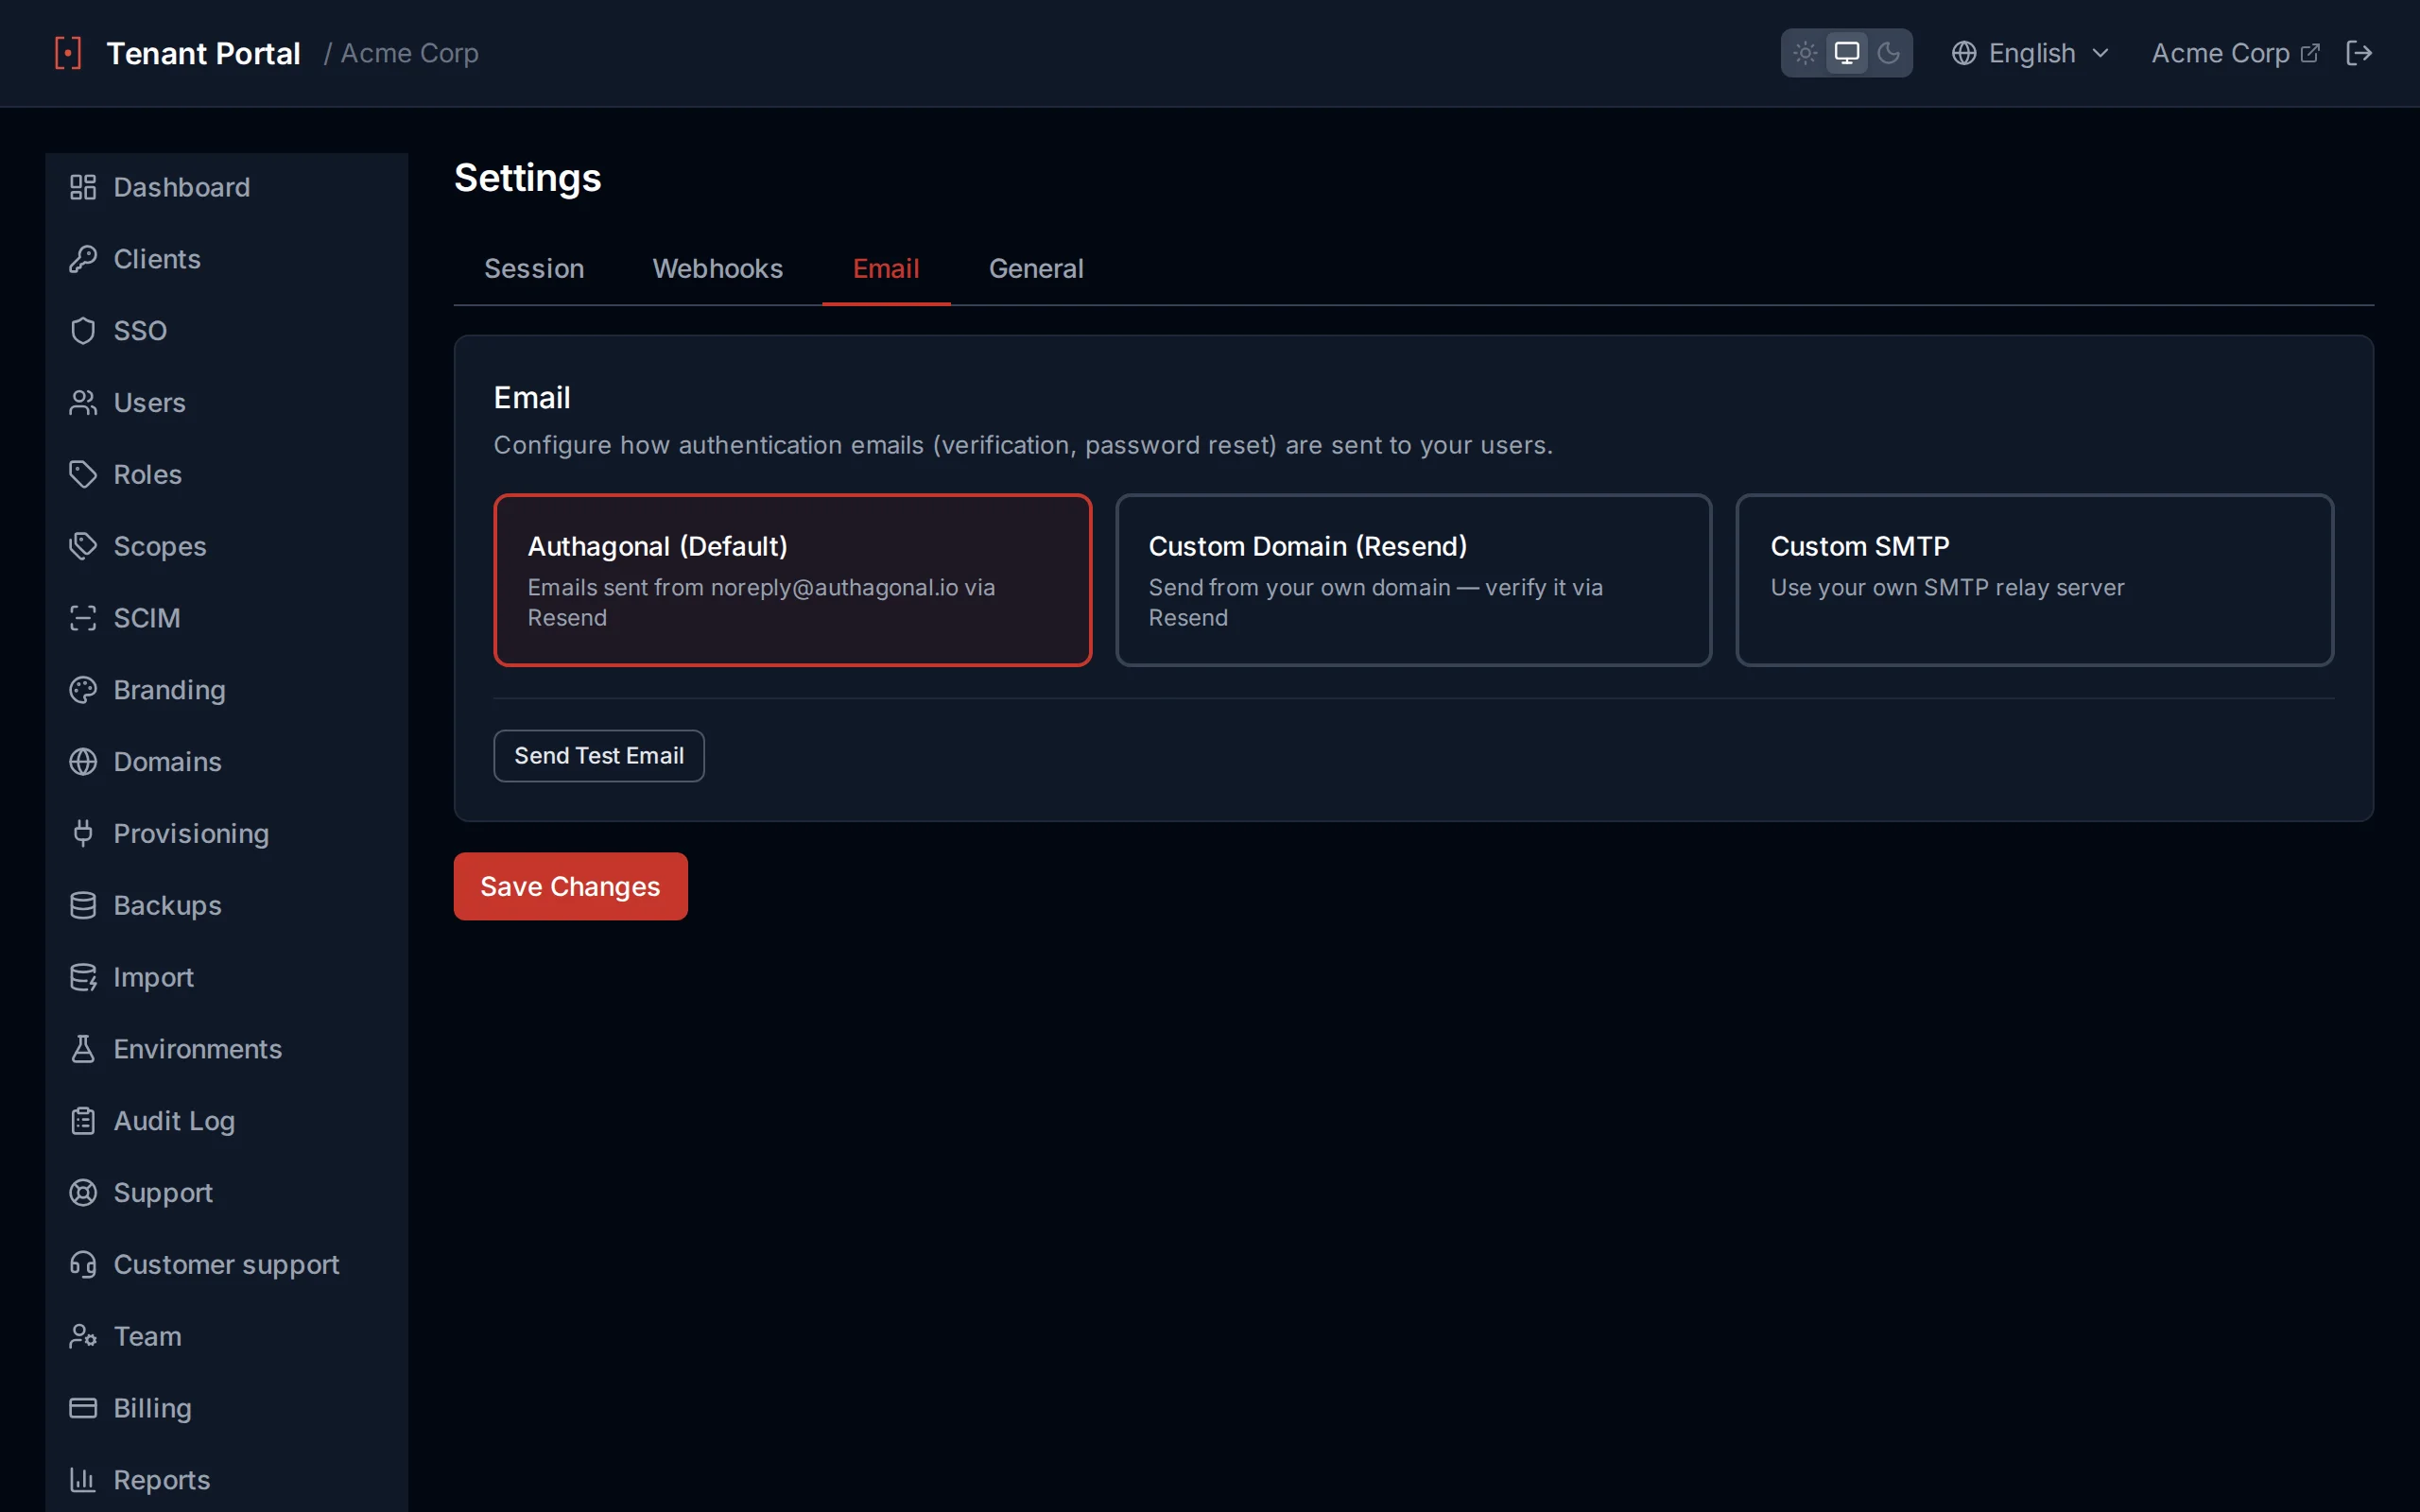
Email Configuration
Configure how your tenant sends transactional emails — verification, password reset, and MFA notifications. Choose between the default shared sender, a verified custom domain via Resend, or your own SMTP server.
Localised Emails
Transactional emails are sent in the recipient's preferred language. Verification, password-reset, account-exists, welcome, billing, and admin-invite emails are templated in seven locales: English, German, French, Spanish, Portuguese, Vietnamese, and Simplified Chinese. When no template exists for a recipient's language, the email falls back to English.
The language is resolved from the recipient's stored preference at send time. That preference can come from several places:
- Sign-up and registration — captured from the language the user chose on the hosted sign-in screens.
- The portal Users page — set by an admin when creating or editing a user.
- SCIM provisioning — mapped from the IdP's
preferredLanguagewhen users are synced via SSO. - The self-service account page — chosen by the user themselves at
/login/account.
No configuration needed
Email Providers
| Provider | Description | Setup |
|---|---|---|
| Default | Emails sent from [email protected] using our shared Resend infrastructure. | No configuration needed — works out of the box. |
| Resend Custom Domain | Emails sent from your own verified domain via Resend. | Register your domain, add DNS records, verify ownership. |
| Custom SMTP | Emails sent through your own SMTP server. | Provide SMTP host, port, credentials, and TLS settings. |
Sender Identity
Sender email and name are shared across all provider modes. Sender email is required; sender name falls back to the tenant name when empty.
| Field | Description |
|---|---|
senderEmail | The From address on outbound emails. Must be on a verified domain for Resend Custom Domain mode. |
senderName | Display name shown in the recipient's inbox. |
Resend Custom Domain
Verify your sending domain with Resend once, then use it as the From address for this tenant. DNS TXT records (SPF, DKIM) are provided by the Domains page; Resend validates them automatically.
Custom SMTP
Bring your own SMTP server — useful for internal relays, vendors not covered by Resend, or regulatory pinning.
| Field | Description |
|---|---|
host | SMTP server hostname (e.g. smtp.example.com). |
port | Connection port. 587 for STARTTLS, 465 for implicit TLS, 25 for unauthenticated internal relays. |
username | Auth username (optional — leave blank for unauthenticated relays). |
password | Auth password. Stored encrypted in the tenant settings secret. |
useTls | Require TLS. Leave on unless you are targeting a trusted internal relay. |
Custom Sending Domain
When using the Resend provider, you can register your own domain so emails come from your brand (e.g. [email protected]) instead of @authagonal.io.
- Go to Settings → Email and select the Resend Custom Domain provider.
- Enter your domain name and click Register.
- Add the DNS records shown (DKIM, SPF, and return path) to your domain's DNS.
- Click Check Verification — once DNS propagates (usually 1–10 minutes), the domain status will change to verified.
DNS Propagation
Testing
Use the Send Test Email button in Settings → Email to verify your configuration. A test email will be sent to your admin email address using the currently saved settings.
Audit Log
The Audit Log provides a read-only record of all administrative actions performed on your tenant. Every change made through the portal or API is captured with full context, giving you a complete trail for compliance and troubleshooting.
Log Columns
| Column | Description |
|---|---|
| Timestamp | The date and time the action occurred |
| Actor | The email address of the admin who performed the action, or "system" for automated actions |
| Action | The type of action performed (e.g., Client Created, Settings Updated) |
| Entity | The target of the action in type:id format (e.g., client:my-app) |
| Detail | Additional context about the change |
Tracked Actions
The following administrative actions are recorded in the audit log:
| Category | Actions |
|---|---|
| Clients | Client Created, Client Updated, Client Deleted |
| SSO Connections | SAML Connection Created, SAML Connection Deleted, OIDC Connection Created, OIDC Connection Deleted |
| Users | User Created, User Updated |
| Settings | Settings Updated, Branding Updated |
| Domains | Domain Added, Domain Verified, Domain Deleted |
| SCIM | SCIM Token Created, SCIM Token Revoked |
| Roles | Role Created, Role Updated, Role Deleted |
| Groups | Group Created, Group Deleted |
| Team | Team Member Invited, Team Member Removed |
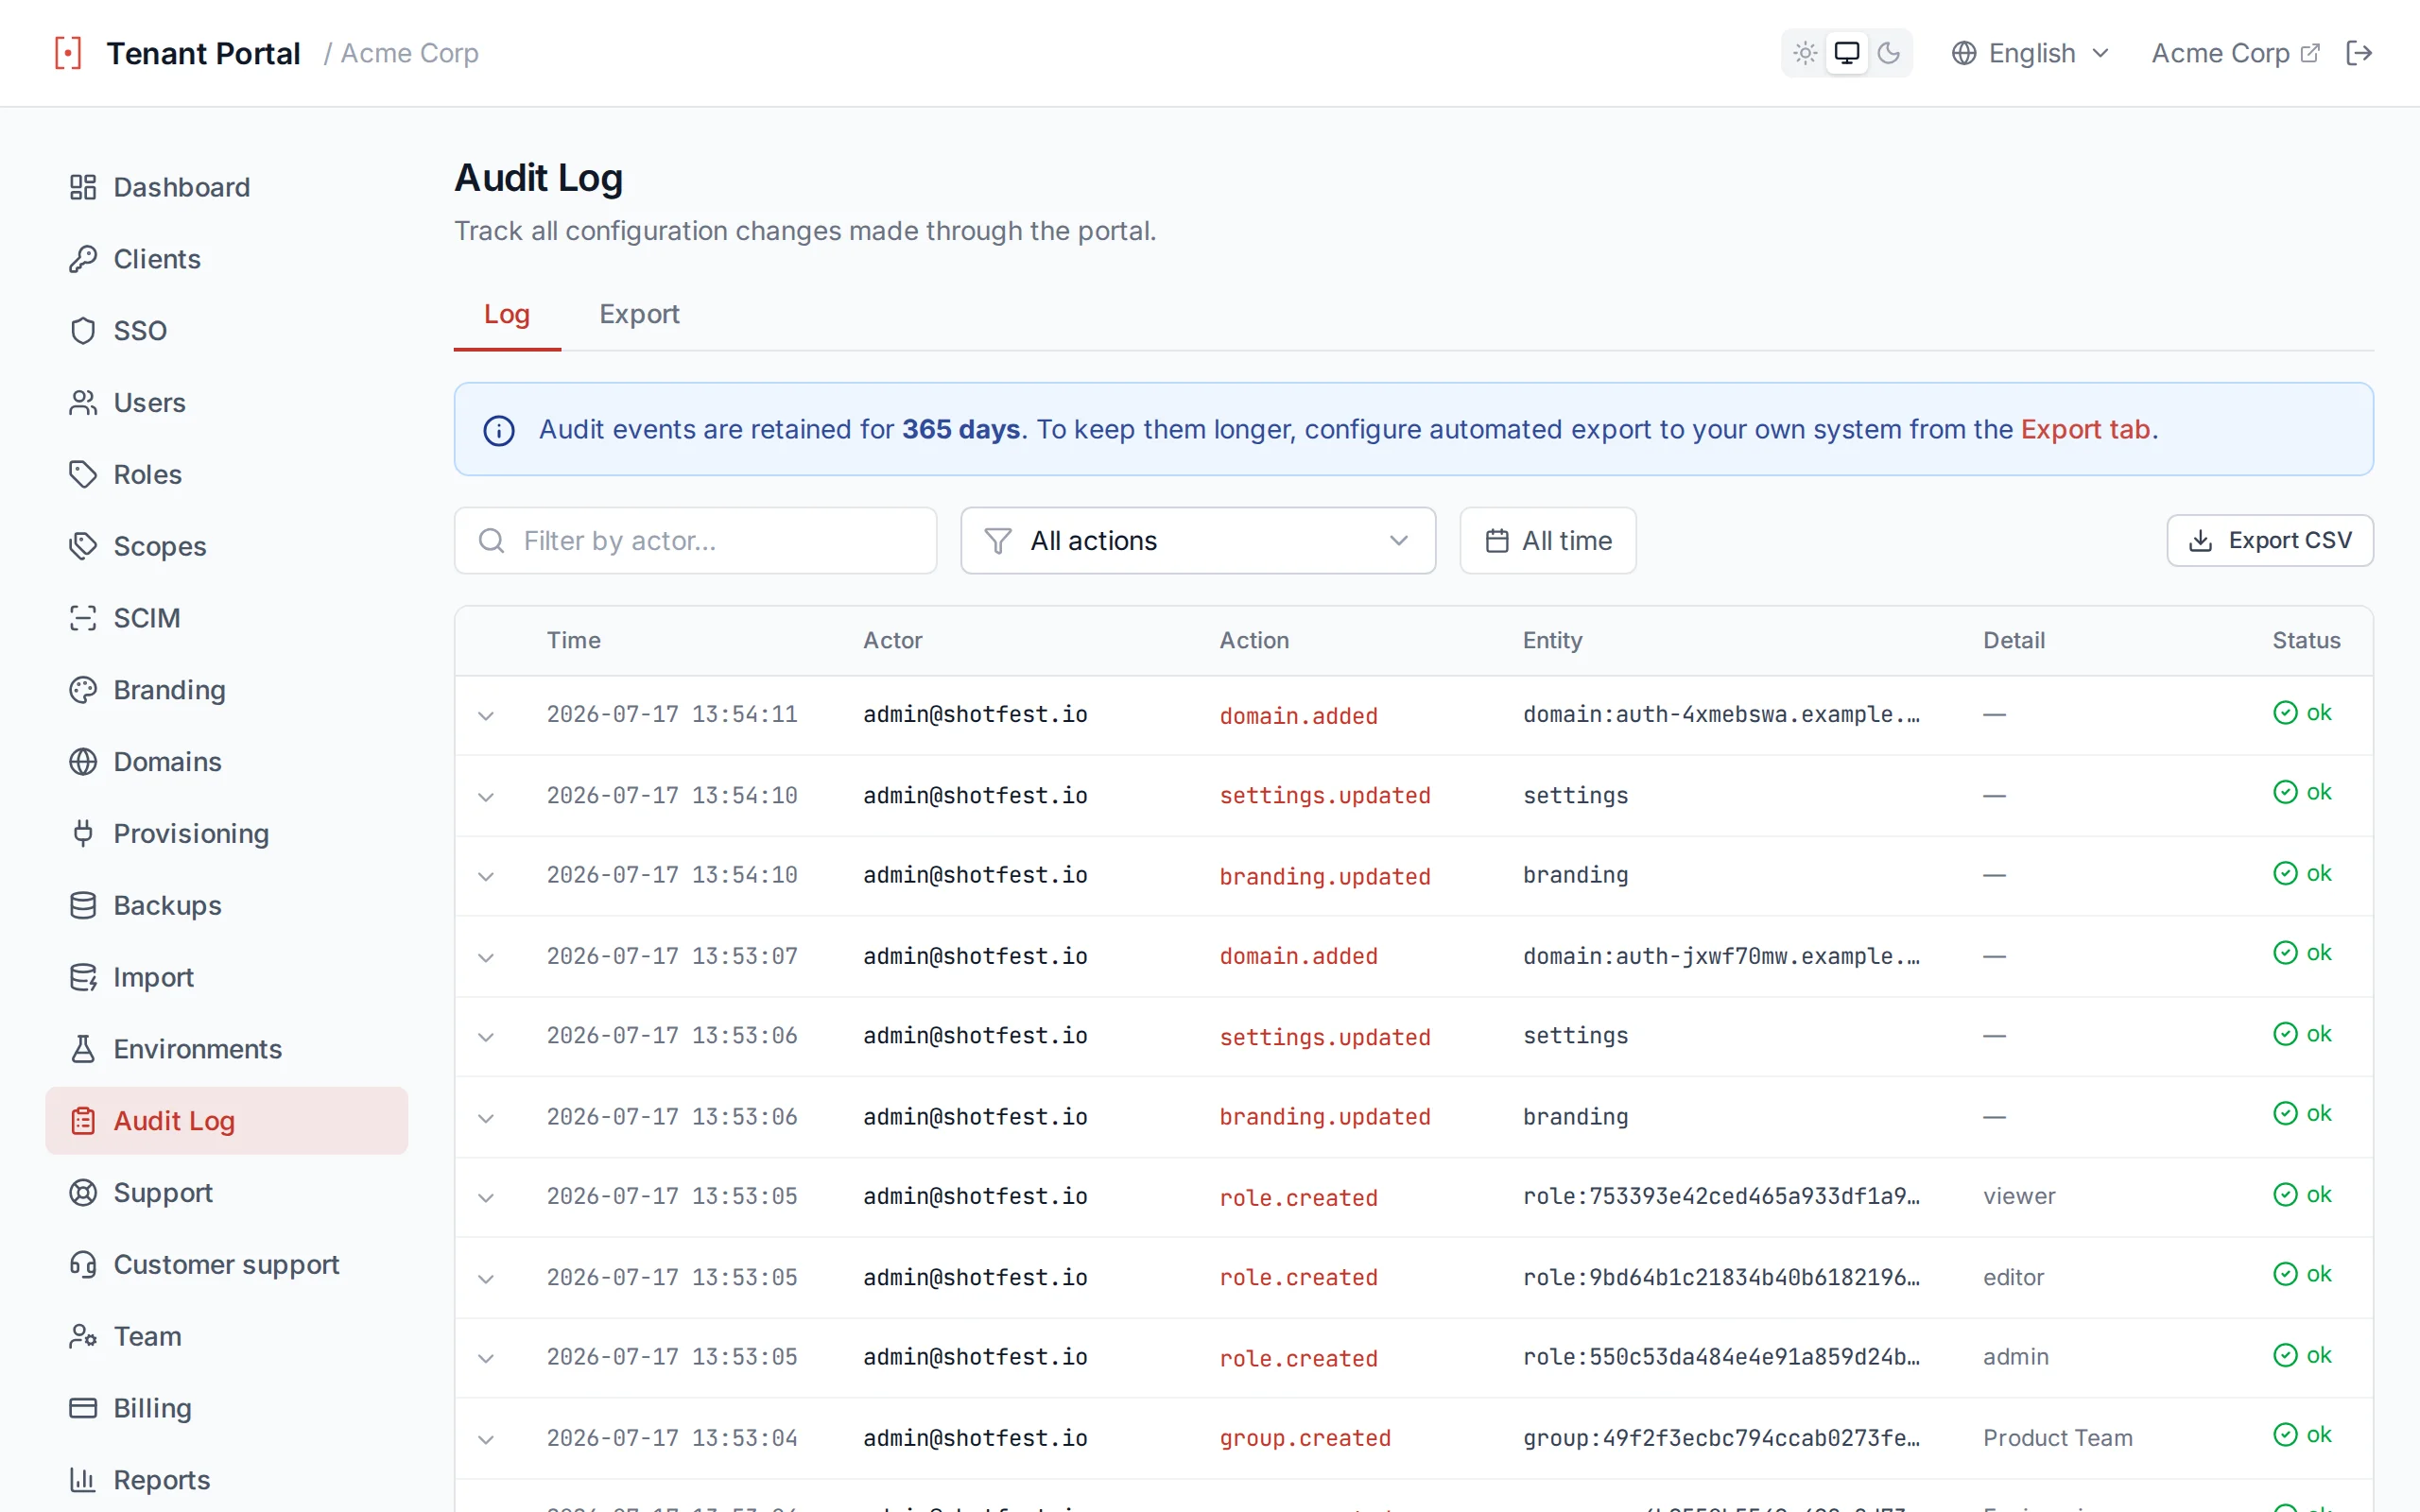
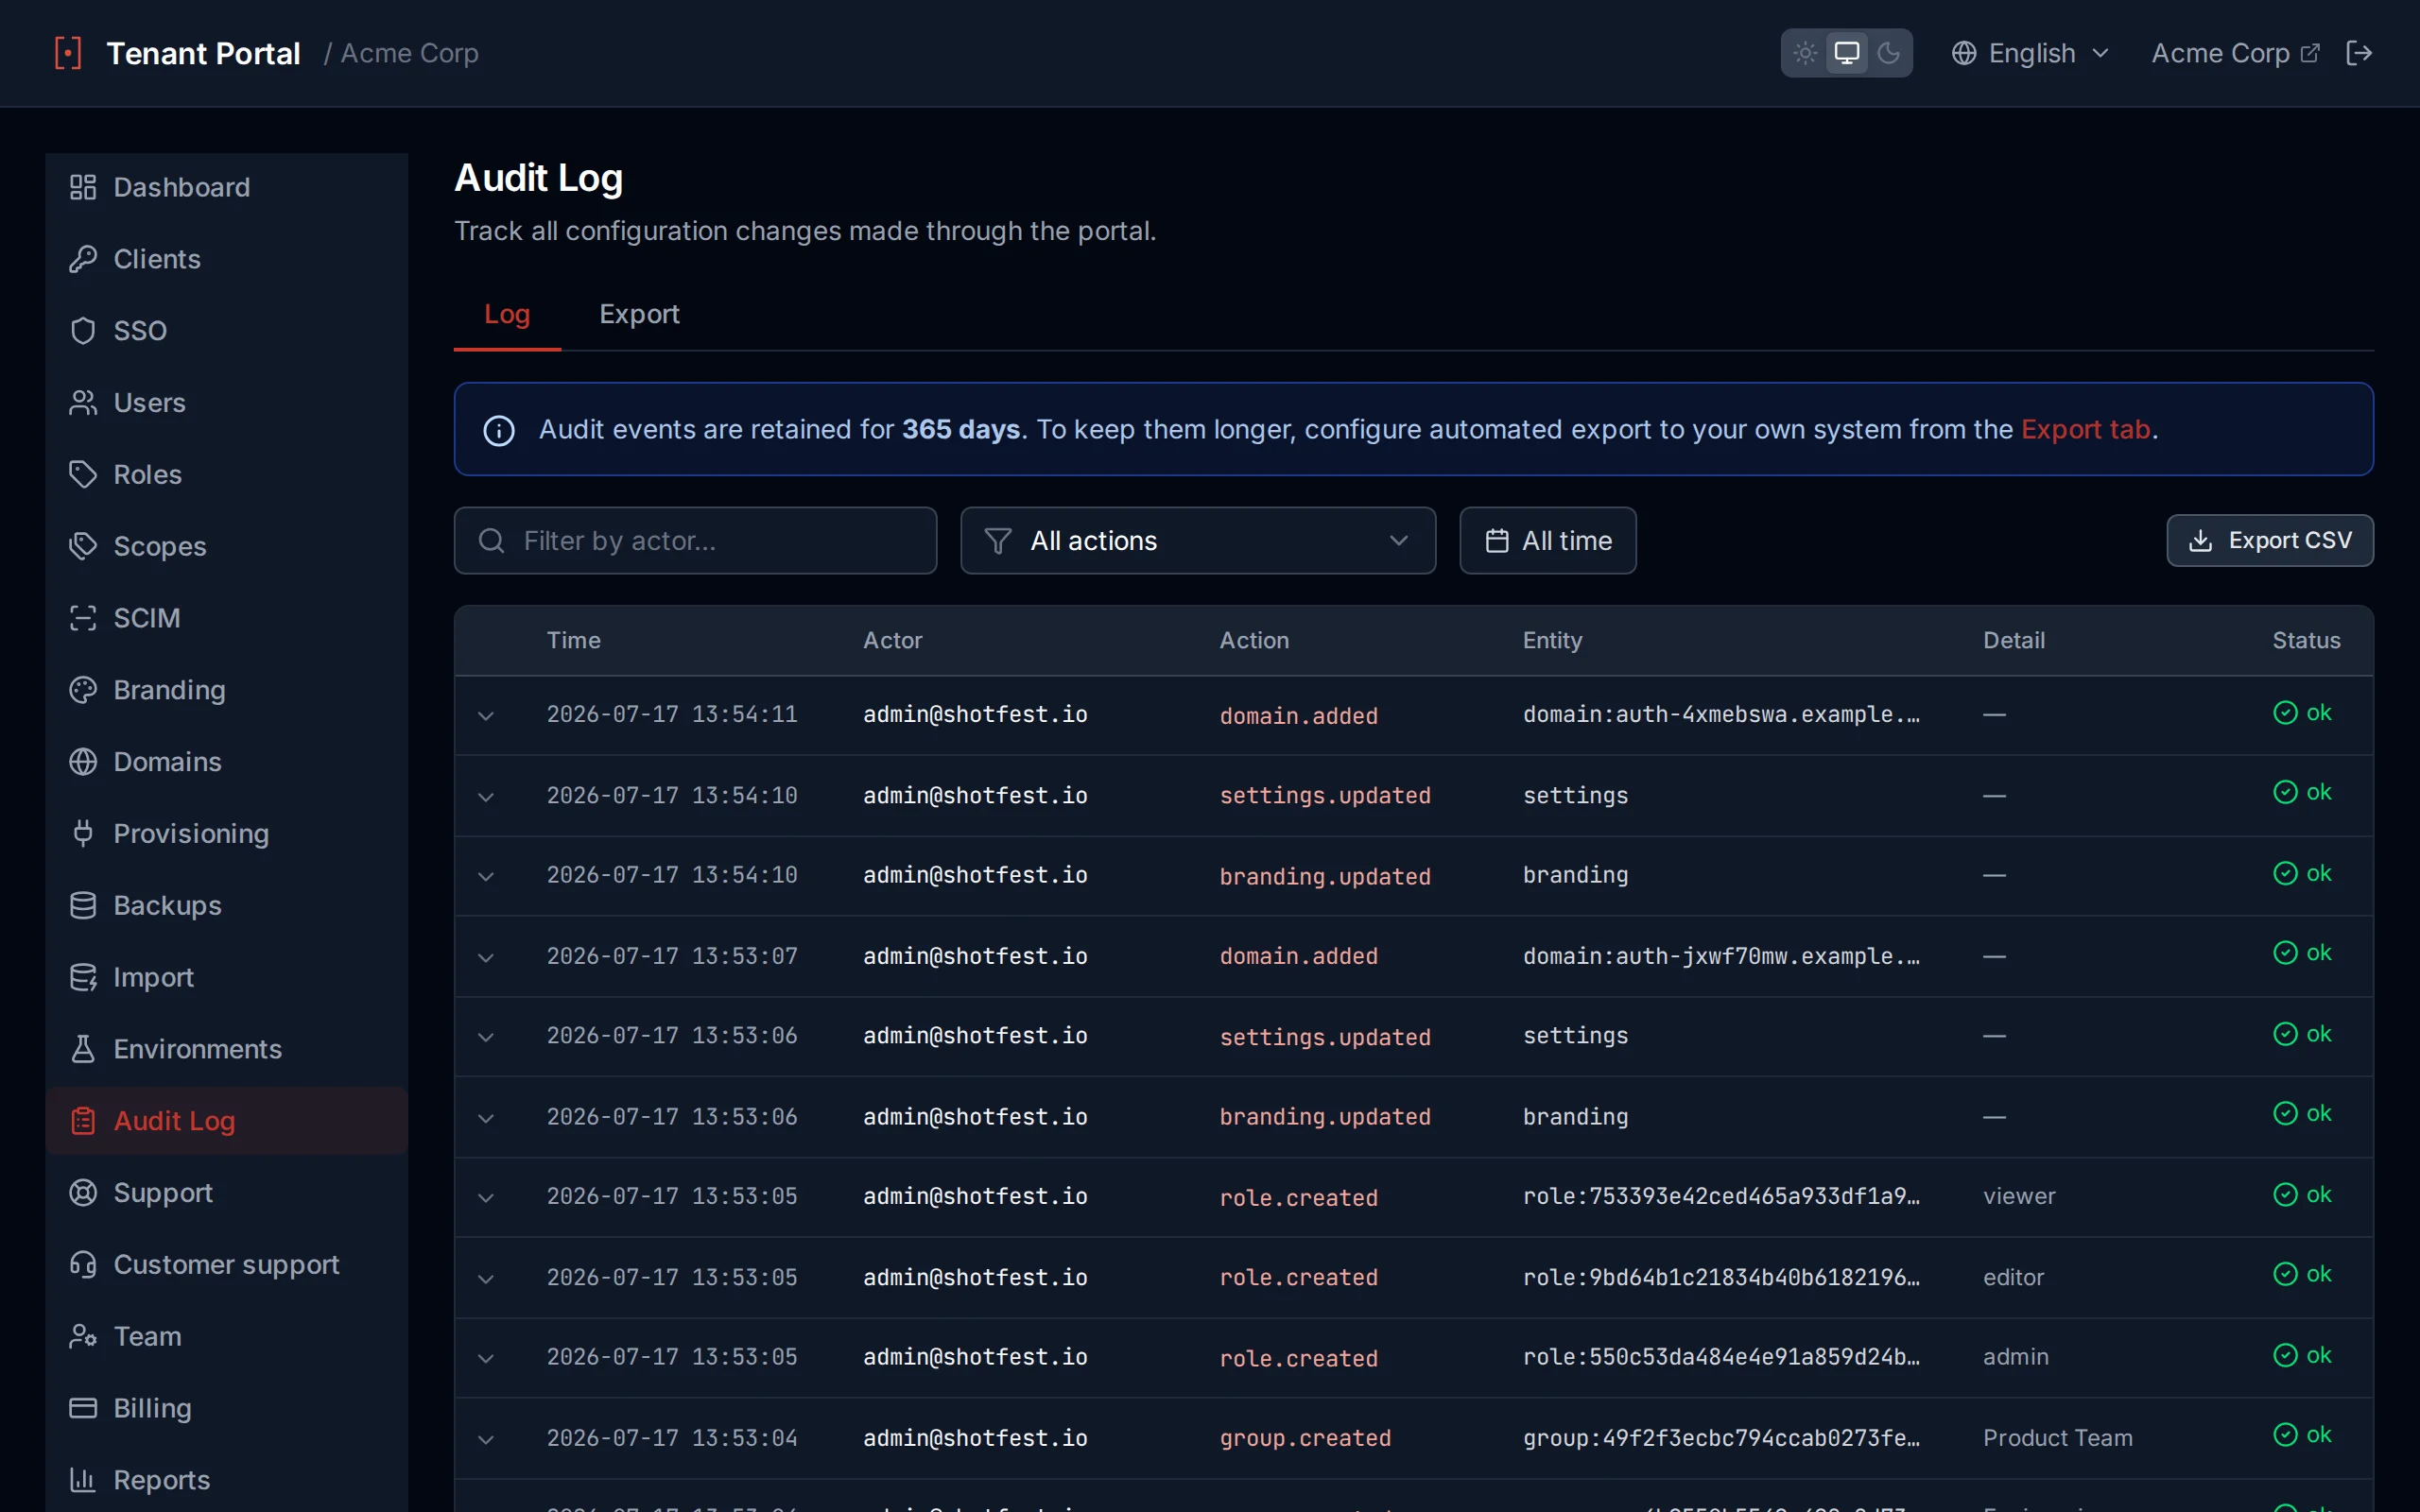
The audit log provides a complete record of all administrative actions
Retention
Backups
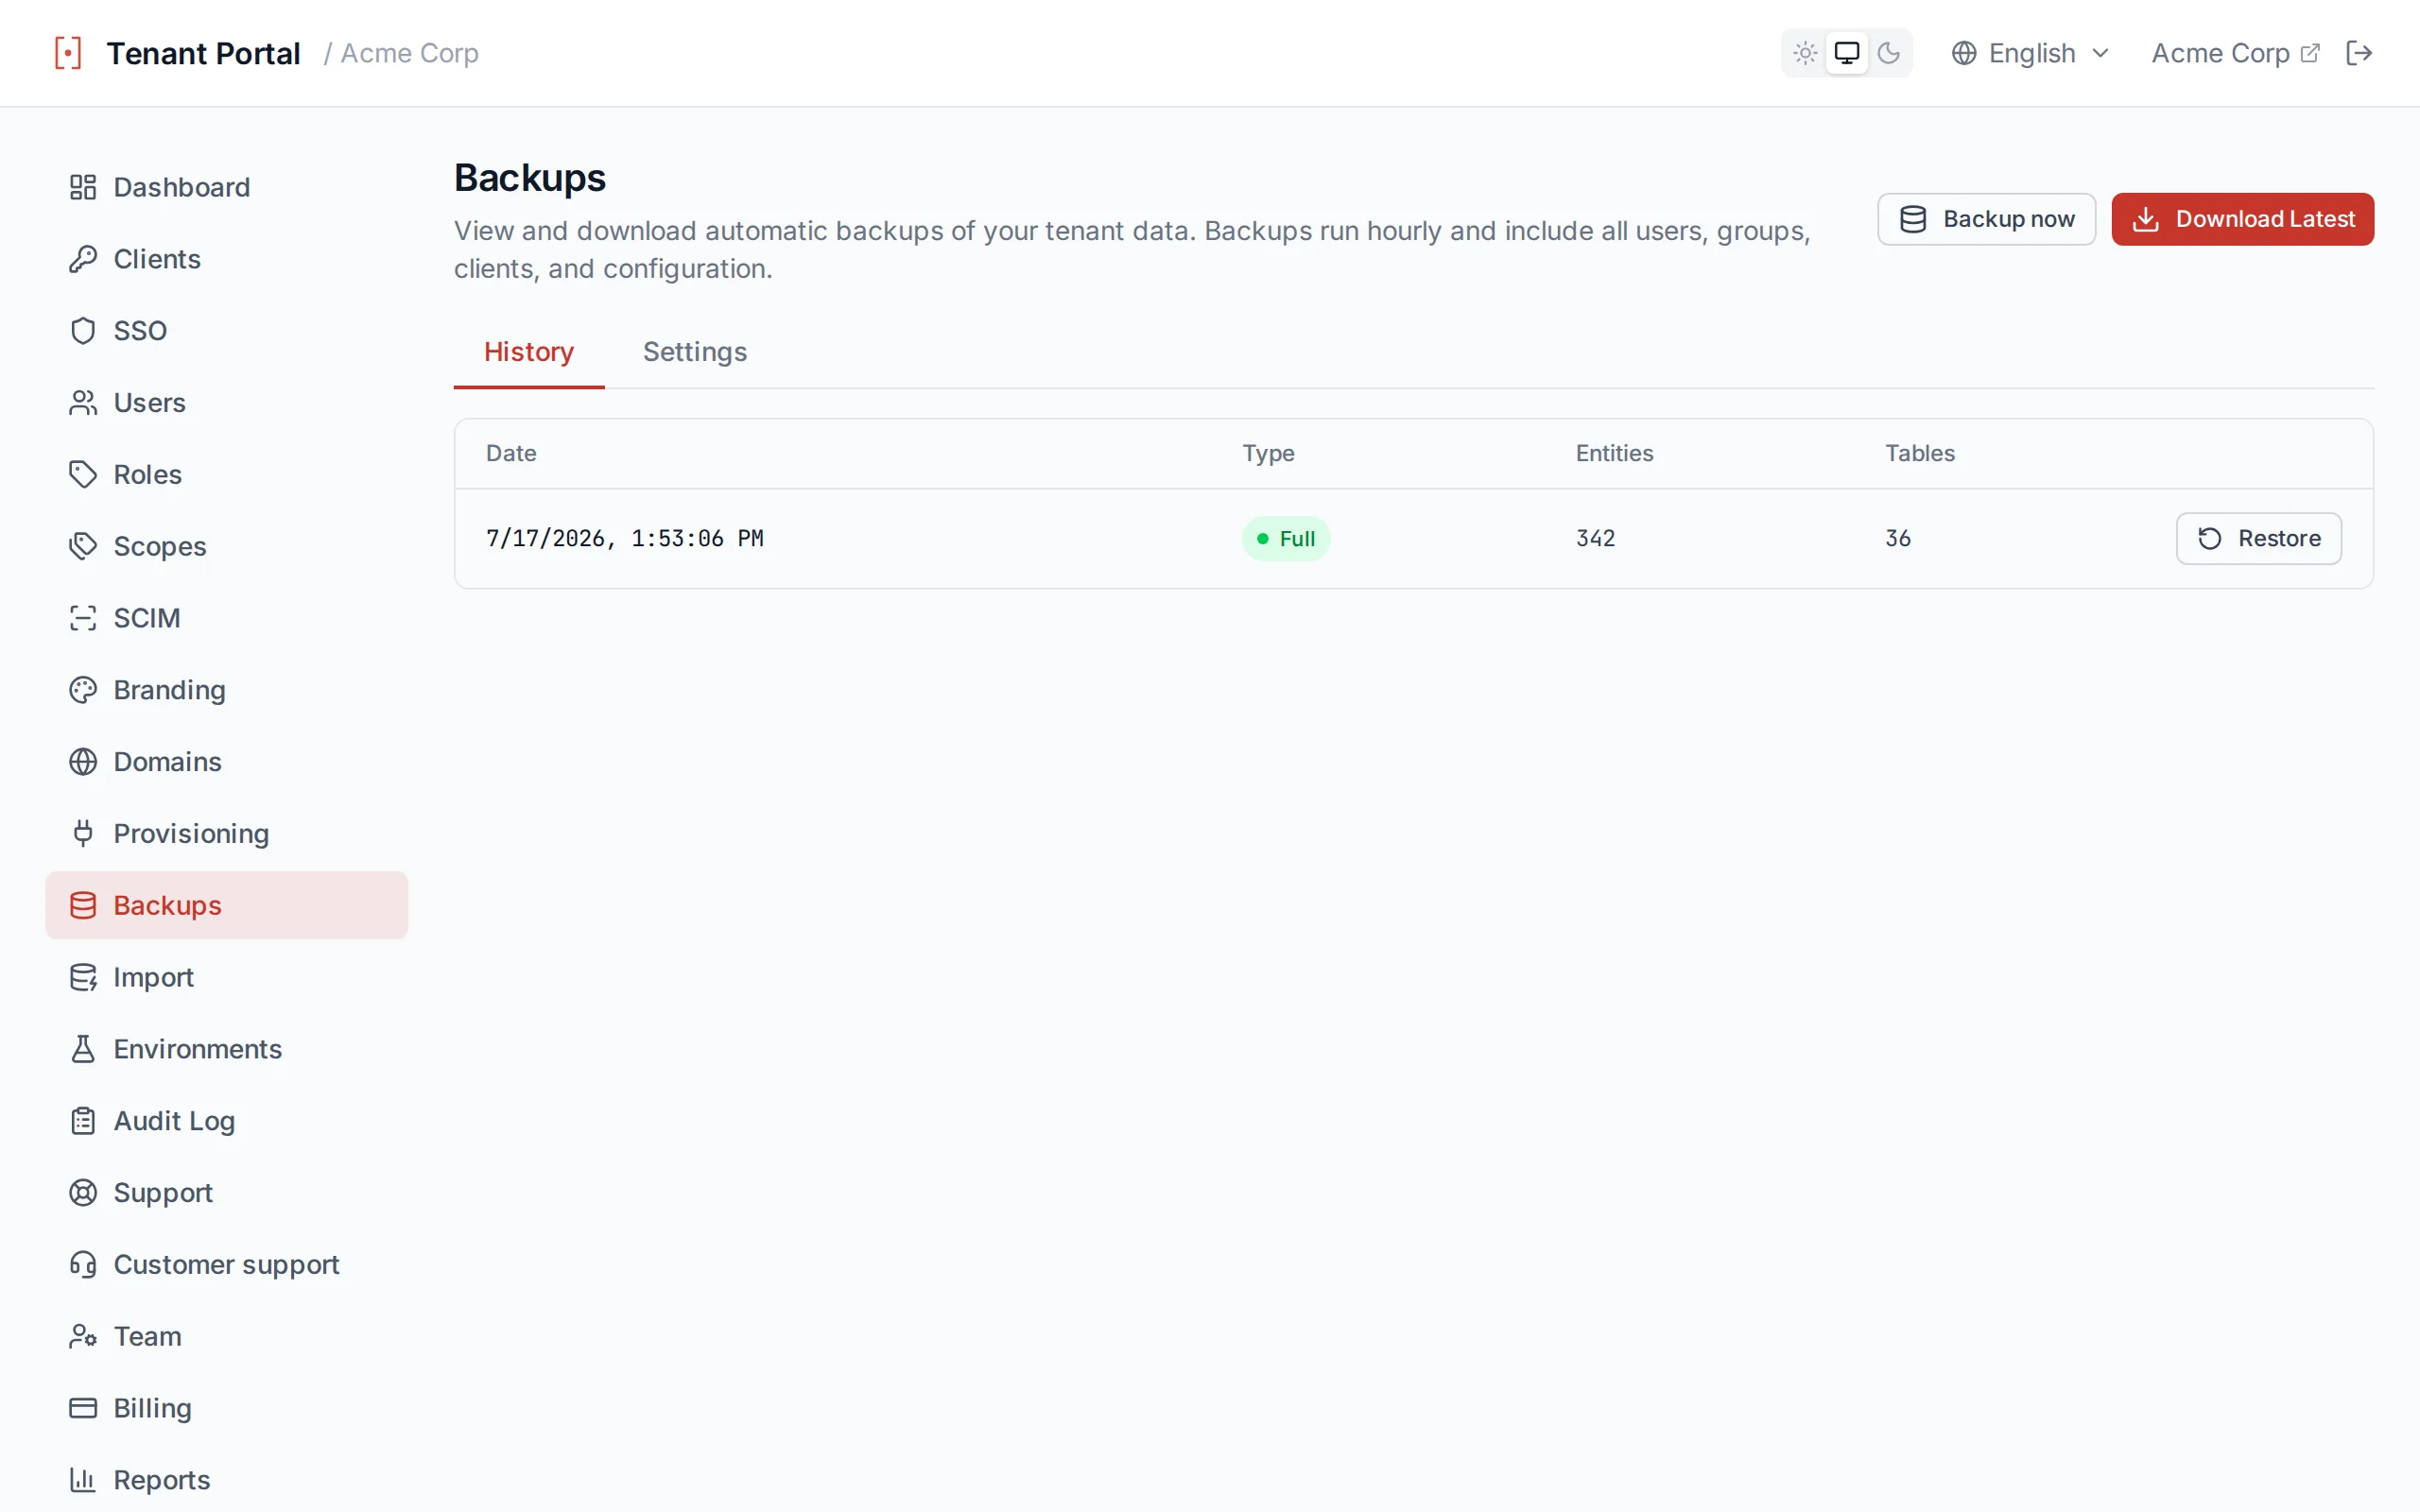
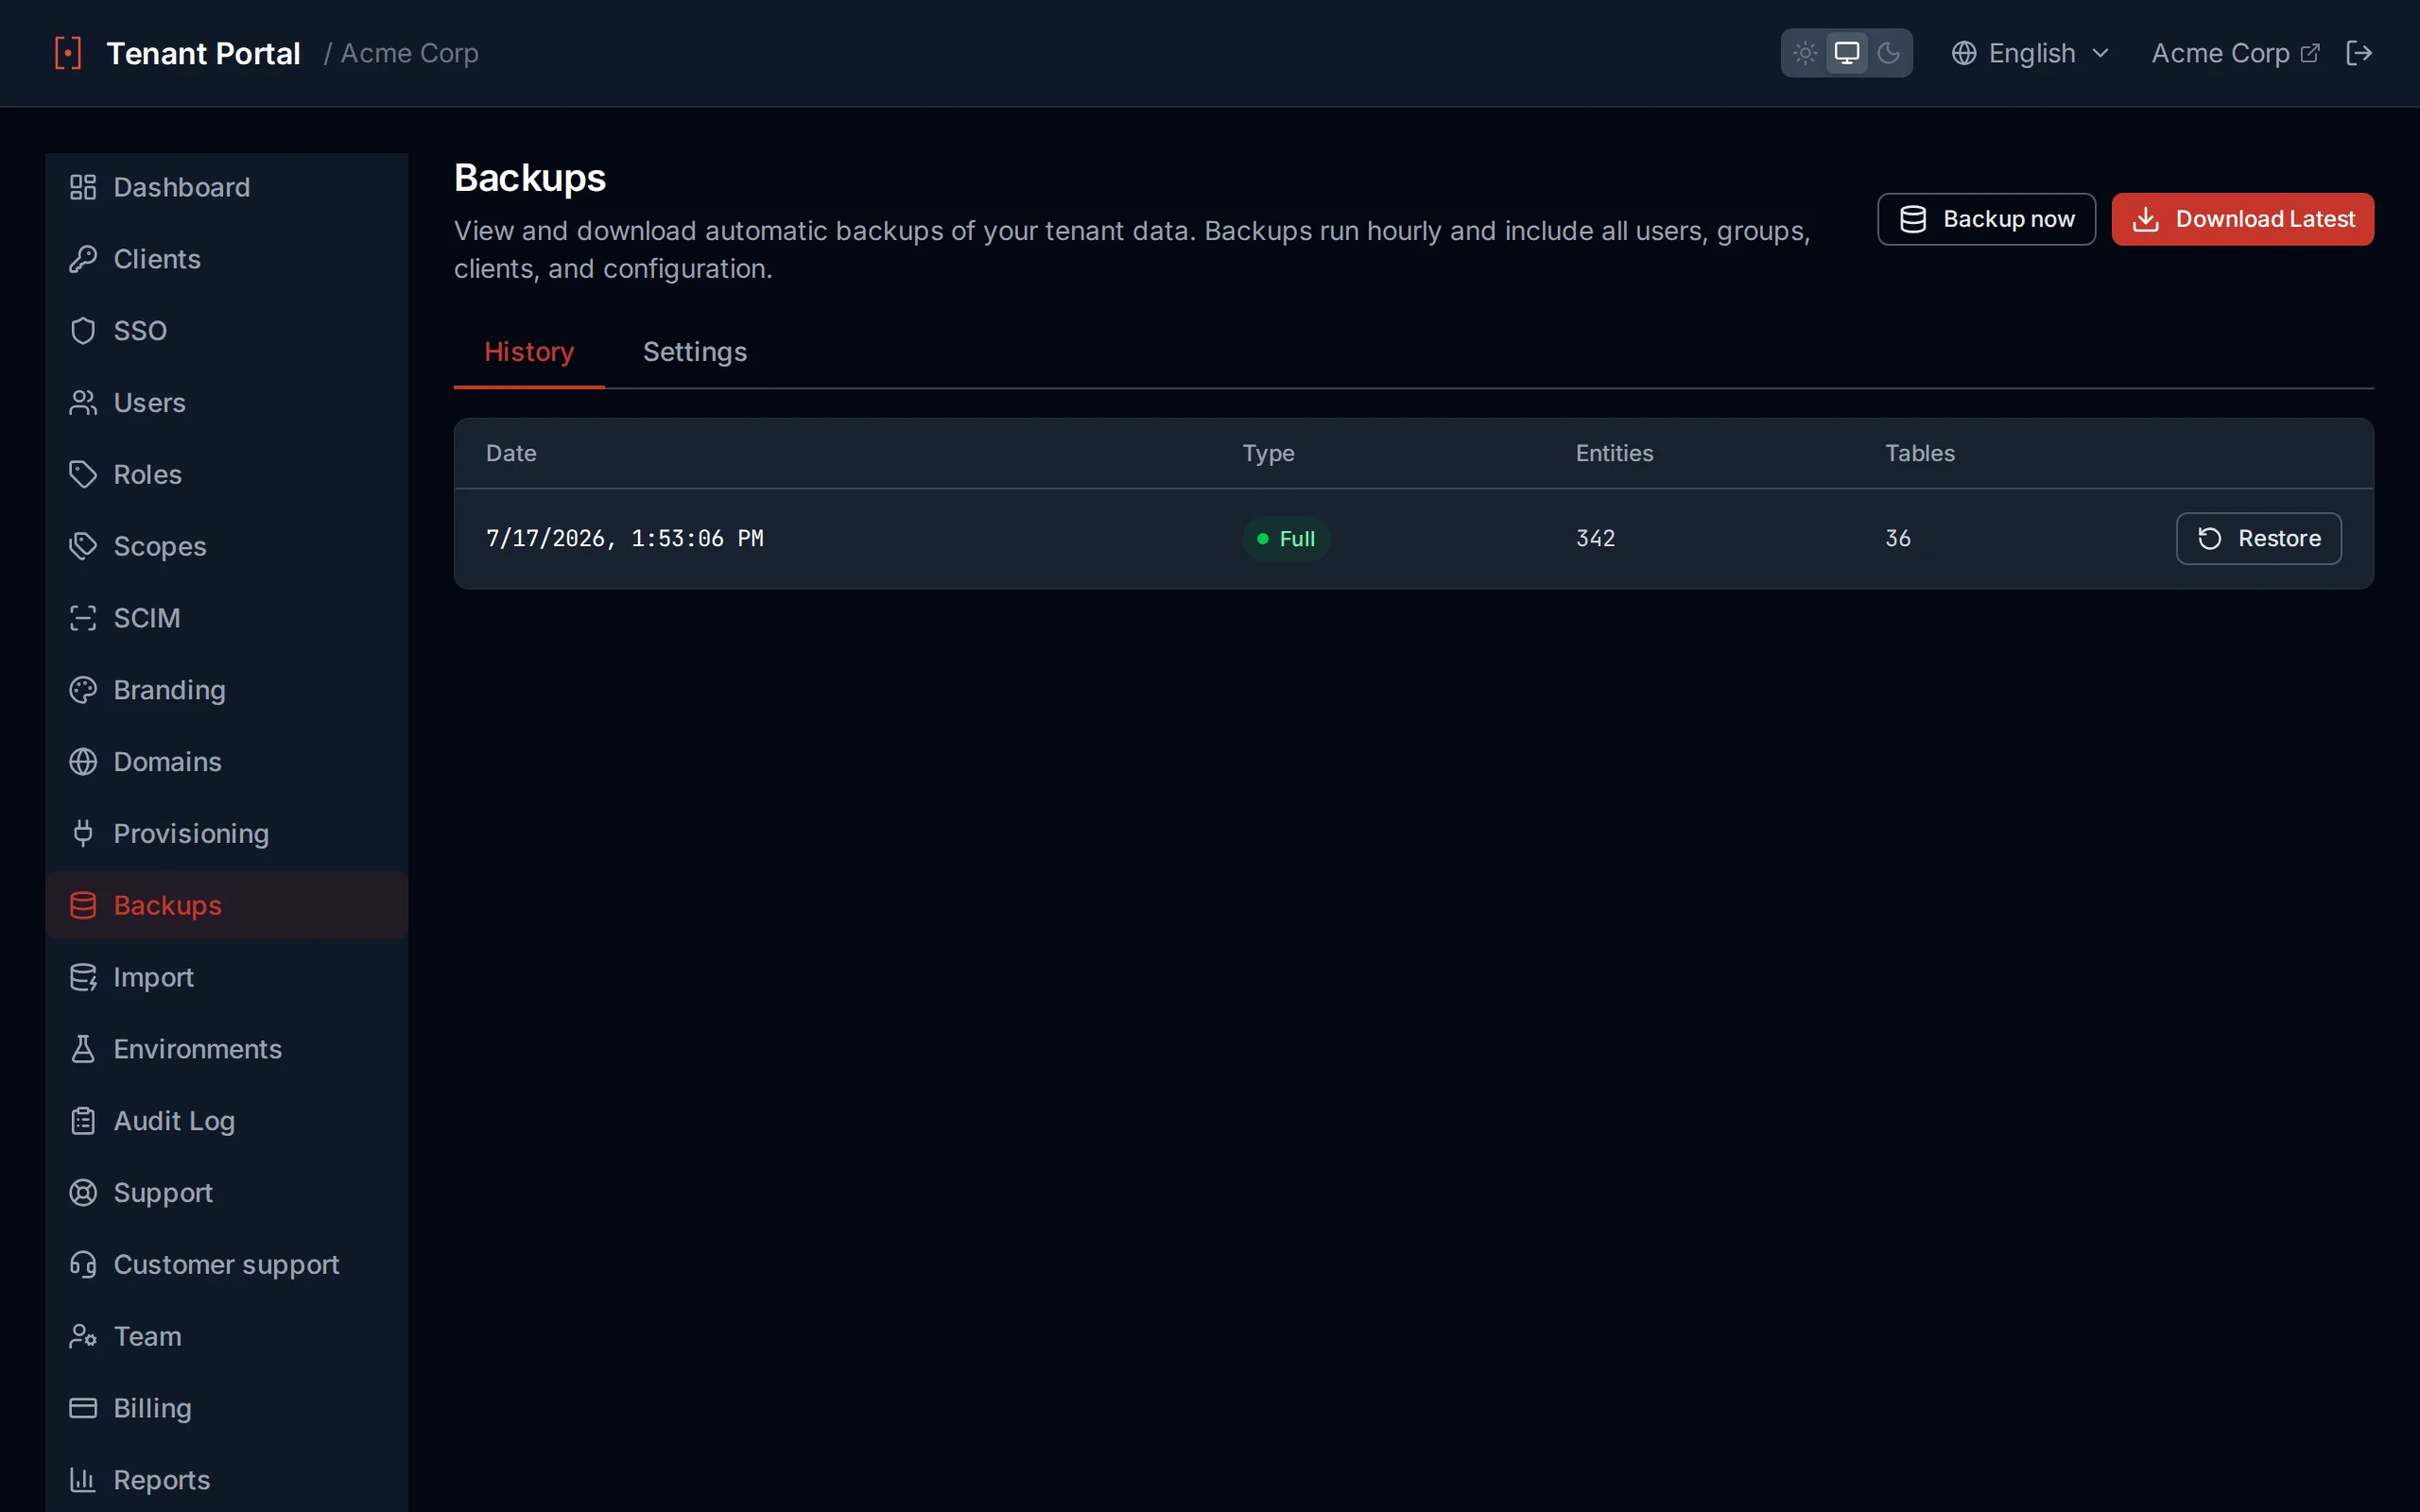
Authagonal automatically backs up your tenant data on an hourly schedule. Backups include all users, groups, roles, clients, SSO connections, SCIM tokens, branding, and settings. You can view backup history and download the latest complete backup from the Backups page.
How Backups Work
- A full backup runs once daily, capturing every table in your tenant's storage shard.
- Incremental backups run hourly, capturing only rows that changed since the last backup.
- Backups are stored in Azure Blob Storage with the same managed identity used by your tenant.
- Deleted records are tracked via tombstones and included in backups for audit completeness.
Downloading Backups
Click Download Latest to get a ZIP file containing the most recent full backup merged with all subsequent incremental backups. Each table is exported as a JSONL file (one JSON object per line).
Backup Format
Provisioning Apps
Provisioning apps are your own services, called by Authagonal whenever a user is created, so they can set up an account, assign a licence, decide which organization the user belongs to, or refuse the signup outright.
How It Works
When a user is created, Authagonal calls your provisioning app's callback URL using the TCC (Try/Confirm/Cancel) pattern. Every app must accept in the Try phase before any of them is committed, so several downstream systems can agree, or one can veto, without leaving half-created accounts behind.
| Phase | Endpoint | Purpose |
|---|---|---|
| /try | POST {callbackUrl}/try | Checks if the app can handle the user. Return 200 to accept or 4xx to reject. |
| /confirm | POST {callbackUrl}/confirm | Commits the operation after all apps have accepted the /try phase. |
| /cancel | POST {callbackUrl}/cancel | Rolls back the operation if another app fails during the /try phase. |
When provisioning runs
Provisioning runs on every path that creates a user, not just self-service signup. Already-provisioned app and user combinations are skipped, so an app sees each user once.
| Creation path | When it fires |
|---|---|
POST /api/auth/register | Self-service registration |
| SAML ACS callback | First SSO login for a new user (JIT) |
| OIDC callback | First SSO login for a new user (JIT) |
POST /scim/v2/Users | A connector provisions a user from the customer's directory |
| Portal and admin user creation | An operator creates or invites a user by hand |
The Try request
Authagonal POSTs this JSON to <code>{callbackUrl}/try</code>. Fields with no value are omitted rather than sent as null.
| Field | Type | Description |
|---|---|---|
transactionId | string | Identifies this provisioning transaction. The same value is sent to /confirm and /cancel, so stage your work against it and commit or discard it when that call arrives. |
userId | string | The user's Authagonal id. This is the subject you will see in their tokens. |
email | string | The user's email address. |
firstName | string | Given name, when the creation path supplied one. |
lastName | string | Family name, when the creation path supplied one. |
organizationId | string | The organization the user is already in, if any. Present only when something has previously assigned one; on a first signup it is absent, which is your cue to assign it. |
customAttributes | object | The user's stored custom attributes. For a user created by SSO this includes federated_connection, the name of the connection that vouched for them. |
A user arriving through SSO is the common case worth planning for: they have no organization yet, and federated_connection tells you which of your customers they came from.
{
  "transactionId": "8f14e45fceea167a5a36dedd4bea2543",
  "userId": "0f6b1c8e-3d2a-4f51-9e77-2c1a4b5d6e7f",
  "email": "[email protected]",
  "firstName": "Ada",
  "lastName": "Lovelace",
  "customAttributes": {
    "federated_connection": "acme-okta"
  }
}
The Try response
Your app answers with 200 and a JSON body. The body is not just an acknowledgement: it is how a downstream app assigns the organization and attributes that end up on the user's tokens.
| Field | Type | Description |
|---|---|---|
approved | boolean | Whether this app accepts the user. Defaults to true if omitted. False rejects the signup and the new account is deleted. |
reason | string | Why the user was rejected. Surfaced to the caller of the creation path. |
organizationId | string | The organization this user belongs to. Stored on the user and emitted as the org_id claim on their tokens. Applied only if the user does not already have one, so the first app to answer wins and later apps see that assignment. |
customAttributes | object | Attributes to merge onto the user, key by key. Emitted on tokens through a scope's UserClaims configuration. |
emailVerified | boolean | Your app vouches that it verified this address, for example by redeeming an invite sent to it. Authagonal marks the account confirmed and skips its own verification email. |
{
  "approved": true,
  "organizationId": "org_acme",
  "customAttributes": { "org_role": "member" }
}
This is where org_id comes from
org_id claim on tokens and on /connect/userinfo is whatever your provisioning app returned as organizationId. Authagonal never derives it: there is no Organization object, no uniqueness rule and no format requirement. It is your identifier, stored on the user and handed back to you on every token. You can also set it directly with PUT /api/v1/users/{userId}, and filter by it with GET /api/v1/users?organizationId=.Tagging users with the right organization
Decide the organization here, in one place, rather than at each creation path. An SSO user carries federated_connection, which identifies the connection that authenticated them and therefore the customer, and stays correct when one customer federates several email domains. An invited user has no connection, so match them by the invite you issued. Both paths reach /try before the user exists, so one piece of logic covers them and there are no two rules to drift apart.
// POST {callbackUrl}/try
app.post('/provisioning/try', async (req, res) => {
  const { email, customAttributes } = req.body;

  // An SSO user carries the connection that vouched for them. That is the
  // customer, and it stays right when one customer has several domains.
  const connection = customAttributes?.federated_connection;

  const org = connection
    ? await orgByConnection(connection)
    : await orgByPendingInvite(email);

  if (!org) return res.json({ approved: false, reason: 'No organization for this user' });

  // Stamped on the user and emitted as org_id on every token from now on.
  res.json({ approved: true, organizationId: org.id });
});
Rejection deletes the account
approved: false, the newly created user is deleted so no half-provisioned account is left behind. The API creation paths return 422 with your reason; the SAML and OIDC callbacks return 400. Return approved: true for a user you have nothing to do for.Adding a Provisioning App
To add a provisioning app, provide a name, a callback URL, and an optional API key. The API key is sent as a Bearer token in the Authorization header of each webhook request, allowing your app to authenticate requests from Authagonal.
Testing
Click Test next to any provisioning app to send a test request to your callback URL. The test results display the HTTP status code and response body, helping you verify that your app is receiving and processing webhooks correctly.
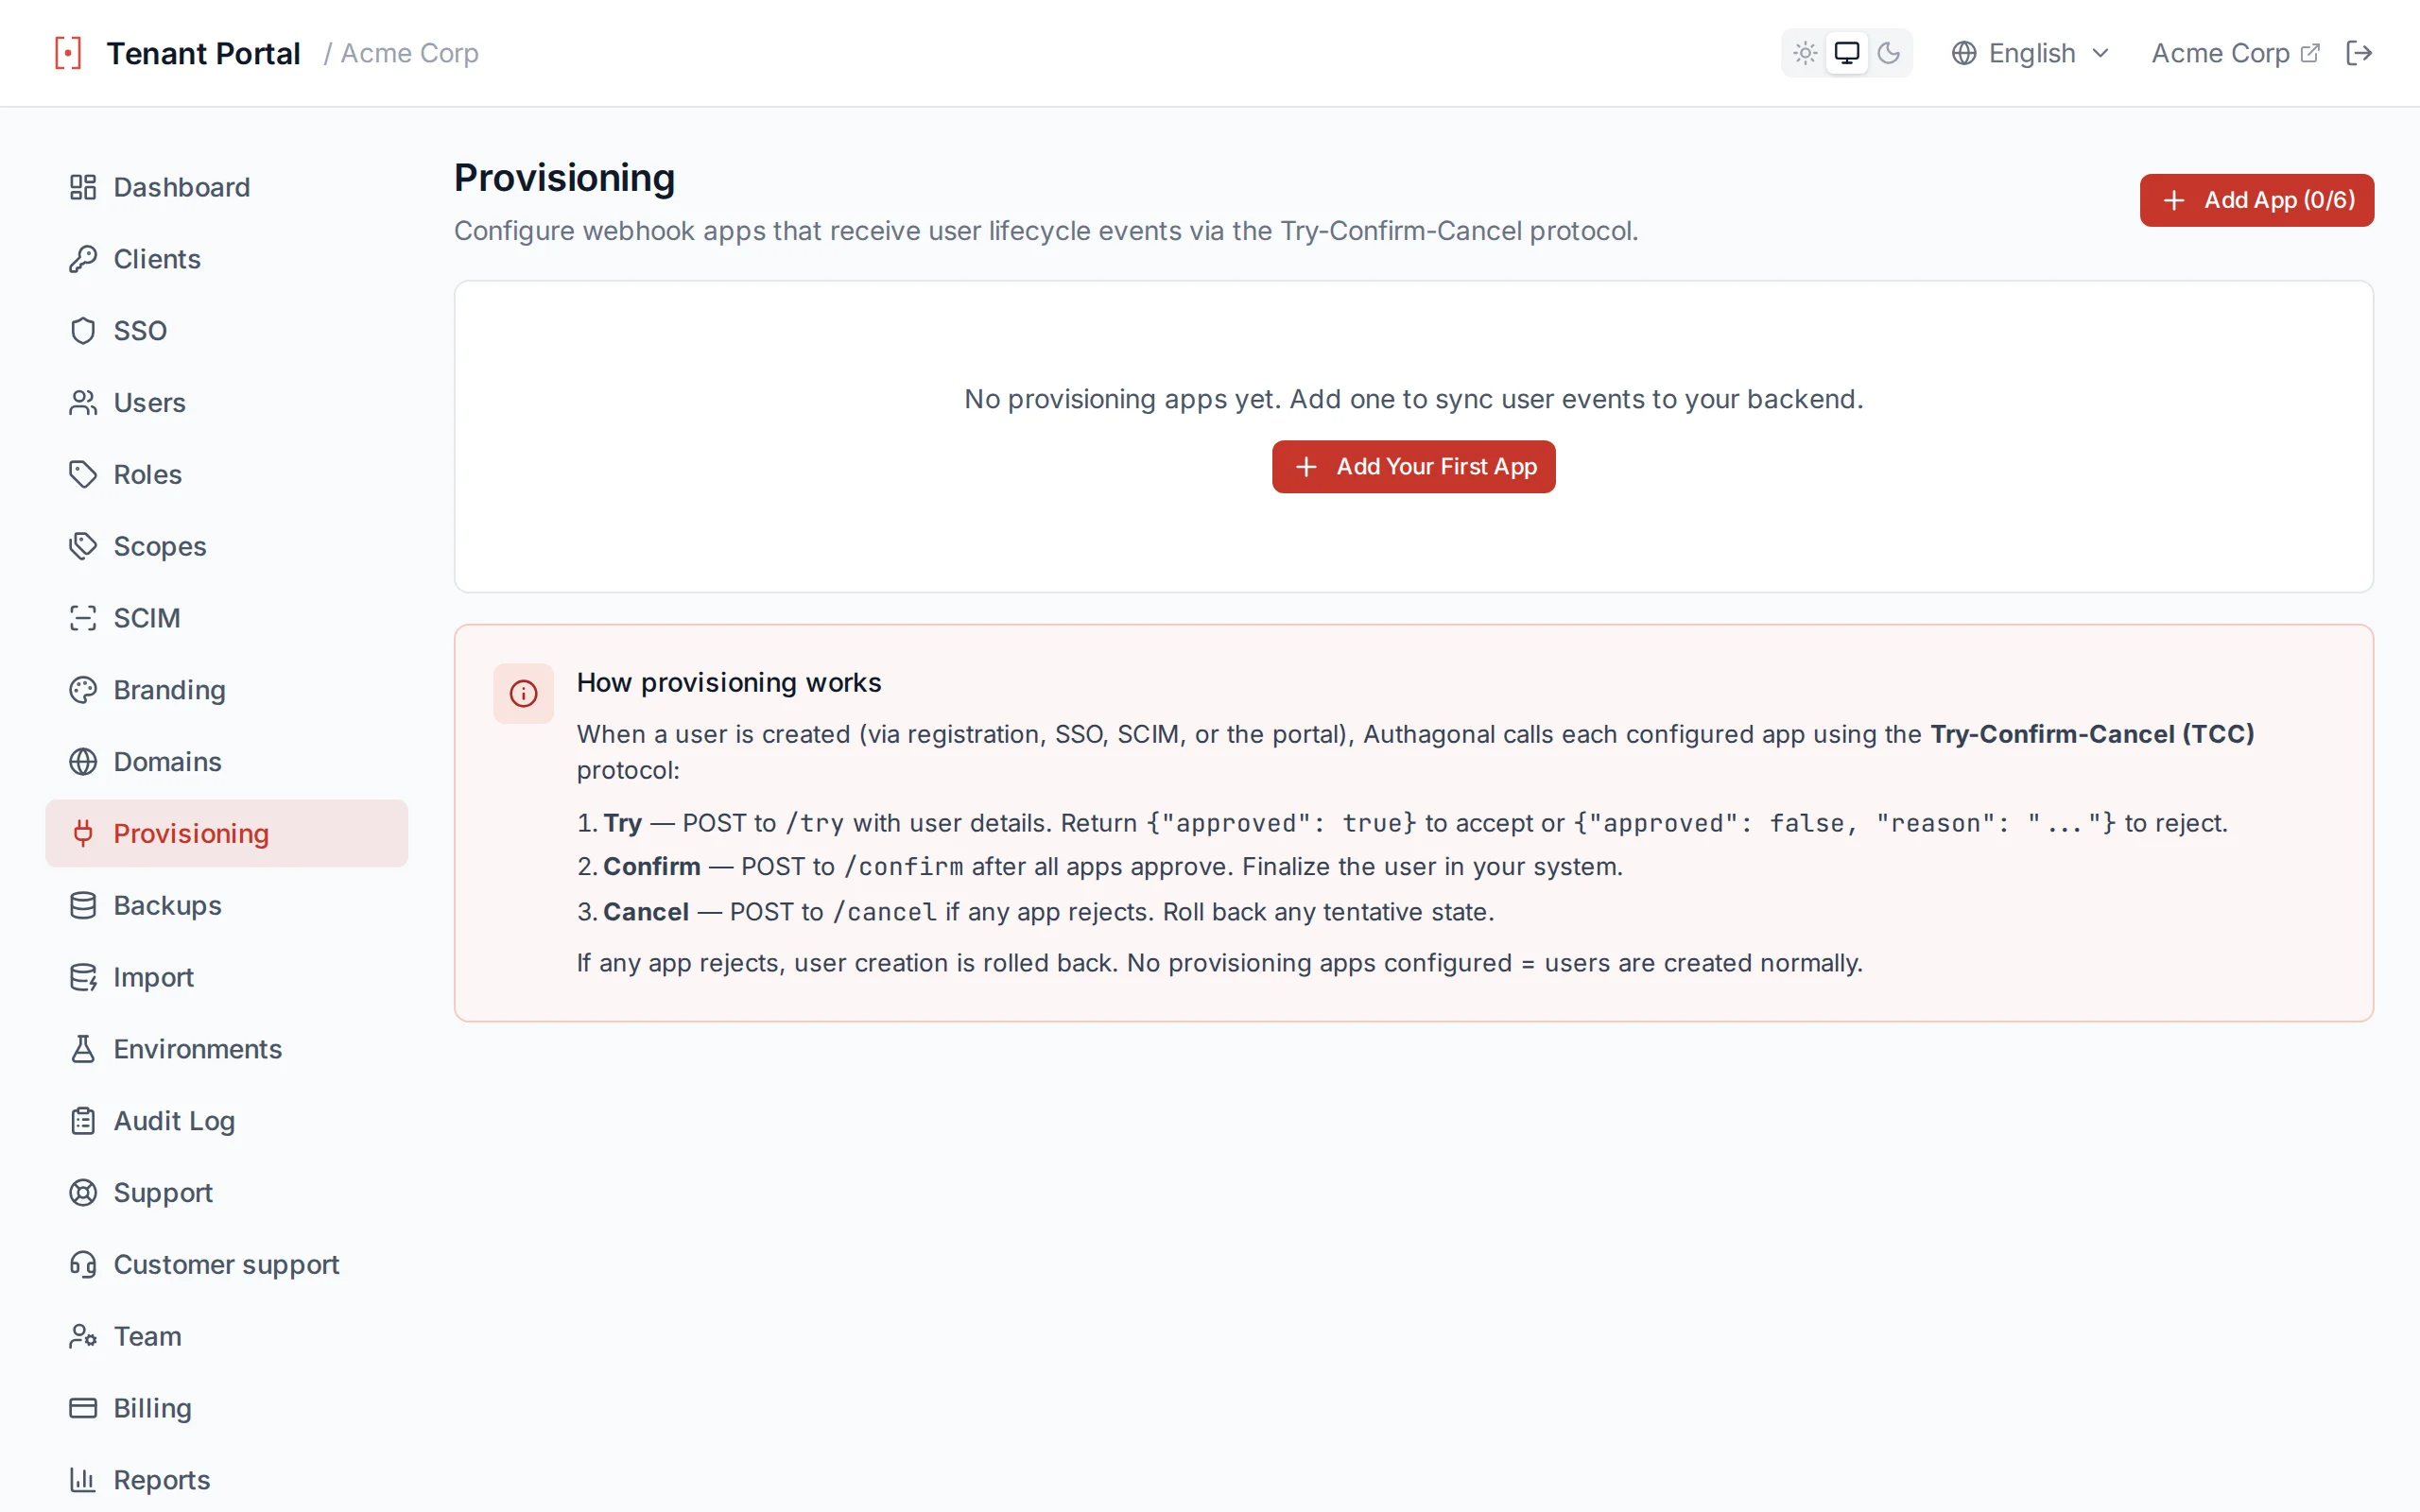
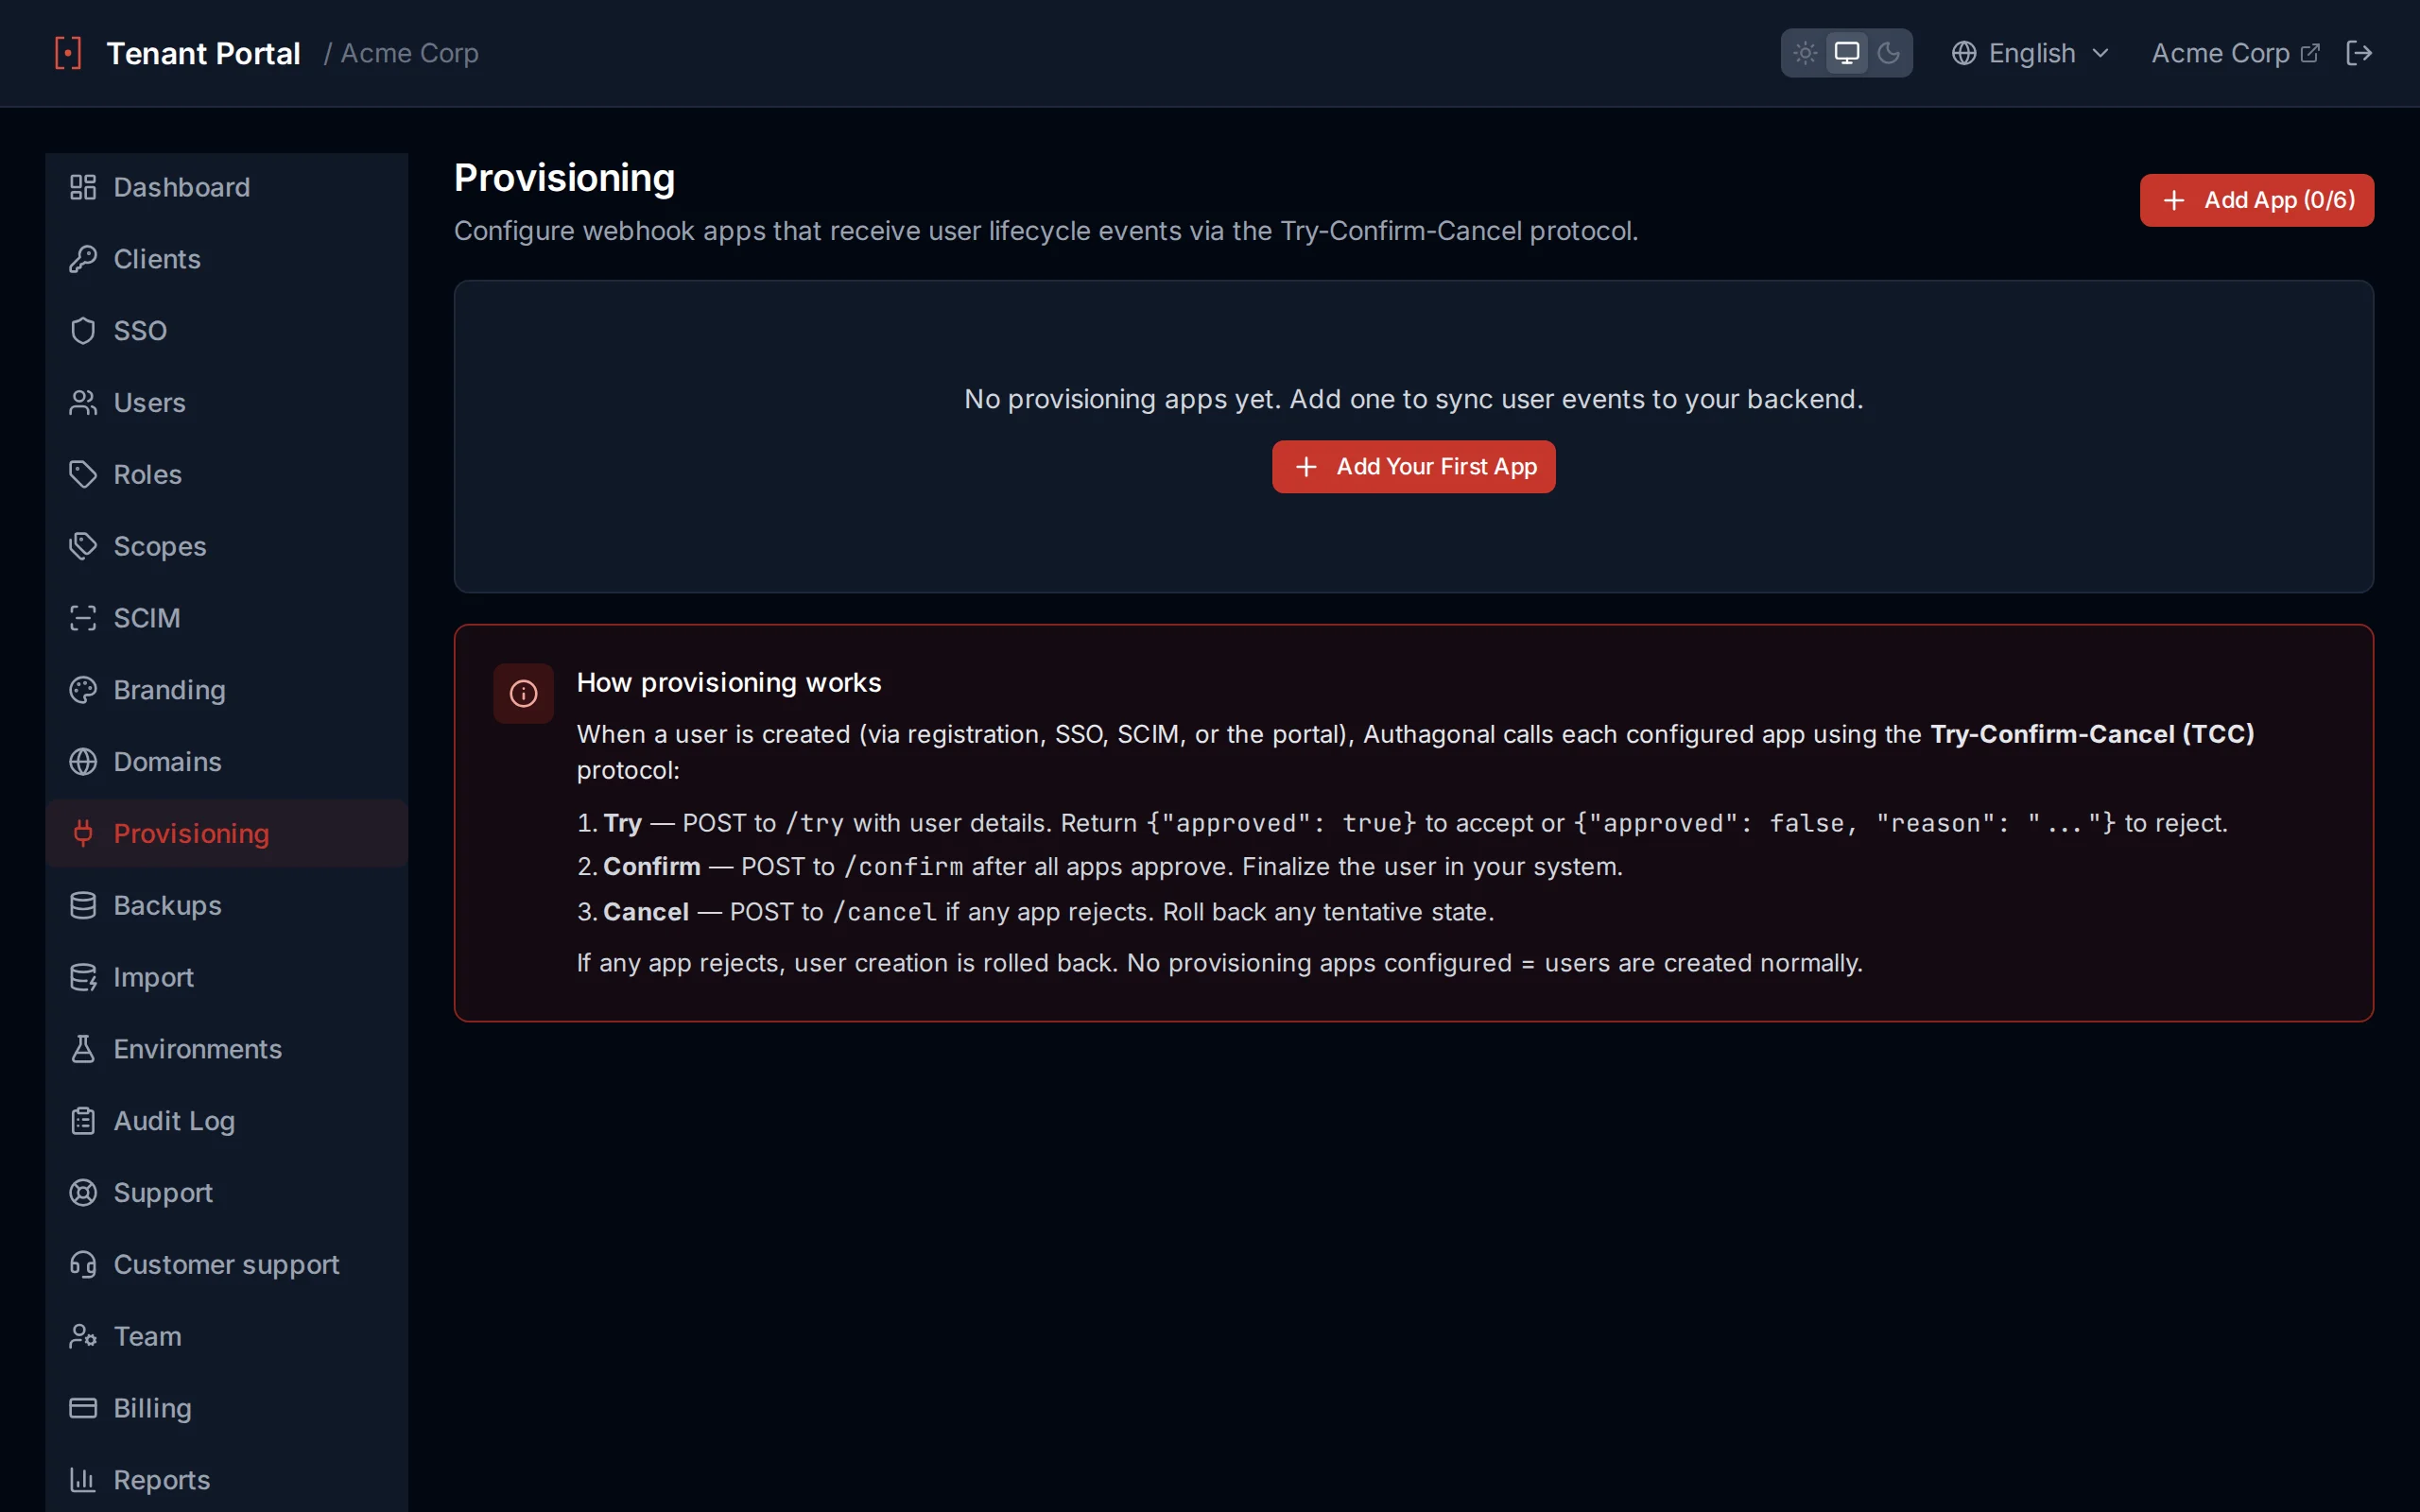
Test provisioning apps to verify webhook delivery and response handling
Plan Limits
The maximum number of provisioning apps is configurable per tenant, with a default limit of 6. This limit can be adjusted by an admin if your workflow requires additional provisioning targets.
API Key Authentication
Team
The Team page manages portal administrators — the people who can access and configure your tenant through the management portal. All team members have full administrative access to every aspect of your tenant configuration.
Admin List
The admin list displays each team member's name, email address, and the date they were added. A "You" indicator is shown next to the current user's row so you can easily identify your own account.
Inviting Admins
To invite a new team member, provide their email address, name, and a temporary password (minimum 8 characters). The invited user signs in with the temporary password and should change it on first login.
Invite Fields
Admin invitations create a fully provisioned user — no email round-trip required.
| Field | Description |
|---|---|
email | Email address of the new admin. Must be unique in the tenant. |
name | Display name shown in the admin list. |
tempPassword | Temporary password the invitee uses on first login. They'll be prompted to change it. Leave blank to auto-generate and send via email. |
Removing Admins
Click Remove next to any team member to revoke their access. A confirmation dialog is shown before the removal is finalized. You cannot remove yourself — there must always be at least one admin on the team.
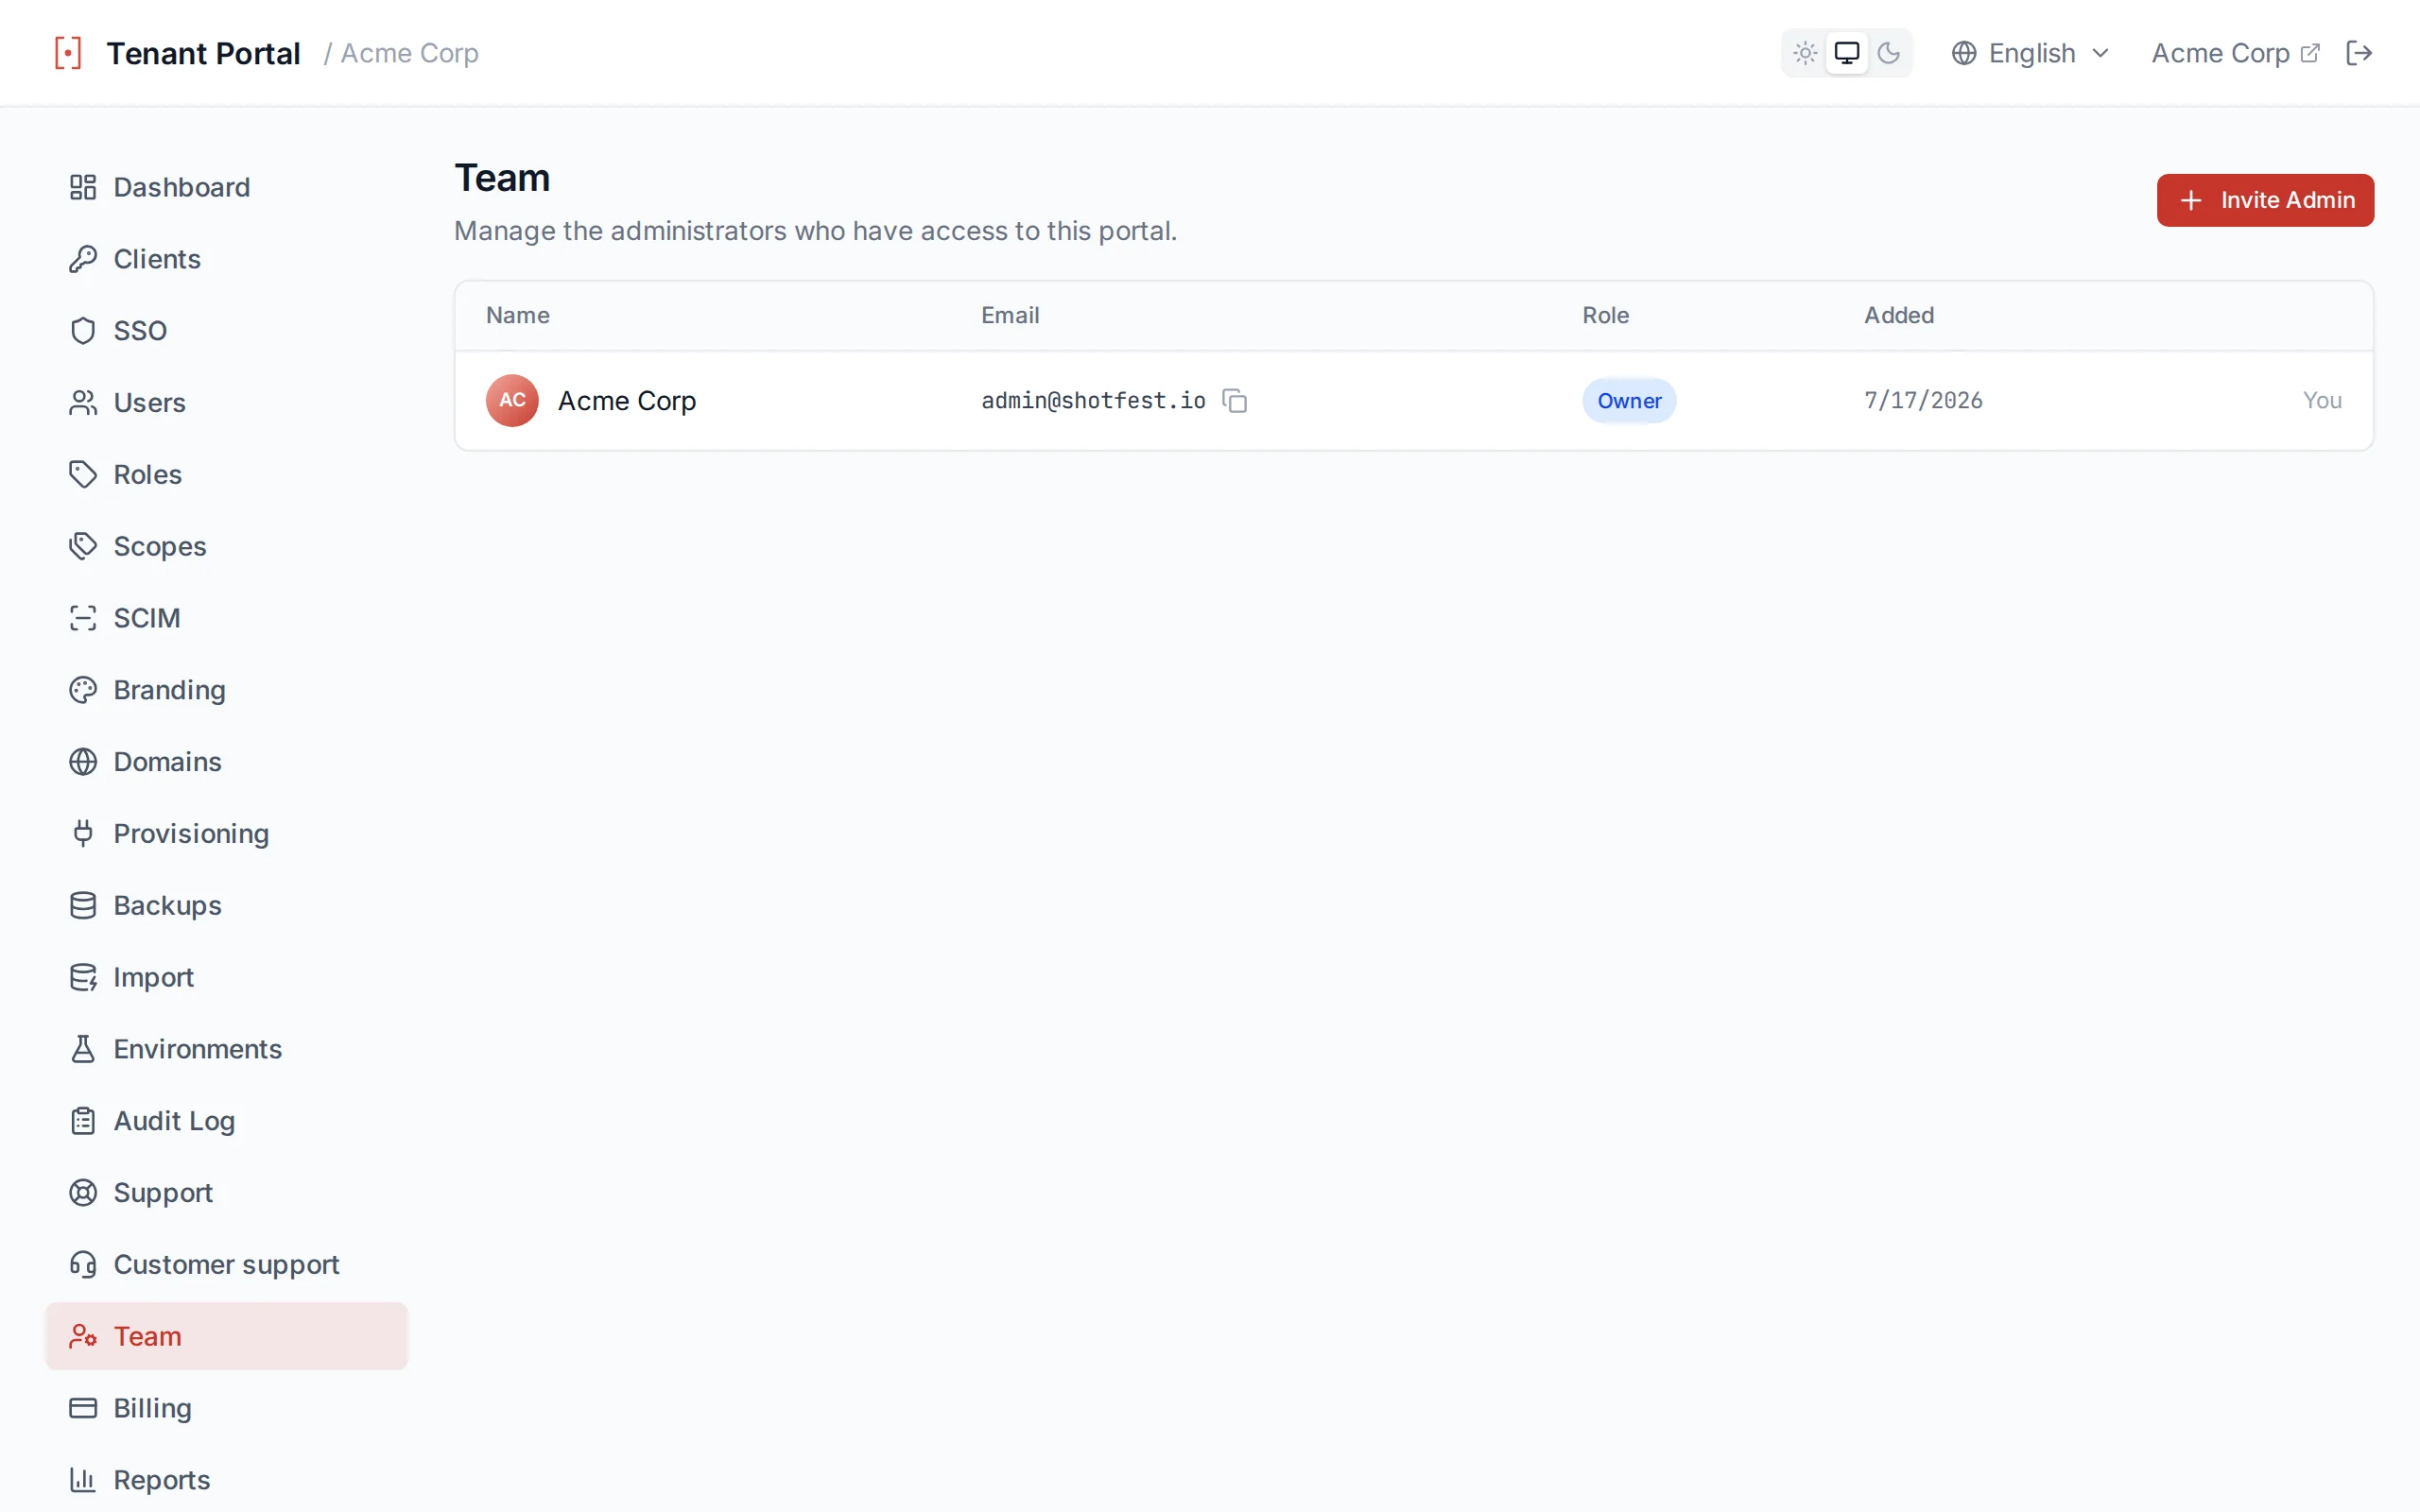
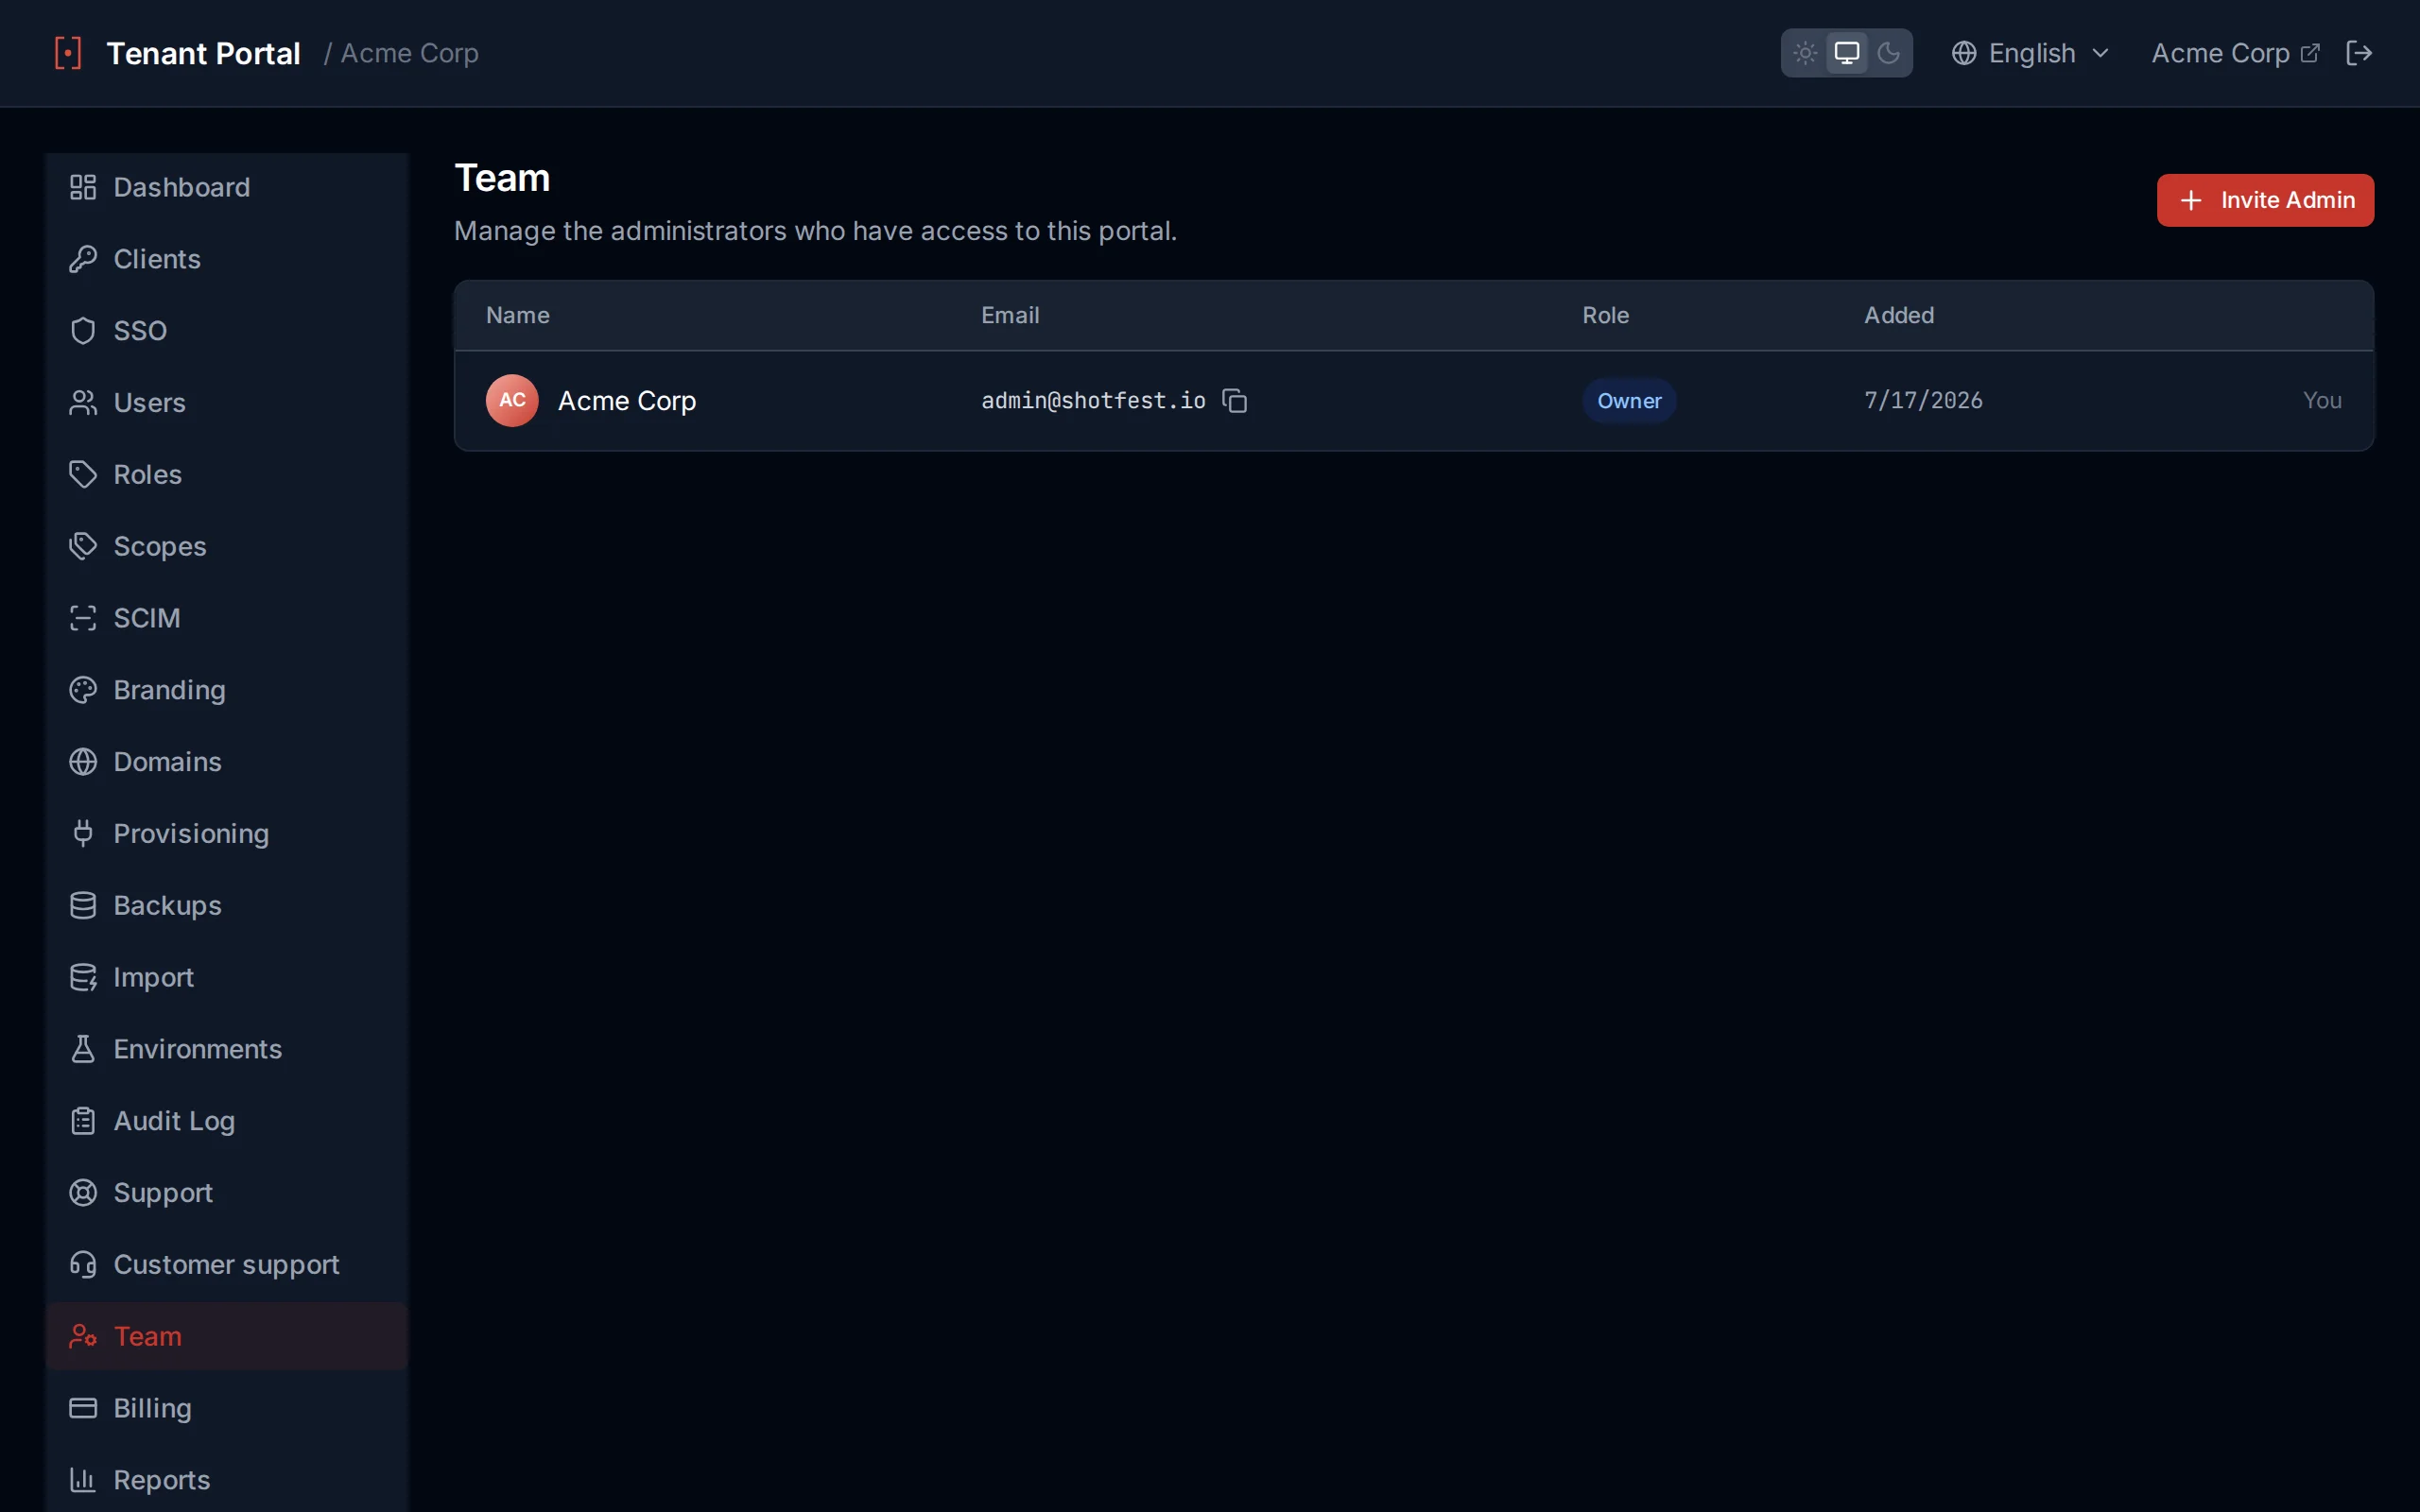
Manage portal administrators from the Team page
No Owner Role
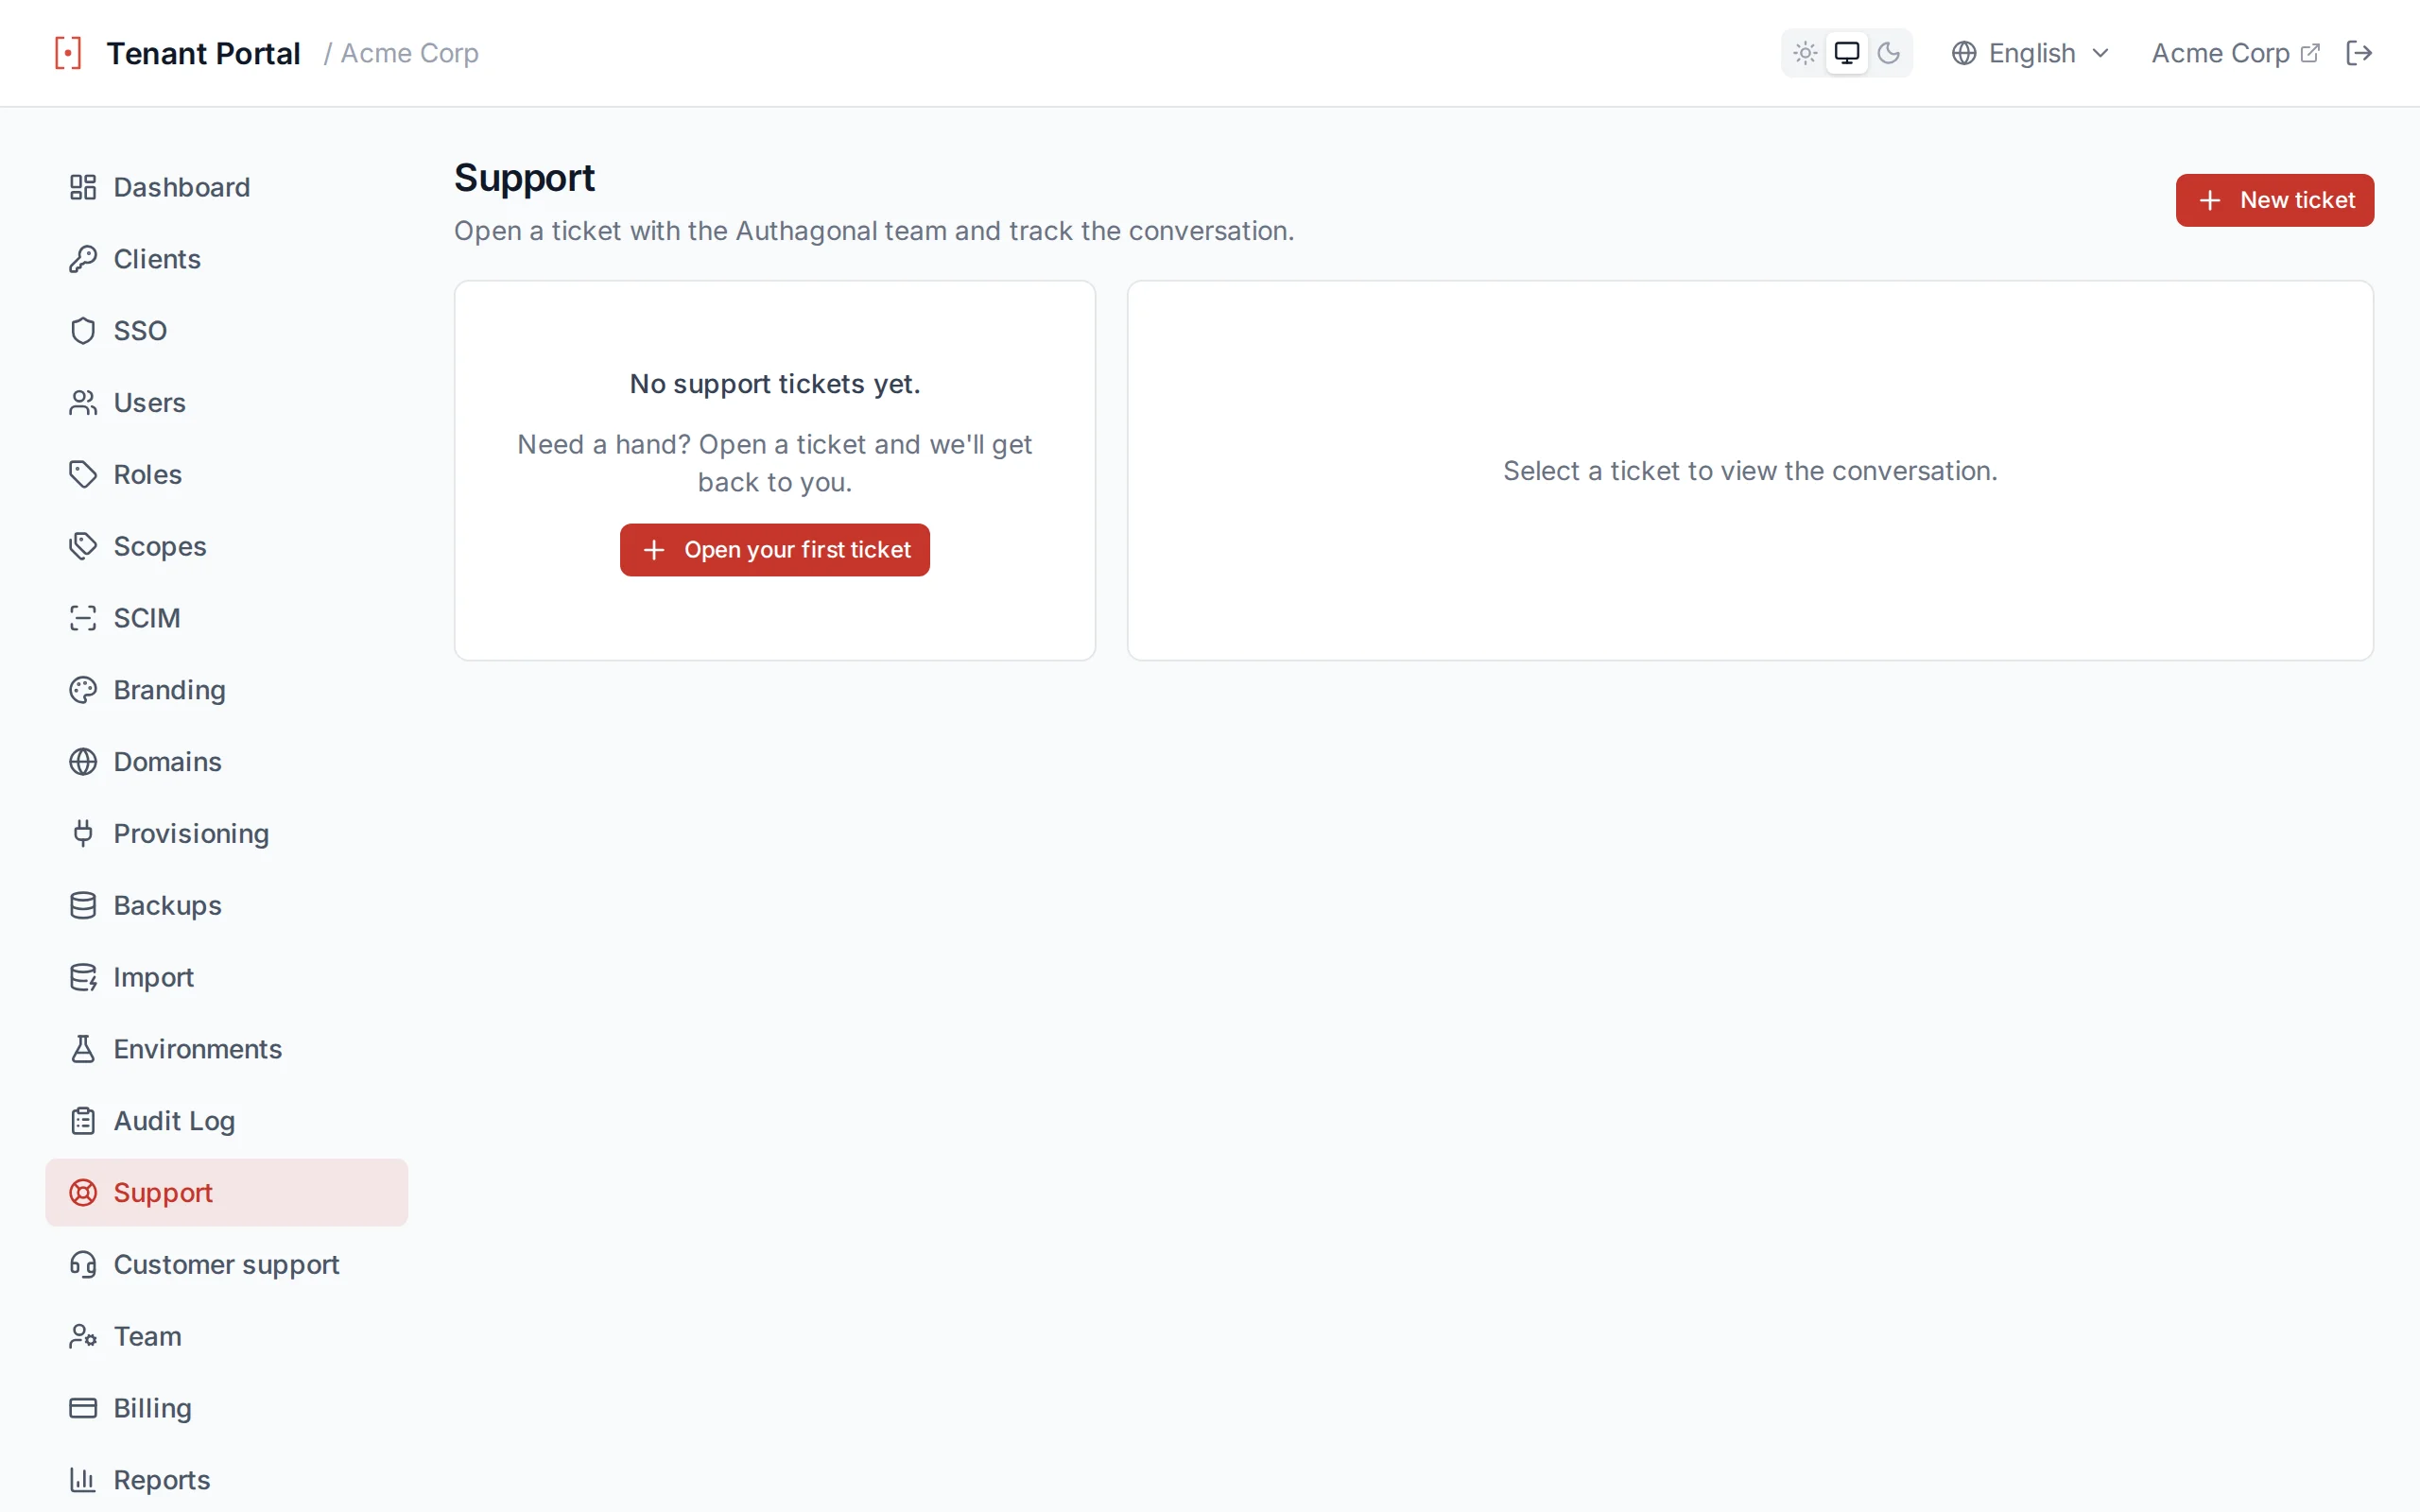
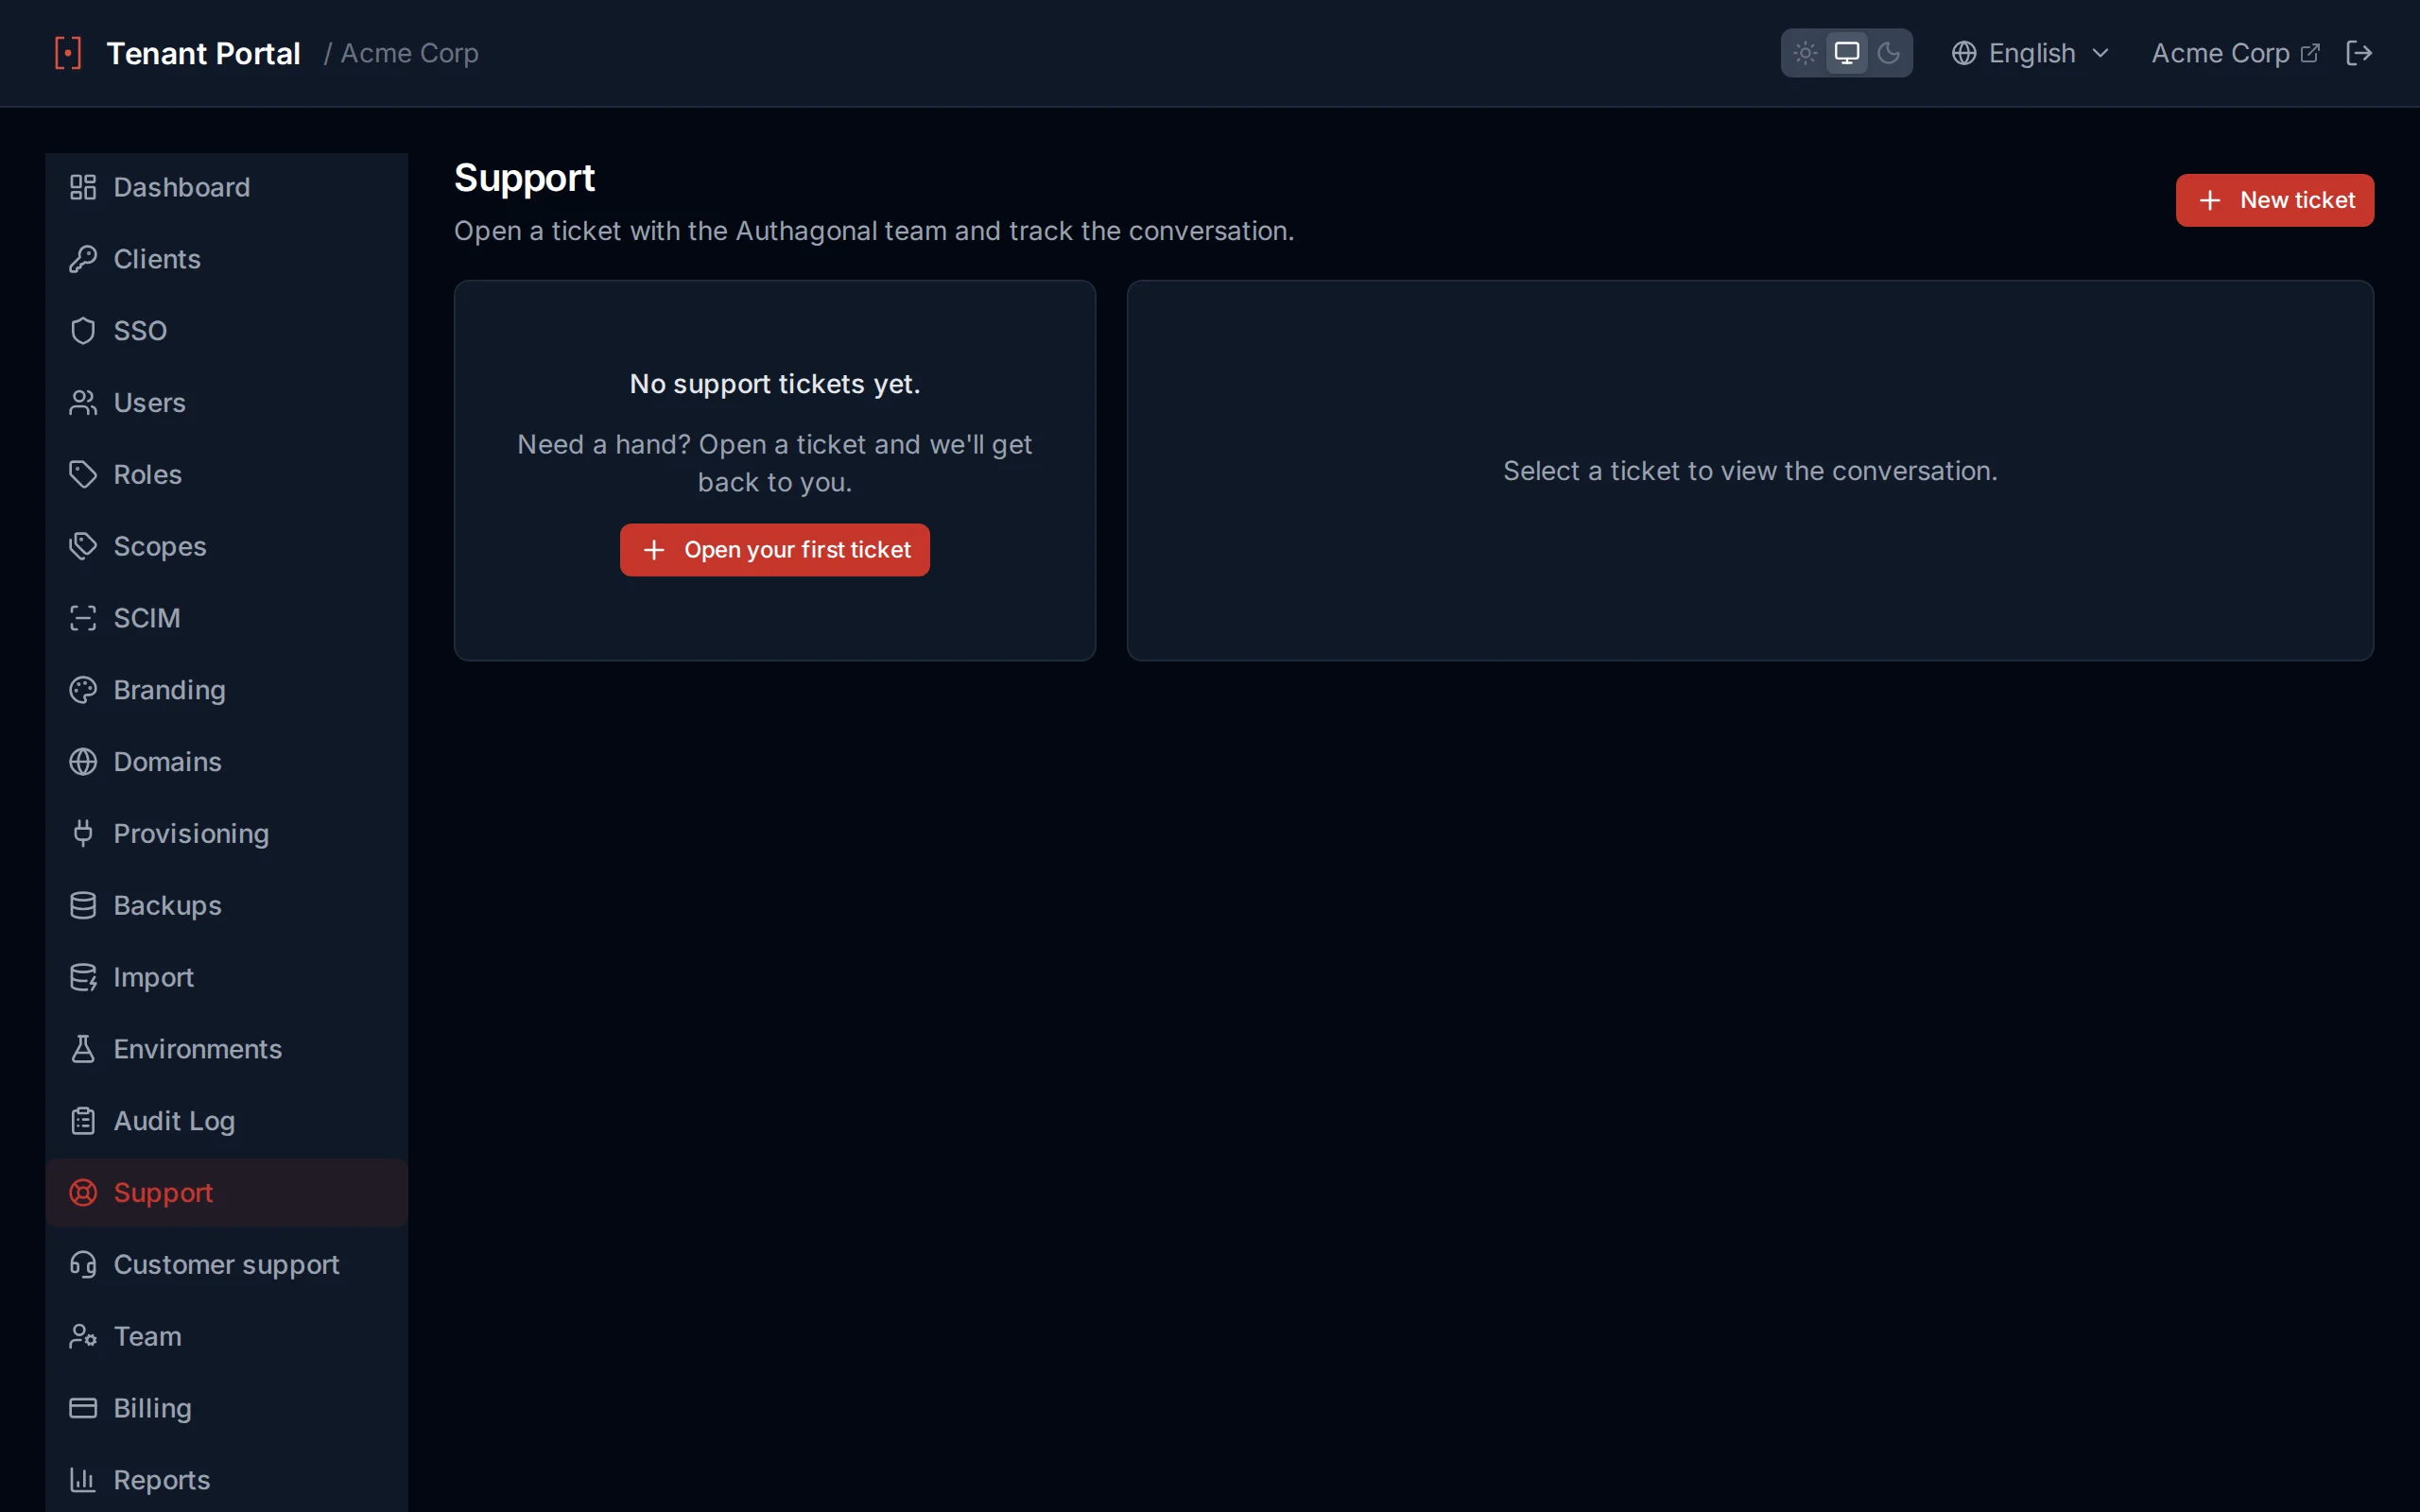
Support
Open a support ticket with the Authagonal team without leaving the portal. Every ticket is a threaded conversation, so you and our team stay on the same page from first report to resolution.
Your tickets
The support page lists every ticket you have raised, newest activity first. Use the status badge to see at a glance what is waiting on you and what is waiting on us.
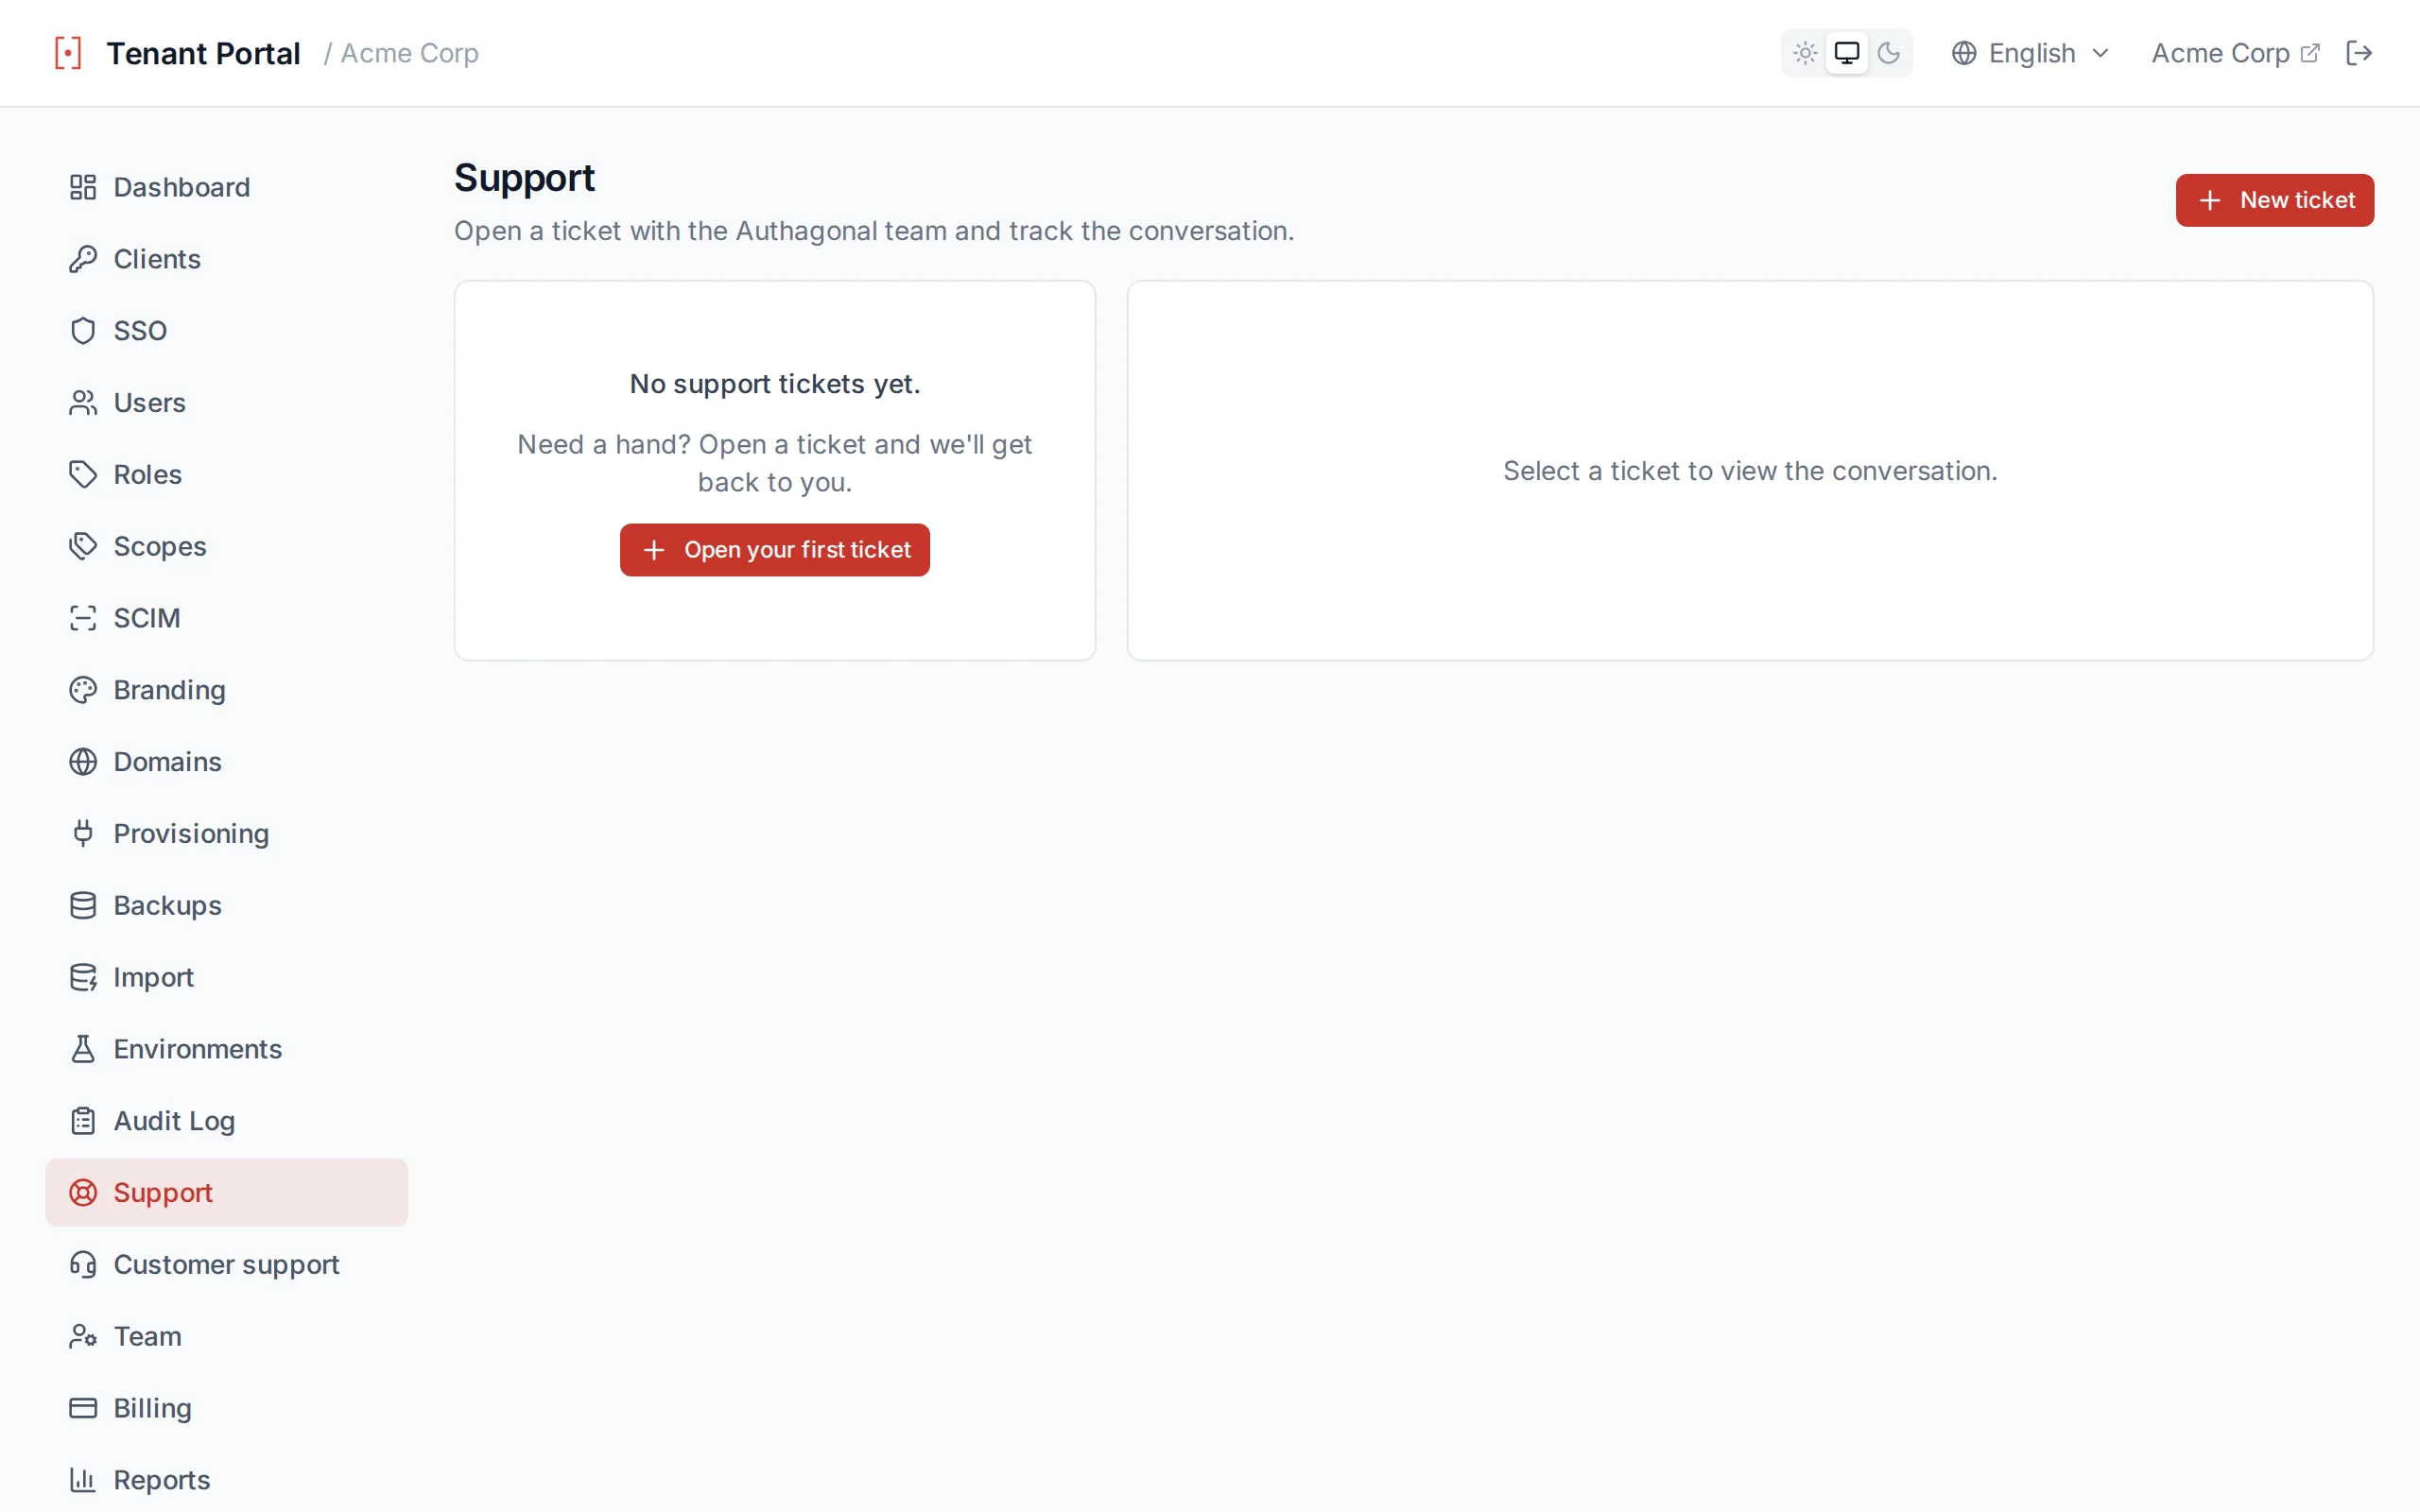
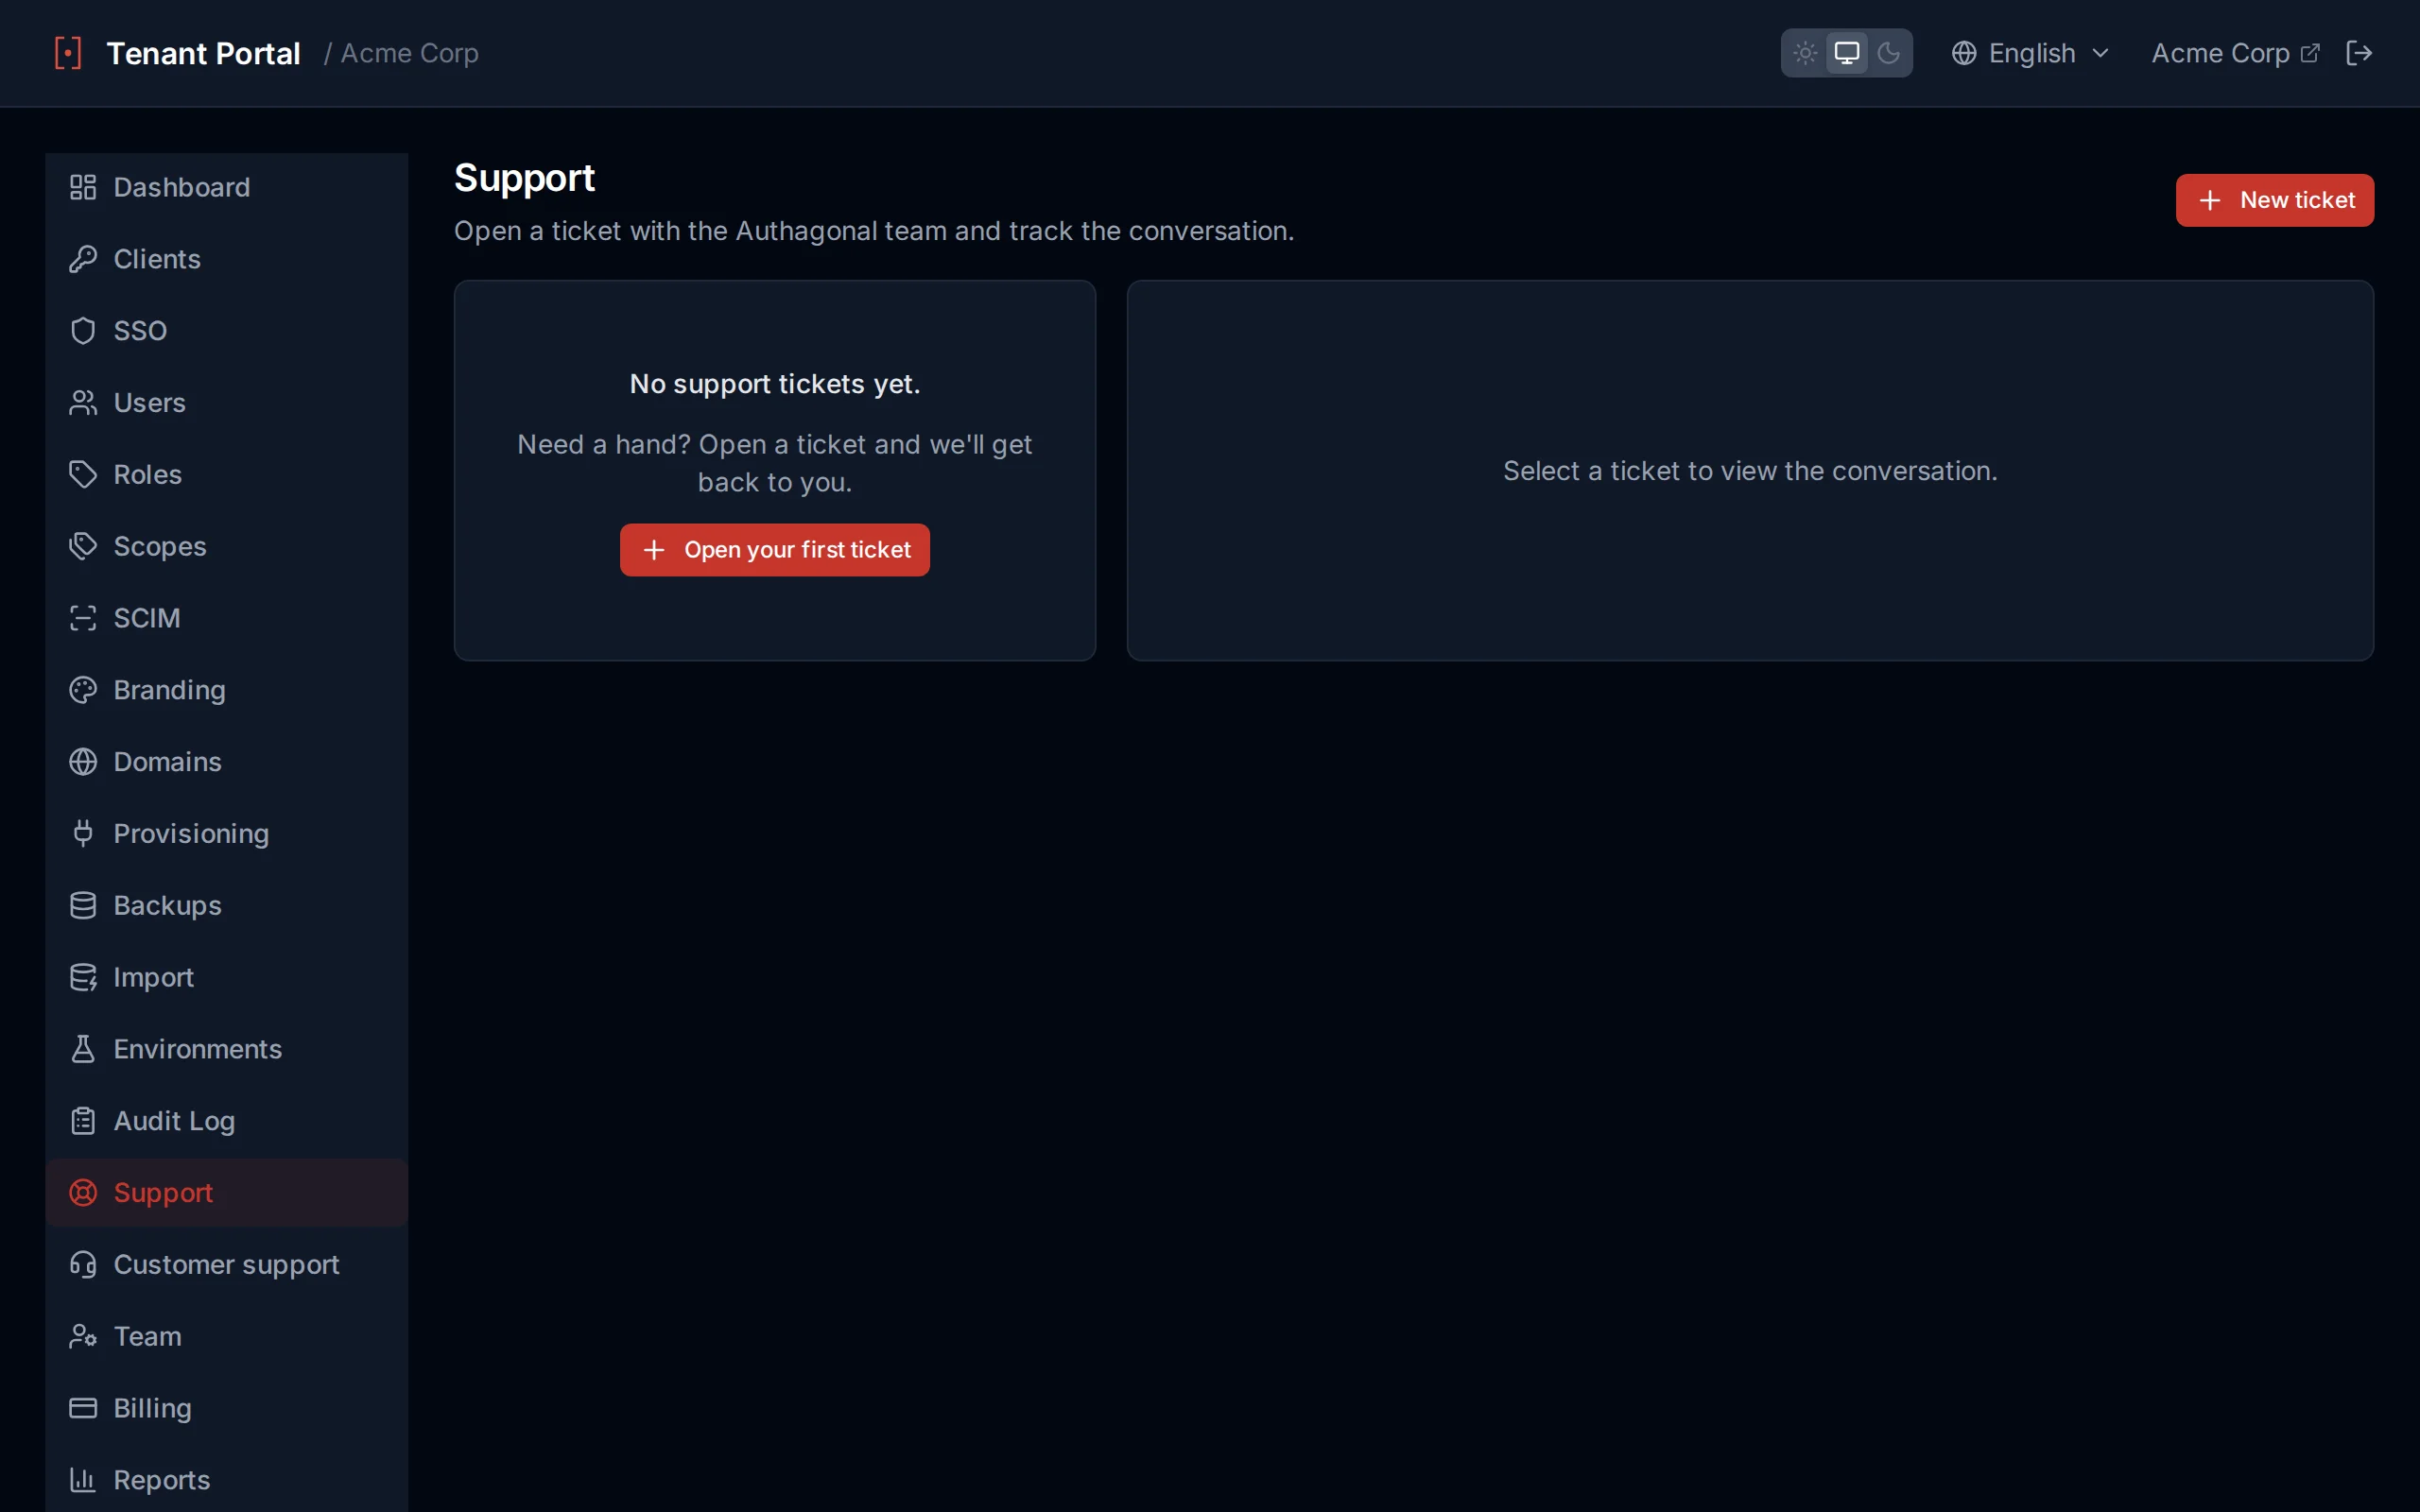
Your support tickets with subject, status, priority, and last activity
- Each row shows the subject, current status (open, pending, resolved, or closed), priority, and time of the last activity.
- Click New ticket to open one, then give it a subject, priority, and your first message.
- Colour-coded status badges make it easy to scan the list for tickets that need your attention.
A ticket thread
Opening a ticket shows the full conversation. Replies post in order, and new messages from our team appear without a page reload.
A ticket thread between you and the Authagonal team
- Threaded messages between you and the Authagonal team are shown in chronological order.
- Reply inline and attach files to share logs, screenshots, or configuration.
- The thread updates live, so a reply from our team shows up as soon as it is sent.
- If you reply to a notification email instead, your message is threaded in automatically.
How replies reach you
Support desk for your users
Separate from the support you get from us, Authagonal can run a support desk for your end users. They raise tickets from their account pages on your tenant's own branded host, and your team answers them from the portal.
It exists because the people who cannot sign in are exactly the people who cannot reach a support tool that requires signing in. The desk sits beside the login screens, so a locked-out user still has a way through, and every ticket arrives already tied to a real account in your directory rather than to whatever address someone typed.
Turning it on
Open Settings in the portal and enable the support portal. Nothing is visible to your users until you do.
| Setting | What it does |
|---|---|
| Support portal | The master switch. Off, both the end-user pages and your operator inbox are hidden and their APIs answer 404. |
| Allow anonymous tickets | Lets a signed-out visitor raise a ticket, which is the locked-out case. Protected by a bot check, and the exchange continues by email plus a private link, since there is no account to sign in to. |
| Notifications | Email addresses to alert when a ticket arrives or a user replies, so nobody has to sit watching the inbox. |
| Default end-user language | Used when a message is too short to detect a language from. Falls back to English. |
| Support webhook | A URL to POST ticket events to, for pushing them into your own tooling. |
Not available on Free
What your users see
Signed-in users get a support area in their account pages on your tenant host, carrying your branding. They can raise a ticket, see everything they have raised, and reply in a thread. Replies from your team arrive by email as well, so a user does not have to keep checking.
With anonymous tickets enabled, someone who cannot sign in can still raise one. They give an email address and their message, and get back a private link to the conversation. That link is the only way in, so treat it as a credential: it is unguessable, and anyone holding it can read and reply to that one thread.
The operator inbox
Your team answers from Support inbox in the portal. It is a separate place from your own tickets with us, and it is available to the tenant:support role and above, so you can give an agent access to the desk without giving them the rest of the portal.
| Action | What it does |
|---|---|
| Reply | Post into the thread. The user is emailed and sees it live if they have the page open. |
| Assign | Give a ticket to a named member of your team, so two people do not answer the same one. |
| Status and priority | Move a ticket through open, pending, resolved and closed, and mark how urgent it is. Closed tickets are deleted after a retention period rather than kept forever. |
| Internal notes | Notes visible only to your team, never to the user. Edits and deletions are recorded in the audit log. |
| Open on behalf of a user | Start a thread with one of your users by picking them from your directory, for when the conversation began somewhere else. |
| Escalate to Authagonal | If a ticket turns out to be about Authagonal rather than your product, escalate it. That opens a linked ticket with our team, optionally carrying the thread so far, and links the two so you can follow both. A ticket can only be escalated once. |
Users write in their own language
A ticket is stored in the language the user wrote it in, and each person on the thread reads it in theirs. Your agent sees a message translated into their portal language, the user sees your reply translated into theirs, and the original text is always kept alongside. The language is detected from the first message and pinned to the ticket. Translations are computed once per language and reused, so a long thread does not re-translate itself.
Time zones
A ticket records the time zone the user raised it from. Each message then shows their local time next to yours, so a reply at 14:32 reads as the 02:32 it actually was for the person waiting on it. Nothing is shown when the zone is unknown, such as a ticket that arrived by email, or when it matches yours.
Webhooks
Set a support webhook URL to receive ticket events as they happen, for raising an alert or mirroring tickets into your own system. Payloads are signed so you can verify they came from us.
| Event | What it does |
|---|---|
support.ticket.created | A user raised a ticket. |
support.ticket.message | A user replied to a thread. |
support.ticket.replied | One of your operators replied. |
support.ticket.assigned | A ticket was assigned to a team member. |
support.ticket.escalated | A ticket was escalated to Authagonal. |
Import & migrate
Migrate an existing identity system into your Authagonal tenant. Two sources are supported — Duende IdentityServer (a SQL Server database) and Auth0 (the Management API). Each runs a read-only preview so you can review exactly what will be copied before committing.
Import from Duende IdentityServer
Migrate clients, scopes, users, and roles from an existing Duende IdentityServer SQL Server database into your Authagonal tenant. The import runs in two phases — preview and commit — so you can review what will be copied before any changes are made.
What Gets Imported
The importer reads from Duende's ConfigurationDb and ASP.NET Identity tables and writes mapped rows into your tenant. Short-lived artifacts like persisted grants, device codes, and signing keys are skipped.
| Entity | Source Tables | Notes |
|---|---|---|
| Clients | Clients, ClientSecrets, ClientGrantTypes, ClientScopes, ClientRedirectUris | Disabled clients are imported disabled. Expired secrets are skipped. |
| Scopes | ApiScopes, ApiResources, IdentityResources | User-claim mappings are preserved where recognised. |
| Users | AspNetUsers, AspNetUserClaims | Password hashes (ASP.NET Identity V3) copy verbatim and rehash on first login. |
| Roles | AspNetRoles, AspNetUserRoles | Role assignments are preserved. |
| External Logins | AspNetUserLogins | Stored for reference; reconnect upstream IdPs via SSO after import. |
Preview Before Commit
Paste your Duende ConfigurationDb / IdentityDb connection string and click Run preview. The preview opens a read-only connection and counts every row that would be imported — no writes occur.
- Entity counts for clients, scopes, users, roles, and role assignments.
- Overwrite warnings when the target tenant already has matching clients, roles, or scopes.
- Warnings for unknown tables and unmapped columns so you know what will be dropped.
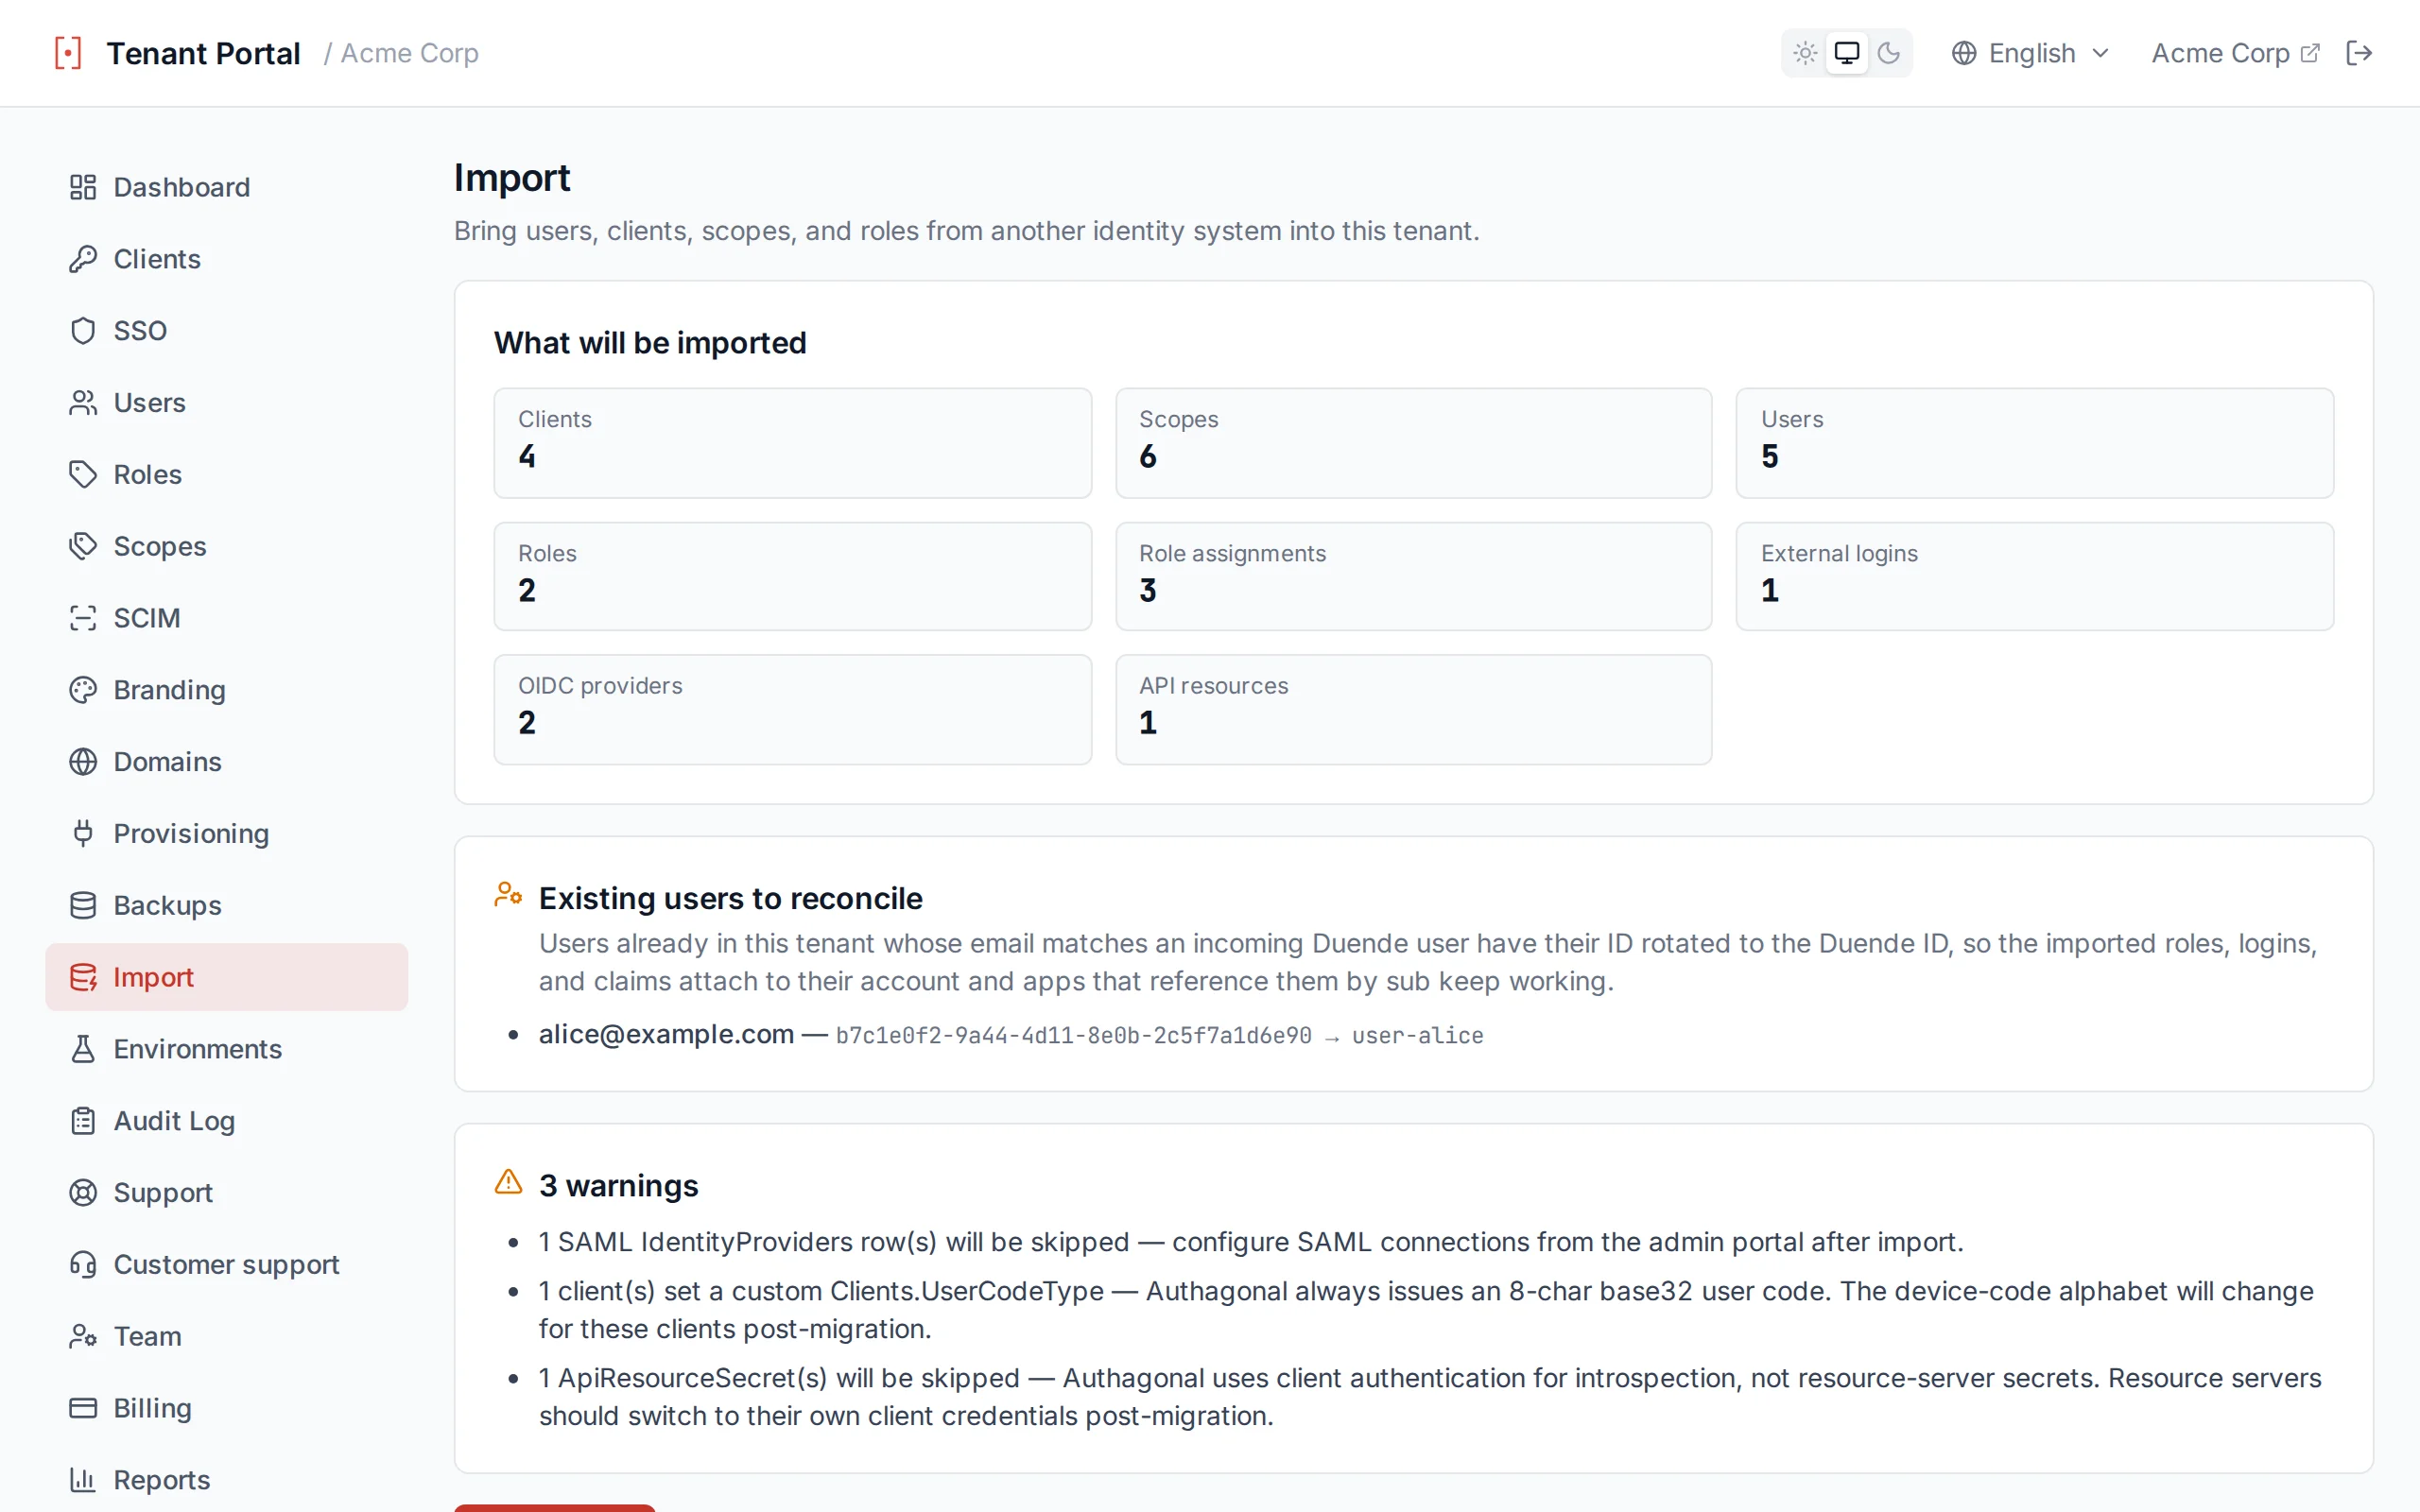
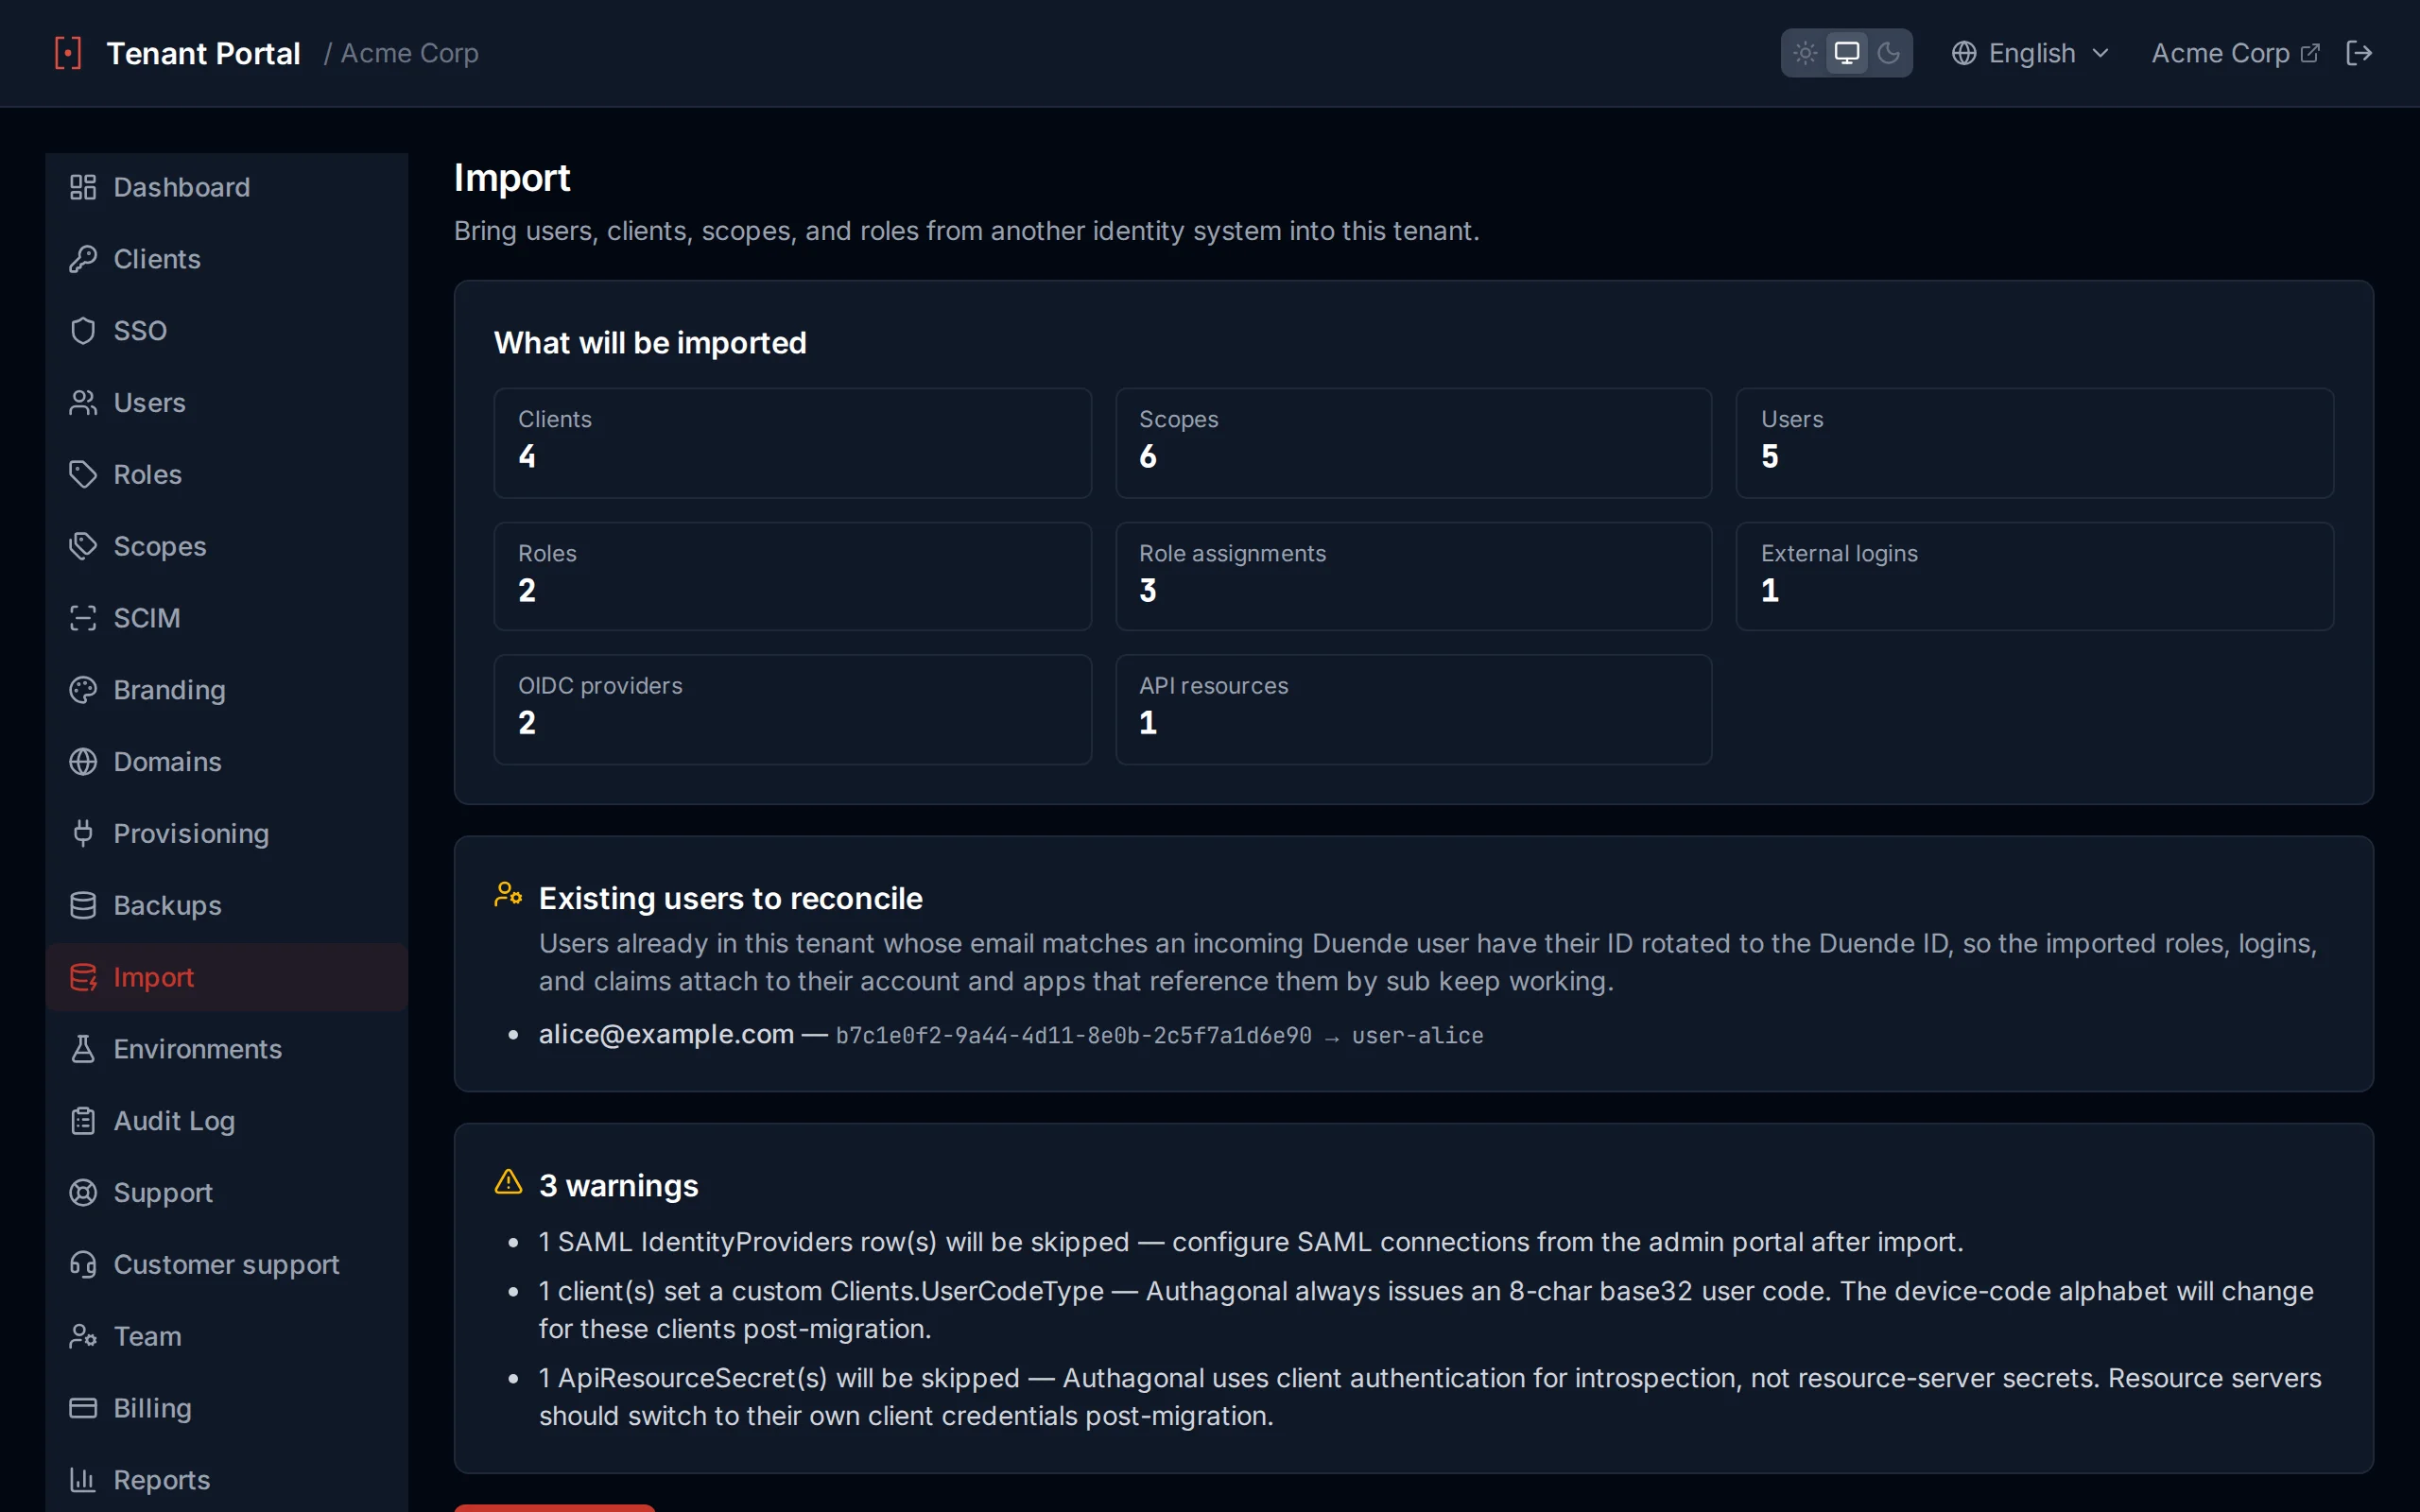
Preview panel with counts and warnings
Password Hashes
Duende stores passwords using ASP.NET Identity V3 (PBKDF2). Authagonal's PasswordHasher verifies that format directly and rehashes to the native format on the first successful sign-in — users keep their existing passwords without a reset flow.
User ID Reconciliation
If a user already in this tenant has the same email as an incoming record, the import rotates that account's userId to the source sub before importing, so the imported roles, logins, and claims attach to the existing account and apps that already reference the user by their source sub keep resolving after cutover. The account's existing password and profile are preserved; the source roles merge on top. The preview lists every account that will be reconciled before you commit.
Running the Import
Click Start import after reviewing the preview. The commit phase writes clients, scopes, users, roles, and external-login references into your tenant stores. Duplicate clientId, scope name, email, and role name rows are skipped — the importer is safe to re-run.
What's Not Imported
- Persisted grants, device codes, server-side sessions — short-lived, regenerated automatically.
- Signing keys — Authagonal issues its own per-tenant keys.
- Custom columns and tables — anything outside Duende's standard schema is surfaced as a warning so you know the data was dropped.
- Disabled clients — imported in a disabled state; re-enable them from the Clients page when ready.
Not available in sandbox
Import from Auth0
Connect Authagonal to your Auth0 tenant’s Management API and bring your applications, APIs, roles, users, and enterprise connections across. Imported user and application IDs are preserved, so existing sub and client_id references keep resolving after cutover.
What you’ll need
Create a Machine-to-Machine application in Auth0 authorized for the Management API, granted these read scopes: read:users, read:clients, read:resource_servers, read:roles, read:connections, read:client_grants. Paste its domain, client ID, and client secret into the import form — they’re used only for the import.
What Gets Imported
| Entity | Source Tables | Notes |
|---|---|---|
| Applications | clients, client-grants | Public vs confidential is detected automatically. Client secrets are re-hashed so they keep working. |
| APIs & scopes | resource-servers | Audiences and scopes are assigned to each client from its grants. |
| Roles | roles + assignments | Per-user role assignments are preserved. |
| Users | users + identities | Profiles and metadata transfer; social/enterprise identities become linked logins. |
| Connections | connections (OIDC) | Enterprise OIDC connections become federated providers. SAML, social, and database connections are skipped with a warning. |
Passwords
Auth0’s Management API never returns password hashes. If you have Auth0’s support-assisted bulk password export (NDJSON), provide it — bcrypt hashes import verbatim and your users keep their passwords with no reset. That file also carries your full user set, lifting Auth0’s 1,000-user API listing limit. Without it, users import as profiles and set a new password on first sign-in.
Same preview, rotation, and limits
API Reference
Each tenant exposes a standards-compliant OIDC server at https://{slug}.authagonal.io. All endpoints follow the OAuth 2.0 and OpenID Connect specifications. This reference covers every endpoint your application may need to interact with.
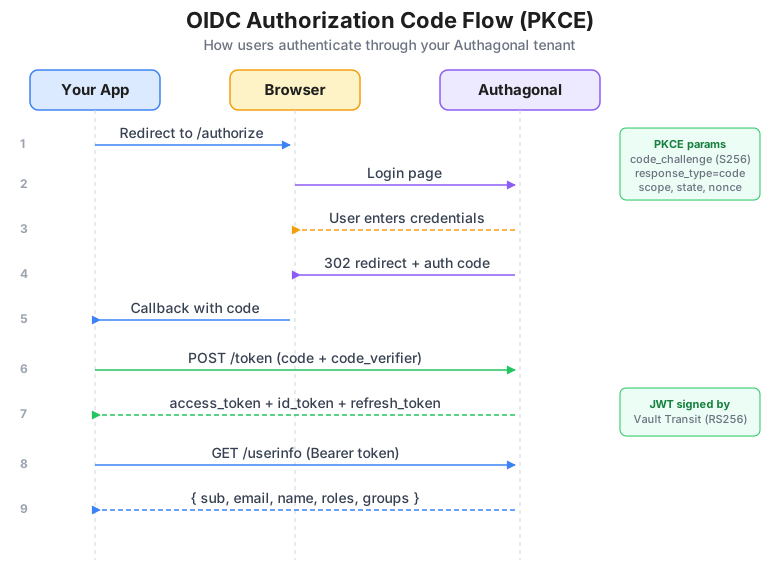
Authorization Code Flow with PKCE
OIDC Discovery & JWKS
The discovery document lets OIDC client libraries automatically configure themselves. No authentication is required for either endpoint.
GET /.well-known/openid-configuration
Returns the OpenID Provider Configuration document. The response includes all metadata your client needs to interact with this tenant.
| Field | Description |
|---|---|
| issuer | The tenant issuer URL |
| authorization_endpoint | URL for authorization requests |
| token_endpoint | URL for token exchange |
| userinfo_endpoint | URL for fetching user claims |
| jwks_uri | URL for the JSON Web Key Set |
| revocation_endpoint | URL for token revocation |
| introspection_endpoint | URL for token introspection |
| end_session_endpoint | URL for logout / end-session |
| device_authorization_endpoint | URL for device authorization requests |
| pushed_authorization_request_endpoint | URL of the Pushed Authorization Request endpoint (RFC 9126). |
| require_pushed_authorization_requests | Whether the tenant globally requires PAR. Even when this is false, individual clients can still set RequirePushedAuthorizationRequests = true. |
| scopes_supported | List of supported scopes |
| response_types_supported | Supported response types |
| grant_types_supported | Supported grant types |
| code_challenge_methods_supported | Supported PKCE methods (S256) |
| backchannel_logout_supported | Whether back-channel logout is supported |
GET /.well-known/openid-configuration/jwks
Returns the JSON Web Key Set used for verifying token signatures. The response contains a keys array with RSA public keys, each including kty, use, kid, alg, n, and e fields.
curl https://acme.authagonal.io/.well-known/openid-configuration
Authorization Endpoint
GET /connect/authorize
Initiates an authorization code flow. The user must have an active session or they will be redirected to the login page. On success, the user is redirected back to your application with an authorization code.
| Parameter | Required | Description |
|---|---|---|
response_type | Yes | Must be "code" |
client_id | Yes | Your registered client identifier |
redirect_uri | Yes | Must exactly match a registered redirect URI |
scope | Yes | Space-separated list of scopes (e.g. "openid profile email") |
state | Recommended | Opaque value for CSRF protection, returned unchanged in the redirect |
code_challenge | Required if PKCE | Base64url-encoded SHA-256 hash of the code_verifier |
code_challenge_method | Required if PKCE | Must be "S256" |
nonce | Optional | Value bound to the ID token for replay protection |
login_hint | Optional | Pre-fill the email field on the login page |
Success response: 302 redirect to redirect_uri with code and state query parameters.
Error response: 302 redirect with error, error_description, and state query parameters.
PKCE Required
code_verifier (a random string of 43 or more characters), hash it with SHA-256, and base64url-encode the result to create the code_challenge.Pushed Authorization Requests (PAR)
RFC 9126. Instead of putting every authorize parameter on the URL, your client POSTs them to /connect/par with normal client authentication and gets back a short-lived opaque request_uri. The browser then visits /connect/authorize?client_id=...&request_uri=... — nothing else lands in browser history, server logs, or Referer headers, and the server has already integrity-checked the parameters under client auth.
POST /connect/par
Client authentication is the same as /connect/token: HTTP Basic with client_id/client_secret, or form-encoded credentials. Public clients post without a secret. The body carries the same parameters you would normally send to /connect/authorize; request_uri itself is rejected (chaining a PAR is forbidden by §2.1 of the spec). Returns 201 Created.
| Parameter | Required | Description |
|---|---|---|
client_id | Yes | Your client ID. Must match the authenticated client. |
client_secret | Confidential clients | Your client secret. Required for confidential clients. |
response_type | Yes | Must be "code" |
redirect_uri | Yes | Must exactly match a registered redirect URI |
scope | Yes | Space-separated list of scopes (e.g. "openid profile email") |
code_challenge | Required if PKCE | Base64url-encoded SHA-256 hash of the code_verifier |
code_challenge_method | Required if PKCE | Must be "S256" |
state | Recommended | Opaque value for CSRF protection, returned unchanged in the redirect |
nonce | Optional | Value bound to the ID token for replay protection |
Response
| Field | Description |
|---|---|
request_uri | Single-use opaque reference, e.g. <code>urn:ietf:params:oauth:request_uri:abc123…</code>. Pass it to <code>/connect/authorize</code> as <code>request_uri</code>. |
expires_in | Lifetime of the <code>request_uri</code> in seconds. Default is 90 — typical reference-IdP value. |
On the follow-up GET /connect/authorize?client_id=…&request_uri=…, all other parameters are pulled from the pushed payload and any extra query parameters are ignored. The client_id on the authorize call must match the client that pushed the request. Once consumed (or once expires_in elapses), the request_uri is removed from the store.
Forcing PAR per client
/connect/authorize calls from it. The recommended posture for high-risk clients combines RequirePushedAuthorizationRequests = true with PKCE — that removes the URL bar as an attack surface entirely.# 1. Push parameters (server returns request_uri + expires_in) curl -X POST https://acme.authagonal.io/connect/par \ -u "my-app:CLIENT_SECRET" \ -H "Content-Type: application/x-www-form-urlencoded" \ -d "response_type=code" \ -d "redirect_uri=https://app.example.com/callback" \ -d "scope=openid profile email" \ -d "state=$(openssl rand -hex 16)" \ -d "code_challenge=YOUR_CODE_CHALLENGE" \ -d "code_challenge_method=S256" # 2. Send the user to /authorize with only client_id + request_uri # https://acme.authagonal.io/connect/authorize?client_id=my-app&request_uri=urn:ietf:params:oauth:request_uri:abc123...
Token Endpoint
POST /connect/token
Exchanges credentials for tokens. Requests must use Content-Type: application/x-www-form-urlencoded. Client authentication can be provided via HTTP Basic auth (Authorization: Basic base64(client_id:client_secret)) or as form body parameters (client_id + client_secret).
Authorization Code Grant
| Parameter | Required | Description |
|---|---|---|
grant_type | Yes | "authorization_code" |
code | Yes | The authorization code from the redirect |
redirect_uri | Yes | Must match the URI used in the authorization request |
code_verifier | Required if PKCE | The original random string used to generate the code_challenge |
client_id | Yes | Your client identifier (if not using Basic auth) |
client_secret | Confidential clients | Your client secret (if not using Basic auth) |
Refresh Token Grant
| Parameter | Required | Description |
|---|---|---|
grant_type | Yes | "refresh_token" |
refresh_token | Yes | The refresh token to exchange |
client_id | Yes | Your client identifier |
client_secret | Confidential clients | Your client secret |
Client Credentials Grant
| Parameter | Required | Description |
|---|---|---|
grant_type | Yes | "client_credentials" |
client_id | Yes | Your client identifier |
client_secret | Yes | Your client secret |
scope | Optional | Space-separated scopes to request |
Device Code Grant
| Parameter | Required | Description |
|---|---|---|
grant_type | Yes | "urn:ietf:params:oauth:grant-type:device_code" |
device_code | Yes | The device code from the device authorization response |
client_id | Yes | Your client identifier |
client_secret | Confidential clients | Your client secret |
Token response:
| Field | Description |
|---|---|
access_token | The access token for API calls |
token_type | "Bearer" |
expires_in | Token lifetime in seconds |
id_token | OpenID Connect ID token (when openid scope is requested) |
refresh_token | Refresh token (when offline_access scope is granted) |
curl -X POST https://acme.authagonal.io/connect/token \
  -H "Content-Type: application/x-www-form-urlencoded" \
  -d "grant_type=authorization_code" \
  -d "code=AUTHORIZATION_CODE" \
  -d "redirect_uri=https://app.example.com/callback" \
  -d "client_id=my-app" \
  -d "code_verifier=YOUR_CODE_VERIFIER"
UserInfo Endpoint
GET /connect/userinfo
Returns claims about the authenticated user. Requires a valid access token with the openid scope.
| Field | Type | Description |
|---|---|---|
sub | string | Unique user identifier |
email | string | User email address |
email_verified | boolean | Whether the email has been verified |
given_name | string | First name |
family_name | string | Last name |
name | string | Full display name |
phone_number | string | Phone number (if provided) |
org_id | string | The organization the user belongs to. Assigned by your own provisioning app (see Provisioning apps) or set with PUT /api/v1/users/{userId}; Authagonal never derives it. Released under the profile scope, and absent when the user has none. |
roles | string[] | Array of assigned roles |
groups | object[] | Array of group memberships, each with id and name |
curl https://acme.authagonal.io/connect/userinfo \
  -H "Authorization: Bearer ACCESS_TOKEN"
Token Introspection (RFC 7662)
POST /connect/introspect
Validates a token and returns its metadata. Requires client credentials (Basic auth or form body parameters).
| Parameter | Required | Description |
|---|---|---|
token | Yes | The token to introspect |
token_type_hint | Optional | Hint about the token type (e.g. "refresh_token") |
Active token response:
| Field | Description |
|---|---|
active | true |
sub | Subject (user ID) |
client_id | Client that the token was issued to |
scope | Space-separated scopes granted |
iss | Issuer |
exp | Expiration time (Unix timestamp) |
iat | Issued-at time (Unix timestamp) |
aud | Audience |
token_type | Token type (e.g. "Bearer") |
Inactive token response: { "active": false }
Always 200 OK
active: false.curl -X POST https://acme.authagonal.io/connect/introspect \ -u "my-app:CLIENT_SECRET" \ -H "Content-Type: application/x-www-form-urlencoded" \ -d "token=ACCESS_OR_REFRESH_TOKEN"
Token Revocation (RFC 7009)
POST /connect/revocation
Revokes a previously issued token. Requires client credentials.
| Parameter | Required | Description |
|---|---|---|
token | Yes | The token to revoke |
token_type_hint | Optional | Hint about the token type (e.g. "refresh_token") |
The endpoint always returns 200 OK, even for invalid or already-revoked tokens, per the RFC 7009 specification.
Refresh Tokens Only
Device Authorization (RFC 8628)
POST /connect/deviceauthorization
Initiates the device authorization flow for input-constrained devices (CLIs, smart TVs, IoT devices). The device displays a code to the user, who then approves the request on a separate device with a browser.
| Parameter | Required | Description |
|---|---|---|
client_id | Yes | Your client identifier |
client_secret | Confidential clients | Your client secret |
scope | Optional | Space-separated scopes (defaults to "openid") |
Response:
| Field | Description |
|---|---|
device_code | Device verification code (used for polling) |
user_code | User-facing code in XXXX-XXXX format |
verification_uri | URL the user visits to enter the code |
verification_uri_complete | URL with the user_code pre-filled |
expires_in | 600 (seconds — the code is valid for 10 minutes) |
interval | 5 (seconds — minimum polling interval) |
Approval flow: The user visits the verification_uri, enters the user_code, and approves the request. Meanwhile, the device polls the token endpoint with the device_code.
Polling error codes:
| Error | Meaning |
|---|---|
authorization_pending | User has not yet approved — keep polling |
expired_token | The device code has expired — restart the flow |
access_denied | The user denied the authorization request |
curl -X POST https://acme.authagonal.io/connect/deviceauthorization \
  -H "Content-Type: application/x-www-form-urlencoded" \
  -d "client_id=my-cli" \
  -d "scope=openid profile email"
End Session / Logout
GET POST /connect/endsession
Signs out the current user session, triggers back-channel logout to all clients with a registered BackChannelLogoutUri, and revokes all grants.
| Parameter | Required | Description |
|---|---|---|
id_token_hint | Optional | The ID token — used to validate the post_logout_redirect_uri |
post_logout_redirect_uri | Optional | Where to redirect after logout (must be registered) |
state | Optional | Opaque value returned in the redirect |
If a valid post_logout_redirect_uri is provided and matches a registered URI, the user receives a 302 redirect. Otherwise, a JSON response confirms the session has been ended.
Back-Channel Logout
BackChannelLogoutUri. The JWT contains sub, aud, iss, and the http://schemas.openid.net/event/backchannel-logout event claim. Your application should invalidate the user's local session when it receives this notification.SCIM 2.0 API Reference
Authagonal supports the SCIM 2.0 protocol for automated user and group provisioning. Identity providers such as Okta, Azure AD, and OneLogin can use this API to keep your Authagonal tenant in sync with your corporate directory.
Base URL: https://{slug}.authagonal.io/scim/v2
Authentication: All requests require a Bearer token. Generate a SCIM token in the portal under Settings > SCIM Provisioning.
Common headers:
| Header | Value |
|---|---|
Authorization | Bearer SCIM_TOKEN |
Content-Type | application/scim+json |
List endpoints support pagination via startIndex (1-based) and count (max 200) query parameters, and filtering via the filter parameter (e.g. userName eq "[email protected]").
Users
GET /scim/v2/Users — List users with optional pagination and filtering.
| Query Parameter | Description |
|---|---|
startIndex | 1-based index of the first result (default: 1) |
count | Maximum number of results per page (max: 200) |
filter | SCIM filter expression (e.g. userName eq "[email protected]") |
GET /scim/v2/Users/{id} — Get a single user by their Authagonal user ID.
POST /scim/v2/Users — Create a new user. Returns 201 Created.
| Field | Required | Description |
|---|---|---|
userName | Yes | Email address (must be unique within the tenant) |
name.givenName | No | First name |
name.familyName | No | Last name |
displayName | No | Full display name |
active | No | Whether the user is active (default: true) |
externalId | No | Identifier from the upstream identity provider |
PUT /scim/v2/Users/{id} — Full replacement of a user resource. All fields must be provided.
PATCH /scim/v2/Users/{id} — Partial update using SCIM PatchOp.
| Operation | Supported Paths | Example Value |
|---|---|---|
replace | active, name.givenName, name.familyName, externalId | true / false, or a string value |
add | name.givenName, name.familyName, externalId | A string value |
remove | externalId | (no value needed) |
DELETE /scim/v2/Users/{id} — Soft deletes the user (deactivates the account and revokes all tokens). Returns 204 No Content.
curl -X POST https://acme.authagonal.io/scim/v2/Users \
  -H "Authorization: Bearer SCIM_TOKEN" \
  -H "Content-Type: application/scim+json" \
  -d '{
    "schemas": ["urn:ietf:params:scim:schemas:core:2.0:User"],
    "userName": "[email protected]",
    "name": {
      "givenName": "Jane",
      "familyName": "Smith"
    },
    "displayName": "Jane Smith",
    "active": true,
    "externalId": "ext-12345"
  }'
Groups
GET /scim/v2/Groups — List all groups with optional pagination and filtering.
GET /scim/v2/Groups/{id} — Get a single group by ID, including its members list.
POST /scim/v2/Groups — Create a new group. Returns 201 Created.
| Field | Required | Description |
|---|---|---|
displayName | Yes | Group display name |
members | No | Array of member objects, each with a value field containing the user ID |
externalId | No | Identifier from the upstream identity provider |
PUT /scim/v2/Groups/{id} — Full replacement of a group resource (including its member list).
PATCH /scim/v2/Groups/{id} — Partial update for adding or removing group members.
DELETE /scim/v2/Groups/{id} — Hard deletes the group. Returns 204 No Content.
curl -X PATCH https://acme.authagonal.io/scim/v2/Groups/GROUP_ID \
  -H "Authorization: Bearer SCIM_TOKEN" \
  -H "Content-Type: application/scim+json" \
  -d '{
    "schemas": ["urn:ietf:params:scim:api:messages:2.0:PatchOp"],
    "Operations": [
      {
        "op": "add",
        "path": "members",
        "value": [
          { "value": "USER_ID_1" },
          { "value": "USER_ID_2" }
        ]
      }
    ]
  }'
SCIM Error Responses
{ "schemas": ["urn:ietf:params:scim:api:messages:2.0:Error"], "status": "400", "detail": "..." }. Common status codes include 400 (bad request), 404 (resource not found), 409 (conflict / duplicate), and 429 (rate limited).Portal API (automation)
The Portal API lets your own backend automate everything you can do in the portal — manage users, clients, groups, roles, scopes, SSO connections, and settings — using a machine-to-machine credential. It is the same API the portal UI calls.
Base URL: https://portal-api.<your-domain>/api/v1. Requests authenticate with a Bearer access token; the tenant is taken from the token, not the URL.
Creating an API credential
In the portal, open Clients → Create API credential, pick an access level, and give it a name. Authagonal generates an OAuth client_credentials client wired for the Portal API and returns a client ID and secret.
Copy the secret immediately
Access levels
| Scope | Grants |
|---|---|
tenant:owner | Full access, including destructive owner-only actions such as deleting the entire tenant. |
tenant:admin | Manage everything except owner-only actions — users, clients, SSO, groups, roles, branding, and settings. |
tenant:developer | Manage clients, scopes, and provisioning apps. |
tenant:support | Read and manage users for support tasks. |
You can only grant what you hold
Getting a token
Exchange the credential for an access token at your tenant's token endpoint — https://<your-tenant>.<your-domain>/connect/token — then send the token as a Bearer header to the Portal API. Tokens are valid for one hour.
# 1. Exchange the credential for an access token (your tenant's token endpoint)
curl -X POST https://acme.authagonal.io/connect/token \
  -d grant_type=client_credentials \
  -d client_id=api-3f2a... \
  -d client_secret=YOUR_CLIENT_SECRET \
  -d scope=tenant:admin

# Response: { "access_token": "ey...", "token_type": "Bearer", "expires_in": 3600 }

# 2. Call the Portal API with the access token
curl https://portal-api.authagonal.io/api/v1/users \
  -H "Authorization: Bearer $ACCESS_TOKEN"
Endpoints
All paths are relative to the base URL and require a Bearer access token. The scope beside each group is the minimum credential access level it needs. List endpoints accept startIndex and count query parameters.
tenant:developerGET/api/v1/clients— List OAuth clients.
GET/api/v1/clients/{id}— Get a single client by ID.
POST/api/v1/clients— Create a client. Returns the client ID and, for confidential clients, a one-time secret.
PUT/api/v1/clients/{id}— Update a client (redirect URIs, grant types, token lifetimes, PKCE/PAR requirements).
DELETE/api/v1/clients/{id}— Delete a client.
POST/api/v1/clients/api-credential— Mint a machine-to-machine Portal API credential.
tenant:supportGET/api/v1/users— List users. Supports count, search (email / name prefix), organizationId to filter to one organization, and after for cursor paging.
GET/api/v1/users/count— Total user count for the tenant.
GET/api/v1/users/stats/mfa— MFA enrollment statistics.
GET/api/v1/users/{id}— Get a single user.
POST/api/v1/users— Create a user with an email and password.
PUT/api/v1/users/{id}— Update a user (profile, email, enabled/blocked state, organizationId).
DELETE/api/v1/users/{id}— Delete a user.
GET/api/v1/users/{id}/mfa— Get a user's enrolled MFA methods.
DELETE/api/v1/users/{id}/mfa— Reset a user's MFA enrollment.
tenant:adminGET/api/v1/roles— List roles.
POST/api/v1/roles— Create a role.
DELETE/api/v1/roles/{id}— Delete a role.
POST/api/v1/roles/assign— Assign a role to a user.
POST/api/v1/roles/unassign— Remove a role from a user.
tenant:adminGET/api/v1/groups— List groups.
GET/api/v1/groups/{id}— Get a group with its members.
POST/api/v1/groups— Create a group.
POST/api/v1/groups/{id}/members— Add members to a group.
DELETE/api/v1/groups/{groupId}/members/{userId}— Remove a member from a group.
DELETE/api/v1/groups/{id}— Delete a group.
GET/api/v1/group-role-mappings— List group-to-role mappings (roles granted at token issuance by group membership).
tenant:developerGET/api/v1/scopes— List API scopes.
POST/api/v1/scopes— Create a scope.
DELETE/api/v1/scopes/{name}— Delete a scope.
tenant:adminGET/api/v1/saml/connections— List SAML connections.
POST/api/v1/saml/connections— Create a SAML connection.
DELETE/api/v1/saml/connections/{id}— Delete a SAML connection.
GET/api/v1/oidc/connections— List OIDC connections.
POST/api/v1/oidc/connections— Create an OIDC connection.
DELETE/api/v1/oidc/connections/{id}— Delete an OIDC connection.
GET/api/v1/sso/domains— List the domains routed to SSO connections (home-realm discovery).
tenant:adminGET/api/v1/branding— Get the tenant branding (colors, logo, supported languages).
PUT/api/v1/branding— Update the tenant branding.
tenant:adminGET/api/v1/settings— Get tenant settings (webhooks, public sign-up, token policy).
PUT/api/v1/settings— Update tenant settings.
POST/api/v1/settings/webhook-secret/regenerate— Rotate the webhook signing secret.
POST/api/v1/settings/test-email— Send a test email with the current email configuration.
tenant:adminGET/api/v1/custom-domains— List custom login domains and their verification status.
POST/api/v1/custom-domains— Add a custom domain.
POST/api/v1/custom-domains/{domain}/verify— Trigger DNS verification for a custom domain.
DELETE/api/v1/custom-domains/{domain}— Remove a custom domain.
GET/api/v1/email/domains— List sender email domains.
tenant:adminGET/api/v1/audit— Query the tenant audit log.
Provisioning users via SCIM
Example: create a user
curl -X POST https://portal-api.authagonal.io/api/v1/users \
  -H "Authorization: Bearer $ACCESS_TOKEN" \
  -H "Content-Type: application/json" \
  -d '{
    "email": "[email protected]",
    "password": "S3cure-temp-passw0rd",
    "firstName": "Ada",
    "lastName": "Lovelace"
  }'

# 200 OK
# { "userId": "8f3a...", "email": "[email protected]" }
Anything the UI can do
Login Screens
These are the hosted screens your end users see on your tenant's auth server. Authagonal ships every screen ready to use, so you get a complete, secure sign-in experience without building any UI. This page walks through each screen and shows which portal settings control it.
Fully white-labelled
prefers-color-scheme, so they switch between light and dark to match the user's device.Sign-in
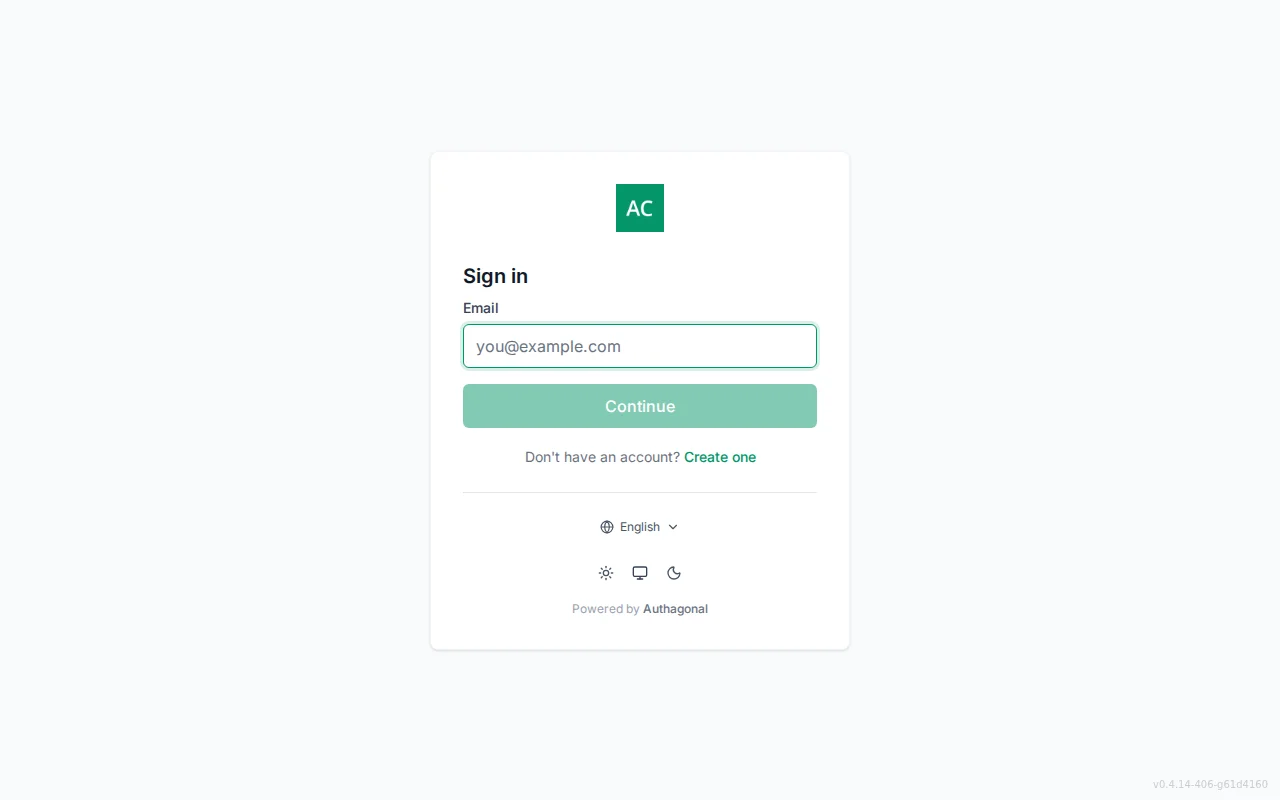
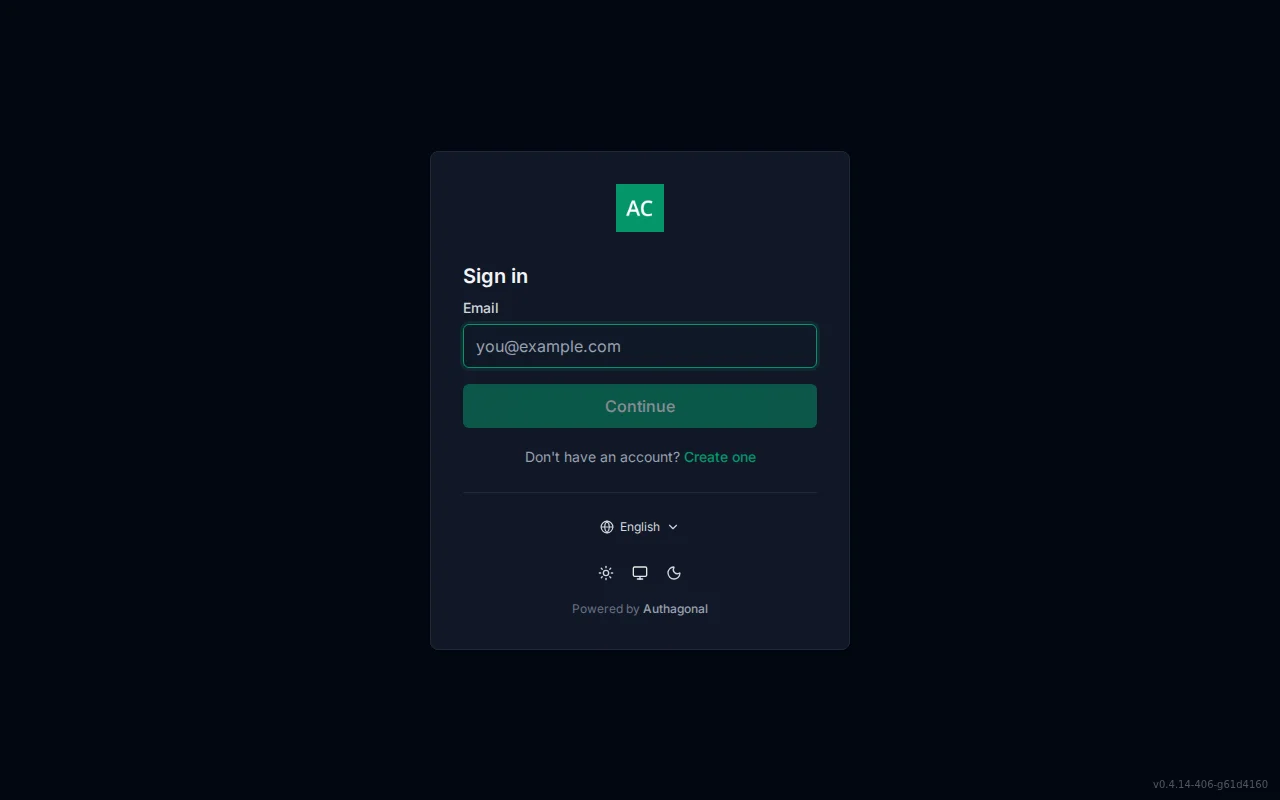
- Email-first, two-step flow: the user enters their email and clicks Continue, then the password field appears.
- "Continue with {provider}" single sign-on buttons appear automatically when SSO connections exist.
- Forgot password and create account links, each of which can be shown or hidden.
- Optional Cloudflare Turnstile captcha to deter automated sign-in attempts.
Controlled in the portal admin
- Branding sets the logo, colour, app name, support email, and custom CSS.
- Show or hide the forgot-password and registration links (Branding).
- SSO connections add the social sign-in buttons (SSO page).
- Session lifetime and lockout thresholds (Settings → Security).
Registration
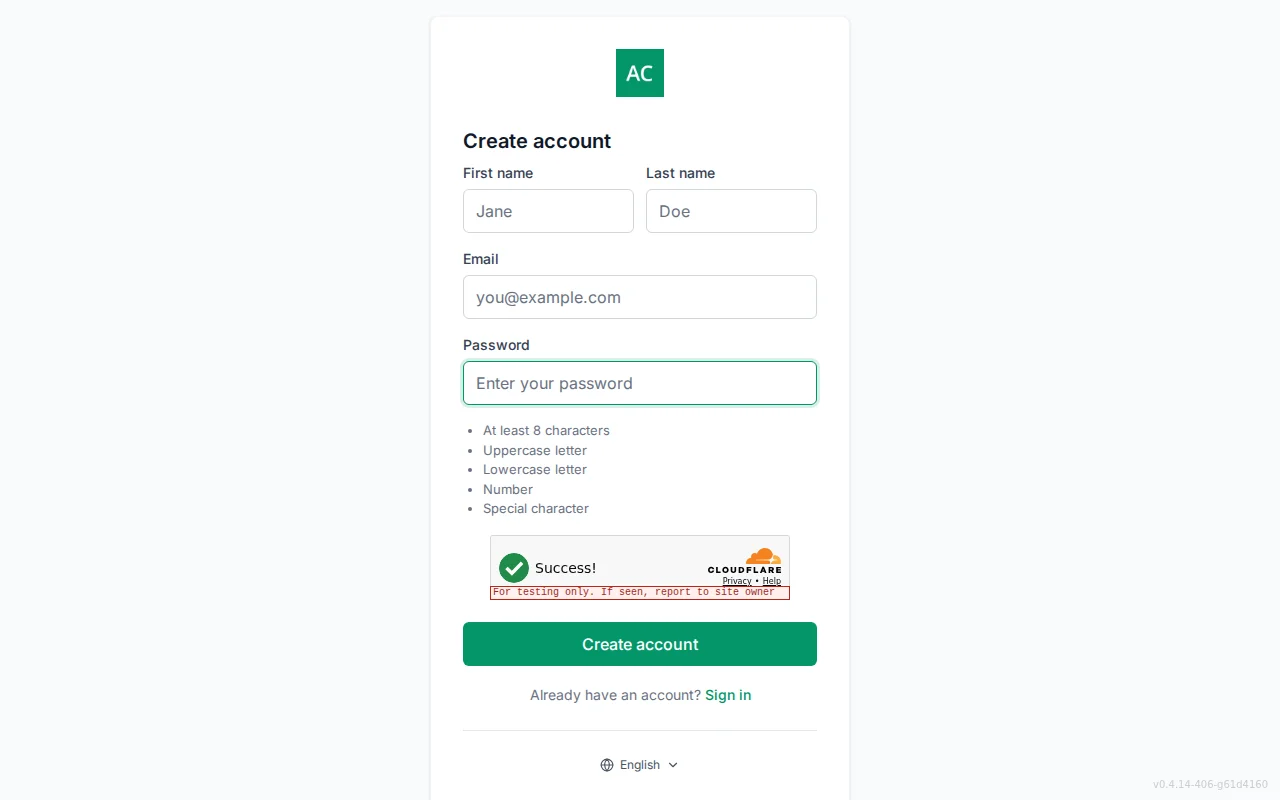
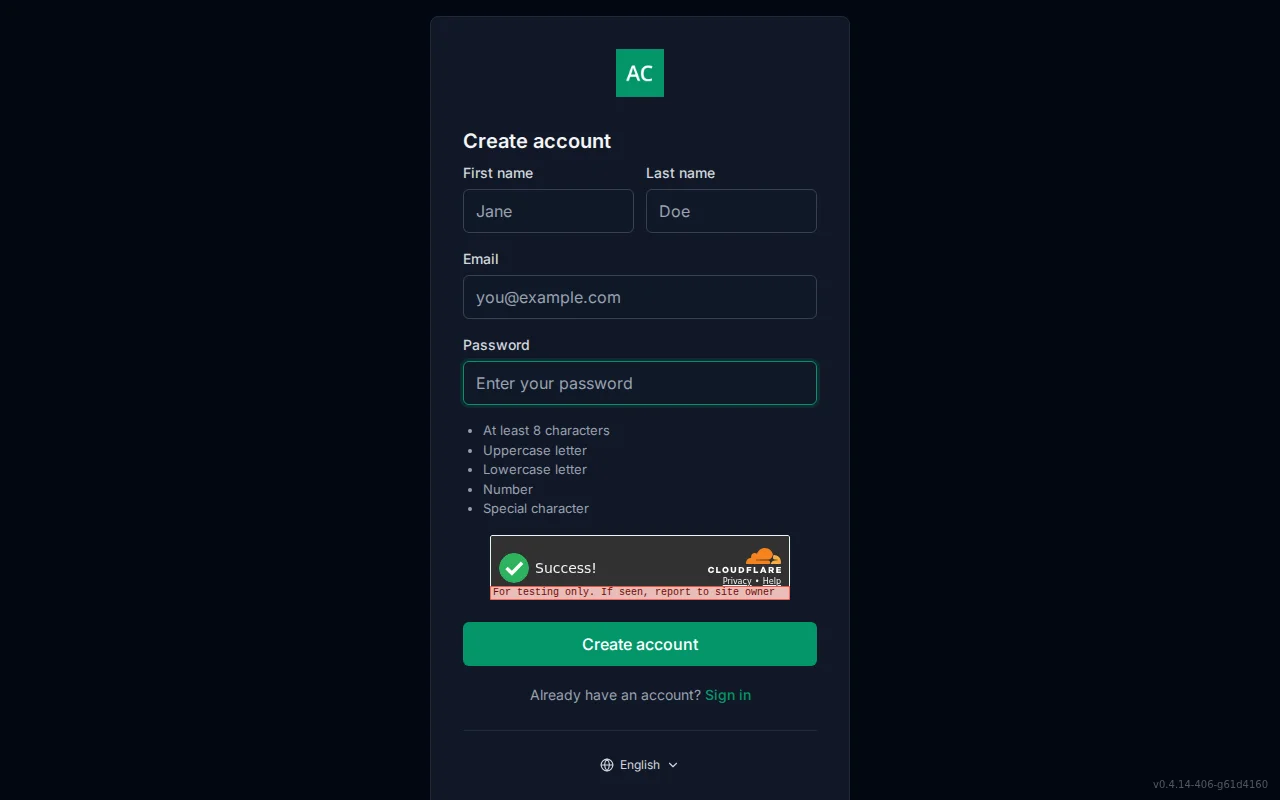
- Collects first and last name (optional), email, and a password.
- A live password-policy checklist updates as the user types, so requirements are clear before submitting.
- Optional Cloudflare Turnstile captcha.
- A "Sign in" link for users who already have an account.
Controlled in the portal admin
- Show or hide the registration link (Branding).
- Your tenant's password policy drives the checklist.
- Branding styles the whole screen.
Forgot password
- The user enters their email, then sees a neutral "check your email" confirmation.
- The screen never reveals whether an account exists, which defeats account-enumeration probing.
- A "Back to sign in" link returns the user to the sign-in screen.
Controlled in the portal admin
- Show or hide the forgot-password link (Branding).
- Your tenant's email delivery sends the reset message.
- Branding styles the whole screen.
Reset password
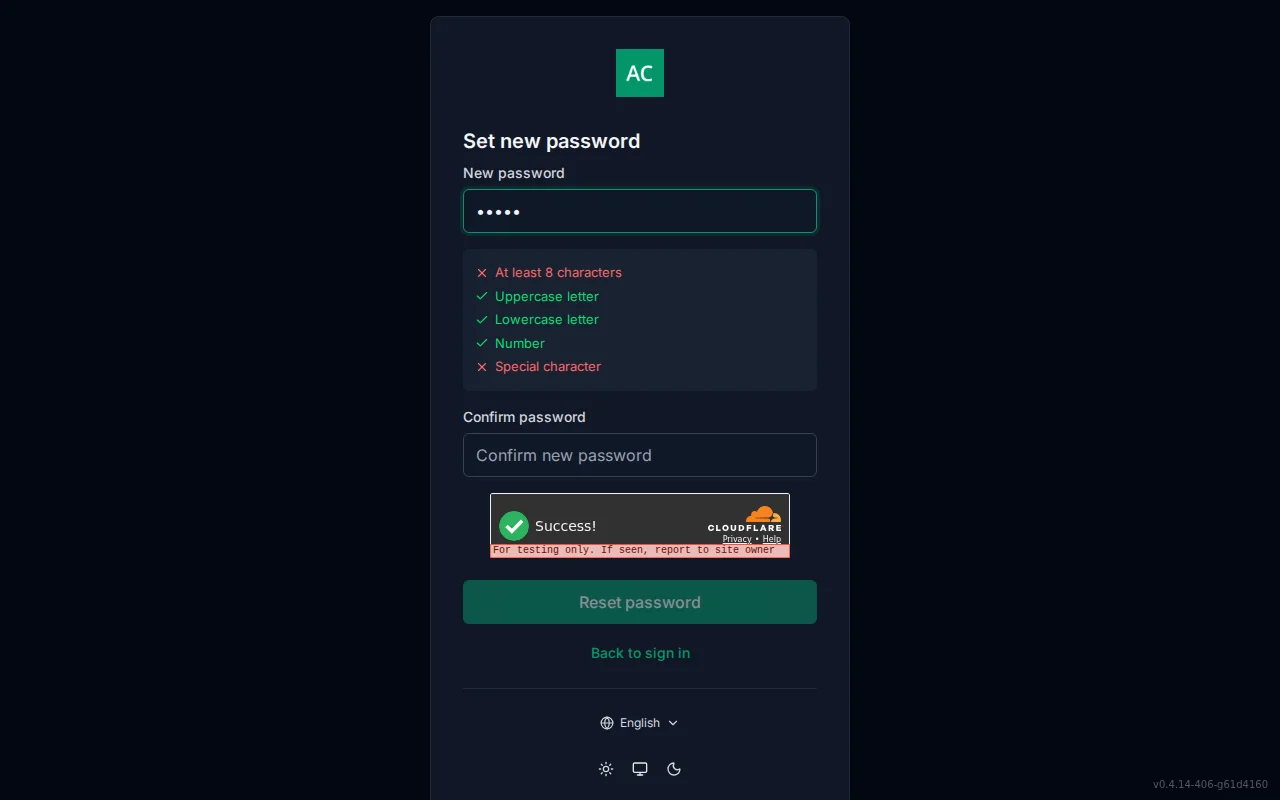
- New password and confirm password fields with a live per-rule requirement checklist.
- A clear invalid or expired link state when the reset token is no longer valid.
- A success state confirming the password has been changed.
Controlled in the portal admin
- Your tenant's password policy drives the checklist.
- Branding styles the whole screen.
MFA challenge
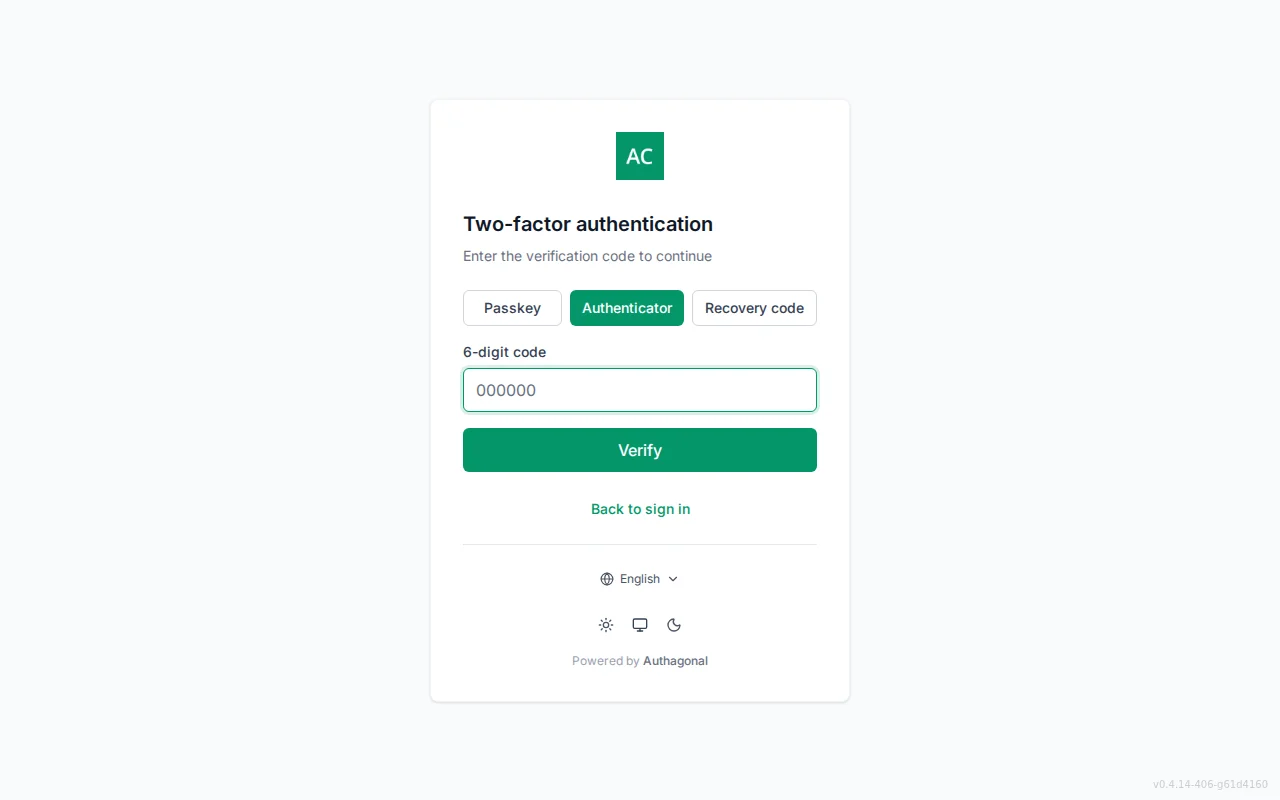
- A method switcher between authenticator app, passkey, and recovery code.
- A 6-digit TOTP field that auto-submits once all digits are entered.
- Recovery-code entry for users who have lost access to their authenticator.
- A passkey button for hardware-backed verification.
Controlled in the portal admin
- MFA policy is set per application (Clients → Security).
- Any user with an enrolled factor is always challenged, regardless of policy.
MFA setup
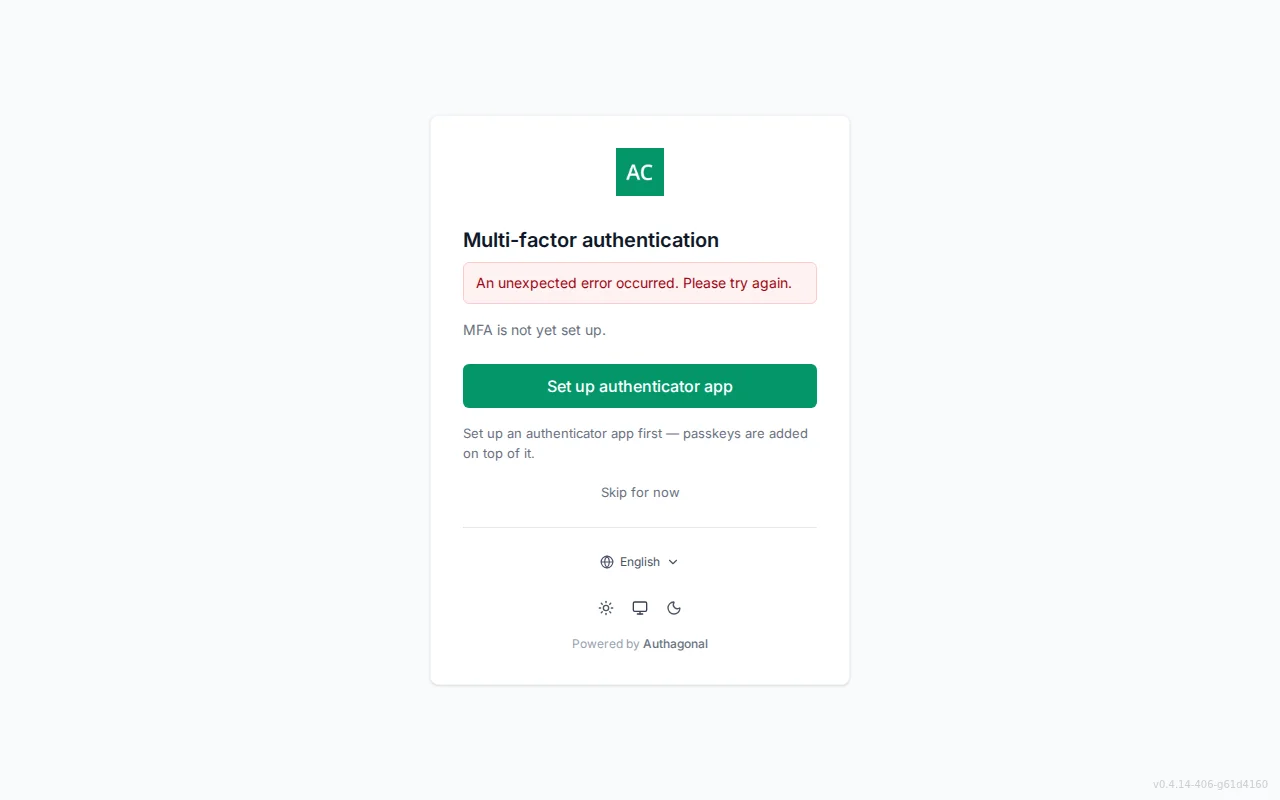
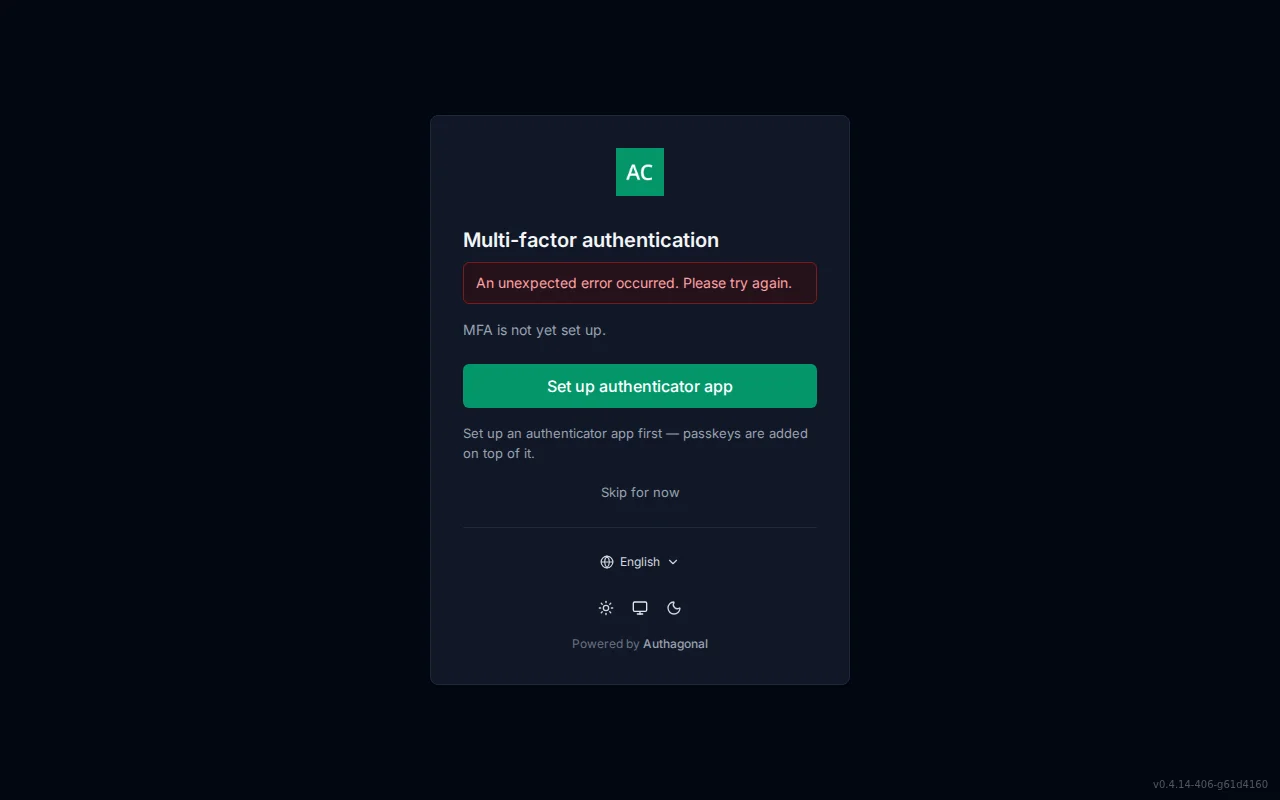
- Shows the status of enrolled methods so the user knows what is already configured.
- Authenticator setup via QR code, a manual key fallback, and a confirmation step.
- Passkey enrolment for hardware-backed authentication.
- Recovery-code generation for account recovery.
- An optional skip when MFA is self-service rather than required.
Controlled in the portal admin
- MFA policy is set per application; Required forces setup at login (Clients → Security).
- Branding styles the whole screen.
Device authorization
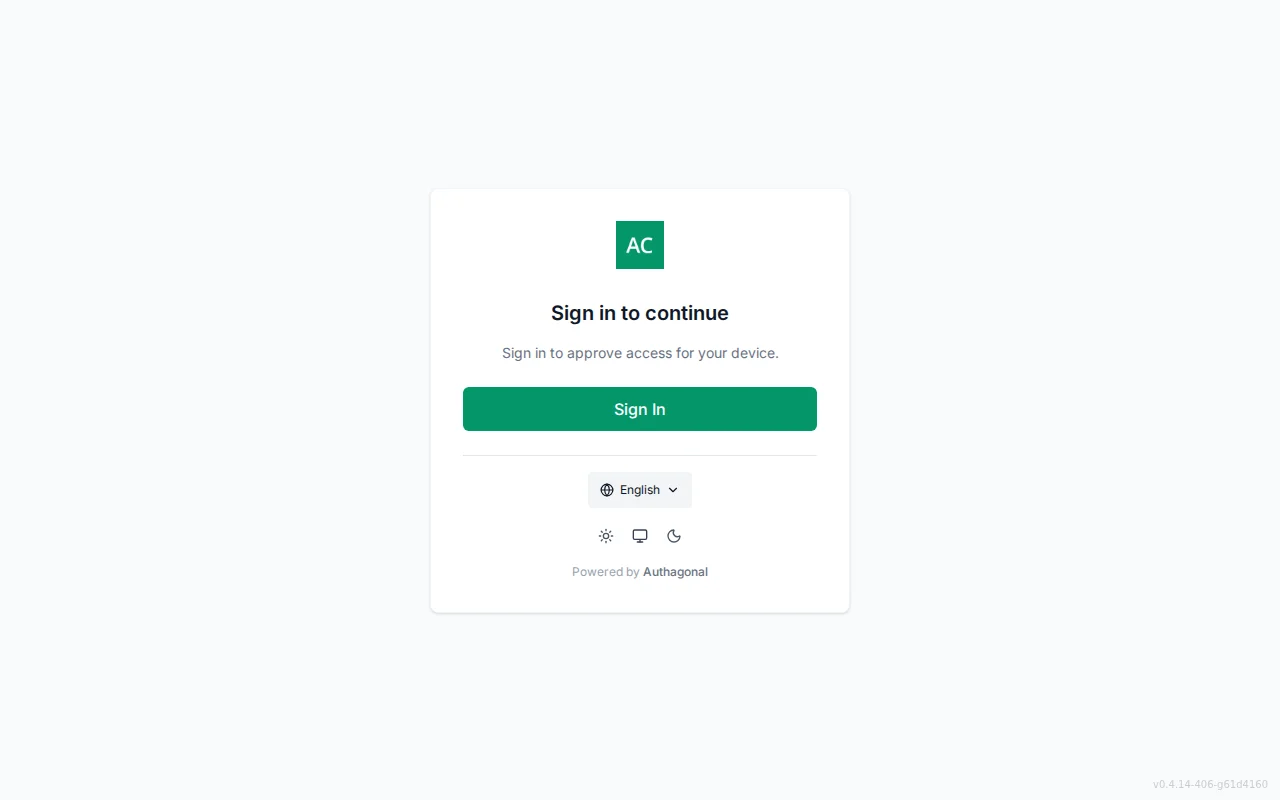
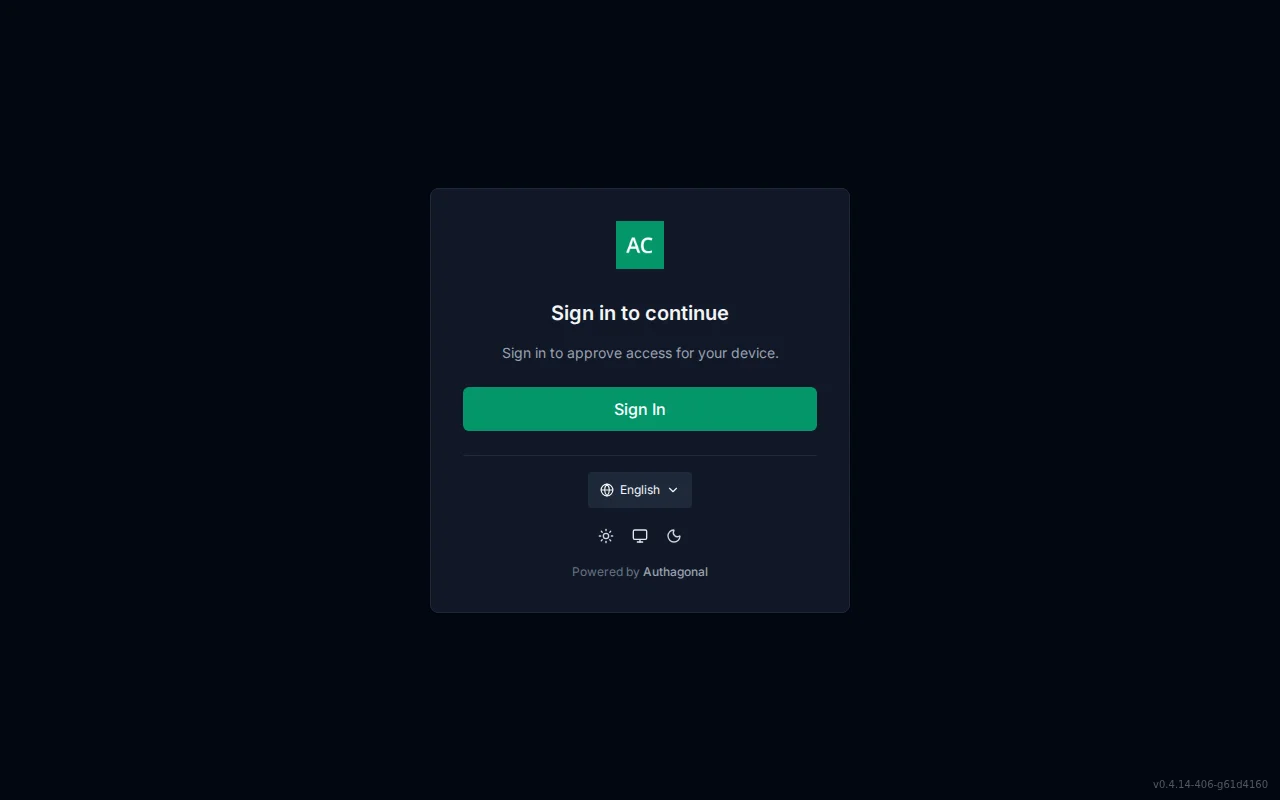
- A centered user-code entry field for the code shown on the device.
- An approve step to authorize the device.
- A sign-in interstitial when the user is not yet authenticated.
- An approved confirmation once the device is authorized.
Controlled in the portal admin
- Enable the device-code grant on the application (Clients → Grant types).
- Set the device-code lifetime (Clients → Tokens).
Consent
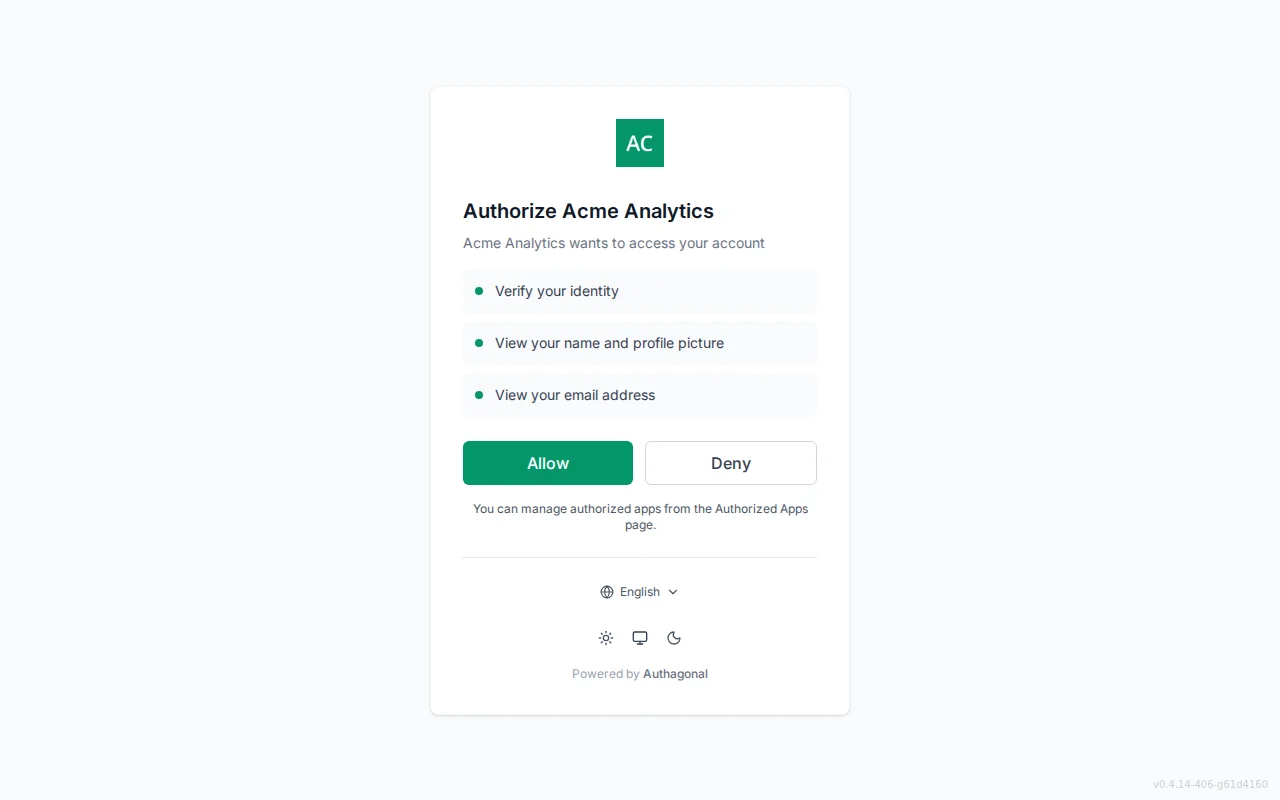
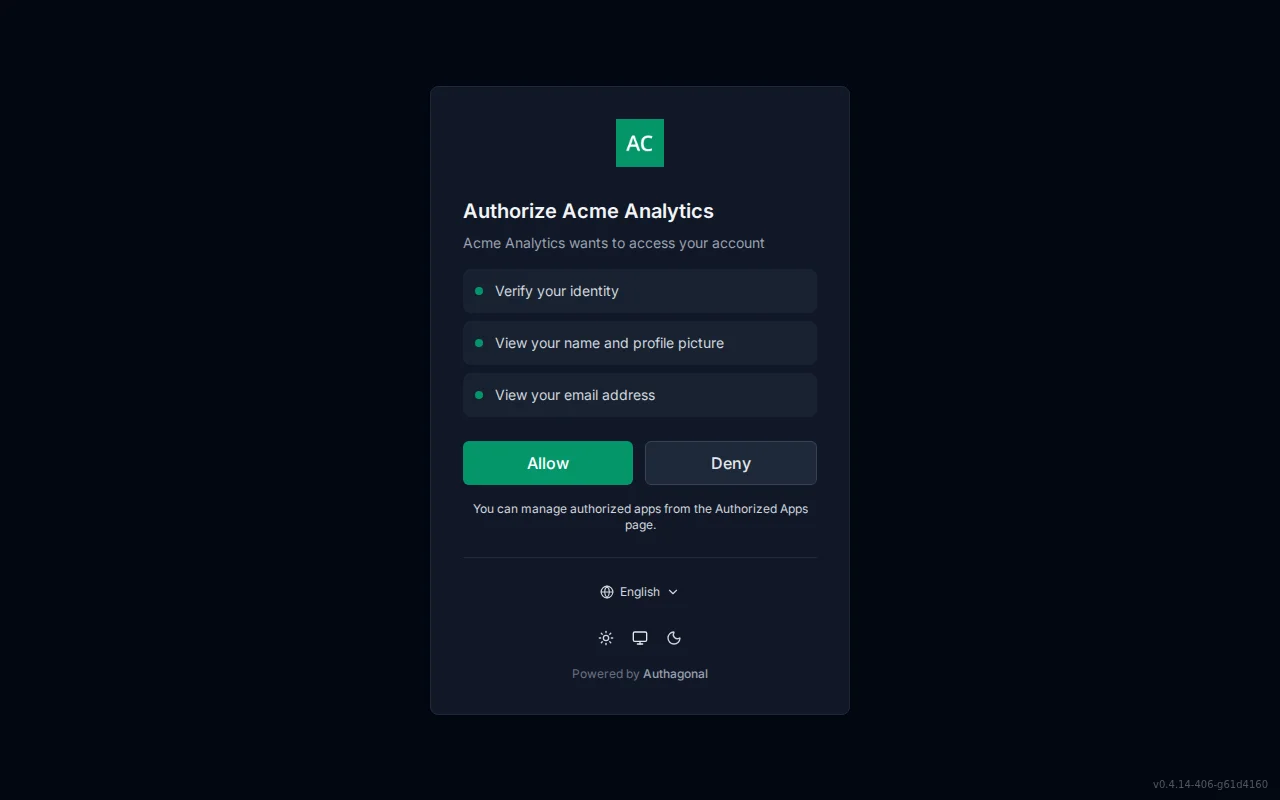
- Shows the requesting client's logo and name.
- A per-scope list with friendly, human-readable labels for each permission.
- Allow and Deny buttons to grant or refuse access.
- A consent hint footer explaining what the decision means.
Controlled in the portal admin
- Turn on Require consent per application (Clients → Security).
- The logo, name, and URL come from the application's own metadata.
- Branding paints the consent card.
Connected apps (grants)
- Lists every app the user has authorized, with its name, scopes, and granted date.
- Revoke access to an app, with a confirmation step before it takes effect.
- A friendly empty state when the user has not authorized any apps.
Controlled in the portal admin
- The list is populated by consent-required applications.
- Branding styles the whole screen.
Account
A hosted self-service account page at /login/account where signed-in users manage their own profile and preferred language, with no portal access required.
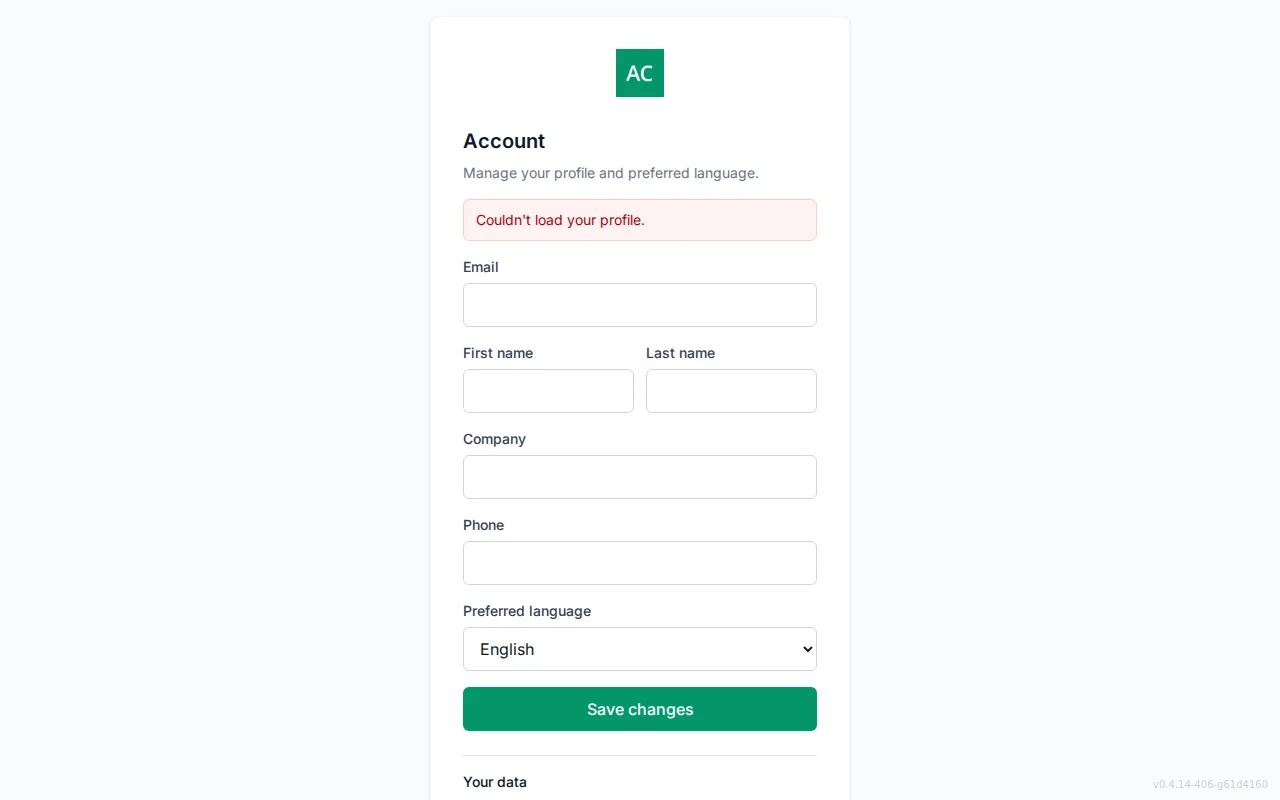
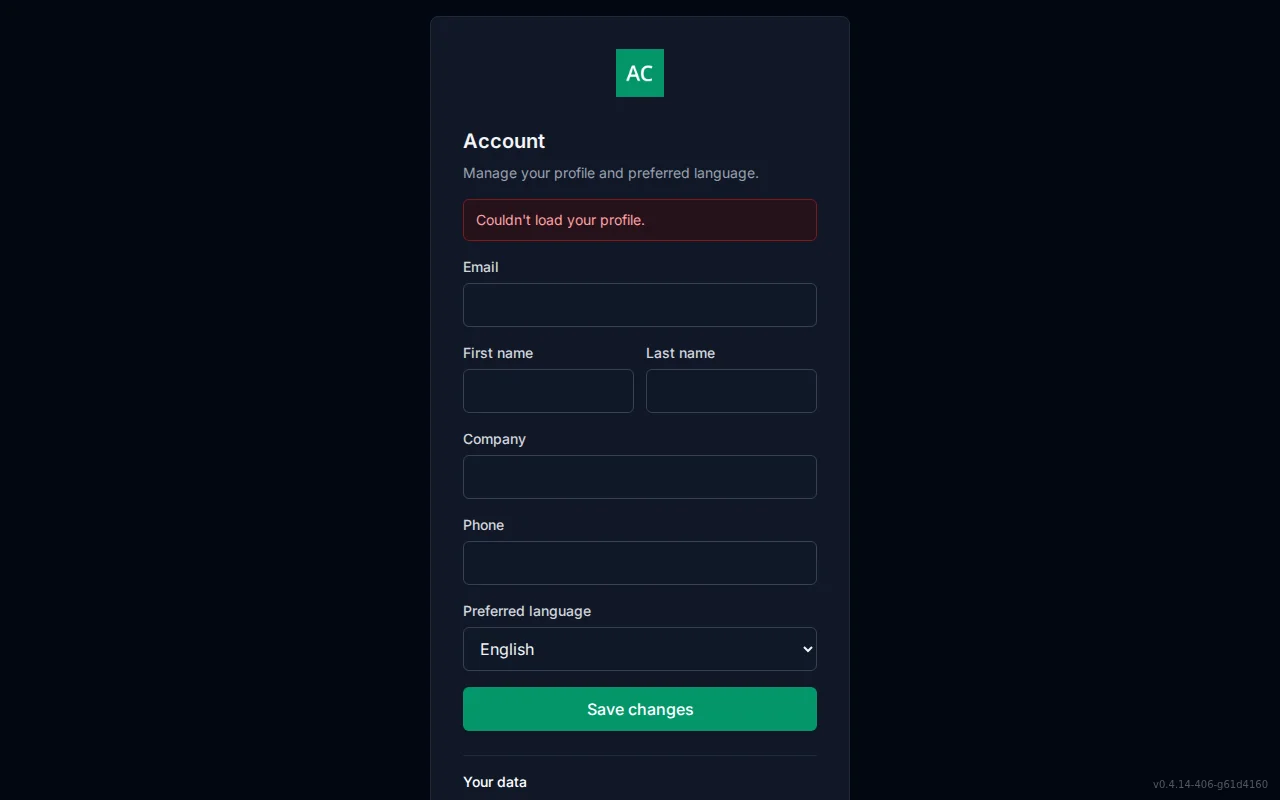
- Edit first and last name, company, and phone; the email address is shown read-only.
- Choose a preferred language from the supported locales; the UI previews the choice instantly and persists it on save.
- The saved language drives the user's hosted UI and the language of the transactional emails they receive.
Controlled in the portal admin
- Branding styles the whole screen.
- The same preferred language is editable by an admin on the portal Users page.
Authentication Flows
Authentication flows cover how end users interact with your Authagonal tenant — logging in, registering, resetting passwords, and setting up MFA. These endpoints are used by the hosted login page and can be called directly if you are building a custom login UI.
Login
POST /api/auth/login
Authenticates a user with email and password. On success, signs a session cookie and returns the user profile. If MFA is configured, the response indicates that a second factor is required before the session is fully established.
Request body:
{
  "email": "[email protected]",
  "password": "correct-horse-battery-staple"
}
Success response:
| Field | Type | Description |
|---|---|---|
userId | string | Unique user identifier |
email | string | User email address |
name | string | Full display name |
mfaAvailable | boolean | Whether the user has MFA methods enrolled |
MFA required response: When the user has MFA enrolled, the response includes mfaRequired: true along with a challengeId and a methods array listing available MFA methods.
MFA setup required response: When the tenant requires MFA but the user has not yet enrolled, the response includes mfaSetupRequired: true with a setupToken for the enrollment flow.
Error responses:
| Error Code | HTTP Status | Description |
|---|---|---|
invalid_credentials | 401 | Email or password is incorrect |
account_disabled | 403 | The account has been deactivated by an admin |
email_not_confirmed | 403 | The user has not verified their email address |
locked_out | 423 | Account is temporarily locked (includes retryAfter in seconds) |
sso_required | 409 | Email domain has SSO configured (includes redirectUrl) |
SSO check: If the user's email domain has an SSO connection configured, the login endpoint returns sso_required with a redirectUrl. The client should redirect the user to the SSO provider.
Account lockout: After maxFailedAttempts consecutive failed login attempts, the account is locked for lockoutDurationMinutes. Both values are configurable in tenant settings.
Hosted Login Page
Registration
POST /api/auth/register
Creates a new user account. A verification email is sent automatically — the user must verify their email before they can log in.
Request body:
{
  "email": "[email protected]",
  "password": "a-strong-password-here",
  "firstName": "Jane",
  "lastName": "Smith"
}| Field | Required | Description |
|---|---|---|
email | Yes | Email address (must be unique) |
password | Yes | Must meet the tenant password policy |
firstName | No | First name |
lastName | No | Last name |
Success: 201 Created with the userId of the new account. Registering with an email that's already taken also returns 201: we never disclose whether an email exists (to prevent account enumeration), and instead notify the real account holder by email.
Error responses:
| Error Code | HTTP Status | Description |
|---|---|---|
weak_password | 400 | Password does not meet the tenant password policy |
rate_limited | 429 | Too many registration attempts |
provisioning_rejected | 422 | A provisioning webhook rejected the registration |
Password Policy
/api/auth/password-policy. This returns minimum length, required character classes, and whether breached password checking is enabled.Password Reset
POST /api/auth/forgot-password
Requests a password reset email. The endpoint always returns a success response regardless of whether the email exists, to prevent email enumeration.
{
  "email": "[email protected]"
}
POST /api/auth/reset-password
Resets the user's password using the token from the email link.
{
  "token": "RESET_TOKEN_FROM_EMAIL",
  "newPassword": "new-strong-password"
}
Side effects of a successful password reset:
- Failed login attempt counter is reset to zero
- All existing refresh tokens are revoked
- A new security stamp is generated (invalidating all existing sessions)
MFA Setup & Verification
Authagonal supports three MFA methods: TOTP (authenticator apps), WebAuthn (security keys and biometrics), and single-use recovery codes.
TOTP Setup
POST /api/auth/mfa/totp/setup — Returns a QR code data URI and a manual entry key. The user scans the QR code with their authenticator app (Google Authenticator, Authy, 1Password, etc.), then confirms enrollment.
POST /api/auth/mfa/totp/confirm — Confirms TOTP enrollment by validating a 6-digit code from the authenticator app.
{
  "code": "123456"
}
WebAuthn Setup
POST /api/auth/mfa/webauthn/setup — Returns credential creation options for the WebAuthn API. The browser calls navigator.credentials.create() with these options.
POST /api/auth/mfa/webauthn/confirm — Confirms WebAuthn enrollment by submitting the attestation response from the browser.
Recovery Codes
POST /api/auth/mfa/recovery/generate — Generates 10 single-use 8-character recovery codes. Each code can be used exactly once to bypass MFA.
Recovery Codes Are Shown Only Once
MFA Verification
POST /api/auth/mfa/verify — Completes the MFA challenge after a successful password login.
| Field | Required | Description |
|---|---|---|
challengeId | Yes | The challenge ID from the login response |
method | Yes | "totp", "recovery", or "webauthn" |
code | TOTP / Recovery | 6-digit TOTP code or 8-character recovery code |
assertion | WebAuthn | The assertion response from navigator.credentials.get() |
MFA Status
GET /api/auth/mfa/status — Returns the user's currently enrolled MFA methods.
SSO Login Flow
Authagonal supports both SAML 2.0 and OIDC-based SSO connections. Domain-based routing automatically detects which SSO provider to use based on the user's email address.
SSO Check
GET /api/auth/[email protected]
| Field | Type | Description |
|---|---|---|
ssoRequired | boolean | Whether the email domain requires SSO |
providerType | string | "saml" or "oidc" |
connectionId | string | The SSO connection identifier |
redirectUrl | string | The URL to redirect the user to for SSO login |
SAML Flow
The user is redirected to GET /saml/{connectionId}/login which sends a SAML AuthnRequest to the identity provider. The IdP authenticates the user and posts a SAML response back to the Assertion Consumer Service (ACS) endpoint. Authagonal validates the assertion, creates or updates the user, and signs a session cookie.
SAML metadata for configuring your IdP is available at GET /saml/{connectionId}/metadata.
OIDC Flow
The user is redirected to GET /oidc/{connectionId}/login which redirects to the upstream identity provider with PKCE. After the user authenticates, the callback at /oidc/callback exchanges the authorization code, validates the ID token, and creates or updates the user.
JIT Provisioning: Both SAML and OIDC flows support just-in-time provisioning. If the user does not already exist in the tenant, they are created automatically from the identity provider's claims. If they do exist, their profile attributes are updated to match the latest values from the provider.
Domain-Based Routing
Backend-for-Frontend (BFF)
A BFF keeps OAuth tokens out of the browser entirely. Your single-page app holds nothing but an httpOnly session cookie, and a confidential client on your own backend does the OpenID Connect flow and holds the tokens server-side.
Anything a single-page app can read, cross-site scripting can steal, and that includes an access token in memory and a refresh token in localStorage. Storing tokens in the browser also caps their lifetime, because a long-lived refresh token in reach of scripts is a standing liability. The IETF OAuth 2.0 for Browser-Based Apps best current practice recommends this pattern for exactly that reason.
In exchange you get a session that can outlive a page reload without a token in sight, refresh handled for you server-side, immediate revocation through back-channel logout, and an authenticated proxy so your API never has to parse a token the browser could have tampered with.
Create the client
In the portal, open Clients and choose Create BFF app. Give it the Application URL your app is served from, for example https://app.acme.com, and Authagonal registers a correctly configured confidential client for you rather than leaving you to assemble one. The redirect and logout URLs are derived from that one value:
| Setting | Value |
|---|---|
| Redirect URI | {appBaseUrl}/bff/callback |
| Post-logout redirect URI | {appBaseUrl}/ |
| Back-channel logout URI | {appBaseUrl}/bff/backchannel-logout |
| Grant types | authorization_code, refresh_token |
| Scopes | openid, profile, email, offline_access |
| PKCE and client secret | Both required |
The secret is shown once
clientId, clientSecret and authority, and the secret is never recoverable afterwards because only its hash is stored. Put it straight into your backend's configuration or secret store. If you lose it, create another client rather than trying to recover this one.Wire it into your backend
Two runtimes are supported and behave identically: Authagonal.Bff for .NET and @authagonal/bff for Node, the latter with adapters for Express and Next.js. Point either at the values the portal just gave you.
// dotnet add package Authagonal.Bff
builder.Services.AddAuthagonalBff(o =>
{
    o.Authority    = "https://acme.authagonal.io";       // your tenant auth host
    o.ClientId     = builder.Configuration["Bff:ClientId"]!;
    o.ClientSecret = builder.Configuration["Bff:ClientSecret"]!;
    o.Scope        = ["openid", "profile", "email", "offline_access"];
    o.PostLogoutRedirectUri = "https://app.acme.com/";
});

var app = builder.Build();

app.UseForwardedHeaders();   // required behind a proxy or ingress, see the note below
app.MapAuthagonalBff();
app.MapFallbackToFile("index.html");   // your SPA
app.Run();// npm install @authagonal/bff
import express from 'express';
import { authagonalBff } from '@authagonal/bff/express';
const app = express();
app.use(authagonalBff({
authority: 'https://acme.authagonal.io',
clientId: process.env.BFF_CLIENT_ID,
clientSecret: process.env.BFF_CLIENT_SECRET,
scope: ['openid', 'profile', 'email', 'offline_access'],
postLogoutRedirectUri: 'https://app.acme.com/',
}));
app.listen(8080);Behind a proxy, trust the forwarded headers
__Host- session cookie without the Secure attribute, which browsers then silently discard. The symptom is a login that completes cleanly and a session that never appears. In .NET call app.UseForwardedHeaders() before MapAuthagonalBff(); in Node set your framework's trust-proxy setting.Endpoints
Mounted under /bff by default. They must be served from the same origin as your SPA, because the session cookie is httpOnly and same-origin: put them behind the same hostname rather than on a separate API domain.
| Route | Purpose |
|---|---|
GET /bff/login?returnUrl=/ | Starts login and redirects to Authagonal. Returns the user to returnUrl afterwards. |
GET /bff/callback | The OIDC redirect URI. Handled for you; you never write this. |
GET /bff/user | Returns isAuthenticated, the session claims, and sessionExpiresAt. Requires the anti-forgery header. |
GET|POST /bff/logout | Ends the session locally and at Authagonal. |
POST /bff/backchannel-logout | Receives logout notifications from Authagonal, so a sign-out elsewhere ends this session too. |
From the browser
Every non-navigation request must carry a static anti-forgery header. It defends against cross-site request forgery alongside the cookie's SameSite attribute: a cross-site form post cannot set a custom header, so a request without it is refused.
const me = await fetch('/bff/user', {
  headers: { 'X-Authagonal-Bff': '1' },
}).then(r => r.json());

if (!me.isAuthenticated) {
  // Navigate, do not fetch: this is a redirect to your identity provider.
  window.location.href = '/bff/login?returnUrl=' + encodeURIComponent(location.pathname);
}
Log in and out by navigating, not fetching: location.href = '/bff/login'. Those routes answer with a redirect to your identity provider, and a redirect chain is not something fetch can usefully follow.
Calling your API
The BFF can forward your API under its own base path and attach the session's access token on the way through. The browser sends a cookie, your API receives a bearer token it validates normally, and nothing about that token is visible to or forgeable by the page. Register an upstream and requests to /bff/api/** reach it authenticated. Leave the list empty and the proxy is disabled entirely.
o.Upstreams.Add(new BffUpstream
{
    Prefix        = "/orders",                        // matches /bff/api/orders/**
    TargetBaseUrl = "https://api.internal.acme.com",
    StripPrefix   = false,                            // keep /orders in the forwarded path
});| Option | Default | What it does |
|---|---|---|
Upstreams | [] | The APIs the proxy forwards to. Empty disables the proxy endpoint. |
Prefix | / | Path prefix after /bff/api that this upstream handles, for example /orders. |
TargetBaseUrl | - | Base URL requests are forwarded to. |
StripPrefix | false | Remove the matched prefix before forwarding. Lets you use a synthetic routing prefix to fan one BFF out to several backends that share a path namespace. |
AllowAnonymousProxyRequests | false | Forward a request with no usable session without an Authorization header, instead of refusing it. For an API that serves both signed-in and anonymous callers. |
RequiredAuthority | [] | An authority gate as type:action pairs, for example email:send. When set, the proxy checks the outgoing token's RFC 9396 authorization details before forwarding. |
AuthorityLocation | - | The RFC 9396 locations root this upstream is known by, when authority is granted against a public resource identifier that differs from the internal address the proxy calls. |
StrictAuthority | false | Refuse a call carrying a grant constraint the proxy cannot evaluate, rather than forwarding it. The proxy forwards blind and derives no constraint context, so this is off by default. |
ExchangeRoutes | [] | Proxy routes whose upstream calls ride a context-bound exchanged token rather than the session's primary access token. The first matching pattern wins. |
WebSockets
A WebSocket handshake cannot carry a custom header or a bearer token, so neither the anti-forgery header nor the proxy helps. Enable tickets and the SPA can call GET /bff/ws-ticket, put the short-lived single-use ticket on the connect URL, and have your API redeem it. Mint one immediately before each connect: it is deleted on first use and expires in seconds.
| Option | Default | What it does |
|---|---|---|
WsTicketsEnabled | false | Enables the ws-ticket endpoint. Off by default. |
WsTicketLifetime | 30s | How long a ticket is valid. Kept short deliberately, since it travels in a URL. |
TicketExchangeParams | [] | Query parameters a ticket request may forward into a token exchange, so the ticket is bound to that context rather than being valid for everything. |
Handing a token to the browser, deliberately
The whole point of a BFF is that the browser holds no token, so this is opt-in and narrow. It exists for the one case the cookie model cannot reach: a resource server on another origin, such as an app you embed in an iframe, that must be called with a bearer. Enabled, GET /bff/token?resource=… returns an exchanged token: the session's token downscoped to one allow-listed resource and bound to any allow-listed context parameter. The browser never sees the session's own token, and what it does get is short-lived and single-audience. A request naming a resource outside the allow-list is refused, which is what stops this being a general-purpose mint.
| Option | Default | What it does |
|---|---|---|
TokenEndpointEnabled | false | Enables the token endpoint. Off by default. |
TokenEndpointResources | [] | The resource values a token may be addressed to. Anything else is refused. |
TokenEndpointExchangeParams | [] | Query parameters forwarded into the exchange as context bindings, for example project_id. |
Serving several tenants from one BFF
Set a tenant query parameter and one deployment serves many tenants: /bff/login?slug=acme selects the tenant, a resolver supplies that tenant's authority and client credentials, the key rides the correlation cookie into the session, and back-channel logout resolves the tenant from the token issuer. The default resolver keeps single-tenant behaviour byte-identical, so you pay nothing for this unless you use it.
Options worth knowing
The full set. The Node package mirrors these in camelCase, so BasePath is basePath and so on.
| Option | Default | What it does |
|---|---|---|
Authority | - | Your tenant auth host. OIDC metadata is discovered from it. Required unless you are multi-tenant, where the resolver supplies it. |
ClientId | - | The confidential client id registered for this BFF. |
ClientSecret | - | The client secret. A BFF is a confidential client, so this is required. |
Scope | openid profile offline_access | Requested scopes. Include offline_access or there is no refresh token and sessions end when the access token does. |
BasePath | /bff | Where the BFF routes are mounted. |
CallbackPath | /bff/callback | The OIDC redirect URI path. Must match what the client is registered with. |
CookieName | __Host-agbff | Session cookie name. The __Host- prefix requires HTTPS, so local development over plain HTTP needs a different name. |
SessionLifetime | 8h | How long a session may live. Set it to match your refresh token's absolute lifetime, or an idle user is signed out while holding a credential that was still valid. |
PersistentCookie | false | Whether the cookie survives closing the browser. The refresh token stays server-side either way. |
CorrelationLifetime | 30m | How long a login may take between starting it and the callback. It bounds the cookie carrying the state, nonce and PKCE verifier, so a user who leaves the login screen open and comes back is the case it has to survive. |
RefreshThresholdSeconds | 60 | How many seconds before expiry the access token is refreshed. |
AntiForgeryHeader | X-Authagonal-Bff | The header name the browser must send on non-navigation requests. |
PostLogoutRedirectUri | - | Where the browser lands after logout completes. |
ReturnUrlAllowlist | [] | Absolute origins a non-relative returnUrl may target. Relative paths are always allowed and everything else is coerced to /, so an open redirect is not reachable through the login route. |
LoginPassthroughParams | [] | Query parameters forwarded from /bff/login to the authorize request, for example prompt so a get-started link can route to registration rather than sign-in. |
TenantQueryParam | - | Set it to serve several tenants from one BFF. See above. |
Both runtimes behave the same
Everything is swappable
IBffSessionStore for where sessions live, ICookieProtector for cookie encryption (ASP.NET Data Protection by default), and ITokenClient for talking to the token and revocation endpoints. One BFF can also serve several tenants through IBffTenantResolver, selecting the tenant from a query parameter at login and resolving it from the token issuer on back-channel logout.Run your portal from an AI assistant
Connect an AI assistant to your tenant and ask it to do the things you would otherwise click through: find a user who cannot sign in, check whether they still have a second factor, invite someone, see who holds an admin role.
It is an ordinary OAuth connection, not an API key. Each person signs in as themselves and approves the access, so an assistant can do exactly what that person can do in the portal and nothing more. Nothing new is created that could leak, and revoking one assistant leaves everyone else untouched.
Turning it on
Open Settings and enable AI assistant access. It is off until you do, and while it is off the endpoint does not exist rather than merely refusing. Once enabled, the panel shows the URL to paste into your AI client:
https://portal-api.authagonal.io/api/v1/mcp/{your-tenant}How an assistant gets permission
What an assistant can do
Exactly what the person who connected it can do, decided per call against their own token. A tenant:support agent gets the diagnostic and everyday tools; the admin tools are not merely hidden from them, they are refused if named directly. Anything gated inside the portal stays gated: changing a user's email address needs the admin role there, and it needs it here too.
Because it is a normal grant, you manage it the normal way. Revoke it and the assistant stops working immediately rather than at the next token expiry. Everything an assistant does is written to your audit log as the person it acted for, so the trail is the same one you already read.
The tools
Twenty in this release. Your AI client decides which ones to enable, so you can hand an assistant only the reading tools if that is all you want it doing.
| Tool | Role | What it does |
|---|---|---|
find_user | Support | Find users by email, name prefix or id. The starting point for everything else. |
get_user | Support | One user in full, including whether they are active, confirmed and locked out. |
get_user_mfa | Support | Which second factors someone has enrolled. |
get_user_sessions | Support | Where a user is currently signed in. |
search_audit | Support | Search the audit log by actor, action or the thing acted on. |
list_users | Support | List the directory, optionally filtered to one organization. |
get_user_stats | Support | How many users you have and how many use a second factor. |
invite_user | Support | Invite someone by email. |
resend_invite | Support | Send an invitation again. |
send_verification_email | Support | Send the email-verification message again. |
update_user | Support | Update a profile. The email, confirmed state and organization still need admin. |
revoke_user_sessions | Support | Sign a user out everywhere. |
list_roles | Admin | The roles defined in your tenant. |
list_role_members | Admin | Who holds a given role. |
assign_role | Admin | Give a user a role. |
unassign_role | Admin | Take a role away. |
reset_user_mfa | Admin | Remove every second factor, for someone who has lost their authenticator. |
get_settings | Admin | Your tenant's configuration. |
list_sso_connections | Admin | Your SSO connections and the domains they cover. |
list_clients | Developer | The OAuth clients registered in your tenant. |
Readers and writers are marked
What is not included yet
Deleting users, creating or editing SSO connections, billing, backups and client secrets are all absent from this release. Deletion belongs with your erasure queue rather than beside it; an SSO connection is large enough that a wrong edit locks out an entire workforce, so those are read-only for now; and a tool that returns a client secret would put it in an assistant's transcript. Tell us which of these you want and in what order.
MCP server authentication
If you expose a Model Context Protocol server, Authagonal can be the authorization server behind it. An AI assistant connects, the person behind it signs in and grants access, and your server receives a normal bearer token you validate like any other API.
The alternative is an API key pasted into an assistant's configuration, which is a credential with no user behind it, no expiry, no consent step and no way to revoke one connector without rotating for everyone. Doing it as OAuth means the grant belongs to a named person, is visible in your audit log, and can be revoked from the portal without touching anything else.
How the connection happens
The whole exchange is driven by discovery, so a conformant client needs nothing configured but your server's URL.
| Step | What happens |
|---|---|
| 1 | The connector calls your MCP server with no token and gets a 401 naming where to look. |
| 2 | It fetches your protected-resource metadata, which names your Authagonal tenant as the authorization server. |
| 3 | It fetches the tenant's authorization-server metadata and, having never been registered anywhere, registers itself. |
| 4 | It sends the user to sign in and approve the access, naming your MCP server as the resource it wants a token for. |
| 5 | It calls your server again with the resulting bearer token, which is scoped to your server and to that user. |
Nothing in that sequence is Authagonal-specific: it is the MCP authorization spec, built on RFC 9728 for the resource metadata, RFC 8414 for discovering the authorization server, RFC 7591 for registration and RFC 8707 for naming the resource. A connector that follows the spec works without special-casing us.
Let connectors register themselves
A connector you have never met cannot use a client you created by hand, so it registers one at runtime. That is off by default. Turn on dynamic client registration in Settings and the registration endpoint appears in your discovery document; leave it off and the endpoint is not advertised and refuses. Enabling it opens registration for your tenant alone, never anyone else's.
| Guard | What happens |
|---|---|
| Grant types | Only the authorization code and refresh flows can be registered. Self-registration cannot mint a machine-to-machine client that would bypass a user entirely. |
| PKCE | Forced on every registered client, regardless of what the registration asked for. |
| Consent | Forced too. A registered connector cannot get a token until a person has seen what it is asking for and approved it. |
| Scopes | The OIDC built-ins are always available. Anything of your own has to be named in the allowed list before a self-registering client may ask for it. |
| Rate limit | Ten registrations per IP address per hour, so an open endpoint cannot be used to fill your client store. |
Both discovery paths are served
/.well-known/oauth-authorization-server (RFC 8414), while OIDC clients use /.well-known/openid-configuration. Your tenant answers on both with the same metadata, so a connector following the MCP spec finds you without being told where to look.What your MCP server implements
Two small things, and then it is an ordinary resource server. First, publish protected-resource metadata naming your tenant as the authorization server. Serve it at the well-known path and, if your MCP endpoint is on a sub-path, at the path-suffixed form too, since clients try both.
GET https://your-app.example/.well-known/oauth-protected-resource

{
  "resource": "https://your-app.example/mcp",
  "authorization_servers": ["https://acme.authagonal.io"],
  "bearer_methods_supported": ["header"],
  "scopes_supported": ["mcp"]
}
Second, when a call arrives without a valid token, answer 401 with a WWW-Authenticate header pointing at that metadata. That header is what turns a refusal into a connection: without it the client has no way to discover where to authenticate, and simply fails.
// Validate the connector's token like any other resource server.
builder.Services.AddAuthentication().AddJwtBearer("McpBearer", o =>
{
    o.Authority = "https://acme.authagonal.io";              // your tenant
    o.TokenValidationParameters.ValidAudience = "https://your-app.example/mcp";
});

// Unauthenticated? Point the connector at the metadata rather than just refusing.
http.Response.Headers.WWWAuthenticate =
    "Bearer resource_metadata=\"https://your-app.example/.well-known/oauth-protected-resource\"";
return Results.Unauthorized();
Check the audience, not just the signature
Scopes, plans and revocation
Define a scope for your MCP surface, add it to the allowed registration scopes, and it appears on the consent screen so the user can see what they are approving. The token carries the user's roles and any claims you have configured, so your server can decide what this particular person may do rather than treating every connector alike.
Because it is an ordinary OAuth grant, revocation works the ordinary way: find the user, revoke their sessions or the grant, and the connector stops working immediately rather than at the next token expiry. The audit log records the registration, the consent and the issuance, so you can see which assistant asked for what and when.
| Setting | What happens |
|---|---|
Dynamic client registration | Portal setting that allows connectors to register themselves. Off by default. |
Auth:DynamicClientRegistrationScopes | Scopes beyond the OIDC built-ins that a self-registering client may request. |
resource | The parameter a connector sends to name your MCP server, which narrows the token's audience to it. |
Build a custom login UI
Replace Authagonal's hosted login, registration, password-reset and MFA screens with your own UI, while Authagonal keeps handling authentication, MFA, SSO, sessions and token issuance. Two routes: use our React component library, or call the auth API directly from any framework. It's opt-in — enable Custom login UI in tenant settings first.
Prerequisite: a custom domain on your root
The login session is a first-party cookie, so your UI and the Authagonal auth server must share a registrable domain. Point a custom auth domain at Authagonal on the same root your app runs on — e.g. auth at login.acme.com, app at app.acme.com. The Custom login UI setting stays disabled until an active custom domain exists.
| Your UI | Auth host | Works? |
|---|---|---|
| app.acme.com | login.acme.com | ✅ same root |
| acme.com | auth.acme.com | ✅ same root |
| app.acme.com | acme.authagonal.io | ❌ cross-site |
| myapp.io | login.acme.com | ❌ cross-site |
Why a custom domain is required
Also add your UI's origin (e.g. https://app.acme.com) to your OAuth client's Allowed CORS origins — the same list you set for the token exchange.
React: @authagonal/login
npm i @authagonal/login ships the auth logic and UI as one package — the same one Authagonal's hosted login is built on. Pick your altitude:
- Full app — drop in
Appand theme it via branding. - Compose pages — use
LoginPage,MfaChallengePage,ResetPasswordPage… inside your own layout. - Primitives + logic — build your own screens with
AuthLayout/Button/Inputand the API client (login,mfaVerify,forgotPassword, …).
import { AuthLayout, Input, Button, login, ApiRequestError } from '@authagonal/login';

function MyLogin() {
  async function onSubmit(email: string, password: string) {
    try {
      const res = await login({ email, password });        // POST /login (sets the session cookie)
      if (res.mfaRequired) {/* render your MFA step → mfaVerify(...) */}
      else window.location.href = res.returnUrl;            // hand off to /connect/authorize
    } catch (e) {
      if (e instanceof ApiRequestError) {/* show e.message */}
    }
  }
  return <AuthLayout>{/* your own markup + <Input/> <Button/> */}</AuthLayout>;
}
Any framework: call the auth API
Not on React? Call the auth-flow endpoints directly (under /api/auth), then hand off to the standard OIDC /connect/authorize flow. Send credentials: 'include' so the session cookie is stored.
| Endpoint | Purpose |
|---|---|
POST /api/auth/login | Authenticate; returns mfaRequired or a return URL |
POST /api/auth/register | Self-service registration (when enabled) |
POST /api/auth/forgot-password | Start a password reset |
POST /api/auth/reset-password | Complete a password reset |
GET /api/auth/password-policy | Password policy (to render the rules) |
POST /api/auth/mfa/* | MFA setup + verification (TOTP, WebAuthn, recovery) |
Use credentials: 'include'
# 1. Authenticate (browser fetch — credentials:'include' so the session cookie is stored)
curl -i -X POST https://login.acme.com/api/auth/login \
  -H "Content-Type: application/json" \
  -H "Origin: https://app.acme.com" \
  --data '{"email":"[email protected]","password":"..."}'
# (handle {"mfaRequired":true} → POST /api/auth/mfa/verify, then continue)

# 2. Hand off to the OAuth flow — top-level navigation to the authorize endpoint with PKCE:
# https://login.acme.com/connect/authorize?client_id=my-app&redirect_uri=...&response_type=code
#   &scope=openid%20profile%20email&code_challenge=...&code_challenge_method=S256
# The session cookie (same-site) authenticates the user; you get back a code → exchange at /connect/token.
Plans & Limits
Authagonal offers four plan tiers. All plans include all features — the only difference is the Monthly Active User (MAU) limit and overage pricing.
Plan Tiers
| Plan | MAU Limit | Overage | Overage Cost/User |
|---|---|---|---|
| Starter | 1,000 | No | — |
| Pro | 5,000 | Yes | $0.04/user |
| Scale | 25,000 | Yes | $0.025/user |
| Enterprise | 100,000 | Yes | $0.015/user |
Monthly Active Users (MAU)
A Monthly Active User is any unique user who successfully authenticates at least once during a billing month. Users provisioned via SCIM but who haven't logged in don't count toward your MAU total.
Overage — If your plan supports overage, users beyond the MAU limit are billed at the per-user rate shown in the plan table above. You can set an overage cap to limit your maximum spend for the billing period.
Enforcement — If your plan doesn't support overage (Starter), users beyond the MAU limit cannot log in until the next billing period or until you upgrade to a plan that supports overage.
Full Feature Set on Every Plan